Configure pipelines to securely use variables and parameters
In this lab, you will learn how to configure pipelines to securely use variables and parameters.
These exercises take approximately 20 minutes.
Before you start
You’ll need an Azure subscription, Azure DevOps organization, and the eShopOnWeb application to follow the labs.
- Follow the steps to validate your lab environment.
Instructions
Exercise 1: Ensure parameter and variable types
Task 1: (skip if done) Import and run the CI pipeline
Let’s start by importing the CI pipeline named eshoponweb-ci.yml.
-
Navigate to the Azure DevOps portal at
https://aex.dev.azure.comand open your organization. -
Open the eShopOnWeb project in Azure DevOps.
-
Go to Pipelines > Pipelines.
-
Select the Create Pipeline button.
-
Select Azure Repos Git (Yaml).
-
Select the eShopOnWeb repository.
-
Select Existing Azure Pipelines YAML File.
-
Select the /.ado/eshoponweb-ci.yml file then click on Continue.
-
Select the Run button to run the pipeline.
Note: Your pipeline will take a name based on the project name. You will rename it to easier identify the pipeline.
-
Go to Pipelines > Pipelines and select the recently created pipeline. Select the ellipsis and then select Rename/move option.
-
Name it eshoponweb-ci and select Save.
Task 2: Ensure parameter types for YAML pipelines
In this task, you will set parameter and parameter types for the pipeline.
-
Go to Pipelines > Pipelines and select the eshoponweb-ci pipeline.
-
Select Edit.
-
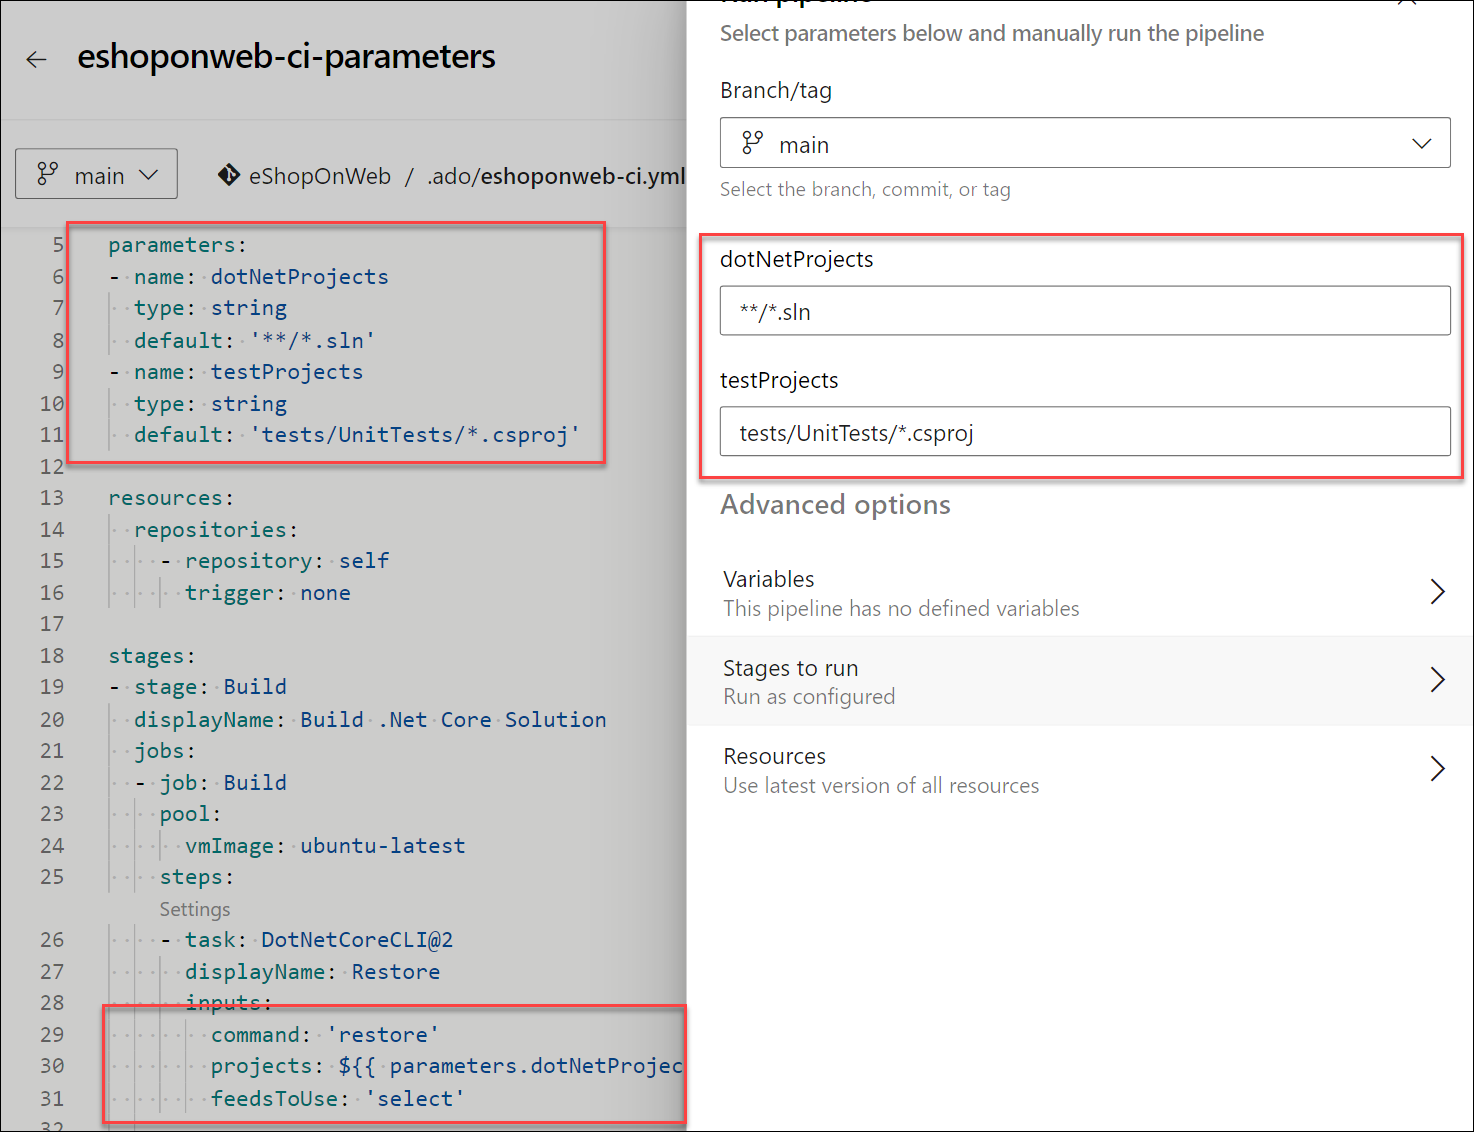
Add the following parameters above the jobs sections to the top of the YAML file:
parameters: - name: dotNetProjects type: string default: '**/*.sln' - name: testProjects type: string default: 'tests/UnitTests/*.csproj' jobs: - job: Build pool: eShopOnWebSelfPool steps: -
Replace the hardcoded paths in the “Restore”, “Build”, and “Test” tasks with the parameters you just created.
- Replace projects:
**/*.slnwith projects:$in theRestoreandBuildtasks. - Replace projects:
tests/UnitTests/*.csprojwith projects:$in theTesttask
The “Restore”, “Build”, and “Test” tasks in the steps section of the YAML file should look like this:
steps: - task: DotNetCoreCLI@2 displayName: Restore inputs: command: 'restore' projects: $ feedsToUse: 'select' - task: DotNetCoreCLI@2 displayName: Build inputs: command: 'build' projects: $ - task: DotNetCoreCLI@2 displayName: Test inputs: command: 'test' projects: $ - Replace projects:
-
Click on Validate and save to save the changes, then click on Save.
-
Navigate to Pipelines > Pipelines and open the eshoponweb-ci pipeline that is running triggered automatically.
-
Verify that the pipeline run completes successfully.

Task 3: Securing variables and parameters
In this task, you will secure the variables and parameters from your pipeline by using variable groups.
-
Go to Pipelines > Library.
-
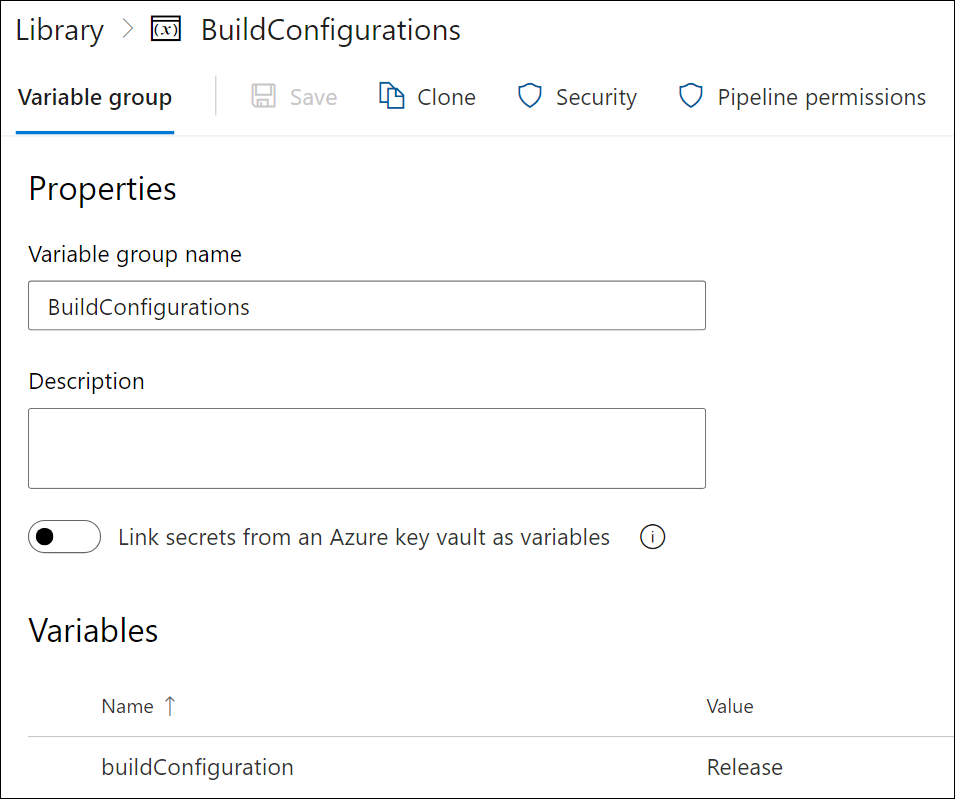
Select the + Variable group button to create a new variable group named
BuildConfigurations. -
Add a variable named
buildConfigurationand set its value toRelease. -
Save the variable group.

-
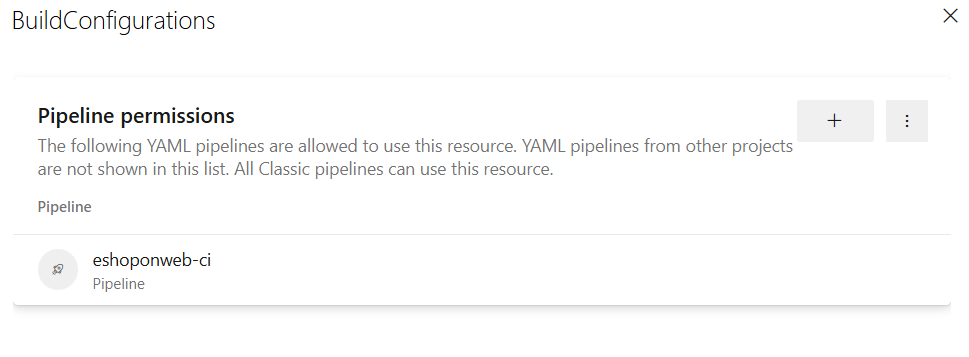
Select the Pipeline permissions button and select the + button to add a new pipeline.
-
Select the eshoponweb-ci pipeline to allow the pipeline to use the variable group.

Note: You can also set specific users or groups to be able to edit the variable group by clicking on the Security button.
-
Go to Pipelines > Pipelines.
-
Open eshoponweb-ci pipeline and select Edit.
-
At the top of the yml file, right under the parameters, reference the variable group by adding the following:
variables: - group: BuildConfigurations -
In the “Build” task, add the configuration parameter to the task to utilize the build configuration from the variable group.
command: 'build' projects: $ configuration: $(buildConfiguration) -
Click on Validate and save to save the changes, then click on Save.
-
Open the eshoponweb-ci pipeline run. It should run successfully with the build configuration set to “Release”. You can verify this by looking at the logs of the “Build” task.
Note: If you don’t see the build configuration set to “Release” in the logs, enable the system diagnostics and rerun the pipeline to see the configuration value.
Note: Following this approach, you can secure your variables and parameters by using variable groups without having to hardcode them in YAML files.
Task 4: Validating mandatory variables and parameters
In this task, you will validate the mandatory variables before the pipeline executes.
-
Go to Pipelines > Pipelines.
-
Open eshoponweb-ci pipeline and select Edit.
-
In the steps section, at its very beginning (following the steps: line), add a new script task to validate the mandatory variables before the pipeline executes.
- script: | IF NOT DEFINED buildConfiguration ( ECHO Error: buildConfiguration variable is not set EXIT /B 1 ) displayName: 'Validate Variables'Note: This is a simple validation to check if the variable is set. If the variables not set, the script will fail and the pipeline will stop. You can add more complex validation to check the value of the variable or if it is set to a specific value.
-
Click on Validate and save to save the changes, then click on Save.
-
Open the eshoponweb-ci pipeline run. It will run successfully because the buildConfiguration variable is set in the variable group.
-
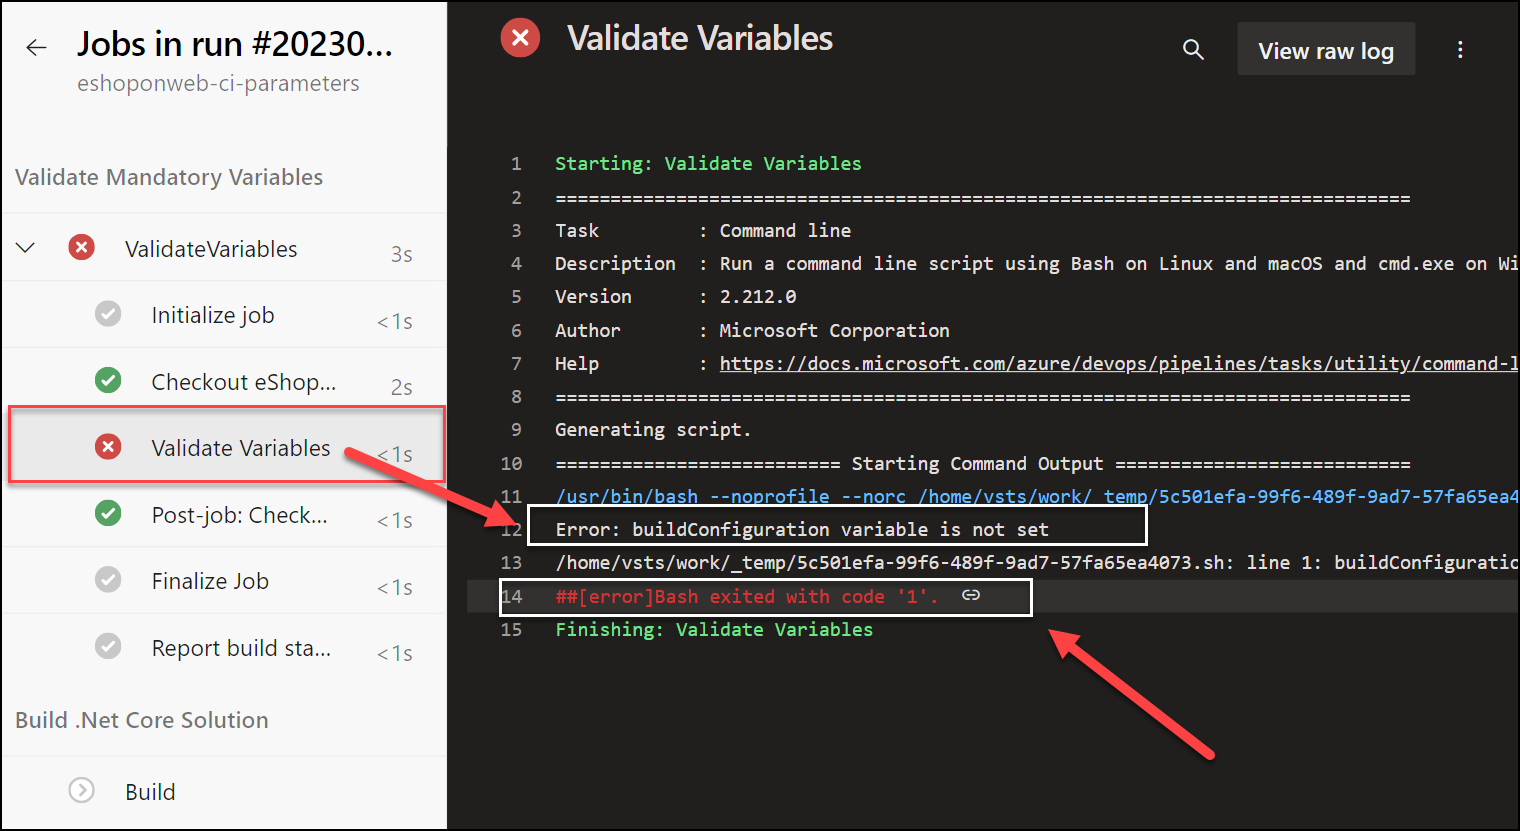
To test the validation, remove the buildConfiguration variable from the variable group, or rename the variable, and run the pipeline again. It should fail with the following error:
Error: buildConfiguration variable is not set
-
Add the variable buildConfiguration variable back to the variable group and run the pipeline again. It should run successfully.
[!IMPORTANT] Remember to delete the resources created in the Azure portal to avoid unnecessary charges.
Review
In this lab you learned how to configure pipelines to securely use variables and parameters, and how to validate mandatory variables and parameters.