Extend a pipeline to use multiple templates
In this lab, explore the importance of extending a pipeline to multiple templates and how to do it using Azure DevOps. This lab covers fundamental concepts and best practices for creating a multi-stage pipeline, creating a variables template, creating a job template, and creating a stage template.
These exercises take approximately 20 minutes.
Before you start
You’ll need an Azure subscription, Azure DevOps organization, and the eShopOnWeb application to follow the labs.
- Follow the steps to validate your lab environment.
Instructions
Exercise 1: Create a multi-stage YAML pipeline
In this exercise, you will create a multi-stage YAML pipeline in Azure DevOps.
Task 1: Create a multi-stage main YAML pipeline
-
Navigate to the Azure DevOps portal at
https://aex.dev.azure.comand open your organization. -
Open the eShopOnWeb project.
-
Go to Pipelines > Pipelines.
-
Click on the New Pipeline button.
-
Select Azure Repos Git (Yaml).
-
Select the eShopOnWeb repository.
-
Select Starter pipeline.
-
Replace the content of the azure-pipelines.yml file with the following code:
trigger: - main pool: vmImage: 'windows-latest' stages: - stage: Dev jobs: - job: Build steps: - script: echo Build - stage: Test jobs: - job: Test steps: - script: echo Test - stage: Production jobs: - job: Deploy steps: - script: echo Deploy -
Select Save and run. Choose to commit directly to the main branch and select Save and run again.
-
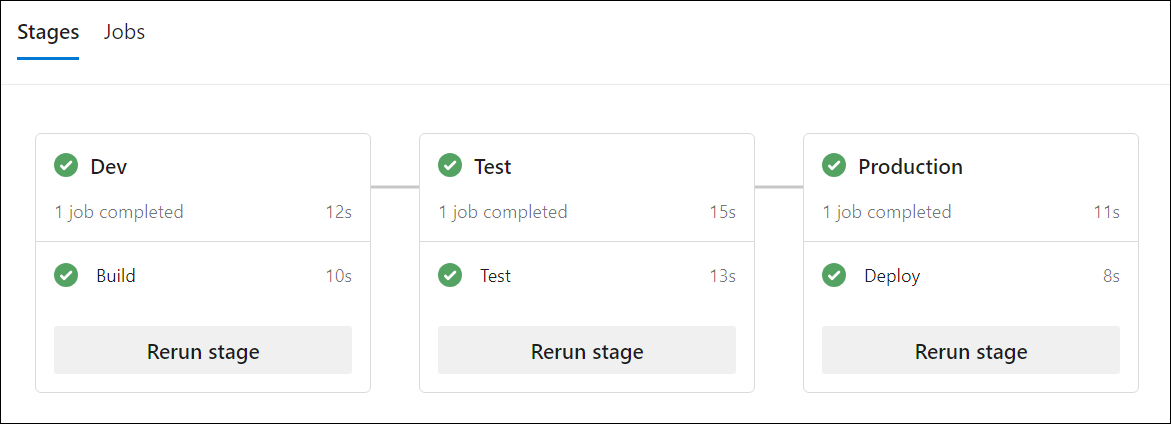
You will see the pipeline running with the three stages (Dev, Test, and Production) and the corresponding jobs. Wait until the pipeline finishes and navigate back to the Pipelines page.

-
Select … (More options) on the right side of the pipeline you just created and select Rename/move.
-
Rename the pipeline to eShopOnWeb-MultiStage-Main and select Save.
Task 2: Create a variables template
-
Go to Repos > Files.
-
Expand the .ado folder and click on New file.
-
Name the file eshoponweb-variables.yml and click on Create.
-
Add the following code to the file:
variables: resource-group: 'YOUR-RESOURCE-GROUP-NAME' location: 'centralus' templateFile: 'infra/webapp.bicep' subscriptionid: 'YOUR-SUBSCRIPTION-ID' azureserviceconnection: 'YOUR-AZURE-SERVICE-CONNECTION-NAME' webappname: 'YOUR-WEB-APP-NAME' -
Replace the values of the variables with the values of your environment:
- Replace YOUR-RESOURCE-GROUP-NAME with the name of the resource group you want to use in this lab, for example, rg-eshoponweb-secure.
- Set the value of the location variable to the name of the Azure region you want to deploy your resources, for example, centralus.
- Replace YOUR-SUBSCRIPTION-ID with your Azure subscription id.
- Replace YOUR-AZURE-SERVICE-CONNECTION-NAME with azure subs
- Replace YOUR-WEB-APP-NAME with a globally unique name of the web app to be deployed, for example, the string eshoponweb-lab-multi-123456 followed by a random six-digit number.
-
Select Commit, in the commit comment text box, enter
[skip ci], and then select Commit.Note: By adding the
[skip ci]comment to the commit, you will prevent automatic pipeline execution, which, at this point, runs by default following every change to the repo.
Task 3: Prepare the pipeline to use templates
-
In the Azure DevOps portal, on the eShopOnWeb project page, go to Repos.
-
In the root directory of the repo, select azure-pipelines.yml which contains the definition of the eShopOnWeb-MultiStage-Main pipeline.
-
Click on the Edit button.
-
Replace the content of the azure-pipelines.yml file with the following code:
trigger: - main variables: - template: .ado/eshoponweb-variables.yml stages: - stage: Dev jobs: - template: .ado/eshoponweb-ci.yml - stage: Test jobs: - template: .ado/eshoponweb-cd-webapp-code.yml - stage: Production jobs: - job: Deploy steps: - script: echo Deploy to Production or Swap -
Select Commit, in the commit comment text box, enter
[skip ci], and then select Commit.
Task 4: Updating CI/CD templates
-
In the Repos of the eShopOnWeb project, select the .ado directory and select the eshoponweb-ci.yml file.
-
Click on the Edit button.
-
Remove everything above the jobs section.
#NAME THE PIPELINE SAME AS FILE (WITHOUT ".yml") # trigger: # - main resources: repositories: - repository: self trigger: none stages: - stage: Build displayName: Build .Net Core Solution -
Select Commit, in the commit comment text box, enter
[skip ci], and then select Commit. -
In the Repos of the eShopOnWeb project, select the .ado directory and select the eshoponweb-cd-webapp-code.yml file.
-
Click on the Edit button.
-
Remove everything above the jobs section.
# NAME THE PIPELINE SAME AS FILE (WITHOUT ".yml") # # Trigger CD when CI executed successfully resources: pipelines: - pipeline: eshoponweb-ci source: eshoponweb-ci # given pipeline name trigger: true repositories: - repository: eShopSecurity type: git name: eShopSecurity/eShopSecurity # name of the project and repository variables: - template: eshoponweb-secure-variables.yml@eShopSecurity # name of the template and repository stages: - stage: Test displayName: Testing WebApp jobs: - deployment: Test pool: eShopOnWebSelfPool environment: Test strategy: runOnce: deploy: steps: - script: echo Hello world! Testing environments! - stage: Deploy displayName: Deploy to WebApp -
Replace the existing content of the #download artifacts step with:
- download: current artifact: Website - download: current artifact: Bicep -
Select Commit, in the commit comment text box, enter
[skip ci], and then select Commit.
Task 5: Run the main pipeline
-
Go to Pipelines > Pipelines.
-
Open the eShopOnWeb-MultiStage-Main pipeline.
-
Select Run pipeline.
Note: If you receive a message that the pipeline needs permission to access a resource before this run can continue, select View and then select Permit and Permit again to allow the pipeline to run.
Note: If any jobs in the Deploy stage fail, navigate to the pipeline run page and select Rerun failed jobs*.
-
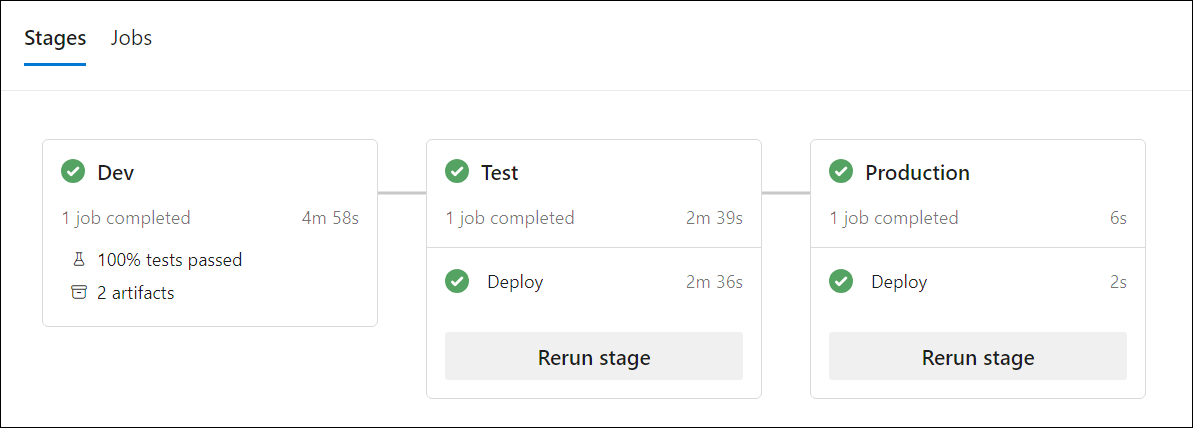
Wait until the pipeline finishes and check the results.

[!IMPORTANT] Remember to delete the resources created in the Azure portal to avoid unnecessary charges.
Review
In this lab, you learned how to extend a pipeline into multiple templates by using Azure DevOps. This lab covered fundamental concepts and best practices for creating a multi-stage pipeline, creating a variables template, a job template, and a stage template.