Backup to URL
Estimated Time: 30 minutes
As a DBA for AdventureWorks, you need to back up a database to a URL in Azure and restore it from Azure blob storage after a human error has occurred.
Restore a database
-
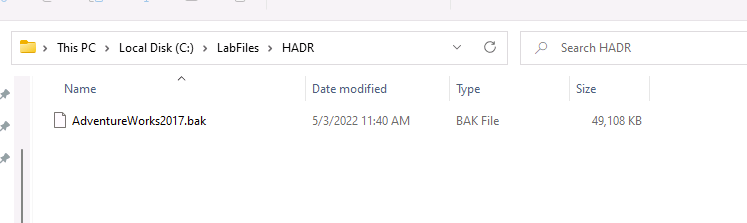
Download the database backup file located on https://github.com/MicrosoftLearning/dp-300-database-administrator/blob/master/Instructions/Templates/AdventureWorks2017.bak to C:\LabFiles\HADR path on the lab virtual machine (create the folder structure if it does not exist).
-
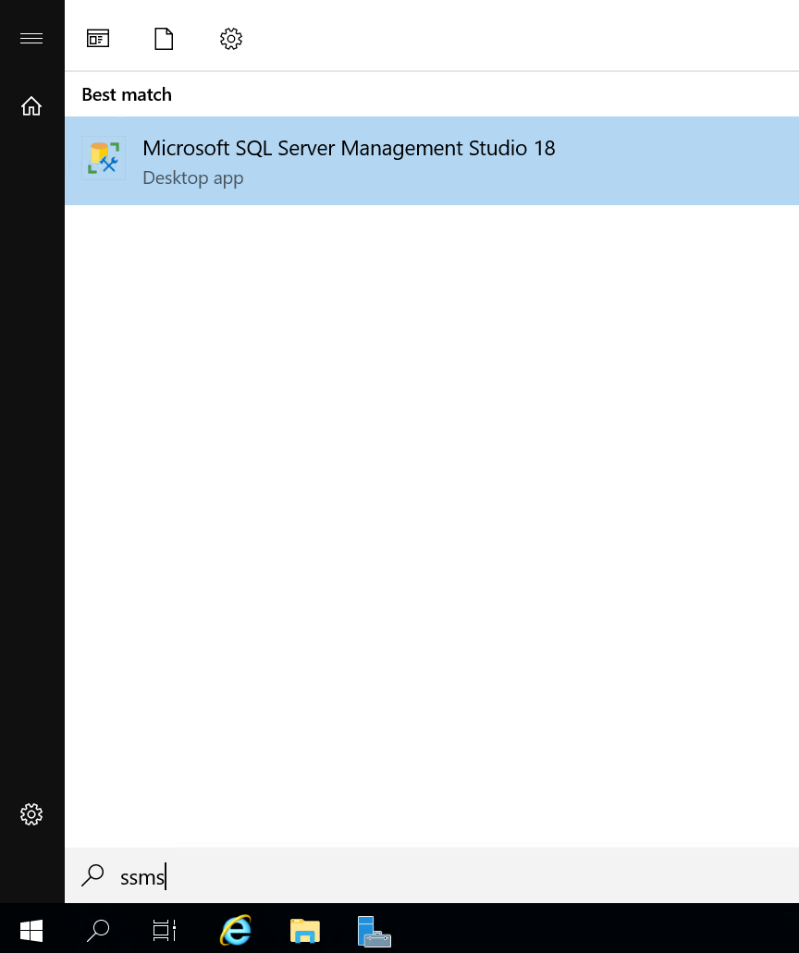
Select the Windows Start button and type SSMS. Select Microsoft SQL Server Management Studio 18 from the list.
-
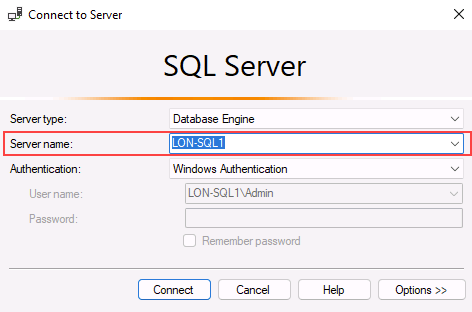
When SSMS opens, notice that the Connect to Server dialog will be pre-populated with the default instance name. Select Connect.
-
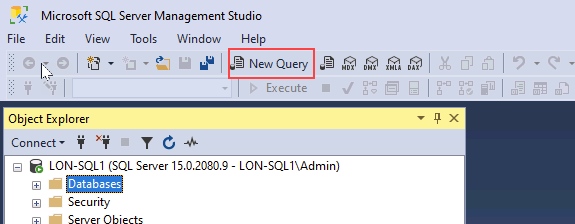
Select the Databases folder, and then New Query.
-
In the new query window, copy and paste the below T-SQL into it. Execute the query to restore the database.
 RESTORE DATABASE AdventureWorks2017
 FROM DISK = 'C:\LabFiles\HADR\AdventureWorks2017.bak'
 WITH RECOVERY,
       MOVE 'AdventureWorks2017'
         TO 'C:\LabFiles\HADR\AdventureWorks2017.mdf',
       MOVE 'AdventureWorks2017_log'
         TO 'C:\LabFiles\HADR\AdventureWorks2017_log.ldf';
Note: The database backup file name and path should match with what you’ve downloaded on step 1, otherwise the command will fail.
-
You should see a successful message after the restore is complete.
Configure Backup to URL
-
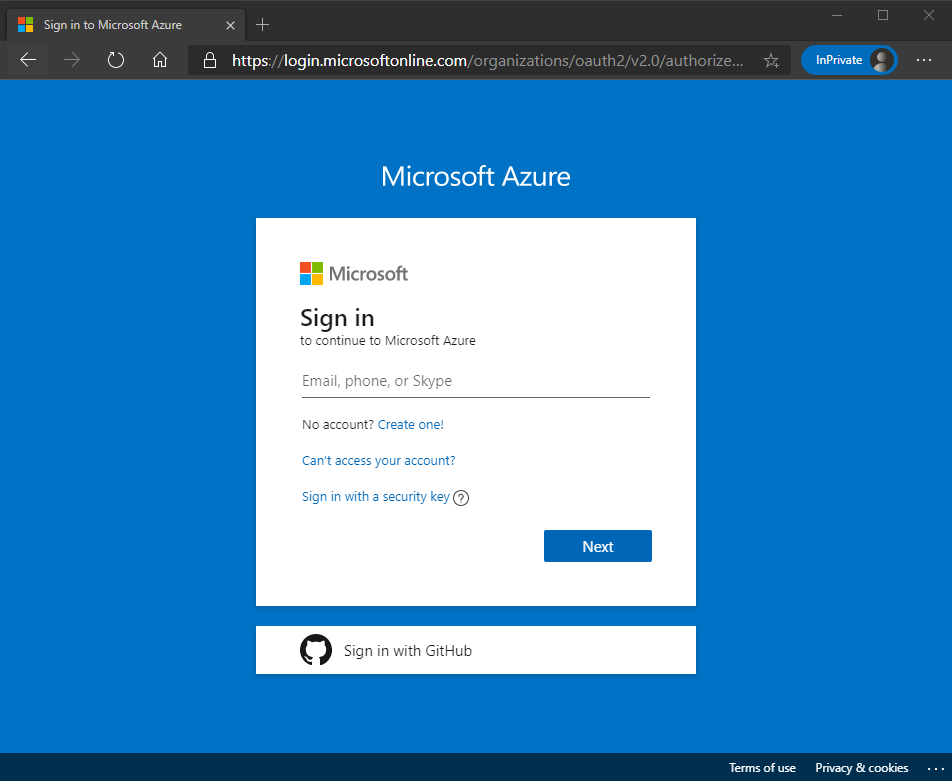
From the lab virtual machine, start a browser session and navigate to https://portal.azure.com. Connect to the Portal using the Azure Username and Password provided on the Resources tab for this lab virtual machine.
-
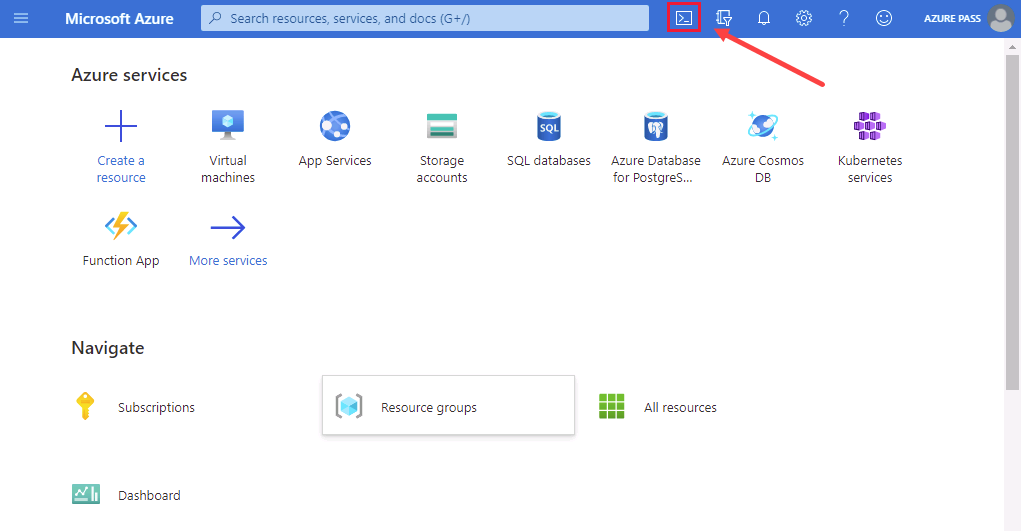
Open a Cloud Shell prompt by selecting the icon shown below.
-
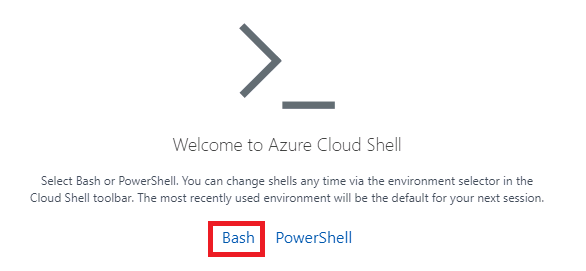
At the bottom half of the portal, you may see a message welcoming you to the Azure Cloud Shell, if you have not yet used a Cloud Shell. Select Bash.
-
If you have not previously used a Cloud Shell, you must configure a storage. Select Show advanced settings (You may have a different subscription assigned).
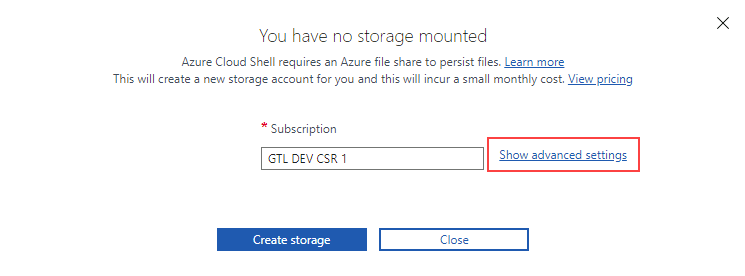
-
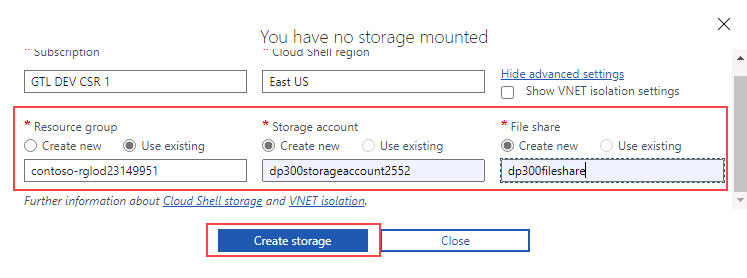
Use the existing Resource group and specify new names for Storage account and File share, as shown in the dialog below. Make a note of the Resource group name. It should start with contoso-rg. Then select Create storage.
Note: Your storage account name must be unique and all lower case with no special characters. Please provide a unique name.
-
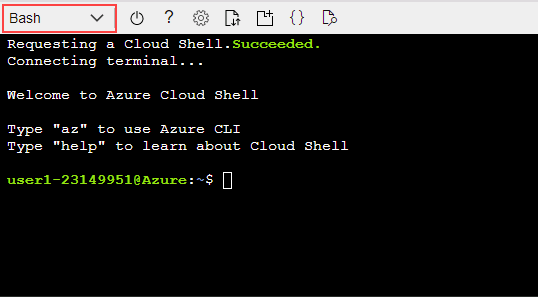
Once complete, you will see a prompt similar to the one below. Verify that the upper left corner of the Cloud Shell screen shows Bash.
-
Create a new storage account from the CLI using by executing the following command in Cloud Shell. Use the name of the resource group starting with contoso-rg that you made note of above.
[!NOTE] Change the resource group name (-g parameter), and provide a unique storage account name (-n parameter).
az storage account create -n "dp300backupstorage1234" -g "contoso-rglod23149951" --kind StorageV2 -l eastus2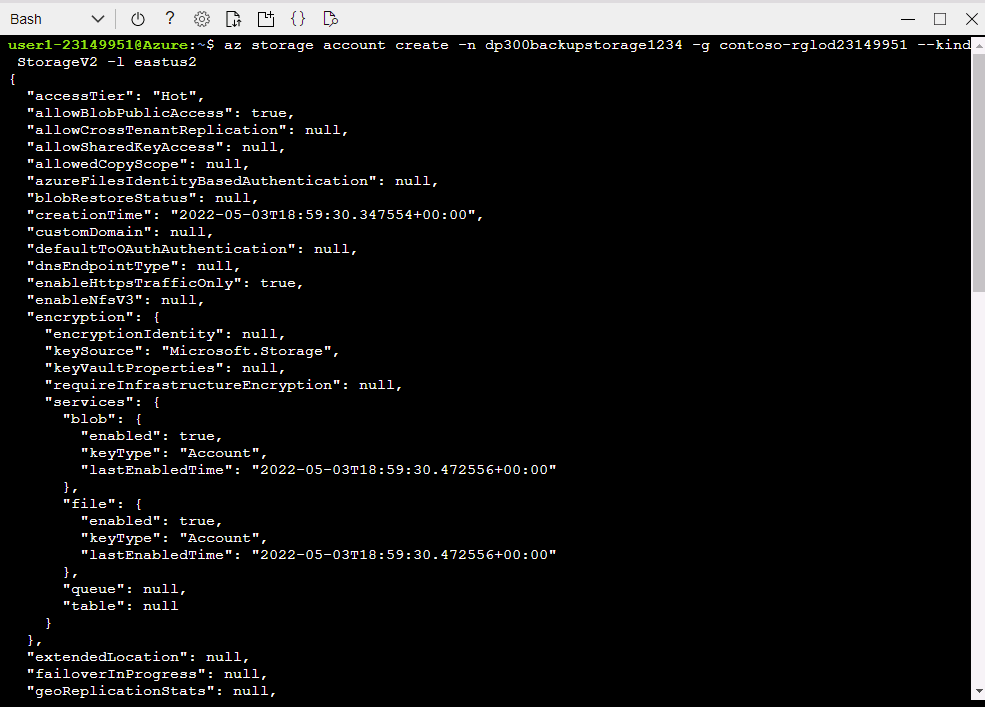
-
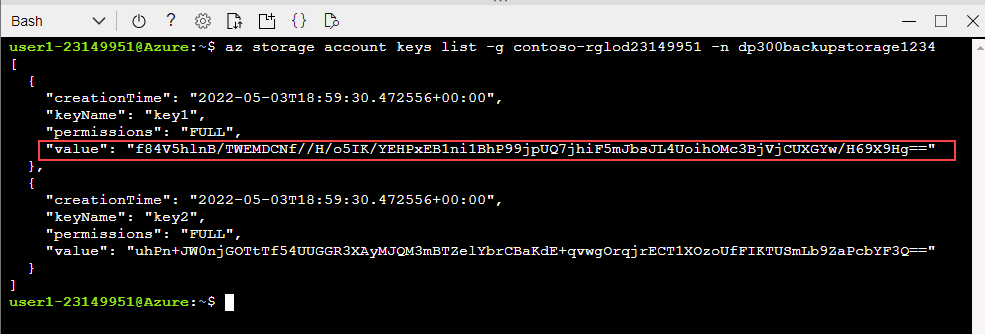
Next you will get the keys for your storage account, which you will use in subsequent steps. Execute the following code in Cloud Shell using the unique name of your storage account and resource group.
az storage account keys list -g contoso-rglod23149951 -n dp300backupstorage1234Your account key will be in the results of the above command. Make sure you use the same name (after the -n) and resource group (after the -g) that you used in the previous command. Copy the returned value for key1 (without the double quotes) as shown here:
-
Backing up a database in SQL Server to a URL uses container within a storage account. You will create a container specifically for backup storage in this step. To do this, execute the commands below.
az storage container create --name "backups" --account-name "dp300backupstorage1234" --account-key "storage_key" --fail-on-existWhere dp300backupstorage1234 is the unique storage account name used when creating the storage account, and storage_key is the key generated above. The output should return true.

-
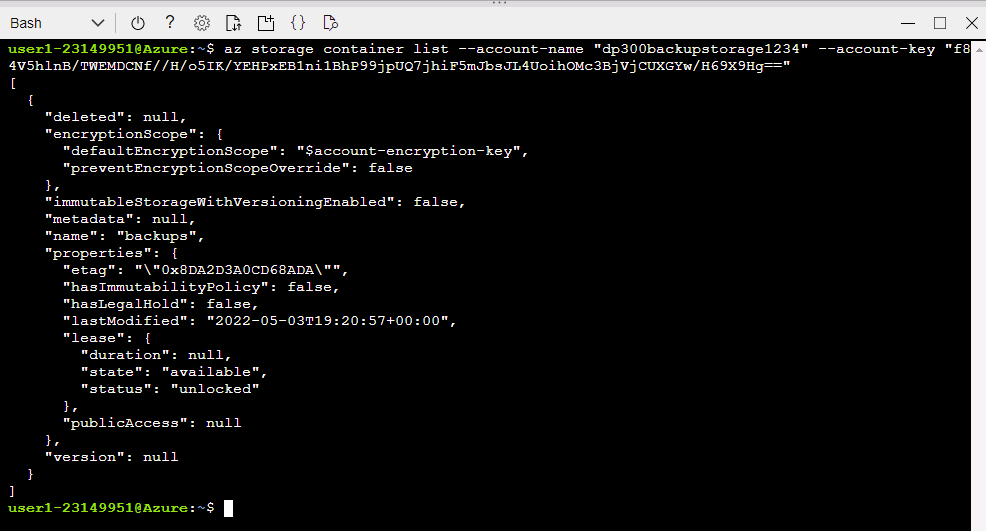
To verify if the container backups has been created properly, execute:
az storage container list --account-name "dp300backupstorage1234" --account-key "storage_key"Where dp300backupstorage1234 is the unique storage account name used when creating the storage account, and storage_key is the key generated. The output should return something similar to below:
-
A shared access signature (SAS) at the container level is required for security. This can be done via Cloud Shell or PowerShell. Execute the following:
az storage container generate-sas -n "backups" --account-name "dp300backupstorage1234" --account-key "storage_key" --permissions "rwdl" --expiry "date_in_the_future" -o tsvWhere dp300backupstorage1234 is the unique storage account name used when creating the storage account, storage_key is the key generated, and date_in_the_future is a time later than now. date_in_the_future must be in UTC. An example is 2021-12-31T00:00Z which translates to expiring at Dec 31, 2020 at midnight.
The output should return something similar to below. Copy the whole shared access signature and paste it in Notepad, it will be used in the next task.

Create credential
Now that the functionality is configured, you can generate a backup file as a blob in Azure Storage Account.
-
Start SQL Server Management Studio (SSMS).
-
You will be prompted to connect to SQL Server. Ensure that Windows Authentication is selected, and select Connect.
-
Select New Query.
-
Create the credential that will be used to access storage in the cloud with the following Transact-SQL. Fill in the appropriate values, then select Execute.
 IF NOT EXISTS
 (SELECT *
     FROM sys.credentials
     WHERE name = 'https://<storage_account_name>.blob.core.windows.net/backups')
 BEGIN
     CREATE CREDENTIAL [https://<storage_account_name>.blob.core.windows.net/backups]
     WITH IDENTITY = 'SHARED ACCESS SIGNATURE',
     SECRET = '<key_value>'
 END;
 GO
Where both occurrences of **
** are the unique storage account name created, and ** ** is the value generated at the end of the previous task in this format: 'se=2020-12-31T00%3A00Z&sp=rwdl&sv=2018-11-09&sr=csig=rnoGlveGql7ILhziyKYUPBq5ltGc/pzqOCNX5rrLdRQ%3D' -
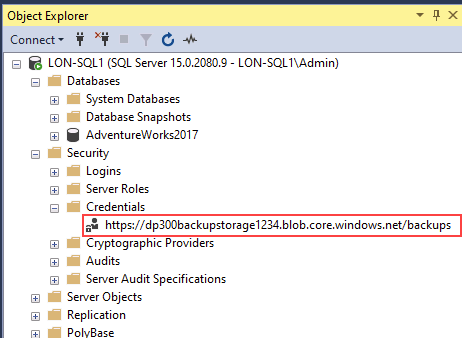
You can check if the credential was created successfully by navigating to Security -> Credentials on Object Explore.
-
If you mistyped and need to recreate the credential, you can drop it with the following command, making sure to change the name of the storage account:
 -- Only run this command if you need to go back and recreate the credential!
 DROP CREDENTIAL [https://<storage_account_name>.blob.core.windows.net/backups]
Backup to URL
-
Back up the database AdventureWorks2017 to Azure with the following command in Transact-SQL:
 BACKUP DATABASE AdventureWorks2017
 TO URL = 'https://<storage_account_name>.blob.core.windows.net/backups/AdventureWorks2017.bak';
 GO
Where **
** is the unique storage account name used created. The output should return something similar to below. 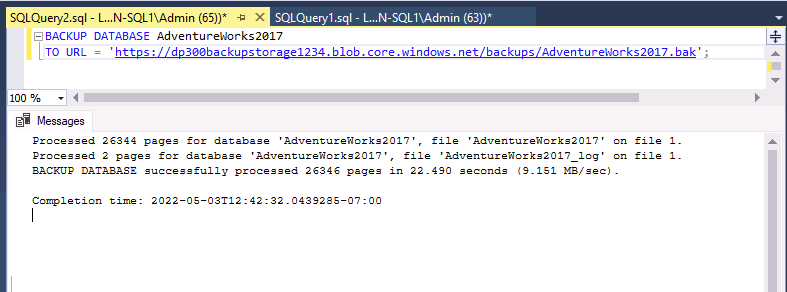
If something was configured incorrectly, you will see an error message similar to the following:

If an error occurs, check that you did not mistype anything during the credential creation, and that everything was created successfully.
Validate the backup through Azure CLI
To see that the file is actually in Azure, you can use Storage Explorer (preview) or Azure Cloud Shell.
-
Start a browser session and navigate to https://portal.azure.com. Connect to the Portal using the Azure Username and Password provided on the Resources tab for this lab virtual machine.
-
Use the Azure Cloud Shell to run this Azure CLI command:
az storage blob list -c "backups" --account-name "dp300backupstorage1234" --account-key "storage_key" --output tableMake sure you use the same unique storage account name (after the –account-name) and account key (after the –account-key) that you used in the previous commands.

We can confirm the backup file was generated successfully.
Validate the backup through Storage Explorer
-
To use the Storage Explorer (preview), from the home page in the Azure portal select Storage accounts.
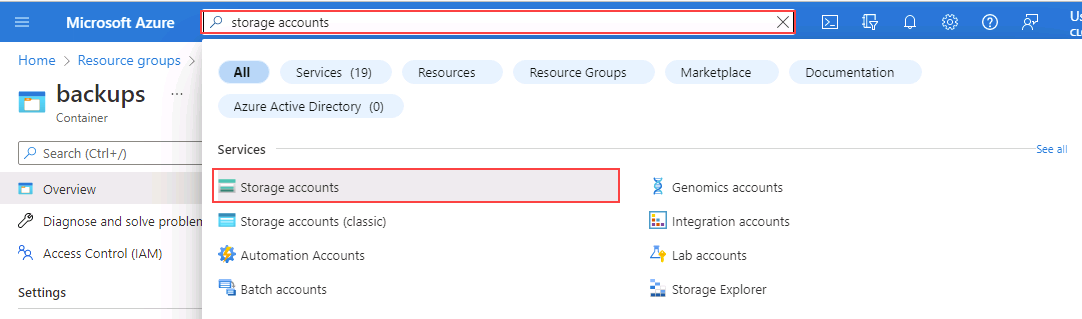
-
Select the unique storage account name you created for the backups.
-
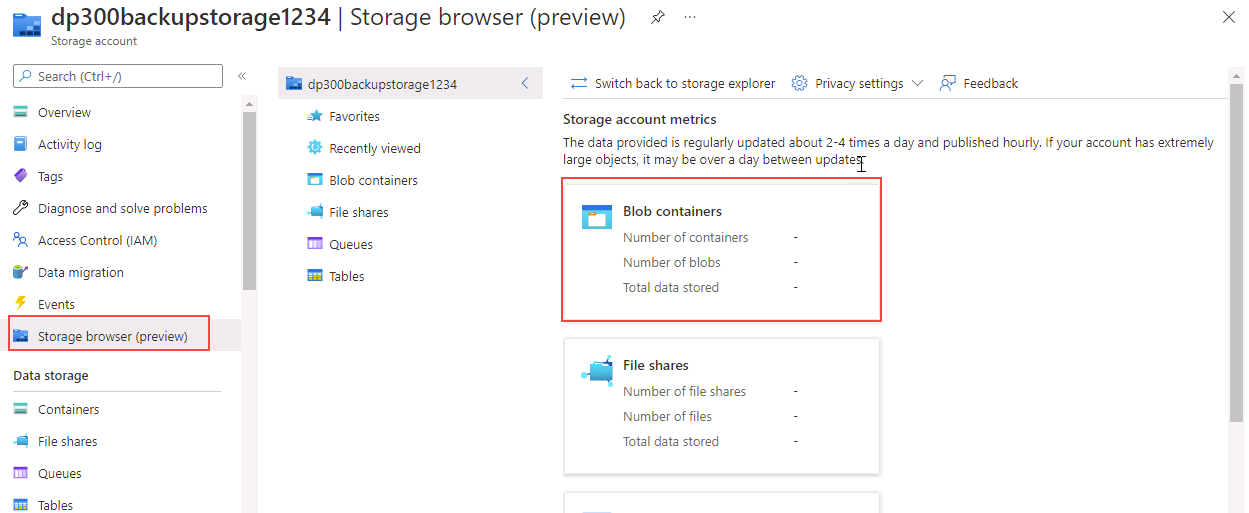
In the left navigation, select Storage browser (preview). Expand Blob containers.
-
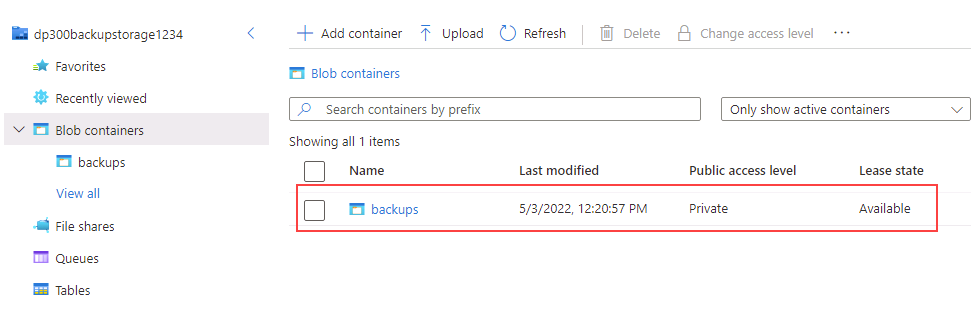
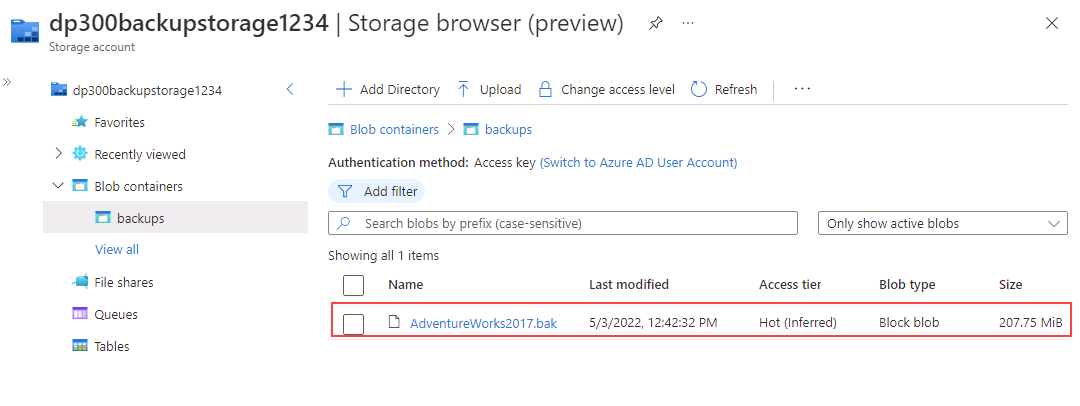
Select backups.
-
Note that the backup file is stored in the container.
Restore from URL
This task will show you how to restore a database from an Azure blob storage.
-
From SQL Server Management Studio (SSMS), select New Query, then paste and execute the following query.
 USE AdventureWorks2017;
 GO
 SELECT * FROM Person.Address WHERE AddressId = 1;
 GO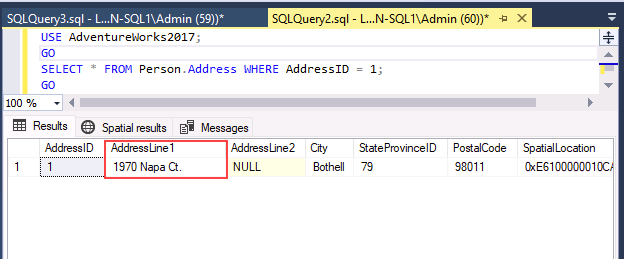
-
Run this command to change the name of that customer.
UPDATE Person.Address SET AddressLine1 = 'This is a human error' WHERE AddressId = 1; GO -
Re-run Step 1 to verify that the address has been changed. Now imagine if someone had changed thousands or millions of rows without a WHERE clause – or the wrong WHERE clause. One of the solutions involves restoring the database from the last available backup.

-
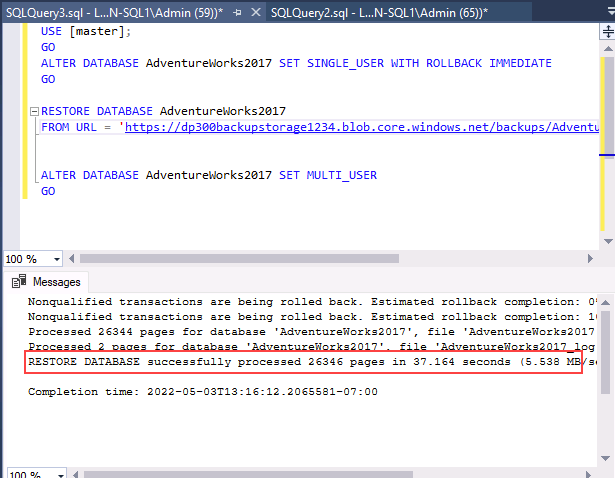
To restore the database to get it back to where it was before the customer name was mistakenly changed, execute the following.
Note: SET SINGLE_USER WITH ROLLBACK IMMEDIATE syntax the open transactions will all be rolled back. This can prevent the restore failing due to active connections.
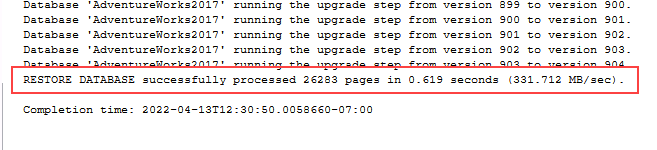
 USE [master]
 GO

 ALTER DATABASE AdventureWorks2017 SET SINGLE_USER WITH ROLLBACK IMMEDIATE
 GO

 RESTORE DATABASE AdventureWorks2017
 FROM URL = 'https://<storage_account_name>.blob.core.windows.net/backups/AdventureWorks2017.bak'
 GO

 ALTER DATABASE AdventureWorks2017 SET MULTI_USER
 GO
Where **
** is the unique storage account name you created. The output should be similar to this:
-
Re-run Step 1 to verify that the customer name has been restored.
It is important to understand the components and the interaction to do a backup to or restore from the Azure Blob Storage service.
You have now seen that you can back up a database to a URL in Azure and, if necessary, restore it.