템플릿에서 Azure SQL Database 배포
예상 시간: 15분
데이터베이스 관리의 일상적인 작업을 자동화하는 데 도움을 주는 선임 데이터 엔지니어로 고용되었습니다. 이와 같은 자동화를 통해 AdventureWorks용 데이터베이스가 최고의 성능으로 계속 작동하고 특정 조건에 따라 경고를 제공하는 메서드를 제공할 수 있습니다. AdventureWorks는 IaaS(Infrastructure as a Service) 및 PaaS(Platform as a Service) 제품 모두에서 SQL Server를 사용합니다.
Azure Resource Manager 템플릿 살펴보기
-
Microsoft Edge에서 새 탭을 열고 GitHub 리포지토리의 다음 경로로 이동합니다. 여기에는 SQL Database 리소스를 배포하는 ARM 템플릿이 들어 있습니다.
https://github.com/Azure/azure-quickstart-templates/tree/master/quickstarts/microsoft.sql/sql-database -
azuredeploy.json을 마우스 오른쪽 단추로 클릭하고 새 탭에서 링크 열기를 선택하여 ARM 템플릿을 봅니다. 다음과 같은 템플릿이 표시됩니다.
{ "$schema": "https://schema.management.azure.com/schemas/2019-04-01/deploymentTemplate.json#", "contentVersion": "1.0.0.0", "parameters": { "serverName": { "type": "string", "defaultValue": "[uniqueString('sql', resourceGroup().id)]", "metadata": { "description": "The name of the SQL logical server." } }, "sqlDBName": { "type": "string", "defaultValue": "SampleDB", "metadata": { "description": "The name of the SQL Database." } }, "location": { "type": "string", "defaultValue": "[resourceGroup().location]", "metadata": { "description": "Location for all resources." } }, "administratorLogin": { "type": "string", "metadata": { "description": "The administrator username of the SQL logical server." } }, "administratorLoginPassword": { "type": "securestring", "metadata": { "description": "The administrator password of the SQL logical server." } } }, "variables": {}, "resources": [ { "type": "Microsoft.Sql/servers", "apiVersion": "2020-02-02-preview", "name": "[parameters('serverName')]", "location": "[parameters('location')]", "properties": { "administratorLogin": "[parameters('administratorLogin')]", "administratorLoginPassword": "[parameters('administratorLoginPassword')]" }, "resources": [ { "type": "databases", "apiVersion": "2020-08-01-preview", "name": "[parameters('sqlDBName')]", "location": "[parameters('location')]", "sku": { "name": "Standard", "tier": "Standard" }, "dependsOn": [ "[resourceId('Microsoft.Sql/servers', concat(parameters('serverName')))]" ] } ] } ] } -
JSON 속성을 검토하고 관찰합니다.
-
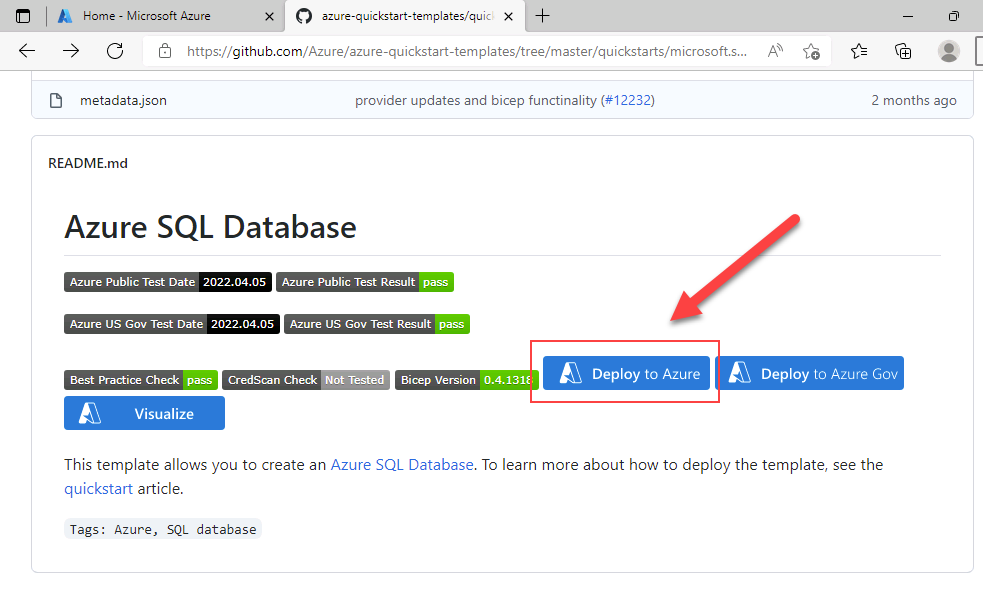
azuredeploy.json 탭을 닫고 sql-database GitHub 폴더를 포함하는 탭으로 돌아갑니다. 아래로 스크롤하여 Azure에 배포를 선택합니다.

-
SQL Server 및 데이터베이스 만들기 빠른 시작 템플릿 페이지가 Azure Portal에서 열리고 ARM 템플릿에서 리소스 세부 정보가 부분적으로 채워집니다. 아래 정보를 사용하여 빈 필드를 완료합니다.
- 리소스 그룹: contoso-rg로 시작
- Sql 관리자 로그인: labadmin
- Sql 관리자 로그인 암호: <강력한 암호 입력>
-
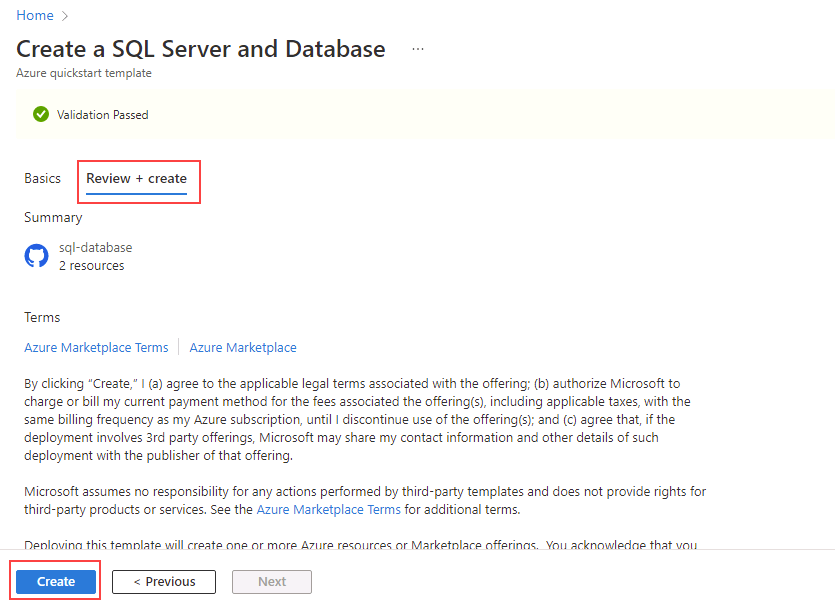
검토 및 생성를 선택한 후 생성를 선택합니다. 배포에는 5분 정도 걸립니다.

-
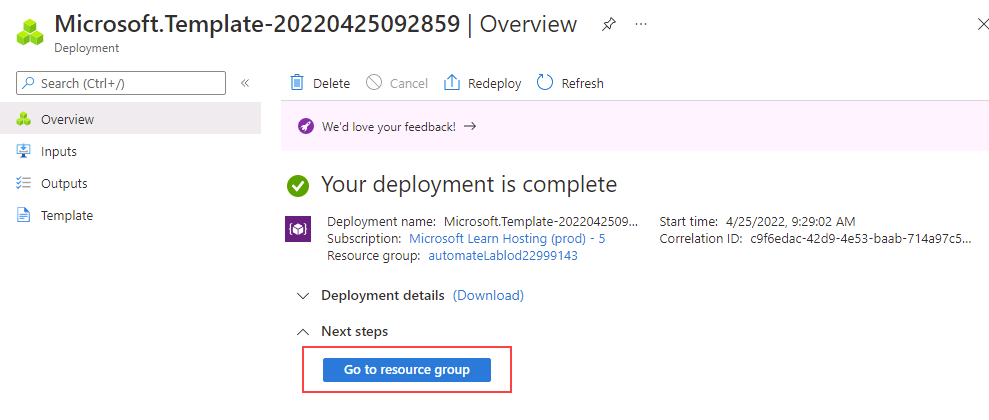
배포가 완료되면 리소스 그룹으로 이동을 선택합니다. 배포에서 만든 임의로 명명된 SQL Server 리소스를 포함하는 Azure 리소스 그룹으로 이동합니다.

Azure Resource Manager 템플릿 링크를 한 번 클릭하여 Azure SQL 서버와 데이터베이스를 쉽게 만드는 방법을 알아보았습니다.