SQL is an industry-standard language for querying and manipulating data. Many data analysts perform data analytics by using SQL to query tables in a relational database. Azure Databricks includes SQL functionality that builds on Spark and Delta Lake technologies to provide a relational database layer over files in a data lake.
This exercise should take approximately 30 minutes to complete.
Provision an Azure Databricks workspace
Tip: If you already have a Premium or Trial Azure Databricks workspace, you can skip this procedure and use your existing workspace.
This exercise includes a script to provision a new Azure Databricks workspace. The script attempts to create a Premium tier Azure Databricks workspace resource in a region in which your Azure subscription has sufficient quota for the compute cores required in this exercise; and assumes your user account has sufficient permissions in the subscription to create an Azure Databricks workspace resource. If the script fails due to insufficient quota or permissions, you can try to create an Azure Databricks workspace interactively in the Azure portal.
- In a web browser, sign into the Azure portal at
https://portal.azure.com. -
Use the [>_] button to the right of the search bar at the top of the page to create a new Cloud Shell in the Azure portal, selecting a PowerShell environment and creating storage if prompted. The cloud shell provides a command line interface in a pane at the bottom of the Azure portal, as shown here:
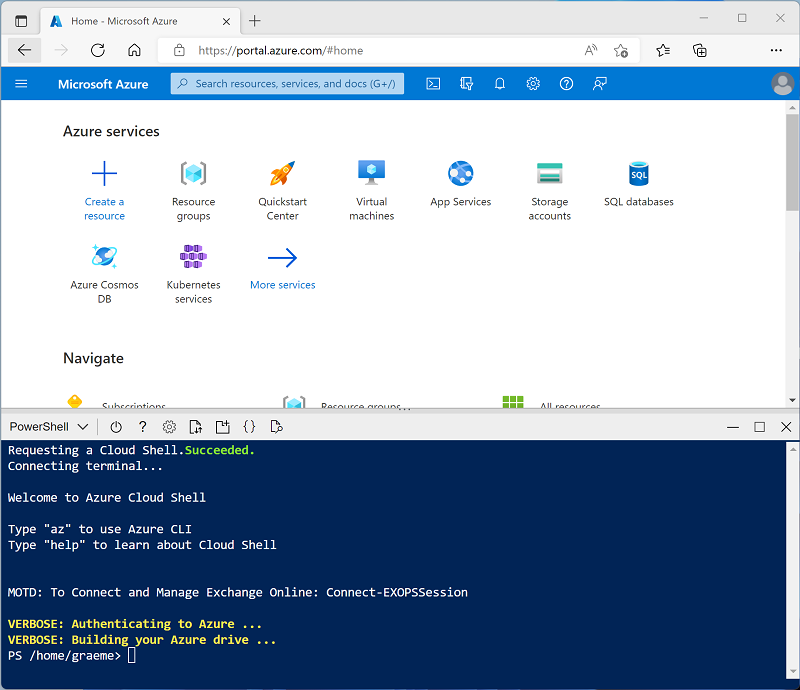
Note: If you have previously created a cloud shell that uses a Bash environment, use the drop-down menu at the top left of the cloud shell pane to change it to PowerShell.
-
Note that you can resize the cloud shell by dragging the separator bar at the top of the pane, or by using the —, ◻, and X icons at the top right of the pane to minimize, maximize, and close the pane. For more information about using the Azure Cloud Shell, see the Azure Cloud Shell documentation.
-
In the PowerShell pane, enter the following commands to clone this repo:
rm -r mslearn-databricks -f git clone https://github.com/MicrosoftLearning/mslearn-databricks -
After the repo has been cloned, enter the following command to run the setup.ps1 script, which provisions an Azure Databricks workspace in an available region:
./mslearn-databricks/setup.ps1 - If prompted, choose which subscription you want to use (this will only happen if you have access to multiple Azure subscriptions).
- Wait for the script to complete - this typically takes around 5 minutes, but in some cases may take longer. While you are waiting, review the What is data warehousing on Azure Databricks? article in the Azure Databricks documentation.
View and start a SQL Warehouse
- When the Azure Databricks workspace resource has been deployed, go to it in the Azure portal.
-
In the Overview page for your Azure Databricks workspace, use the Launch Workspace button to open your Azure Databricks workspace in a new browser tab; signing in if prompted.
Tip: As you use the Databricks Workspace portal, various tips and notifications may be displayed. Dismiss these and follow the instructions provided to complete the tasks in this exercise.
- View the Azure Databricks workspace portal and note that the sidebar on the left side contains the names of the task categories.
- In the sidebar, under SQL, select SQL Warehouses.
- Observe that the workspace already includes a SQL Warehouse named Starter Warehouse.
- In the Actions (⁝) menu for the SQL Warehouse, select Edit. Then set the Cluster size property to 2X-Small and save your changes.
- Use the Start button to start the SQL Warehouse (which may take a minute or two).
Note: If your SQL Warehouse fails to start, your subscription may have insufficient quota in the region where your Azure Databricks workspace is provisioned. See Required Azure vCPU quota for details. If this happens, you can try requesting for a quota increase as detailed in the error message when the warehouse fails to start. Alternatively, you can try deleting your workspace and creating a new one in a different region. You can specify a region as a parameter for the setup script like this:
./setup.ps1 eastus
Create a database schema
- When your SQL Warehouse is running, select SQL Editor in the sidebar.
- In the Schema browser pane, observe that the hive_metastore catalogue contains a database named default.
-
In the New query pane, enter the following SQL code:
CREATE DATABASE retail_db; - Use the ►Run (1000) button to run the SQL code.
- When the code has been successfully executed, in the Schema browser pane, use the refresh button at the top of the pane to refresh the list. Then expand hive_metastore and retail_db, and observe that the database has been created, but contains no tables.
You can use the default database for your tables, but when building an analytical data store it’s best to create custom databases for specific data.
Create a table
- Download the
products.csvfile to your local computer, saving it as products.csv. - In the Azure Databricks workspace portal, in the sidebar, select (+) New and then select Data.
- In the Add data page, select Create or modify table and upload the products.csv file you downloaded to your computer.
- In the Create or modify table from file upload page, select the retail_db schema and set the table name to products. Then select Create table on the bottom right corner of the page.
- When the table has been created, review its details.
The ability to create a table by importing data from a file makes it easy to populate a database. You can also use Spark SQL to create tables using code. The tables themselves are metadata definitions in the hive metastore, and the data they contain is stored in Delta format in Databricks File System (DBFS) storage.
Create a dashboard
- In the sidebar, select (+) New and then select Dashboard.
- Select the New dashboard name and change it to
Retail Dashboard. -
In the Data tab, select Create from SQL and use the following query:
SELECT ProductID, ProductName, Category FROM retail_db.products; - Select Run and then rename the Untitled dataset to
Products and Categories. - Select the Canvas tab and then select Add a visualization.
-
In the visualization editor, set the following properties:
- Dataset: Products and Categories
- Visualization: bar
- X axis: COUNT(ProductID)
- Y axis: Category
- Select Publish to view the dashboard as users will see it.
Dashboards are a great way to share data tables and visualizations with business users. You can schedule the dashboards to be refreshed periodically, and emailed to subscribers.
Clean up
In Azure Databricks portal, on the SQL Warehouses page, select your SQL Warehouse and select ■ Stop to shut it down.
If you’ve finished exploring Azure Databricks, you can delete the resources you’ve created to avoid unnecessary Azure costs and free up capacity in your subscription.