Ingest realtime data with Azure Stream Analytics and Azure Synapse Analytics
Data analytics solutions often include a requirement to ingest and process streams of data. Stream processing differs from batch processing in that streams are generally boundless - in other words they are continuous sources of data that must be processed perpetually rather than at fixed intervals.
Azure Stream Analytics provides a cloud service that you can use to define a query that operates on a stream of data from a streaming source, such as Azure Event Hubs or an Azure IoT Hub. You can use an Azure Stream Analytics query to ingest the stream of data directly into a data store for further analysis, or to filter, aggregate, and summarize the data based on temporal windows.
In this exercise, you’ll use Azure Stream Analytics to process a stream of sales order data, such as might be generated from an online retail application. The order data will be sent to Azure Event Hubs, from where your Azure Stream Analytics jobs will read the data and ingest it into Azure Synapse Analytics.
This exercise should take approximately 45 minutes to complete.
Before you start
You’ll need an Azure subscription in which you have administrative-level access.
Provision Azure resources
In this exercise, you’ll need an Azure Synapse Analytics workspace with access to data lake storage and a dedicated SQL pool. You’ll also need an Azure Event Hubs namespace to which the streaming order data can be sent.
You’ll use a combination of a PowerShell script and an ARM template to provision these resources.
- Sign into the Azure portal at
https://portal.azure.com. -
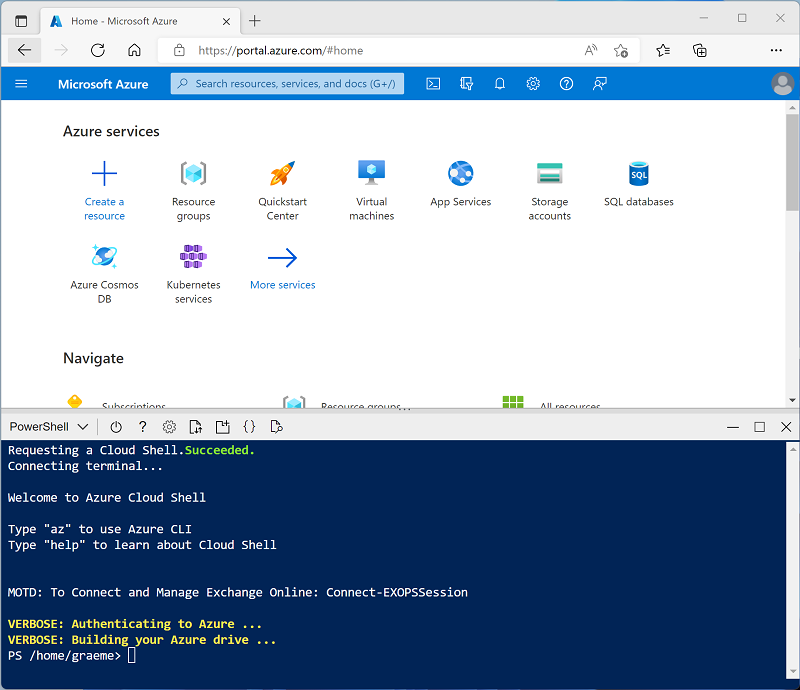
Use the [>_] button to the right of the search bar at the top of the page to create a new Cloud Shell in the Azure portal, selecting a PowerShell environment and creating storage if prompted. The cloud shell provides a command line interface in a pane at the bottom of the Azure portal, as shown here:
Note: If you have previously created a cloud shell that uses a Bash environment, use the the drop-down menu at the top left of the cloud shell pane to change it to PowerShell.
-
Note that you can resize the cloud shell by dragging the separator bar at the top of the pane, or by using the —, ◻, and X icons at the top right of the pane to minimize, maximize, and close the pane. For more information about using the Azure Cloud Shell, see the Azure Cloud Shell documentation.
-
In the PowerShell pane, enter the following commands to clone the repo containing this exercise:
rm -r dp-203 -f git clone https://github.com/MicrosoftLearning/dp-203-azure-data-engineer dp-203 -
After the repo has been cloned, enter the following commands to change to the folder for this exercise and run the setup.ps1 script it contains:
cd dp-203/Allfiles/labs/18 ./setup.ps1 - If prompted, choose which subscription you want to use (this will only happen if you have access to multiple Azure subscriptions).
-
When prompted, enter a suitable password to be set for your Azure Synapse SQL pool.
Note: Be sure to remember this password!
- Wait for the script to complete - this typically takes around 15 minutes, but in some cases may take longer. While you are waiting, review the Welcome to Azure Stream Analytics article in the Azure Stream Analytics documentation.
Ingest streaming data into a dedicated SQL pool
Let’s start by ingesting a stream of data directly into a table in an Azure Synapse Analytics dedicated SQL pool.
View the streaming source and database table
- When the setup script has finished running, minimize the cloud shell pane (you’ll return to it later). Then in the Azure portal, go to the dp203-xxxxxxx resource group that it created, and notice that this resource group contains an Azure Synapse workspace, a Storage account for your data lake, a Dedicated SQL pool, and an Event Hubs namespace.
- Select your Synapse workspace, and in its Overview page, in the Open Synapse Studio card, select Open to open Synapse Studio in a new browser tab. Synapse Studio is a web-based interface that you can use to work with your Synapse Analytics workspace.
- On the left side of Synapse Studio, use the ›› icon to expand the menu - this reveals the different pages within Synapse Studio that you’ll use to manage resources and perform data analytics tasks.
- On the Manage page, in the SQL pools section, select the sqlxxxxxxx dedicated SQL pool row and then use its ▷ icon to resume it.
- While you wait for the SQL pool to start, switch back to the browser tab containing the Azure portal and re-open the cloud shell pane.
-
In the cloud shell pane, enter the following command to run a client app that sends 100 simulated orders to Azure Event Hubs:
node ~/dp-203/Allfiles/labs/18/orderclient - Observe the order data as it is sent - each order consists of a product ID and a quantity.
- After the order client app has finished, minimize the cloud shell pane and switch back to the Synapse Studio browser tab.
- In Synapse Studio, on the Manage page, ensure that your dedicated SQL pool has a status of Online, then switch to the data page and in the Workspace pane, expand SQL database, your sqlxxxxxxx SQL pool, and Tables to see the dbo.FactOrder table.
- In the … menu for the dbo.FactOrder table, select New SQL script > Select TOP 100 rows and review the results. Observe that the table includes columns for OrderDateTime, ProductID, and Quantity but there are currently no rows of data.
Create an Azure Stream Analytics job to ingest order data
- Switch back to the browser tab containing the Azure portal, and note the region where your dp203-xxxxxxx resource group was provisioned - you will create your Stream Analytics job in the same region.
- On the Home page select + Create a resource and search for
Stream Analytics job. Then create a Stream Analytics job with the following properties:- Basics:
- Subscription: Your Azure subscription
- Resource group: Select the existing dp203-xxxxxxx resource group.
- Name:
ingest-orders - Region: Select the same region where your Synapse Analytics workspace is provisioned.
- Hosting environment: Cloud
- Streaming units: 1
- Storage:
- Add storage account: Selected
- Subscription: Your Azure subscription
- Storage accounts: Select the datalakexxxxxxx storage account
- Authentication mode: Connection string
- Secure private data in storage account: Selected
- Tags:
- None
- Basics:
- Wait for deployment to complete and then go to the deployed Stream Analytics job resource.
Create an input for the event data stream
- On the ingest-orders overview page, select the Inputs page. Use the Add input menu to add an Event Hub input with the following properties:
- Input alias:
orders - Select Event Hub from your subscriptions: Selected
- Subscription: Your Azure subscription
- Event Hub namespace: Select the eventsxxxxxxx Event Hubs namespace
- Event Hub name: Select the existing eventhubxxxxxxx event hub.
- Event Hub consumer group: Select the Use existing then select the $Default consumer group
- Authentication mode: Create system assigned managed identity
- Partition key: Leave blank
- Event serialization format: JSON
- Encoding: UTF-8
- Input alias:
- Save the input and wait while it is created. You will see several notifications. Wait for a Successful connection test notification.
Create an output for the SQL table
- View the Outputs page for the ingest-orders Stream Analytics job. Then use the Add output menu to add an Azure Synapse Analytics output with the following properties:
- Output alias:
FactOrder - Select Azure Synapse Analytics from your subscriptions: Selected
- Subscription: Your Azure subscription
- Database: Select the sqlxxxxxxx (synapsexxxxxxx) database
- Authentication mode: SQL server authentication
- Username: SQLUser
- Password: The password you specified for your SQL Pool when running the setup script
- Table:
FactOrder
- Output alias:
- Save the output and wait while it is created. You will see several notifications. Wait for a Successful connection test notification.
Create a query to ingest the event stream
- View the Query page for the ingest-orders Stream Analytics job. Then wait a few moments until the input preview is displayed (based on the sales order events previously captured in the event hub).
- Observe that the input data includes the ProductID and Quantity fields in the messages submitted by the client app, as well as additional Event Hubs fields - including the EventProcessedUtcTime field that indicates when the event was added to the event hub.
-
Modify the default query as follows:
 SELECT
     EventProcessedUtcTime AS OrderDateTime,
     ProductID,
     Quantity
 INTO
     [FactOrder]
 FROM
     [orders]
Observe that this query takes fields from the input (event hub) and writes them directly to the output (SQL table).
- Save the query.
Run the streaming job to ingest order data
- View the Overview page for the ingest-orders Stream Analytics job, and on the Properties tab review the Inputs, Query, Outputs, and Functions for the job. If the number of Inputs and Outputs is 0, use the ↻ Refresh button on the Overview page to display the orders input and FactTable output.
- Select the ▷ Start button, and start the streaming job now. Wait until you are notified that the streaming job started successfully.
-
Re-open the cloud shell pane and re-run the following command to submit another 100 orders.
node ~/dp-203/Allfiles/labs/18/orderclient - While the order client app is running, switch to the Synapse Studio browser tab and view the query you previously ran to select the TOP 100 rows from the dbo.FactOrder table.
- Use the ▷ Run button to re-run the query and verify that the table now contains order data from the event stream (if not, wait a minute and re-run the query again). The Stream Analytics job will push all new event data into the table as long as the job is running and order events are being sent to the event hub.
- On the Manage page, pause the sqlxxxxxxx dedicated SQL pool (to prevent unnecessary Azure charges).
- Return to the browser tab containing the Azure Portal and minimize the cloud shell pane. Then use the 🗆 Stop button to stop the Stream Analytics job and wait for the notification that the Stream Analytics job has stopped successfully.
Summarize streaming data in a data lake
So far, you’ve seen how to use a Stream Analytics job to ingest messages from a streaming source into a SQL table. Now let’s explore how to use Azure Stream Analytics to aggregate data over temporal windows - in this case, to calculate the total quantity of each product sold every 5 seconds. We’ll also explore how to use a different kind of output for the job by writing the results in CSV format in a data lake blob store.
Create an Azure Stream Analytics job to aggregate order data
- In the Azure portal, on the Home page select + Create a resource and search for
Stream Analytics job. Then create a Stream Analytics job with the following properties:- Basics:
- Subscription: Your Azure subscription
- Resource group: Select the existing dp203-xxxxxxx resource group.
- Name:
aggregate-orders - Region: Select the same region where your Synapse Analytics workspace is provisioned.
- Hosting environment: Cloud
- Streaming units: 1
- Storage:
- Add storage account: Selected
- Subscription: Your Azure subscription
- Storage accounts: Select the datalakexxxxxxx storage account
- Authentication mode: Connection string
- Secure private data in storage account: Selected
- Tags:
- None
- Basics:
- Wait for deployment to complete and then go to the deployed Stream Analytics job resource.
Create an input for the raw order data
- On the aggregate-orders overview page, select the Inputs page. Use the Add input menu to add an Event Hub input with the following properties:
- Input alias:
orders - Select Event Hub from your subscriptions: Selected
- Subscription: Your Azure subscription
- Event Hub namespace: Select the eventsxxxxxxx Event Hubs namespace
- Event Hub name: Select the existing eventhubxxxxxxx event hub.
- Event Hub consumer group: Select the existing $Default consumer group
- Authentication mode: Create system assigned managed identity
- Partition key: Leave blank
- Event serialization format: JSON
- Encoding: UTF-8
- Input alias:
- Save the input and wait while it is created. You will see several notifications. Wait for a Successful connection test notification.
Create an output for the data lake store
- View the Outputs page for the aggregate-orders Stream Analytics job. Then use the Add output menu to add a Blob storage/ADLS Gen2 output with the following properties:
- Output alias:
datalake - Select Select Blob storage/ADLS Gen2 from your subscriptions from your subscriptions: Selected
- Subscription: Your Azure subscription
- Storage account: Select the datalakexxxxxxx storage account
- Container: Select Use existing, and from the list select the files container
- Authentication mode: Connection string
- Event serialization format: CSV - Comma (,)
- Encoding: UTF-8
- Write mode: Append,as results arrive
- Path pattern:
{date} - Date format: YYYY/MM/DD
- Time format: Not applicable
- Minimum rows: 20
- Maximum time: 0 Hours, 1 minutes, 0 seconds
- Output alias:
- Save the output and wait while it is created. You will see several notifications. Wait for a Successful connection test notification.
Create a query to aggregate the event data
- View the Query page for the aggregate-orders Stream Analytics job.
-
Modify the default query as follows:
 SELECT
     DateAdd(second,-5,System.TimeStamp) AS StartTime,
     System.TimeStamp AS EndTime,
     ProductID,
     SUM(Quantity) AS Orders
 INTO
     [datalake]
 FROM
     [orders] TIMESTAMP BY EventProcessedUtcTime
 GROUP BY ProductID, TumblingWindow(second, 5)
 HAVING COUNT(*) > 1
Observe that this query uses the System.Timestamp (based on the EventProcessedUtcTime field) to define the start and end of each 5 second tumbling (non-overlapping sequential) window in which the total quantity for each product ID is calculated.
- Save the query.
Run the streaming job to aggregate order data
- View the Overview page for the aggregate-orders Stream Analytics job, and on the Properties tab review the Inputs, Query, Outputs, and Functions for the job. If the number of Inputs and Outputs is 0, use the ↻ Refresh button on the Overview page to display the orders input and datalake output.
- Select the ▷ Start button, and start the streaming job now. Wait until you are notified that the streaming job started successfully.
-
Re-open the cloud shell pane and re-run the following command to submit another 100 orders:
node ~/dp-203/Allfiles/labs/18/orderclient - When the order app has finished, minimize the cloud shell pane. Then switch to the Synapse Studio browser tab and on the Data page, on the Linked tab, expand Azure Data Lake Storage Gen2 > synapsexxxxxxx (primary - datalakexxxxxxx) and select the files (Primary) container.
- If the files container is empty, wait a minute or so and then use the ↻ Refresh to refresh the view. Eventually, a folder named for the current year should be displayed. This in turn contains folders for the month and day.
- Select the folder for the year and on the New SQL script menu, select Select TOP 100 rows. Then set the File type to Text format and apply the settings.
-
In the query pane that opens, modify the query to add a
HEADER_ROW = TRUEparameter as shown here:SELECT TOP 100 * FROM OPENROWSET( BULK 'https://datalakexxxxxxx.dfs.core.windows.net/files/2023/**', FORMAT = 'CSV', PARSER_VERSION = '2.0', HEADER_ROW = TRUE ) AS [result] - Use the ▷ Run button to run the SQL query and view the results, which show the quantity of each product ordered in five-second periods.
- Return to the browser tab containing the Azure Portal and use the 🗆 Stop button to stop the Stream Analytics job and wait for the notification that the Stream Analytics job has stopped successfully.
Delete Azure resources
If you’ve finished exploring Azure Stream Analytics, you should delete the resources you’ve created to avoid unnecessary Azure costs.
- Close the Azure Synapse Studio browser tab and return to the Azure portal.
- On the Azure portal, on the Home page, select Resource groups.
- Select the dp203-xxxxxxx resource group containing your Azure Synapse, Event Hubs, and Stream Analytics resources (not the managed resource group).
- At the top of the Overview page for your resource group, select Delete resource group.
-
Enter the dp203-xxxxxxx resource group name to confirm you want to delete it, and select Delete.
After a few minutes, the resources created in this exercise will be deleted.