Load Data into a Relational Data Warehouse
In this exercise, you’re going to load data into a dedicated SQL Pool.
This exercise should take approximately 30 minutes to complete.
Before you start
You’ll need an Azure subscription in which you have administrative-level access.
Provision an Azure Synapse Analytics workspace
You’ll need an Azure Synapse Analytics workspace with access to data lake storage and a dedicated SQL pool hosting a data warehouse.
In this exercise, you’ll use a combination of a PowerShell script and an ARM template to provision an Azure Synapse Analytics workspace.
- Sign into the Azure portal at
https://portal.azure.com. -
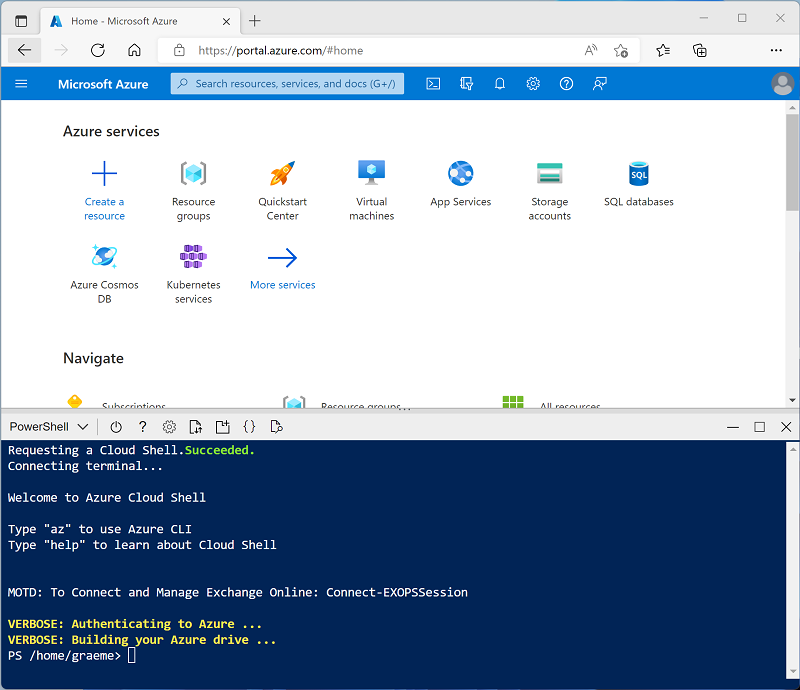
Use the [>_] button to the right of the search bar at the top of the page to create a new Cloud Shell in the Azure portal, selecting a PowerShell environment and creating storage if prompted. The Cloud Shell provides a command line interface in a pane at the bottom of the Azure portal, as shown here:
Note: If you have previously created a cloud shell that uses a Bash environment, use the the drop-down menu at the top left of the cloud shell pane to change it to PowerShell.
-
Cloud Shell can be resized by dragging the separator bar at the top of the pane, or by using the —, ◻, and X icons at the top right of the pane to minimize, maximize, and close the pane. For more information about using the Azure Cloud Shell, see the Azure Cloud Shell documentation.
-
In the PowerShell pane, enter the following commands to clone this repository:
rm -r dp-203 -f git clone https://github.com/MicrosoftLearning/dp-203-azure-data-engineer dp-203 -
After the repository has been cloned, enter the following commands to change to the folder for this exercise, and run the setup.ps1 script it contains:
cd dp-203/Allfiles/labs/09 ./setup.ps1 - If prompted, choose which subscription you want to use (this option will only happen if you have access to multiple Azure subscriptions).
-
When prompted, enter a suitable password to be set for your Azure Synapse SQL pool.
Note: Be sure to remember this password!
- Wait for the script to complete - typically this takes around 10 minutes, but in some cases may take longer. While you’re waiting, review the Data loading strategies for dedicated SQL pool in Azure Synapse Analytics article in the Azure Synapse Analytics documentation.
Prepare to load data
- After the script has completed, in the Azure portal, go to the dp203-xxxxxxx resource group that it created, and select your Synapse workspace.
- In the Overview page for your Synapse Workspace, in the Open Synapse Studio card, select Open to open Synapse Studio in a new browser tab; signing in if prompted.
- On the left side of Synapse Studio, use the ›› icon to expand the menu - revealing the different pages within Synapse Studio that you’ll use to manage resources and perform data analytics tasks.
-
On the Manage page, on the SQL pools tab, select the row for the sqlxxxxxxx dedicated SQL pool, which hosts the data warehouse for this exercise, and use its ▷ icon to start it; confirming that you want to resume it when prompted.
Resuming the pool can take a few minutes. You can use the ↻ Refresh button to check its status periodically. The status will show as Online when it’s ready. While you’re waiting, proceed with the steps below to view the data files you will load.
- On the Data page, view the Linked tab and verify that your workspace includes a link to your Azure Data Lake Storage Gen2 storage account, which should have a name similar to synapsexxxxxxx (Primary - datalakexxxxxxx).
- Expand your storage account and verify that it contains a file system container named files (primary).
- Select the files container, and note that it contains a folder named data. This folder contains the data files you’re going to load into the data warehouse.
- Open the data folder and observe that it contains .csv files of customer and product data.
- Right-click any of the files and select Preview to see the data it contains. Note the files contain a header row, so you can select the option to display column headers.
- Return to the Manage page and verify that your dedicated SQL pool is online.
Load data warehouse tables
Let’s look at some SQL Based approaches to loading data into the Data Warehouse.
- On the Data page, select the workspace tab.
- Expand SQL Database and select your sqlxxxxxxx database. Then in its … menu, select New SQL Script > Empty Script.
You now have a blank SQL page, which is connected to the instance for the following exercises. You will use this script to explore several SQL techniques that you can use to load data.
Load data from a data lake by using the COPY statement
-
In your SQL script, enter the following code into the window.
SELECT COUNT(1) FROM dbo.StageProduct - On the toolbar, use the ▷ Run button to run the SQL code and confirm that there are 0 rows currently in the StageProduct table.
-
Replace the code with the following COPY statement (changing datalakexxxxxx to the name of your data lake):
COPY INTO dbo.StageProduct (ProductID, ProductName, ProductCategory, Color, Size, ListPrice, Discontinued) FROM 'https://datalakexxxxxx.blob.core.windows.net/files/data/Product.csv' WITH ( FILE_TYPE = 'CSV', MAXERRORS = 0, IDENTITY_INSERT = 'OFF', FIRSTROW = 2 --Skip header row ); SELECT COUNT(1) FROM dbo.StageProduct -
Run the script and review the results. 11 rows should have been loaded into the StageProduct table.
Now let’s use the same technique to load another table, this time logging any errors that might occur.
-
Replace the SQL code in the script pane with the following code, changing datalakexxxxxx to the name of your data lake in both the
FROMand theERRORFILEclauses:COPY INTO dbo.StageCustomer (GeographyKey, CustomerAlternateKey, Title, FirstName, MiddleName, LastName, NameStyle, BirthDate, MaritalStatus, Suffix, Gender, EmailAddress, YearlyIncome, TotalChildren, NumberChildrenAtHome, EnglishEducation, SpanishEducation, FrenchEducation, EnglishOccupation, SpanishOccupation, FrenchOccupation, HouseOwnerFlag, NumberCarsOwned, AddressLine1, AddressLine2, Phone, DateFirstPurchase, CommuteDistance) FROM 'https://datalakexxxxxx.dfs.core.windows.net/files/data/Customer.csv' WITH ( FILE_TYPE = 'CSV' ,MAXERRORS = 5 ,FIRSTROW = 2 -- skip header row ,ERRORFILE = 'https://datalakexxxxxx.dfs.core.windows.net/files/' ); -
Run the script and review the resulting message. The source file contains a row with invalid data, so one row is rejected. The code above specifies a maximum of 5 errors, so a single error should not have prevented the valid rows from being loaded. You can view the rows that have been loaded by running the following query.
SELECT * FROM dbo.StageCustomer - On the files tab, view the root folder of your data lake and verify that a new folder named _rejectedrows has been created (if you don’t see this folder, in the More menu, select Refresh to refresh the view).
-
Open the _rejectedrows folder and the date and time specific subfolder it contains, and note that files with names similar to QID123_1_2.Error.Txt and QID123_1_2.Row.Txt have been created. You can right-click each of these files and select Preview to see details of the error and the row that was rejected.
The use of staging tables enables you to validate or transform data before moving or using it to append to or upsert into any existing dimension tables. The COPY statement provides a simple but high-performance technique that you can use to easily load data from files in a data lake into staging tables, and as you’ve seen, identify and redirect invalid rows.
Use a CREATE TABLE AS (CTAS) statement
-
Return to the script pane, and replace the code it contains with the following code:
CREATE TABLE dbo.DimProduct WITH ( DISTRIBUTION = HASH(ProductAltKey), CLUSTERED COLUMNSTORE INDEX ) AS SELECT ROW_NUMBER() OVER(ORDER BY ProductID) AS ProductKey, ProductID AS ProductAltKey, ProductName, ProductCategory, Color, Size, ListPrice, Discontinued FROM dbo.StageProduct; - Run the script, which creates a new table named DimProduct from the staged product data that uses ProductAltKey as its hash distribution key and has a clustered columnstore index.
-
Use the following query to view the contents of the new DimProduct table:
 SELECT ProductKey,
     ProductAltKey,
     ProductName,
     ProductCategory,
     Color,
     Size,
     ListPrice,
     Discontinued
 FROM dbo.DimProduct;
The CREATE TABLE AS SELECT (CTAS) expression has various uses, which include:
- Redistributing the hash key of a table to align with other tables for better query performance.
- Assigning a surrogate key to a staging table based upon existing values after performing a delta analysis.
- Creating aggregate tables quickly for report purposes.
Combine INSERT and UPDATE statements to load a slowly changing dimension table
The DimCustomer table supports type 1 and type 2 slowly changing dimensions (SCDs), where type 1 changes result in an in-place update to an existing row, and type 2 changes result in a new row to indicate the latest version of a particular dimension entity instance. Loading this table requires a combination of INSERT statements (to load new customers) and UPDATE statements (to apply type 1 or type 2 changes).
-
In the query pane, replace the existing SQL code with the following code:
INSERT INTO dbo.DimCustomer ([GeographyKey],[CustomerAlternateKey],[Title],[FirstName],[MiddleName],[LastName],[NameStyle],[BirthDate],[MaritalStatus], [Suffix],[Gender],[EmailAddress],[YearlyIncome],[TotalChildren],[NumberChildrenAtHome],[EnglishEducation],[SpanishEducation],[FrenchEducation], [EnglishOccupation],[SpanishOccupation],[FrenchOccupation],[HouseOwnerFlag],[NumberCarsOwned],[AddressLine1],[AddressLine2],[Phone], [DateFirstPurchase],[CommuteDistance]) SELECT * FROM dbo.StageCustomer AS stg WHERE NOT EXISTS (SELECT * FROM dbo.DimCustomer AS dim WHERE dim.CustomerAlternateKey = stg.CustomerAlternateKey); -- Type 1 updates (change name, email, or phone in place) UPDATE dbo.DimCustomer SET LastName = stg.LastName, EmailAddress = stg.EmailAddress, Phone = stg.Phone FROM DimCustomer dim inner join StageCustomer stg ON dim.CustomerAlternateKey = stg.CustomerAlternateKey WHERE dim.LastName <> stg.LastName OR dim.EmailAddress <> stg.EmailAddress OR dim.Phone <> stg.Phone -- Type 2 updates (address changes triggers new entry) INSERT INTO dbo.DimCustomer SELECT stg.GeographyKey,stg.CustomerAlternateKey,stg.Title,stg.FirstName,stg.MiddleName,stg.LastName,stg.NameStyle,stg.BirthDate,stg.MaritalStatus, stg.Suffix,stg.Gender,stg.EmailAddress,stg.YearlyIncome,stg.TotalChildren,stg.NumberChildrenAtHome,stg.EnglishEducation,stg.SpanishEducation,stg.FrenchEducation, stg.EnglishOccupation,stg.SpanishOccupation,stg.FrenchOccupation,stg.HouseOwnerFlag,stg.NumberCarsOwned,stg.AddressLine1,stg.AddressLine2,stg.Phone, stg.DateFirstPurchase,stg.CommuteDistance FROM dbo.StageCustomer AS stg JOIN dbo.DimCustomer AS dim ON stg.CustomerAlternateKey = dim.CustomerAlternateKey AND stg.AddressLine1 <> dim.AddressLine1; -
Run the script and review the output.
Perform post-load optimization
After loading new data into the data warehouse, it’s recommended to rebuild the table indexes and update statistics on commonly queried columns.
-
Replace the code in the script pane with the following code:
ALTER INDEX ALL ON dbo.DimProduct REBUILD; - Run the script to rebuild the indexes on the DimProduct table.
-
Replace the code in the script pane with the following code:
CREATE STATISTICS customergeo_stats ON dbo.DimCustomer (GeographyKey); - Run the script to create or update statistics on the GeographyKey column of the DimCustomer table.
Delete Azure resources
If you’ve finished exploring Azure Synapse Analytics, you should delete the resources you’ve created to avoid unnecessary Azure costs.
- Close the Synapse Studio browser tab and return to the Azure portal.
- On the Azure portal, on the Home page, select Resource groups.
- Select the dp203-xxxxxxx resource group for your Synapse Analytics workspace (not the managed resource group), and verify that it contains the Synapse workspace, storage account, and Spark pool for your workspace.
- At the top of the Overview page for your resource group, select Delete resource group.
-
Enter the dp203-xxxxxxx resource group name to confirm you want to delete it, and select Delete.
After a few minutes, your Azure Synapse workspace resource group and the managed workspace resource group associated with it will be deleted.