WWL Tenants - Terms of use
If you are being provided with a tenant as a part of an instructor-led training delivery, please note that the tenant is made available for the purpose of supporting the hands-on labs in the instructor-led training.
Tenants should not be shared or used for purposes outside of hands-on labs. The tenant used in this course is a trial tenant and cannot be used or accessed after the class is over and are not eligible for extension.
Tenants must not be converted to a paid subscription. Tenants obtained as a part of this course remain the property of Microsoft Corporation and we reserve the right to obtain access and repossess at any time.
Lab 5 - Exercise 1 - Implement and manage retention
You are Joni Sherman, a Compliance Administrator at Contoso Ltd. The company is tightening its data security strategy to reduce risk exposure related to financial data and privileged communications. You’ve been asked to configure Microsoft Purview retention solutions that support audit readiness, limit unnecessary data retention, and ensure proper oversight for sensitive communications.
Tasks:
- Create a retention label
- Publish a retention label
- Create an auto-apply retention label policy
- Create a static retention policy
- Recover SharePoint content
Task 1 – Create a retention label
In this task, you’ll create a retention label for sensitive financial data that needs to be retained for auditing and investigation purposes.
-
Log into Client 1 VM (SC-401-CL1) as the SC-401-cl1\admin account.
-
In Microsoft Edge, navigate to
https://purview.microsoft.comand sign in asJoniS@WWLxZZZZZZ.onmicrosoft.com(where ZZZZZZ is your unique tenant prefix provided by your lab hosting provider). User account passwords are provided by your lab hosting provider. -
Navigate to Solutions > Data Lifecycle Management > Retention labels.
-
On the Labels page, select Create a label.
-
On the Name your retention label page, enter:
- Name:
Sensitive Financial Records - Description for users:
Use for financial files with sensitive data that must be retained for audit or security purposes. - Description for admins:
Retains high-impact financial data for 5 years to support audits and security investigations.
- Name:
-
Select Next.
-
On the Define label settings page, select Retain items forever or for a specific period, then select Next.
-
On the Define the period page, ensure these values are set for the retention period configuration input:
- How long is the period?: 5 Years
- When should the period begin?: When items were modified
-
Select Next.
-
On the Choose what happens after the retention period page select Delete items automatically, then select Next.
-
On the Review and finish page, select Create label.
-
On the Your retention label is created page, select the option to Do nothing, then select Done.
You’ve created a retention label that retains financial content for five years and deletes it afterward to reduce data exposure.
Task 2 – Publish a retention label
In this task, you’ll publish the retention label so users can apply it in Microsoft 365 services like Exchange, SharePoint, and OneDrive.
-
In Microsoft Purview, navigate to Solutions > Data Lifecycle Management > Retention labels.
-
Select the checkbox next to the Sensitive Financial Records label, then select the Publish labels icon (
 ) to publish this retention label.
 -
On the Choose labels to publish page, verify the Sensitive Financial Records label is selected, then select Next.
-
On the Policy Scope page select Next.
-
On the Choose the type of retention policy to create page select Static then select Next.
-
On the Choose where to publish labels page select Let me choose specific locations and select:
- Exchange mailboxes
- SharePoint classic and communication sites
- OneDrive accounts
- Deselect all other locations
-
Select Next.
-
On the Name your policy enter:
- Name:
Sensitive Financial Data Retention - Description:
Makes the 'Sensitive Financial Records' label available to users in Exchange, SharePoint, and OneDrive.
- Name:
-
Select Next.
-
On the Finish page, select Submit.
-
On the Your retention label was published page, select Done.
You’ve published the retention label, making it available for users to apply in key Microsoft 365 services.
Task 3 – Create an auto-apply retention label policy
In this task, you’ll configure a policy that automatically applies a retention label to content containing personal financial information.
-
In Microsoft Purview, navigate to Solutions > Data Lifecycle Management > Policies > Label policies.
-
On the Label policies page, select Auto-apply a label to start the label configuration.
-
On the Let’s get started page, enter:
- Name:
Auto-apply Personal Financial PII - Description:
Applies this label to personal financial data to help meet audit and investigation requirements. Retains content for 3 years.
- Name:
-
Select Next.
-
On the Choose the type of content you want to apply this label to page, select Apply label to content that contains sensitive info, then select Next.
-
On the Content that contains sensitive info page, select the Financial category, then select the U.S. Gramm-Leach-Bliley Act (GLBA) regulation, then select Next.
-
On the Define content that contains sensitive info page, select Next.
-
On the Policy Scope page, select Next.
-
On the Choose the type of retention policy to create page, select Static.
-
On the Choose where to publish labels page select Let me choose specific locations and select:
- Exchange mailboxes
- SharePoint classic and communication sites
- OneDrive accounts
- Deselect all other locations
-
On the Choose a label to auto-apply page, select Add label.
-
On the Choose a label flyout, select Personal Financial PII, then select Add.
-
Back on the Choose a label to auto-apply page, select Next.
-
On the Decide whether to test or run your policy, select Test the policy before running it, then select Next.
-
On the Review and finish page, select Submit, then select Done on the Your auto-labeling policy has been created page.
You’ve created an auto-apply policy that identifies personal financial data and applies a retention label automatically.
Task 4 – Create a static retention policy
In this task, you’ll create a static retention policy for Microsoft Teams content to help reduce long-term data risk.
-
In Microsoft Purview, navigate to Solutions > Data Lifecycle Management > Policies > Retention policies.
-
On the Retention policies page, select New retention policy.
-
On the Name your retention policy page, enter:
- Name:
Teams Retention - Description:
Retains Teams chats and channel messages for 3 years, then deletes them to reduce long-term data risk.
- Name:
-
Select Next.
-
On the Policy Scope page, select Next.
-
On the Choose the type of retention policy to create page, select Static, then select Next.
-
On the Choose locations to apply the policy page, enable:
- Teams channel messages
- Teams chats
- Leave all other locations disabled.
-
Select Next.
-
On the Decide if you want to retain content, delete it, or both page, ensure these values are set for the retention configuration:
- Select Retain items for a specific period.
- Under Retain items for a specific period, select Custom from the dropdown list
- Change the years field to
3 - Start the retention period based on: When items were last modified
- At the end of the retention period: Delete items automatically
-
Select Next.
-
On the Review and finish page select Submit, then select Done on the You successfully created a retention policy page.
You’ve configured a static retention policy that retains Teams messages for three years before automatically deleting them.
Task 5 – Create an adaptive scope
In this task, you’ll define an adaptive scope that targets Microsoft 365 groups associated with leadership and operations roles.
-
In Microsoft Purview, Settings > Roles and scopes > Adaptive scopes.
-
On the Adaptive scopes page select + Create scope.
-
On the Name your adaptive policy scope page enter:
- Name:
Leadership and Ops Groups - Description:
Targets Leadership and Operations M365 groups with privileged access to sensitive data.
- Name:
-
Select Next.
-
On the Assign admin unit page select Next.
-
On the What type of scope do you want to create? page select Microsoft 365 Groups, then select Next.
-
On the Create the query to define users page, in the User attributes section, ensure these values are selected for the user attribute configuration:
- Select the Attribute dropdown then select Name
- Leave the default is equal to value in the next field
- Enter
Leadershipas the Value
-
Add a second attribute by selecting + Add attribute on the Create the query to define users page. In the new field under the one we just configured, configure these values:
- Select the dropdown for the query operator and update it from And to Or
- Select the Attribute dropdown then select Name
- Leave the default is equal to value in the next field
- Enter
Operationsas the Value
-
Select Next.
-
On the Review and finish page select Submit.
-
Once your adaptive scope is created select Done on the Your scope was created page.
You’ve created an adaptive scope to support targeted retention for privileged groups in the organization.
Task 6 – Create an adaptive retention policy
In this task, you’ll use the adaptive scope you created to configure a retention policy for Microsoft 365 groups with sensitive responsibilities.
-
In Microsoft Purview, navigate to Solutions > Data Lifecycle Management > Policies > Retention policies.
-
On the Retention policies page, select + New retention policy.
-
On the Name your retention policy page enter:
- Name:
Privileged Group Retention - Description:
Retains content from Leadership and Operations groups for 5 years to support audit and investigation.
- Name:
-
Select Next.
-
On the Policy Scope page select Next.
-
On the Choose the type of retention policy to create page select Adaptive then select Next.
-
On the Choose adaptive policy scopes and locations page select + Add scopes.
-
On the Choose adaptive policy scopes flyout panel select the checkbox for Leadership and Ops Groups then select Add at the bottom of the panel.
-
Back on the Choose locations to apply the policy enable:
- Microsoft 365 Group mailboxes & sites
- Leave all other locations disabled.
-
Select Next.
-
On the Decide if you want to retain content, delete it, or both page, ensure these values are set for the retention configuration:
- Select Retain items for a specific period.
- Under Retain items for a specific period, select 5 years from the dropdown list
- Start the retention period based on: When items were last modified
- At the end of the retention period: Delete items automatically
-
Select Next.
-
On the Review and finish page select Submit.
-
Select Done once the policy is created.
You’ve created a retention policy that applies to content owned by privileged groups, retaining it for five years before deletion.
Task 7 – Recover SharePoint content
In this task, you’ll simulate restoring a deleted document from a SharePoint site to validate your recovery options.
-
You should still be logged into Client 1 VM (SC-401-CL1) as the SC-401-CL1\admin account and logged in as Joni Sherman in Microsoft Purview.
-
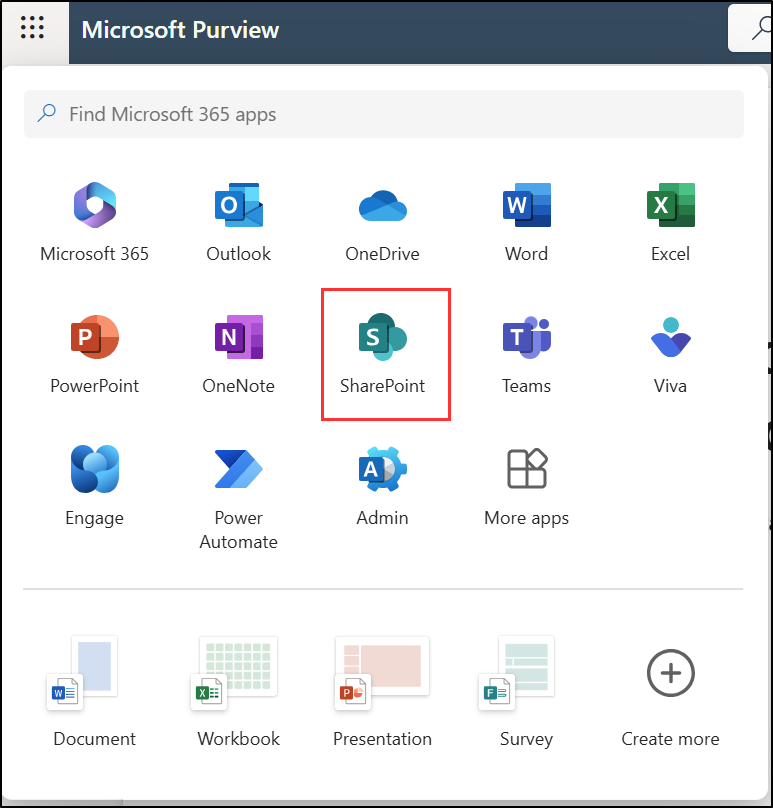
Select the App launcher (the grid icon) in the top-left corner, then select SharePoint from the sub-menu.
-
On the SharePoint landing page, search for
Benefitsthen select Benefits @ Contoso from the search results. -
In the left sidebar select Documents.
-
On the Documents page, select the checkbox for Vacation Policies.pptx then select Delete from the action bar.
-
On the Delete? dialog, select Delete.
-
On the left sidebar, select Recycle bin.
-
On the Recycle bin page, right click Vacation Policies.pptx, then select Restore.
-
On the left sidebar, select Documents and notice the file has been restored.
You have successfully recovered a deleted document from a SharePoint Site.