Lab 3 - Exercise 2 - Implement Adaptive Protection
You are Joni Sherman, the Information Security Administrator for Contoso Ltd. Your role involves protecting sensitive data and responding to insider risks. To enhance protection, you’ll enable Microsoft Purview Adaptive Protection, which dynamically adjusts data loss prevention (DLP) enforcement based on insider risk levels.
Tasks:
- Assign an insider risk policy to Adaptive Protection
- Configure adaptive protection settings for your DLP policy
- Configure Conditional Access with Adaptive Protection
- Enable Adaptive Protection
Task 1 – Assign an insider risk policy to Adaptive Protection
-
Sign into the Client 1 VM (SC-401-CL1) as the SC-401-cl1\admin account.
-
In Microsoft Edge, navigate to
https://purview.microsoft.comand sign in as Joni ShermanJoniS@WWLxZZZZZZ.onmicrosoft.com(where ZZZZZZ is your unique tenant prefix provided by your lab hosting provider). User account passwords are provided by your lab hosting provider. -
In the Microsoft Purview portal, navigate to Solutions > Insider Risk Management > Adaptive Protection.
-
From the left navigation pane, select Insider risk levels.
-
On the Insider risk levels page:
- In the Insider risk policy dropdown, select the Data leaks quick policy you created in a previous exercise.
- Leave the default risk level settings unchanged.
- Select Save.
You’ve linked an insider risk policy to Adaptive Protection, enabling dynamic risk-based actions across Microsoft Purview.
Task 2 – Configure adaptive protection settings for your DLP policy
Now that Adaptive Protection is linked to your insider risk policy, you’ll update a DLP policy to respond to elevated risk levels by blocking sharing of sensitive data.
-
In Microsoft Purview, navigate to Solutions > Data Loss Prevention > Policies.
-
On the Policies page, select the checkbox for the DLP - Credit Card Protection policy created in a previous exercise, then select Edit policy.
-
In the DLP configuration, select Next until you reach the Customize advanced DLP rules page.
-
Select the pencil icon next to the Credit card information rule to edit it.
- On the Edit rule page:
- In the Description field, enter:
Block sharing of credit card data when user has an elevated insider risk level. - In the Conditions section, select Add condition > Insider risk level for Adaptive Protection is.
- In the new section, select Elevated Risk.
- Under Actions, set Restrict access or encrypt the content in Microsoft 365 to Block everyone.
- Select Save to update the rule.
- In the Description field, enter:
-
Back on the Customize advanced DLP rules page, select Next.
-
On the Policy mode page, keep the policy active, then select Next.
- On the Review and finish page, select Submit, then select Done once your policy is updated.
You’ve updated your DLP policy to block sharing when insider risk is elevated, strengthening data protection based on user behavior.
Task 3 – Configure Conditional Access with Adaptive Protection
To add another layer of enforcement, you can use insider risk levels to restrict access using Conditional Access. In this task, you’ll create a policy that blocks access for users with an elevated insider risk level.
-
Open Microsoft Edge in an InPrivate window by right clicking Microsoft Edge from the task bar and selecting New InPrivate window.
-
Navigate Microsoft Entra admin center at
https://entra.microsoft.com, and sign in as MOD Administrator,admin@WWLxZZZZZZ.onmicrosoft.com(where ZZZZZZ is your unique tenant prefix provided by your lab hosting provider). Admin’s password should be provided by your lab hosting provider.[!note] Multi-factor authentication prompt
If you’re prompted for MFA while signing in, open the Microsoft Authenticator app on your mobile device and approve the sign-in request.
After approval, you’ll be redirected to the Microsoft Entra admin center.
-
In the Microsoft Entra admin center, navigate to Protection > Conditional Access > Policies.
-
On the Policies page, select + New policy.
-
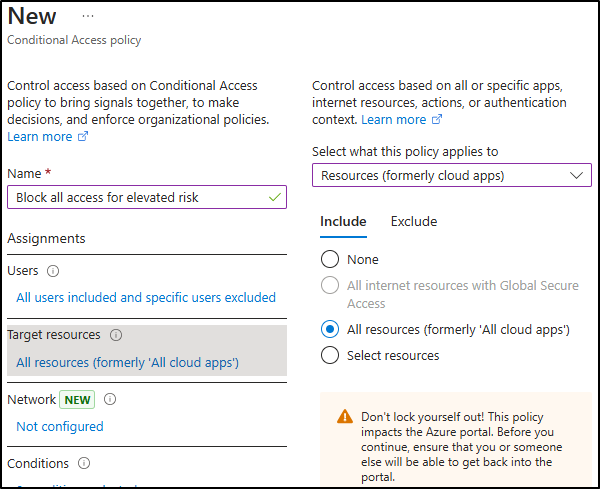
On the New policy page, name your policy:
Block all access for elevated risk. -
Under Assignments, configure the Users section:
- Include: All users
-
Exclude:
Joni ShermanandMOD Administrator
-
Under Target resources, confirm the dropdown is set to Resources (formerly cloud apps) and select All resources (formerly ‘All cloud apps’).
-
Under Conditions, select Insider risk. Set Configure to Yes, then set the risk level to Elevated.
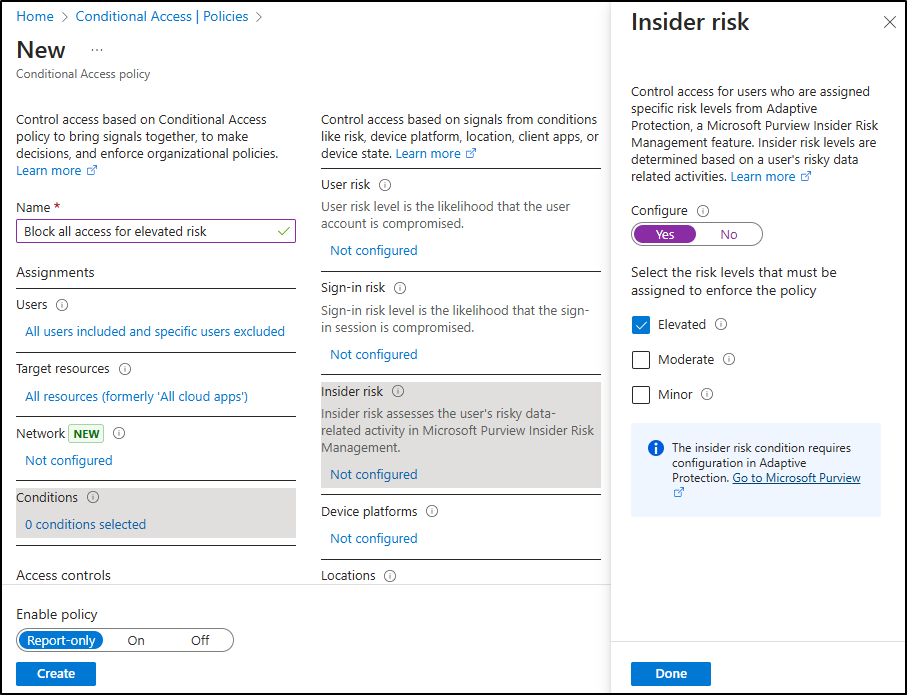
-
Under Access controls, select Grant. Choose Block access, then select Select at the bottom of the flyout.
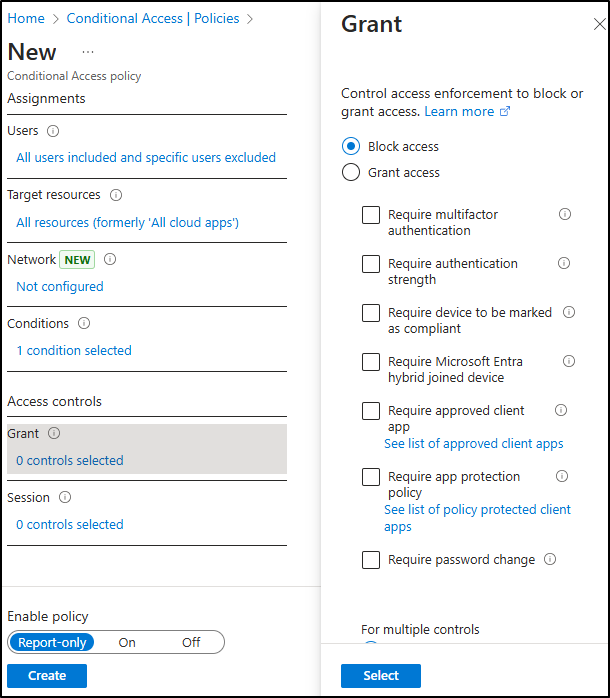
-
At the bottom of the page, confirm Enable policy is set to Report-only, then select Create.
-
Back on the Policies page for Conditional Access, select Refresh to verify your newly created policy appears.
-
Close the InPrivate window.
You’ve created a Conditional Access policy that blocks access for elevated-risk users, without affecting access immediately, since the policy is in report-only mode.
Task 4 – Enable Adaptive Protection
In this final task, you’ll turn on Adaptive Protection so the system can start applying dynamic enforcement based on insider risk.
-
Return to the Microsoft Edge window where you’re signed in as Joni Sherman. Refresh the tab to ensure the Conditional Access policy appears in Adaptive Protection.
-
Navigate to Solutions > Insider Risk Management > Adaptive Protection.
-
Confirm your configurations:
-
On the Insider risk levels tab, the Data leaks quick policy is selected.
-
On the Conditional Access tab, the Block all access for elevated risk policy is visible.
-
On the Data Loss Prevention tab, the DLP - Credit Card Protection policy is listed.
-
-
Select the Adaptive Protection settings tab.
-
Toggle Adaptive Protection to On, then select Save.
You’ve successfully enabled Adaptive Protection. Enforcement actions will now adjust automatically based on a user’s insider risk level.