Lab 1 - Exercise 4 - Deploy Microsoft Purview Message Encryption
Joni Sherman, an Information Security Administrator at Contoso Ltd., is implementing secure email communication to protect sensitive information exchanged between departments. As part of this effort, she’ll configure Microsoft Purview Message Encryption (OME) by using the Exchange admin center to automatically encrypt messages sent from the Finance department and include a clear notice that the message was sent securely.
Tasks:
- Create a mail flow rule to encrypt messages from the Finance department
- Add a disclaimer to encrypted messages
- Enable the mail flow rule
- Validate message encryption
Estimated time: 30-45 minutes
Task 1 – Create a mail flow rule to encrypt messages from the Finance department
In this task, you’ll use the Exchange admin center to create a mail flow rule that applies Microsoft Purview Message Encryption to all messages sent by members of the Finance Team group.
-
In Microsoft Edge, go to
https://admin.exchange.microsoft.comand sign in as JoniS@WWLxZZZZZZ.onmicrosoft.com (replace ZZZZZZ with your unique tenant prefix). -
In the left navigation pane, expand Mail flow, then select Rules.
-
On the Rules page, select + Add a rule > Apply Office 365 Message Encryption and rights protection to messages.
-
On the Set rule conditions page, configure:
-
Name:
Encrypt messages from Finance department -
In the Apply this rule if section, configure:
-
For dropdown 1: The sender
-
For dropdown 2: is a member of this group, then select Finance Team and Save in the Select members flyout.
-
-
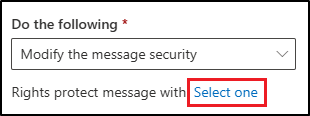
In the Do the following section:
-
Leave the default Modify the message security and Apply Office 365 Message Encryption and rights protection selected
-
Select the Select one link under the Do the following section.
-
In the Select RMS template flyout, select Encrypt, then select Save.
-
Select Next back on the Set rule conditions page.
-
-
-
On the Set rule settings page, leave the default selected, then select Next.
-
On the Review and finish page, review your mail flow rule, then select Finish.
-
Select Done once your mail flow rule has been created.
You’ve successfully created a mail flow rule that encrypts messages sent from the Finance department using Microsoft Purview Message Encryption. This ensures that sensitive financial communications are protected before leaving the organization.
Task 2 – Add a disclaimer to encrypted messages
Next, you’ll modify the existing encryption rule to append a disclaimer. This disclaimer acts as a simple form of message branding, notifying recipients that the message was sent securely by Contoso Ltd.
-
On the Rules page, select the newly created Encrypt messages from Finance department.
-
In the Encrypt messages from Finance department flyout, select Edit rule conditions.
-
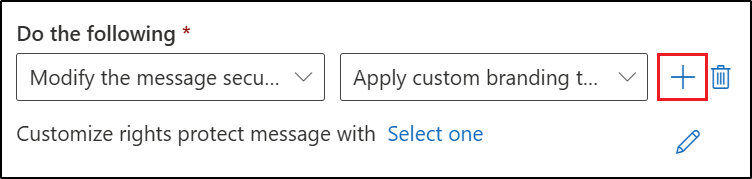
Select the + to the right of the Do the following section to add another action.
-
In the newly created And section:
-
For dropdown 1: Apply a disclaimer to the message
-
For dropdown 2: append a disclaimer.
-
Under the dropdowns, select Enter text, then enter
This email has been encrypted and sent securely by Contoso Ltd.in the specify disclaimer text flyout. -
Select Save at the bottom of the flyout.
-
Select the link to add a fallback action. In the specify fallback action flyout, select Wrap, then select Save at the bottom of the flyout.
-
-
Select Save at the bottom Encrypt messages from Finance department flyout.
-
Once the rule has been changed, you’ll see a message stating Transport rule updated successfully.
-
Close the flyout by selecting the X in the top right corner of the flyout.
You’ve updated the encryption rule to append a disclaimer to each protected message. This makes it clear to recipients that the email was encrypted and securely transmitted from Contoso Ltd.
Task 3 – Enable the mail flow rule
By default, new mail flow rules are created in a disabled state. In this task, you’ll enable the encryption rule so it can begin protecting messages from the Finance department.
-
On the Rules page, select Disabled for the newly created Encrypt messages from Finance department.
-
In the Encrypt messages from Finance department flyout, set the toggle under Enable or disable rule to Enabled.
-
The mail flow rule will enable automatically. You’ll see a message stating Updating the rule status, please wait…. Once the rule is enabled, you’ll see a message stating Rule status updated successfully.
-
Close the flyout by selecting the X in the top right corner of the flyout.
[!note] Note: Rule propagation
Changes can take several minutes to apply. If validation fails, wait a few minutes and send the test again.
The encryption rule is now active and enforcing Microsoft Purview Message Encryption for messages sent from the Finance department. Any future messages from Finance users will be automatically encrypted and include the Contoso Ltd. disclaimer.
Task 4 – Validate message encryption
In this task, you’ll send a test email from a member of the Finance department to confirm that Microsoft Purview Message Encryption is applied automatically and that the recipient sees the secure message notice.
[!alert] External email delivery might be blocked in some lab environments. This task might not complete as expected.
-
Open Microsoft Edge in an InPrivate window by right clicking Microsoft Edge from the task bar and selecting New InPrivate window.
-
Navigate to
https://outlook.office.comand log into Outlook on the web asLynneR@WWLxZZZZZZ.onmicrosoft.com(where ZZZZZZ is your unique tenant prefix provided by your lab hosting provider). User account passwords are provided by your lab hosting provider. -
On the Stay signed in? dialog box, select the checkbox for Don’t show this again then select No.
-
In Outlook on the web, select New mail.
-
In the To line enter your personal or other third-party email address that isn’t in the tenant domain. Enter
Secret Messagein the subject line andMy super-secret message.in the body of the email. -
Select Send to send the message. Leave the Outlook window open.
-
Sign into your personal email account in a new window and open the message from Lynne Robbins. If you sent the message to a Microsoft account (such as @outlook.com), it might open automatically. If you sent the email to another email service like (@gmail.com), you might have to perform the next steps to process the encryption and read the message.
[!Note] Note: You might need to check your junk or spam folder for the message from Lynne Robbins.
-
Select Read the message.
-
Select Sign in with a One-time passcode to receive a limited time passcode.
-
Go to your personal email portal and open the message with subject Your one-time passcode to view the message.
-
Copy the passcode, paste it into the portal and select Continue.
-
Review the encrypted message. You should see the This email has been encrypted and sent securely by Contoso Ltd. message at the bottom of your email.
You’ve successfully validated that messages from the Finance department are automatically encrypted and include the appended Contoso disclaimer, confirming that Microsoft Purview Message Encryption is working as expected.