Lab 3 - Exercise 3 - Configure event-based retention
In this exercise you will assume the role of Joni Sherman, a Compliance Administrator for Contoso Ltd. Your organization is based in Texas and wants to implement retention policies to retain content belonging to specific projects for 5 years after they close.
- Create event-driven retention label and event type
- Publish event-driven retention label
- Apply label and add an asset ID
- Create specific event
- Observe results of event trigger
Task 1 – Create event-driven retention label and event type
In this step, you'll create a retention label and an event type. The event type will trigger the retention period. Any content that has the retention label applied to it for that specific event type will have the retention actions from the label enforced on it.
-
You should still be logged into Client 1 VM (SC-400-CL1) as the SC-400-cl1\admin.
-
In Microsoft Edge, navigate to
https://purview.microsoft.comand log into the Microsoft Purview portal as Joni ShermanJoniS@WWLxZZZZZZ.onmicrosoft.com(where ZZZZZZ is your unique tenant ID provided by your lab hosting provider). Joni's password was set in a previous exercise. -
In the Microsoft Purview portal, on the left sidebar, select Solutions, then select Records management.
-
On the Records Management page select File plan from the left sidebar, then select Create a label.
-
On the Name your retention label, enter:
- Name:
Project Asset - Description for users:
Assign this label to project documents to ensure they are retained for the period of 5 years. - Description for admins:
Project asset for event-based retention.
- Name:
-
Select Next.
-
On the Define file plan descriptors for this label, leave this page blank and select Next.
-
On the Define label settings page, select Retain items forever or for a specific period, then select Next.
-
On the Define the retention period page select the dropdown for Retain items for, then select 5 years.
-
Under the Start the retention period based on dropdown select + Create new event type. This will start the event-based label configuration.
-
On the Name your event type flyout panel on the right, enter:
- Name:
Project Closure - Description:
This event will be triggered when a project closes.
- Name:
-
Select Next.
-
Review the Summary page then select Submit
-
On the Your event type was created page, select Done.
-
Back on the Define the retention period, select the dropdown for Start the retention period based on then select the newly created Product Closure event type.
-
Select Next.
-
On the Choose what happens during the retention period page, select Mark items as a record, and select the option for Unlock this record by default.
-
Select Next.
-
On the Choose what happens after the retention period page, select Delete items automatically, then select Next.
-
On the Review and finish page, select Create label.
-
On the Your retention label is created page select Do Nothing then select Done.
You have successfully created an event-based retention label.
Task 2 – Publish event-driven retention label
In this task, you will publish the Project Asset retention label, making it available for users to apply to relevant documents in SharePoint and OneDrive.
-
You should still be logged into Client 1 VM (SC-400-CL1) as the SC-400-cl1\admin account, and you should be logged into Microsoft Purview as Joni Sherman.
-
You should still be on the File plan page within Microsoft Purview. If not, navigate to
https://purview.microsoft.com, then select Solutions > Records Management > File plan. -
Select the Project Asset label, then select the Publish labels button (
 ).
). -
On the Choose labels to publish page, ensure the Project Asset retention label is selected, then select Next.
-
On the Policy Scope page, select Next.
-
On the Choose the type of retention policy to create page, select Static, then select Next.
-
On the Choose where to publish labels page select Let me choose specific locations to display the location options.
-
On the Choose where to publish labels page select Let me choose specific locations and select:
- SharePoint classic and communication sites
- OneDrive accounts
- Deselect all other locations
-
Select Next.
-
On the Name your policy enter:
- Name:
Project Asset Retention Label - Description:
Project Assets Retention label, retention period 5 years, SharePoint site locations.
- Name:
-
Select Next.
-
Review your settings on the Finish page, then select Submit.
-
Once your retention label has been published, select Done on the Your retention label was published page.
You have successfully published the retention label for project assets.
Task 3 – Apply label and add an asset ID
In this task, you'll apply the Project Asset retention label to a document and assign an asset ID, which will be used to trigger the retention period once the related project event occurs.
-
You should still be logged into Client 1 VM (SC-400-CL1) as the SC-400-cl1\admin account, and you should be logged into Microsoft 365 as Joni Sherman.
-
You should still be on the File plan page within Microsoft Purview. Select meatball menu in the top-left corner, then select SharePoint from the sub-menu.
-
Search for
Brandin the search bar on the top, then select the Brand SharePoint page from the search results. -
On the top navigation pane, select Documents.
-
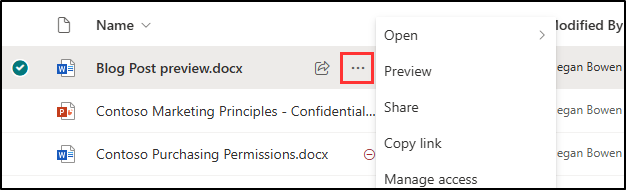
Within the documents folder, hover over the Customer Product Survey.xlsx document and select the ellipses ... for Show more actions to open the menu to show more options, then select Details.
-
In the right-side panel, under Properties select Apply label, then select the Project Asset label.
Note: Retention labels might take 1-2 days to appear in SharePoint. If the Project Asset label isn't available during this task, you can revisit and apply the label later.
-
In the newly appeared Asset ID field enter
NewProductLaunchand close the right-side menu by selecting X in the top right corner.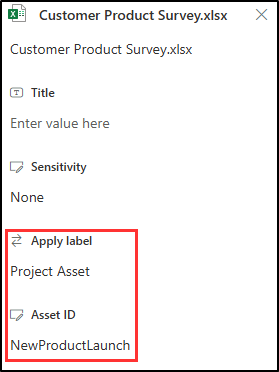
You've successfully applied the Project Asset label and assigned an Asset ID to a document. This setup will initiate the retention process when the project closure event occurs.
Task 4 – Create specific event
In this task, you'll create a specific event to mark the closure of a project, triggering the retention period for all labeled documents.
-
You should still be logged into Client 1 VM (SC-400-CL1) as the SC-400-cl1\admin account, and you should be logged into Microsoft 365 as Joni Sherman.
-
In Microsoft Edge, navigate to
https://purview.microsoft.com, then select Solutions > Records Management from the left sidebar. -
On the Records Management page, select Events from the left sidebar.
-
On the Events page, select + Create.
-
On the Name the event flyout panel on the right, enter:
- Name:
New Product Launch Closed - Description:
Assets with the Project Asset label and AssetID NewProductLaunch will enter their retention period.
- Name:
-
Select Next.
-
On the Event settings page, select Use event type then select Choose an event type.
-
On the Choose an event type page, select Project Closure, then select Add.
-
Select Next on the flyout panel.
-
On the Event settings page, set Asset IDs for items in SharePoint and OneDrive to
NewProductLaunch. -
Select today's date for When did this event occur?, then select Next.
-
Review the Finish page then select Submit.
-
On the Your event has been created page select Done.
You have successfully triggered an event and started the retention period for all documents with the Project Asset label and an Asset ID of NewProductLaunch.
Task 5 – Observe results of event trigger
To verify that the retention period you specified started, you need to try to delete the file.
-
You should still be logged into Client 1 VM (SC-400-CL1) as the SC-400-cl1\admin account, and you should be logged into Microsoft 365 as Joni Sherman.
-
In Microsoft Edge, you should still be on the Events page for records management in the Microsoft Purview portal.
-
In the top left corner select the nine dots and under Apps select SharePoint.
-
Search for
Brandin the search bar on the top, then select the Brand SharePoint page from the search results. -
In the top navigation pane, select Documents.
-
On the Documents page, select the checkbox for Customer Product Survey.xlsx, then select the horizontal ellipses, ... to open the action menu"
-
From the action menu, select Delete and observe the results. You should be blocked from deleting this file due to policy.
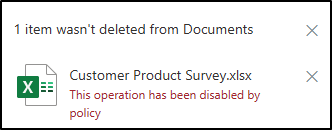
You have successfully confirmed that the retention period on the document has started. If you can still delete the document the synchronization period for the event has not been completed and the triggering of the retention policy is still in progress. As with other Retention Labels, this process can take up to 1-2 days to complete.