WWL Tenants - Terms of use
If you are being provided with a tenant as a part of an instructor-led training delivery, please note that the tenant is made available for the purpose of supporting the hands-on labs in the instructor-led training.
Tenants should not be shared or used for purposes outside of hands-on labs. The tenant used in this course is a trial tenant and cannot be used or accessed after the class is over and are not eligible for extension.
Tenants must not be converted to a paid subscription. Tenants obtained as a part of this course remain the property of Microsoft Corporation and we reserve the right to obtain access and repossess at any time.
Lab 2 – Exercise 1 – Manage DLP Policies
You are Joni Sherman, the newly hired Compliance Administrator for Contoso Ltd. tasked to configure the company's Microsoft 365 tenant for data loss prevention. Contoso Ltd. is a company that offers driving instruction in the United States, and you need to make sure that sensitive customer information does not leave the organization.
Tasks:
- Create a DLP policy in simulation mode
- Modify a DLP policy
- Create a DLP policy in PowerShell
- Test your DLP policy
- Activate a policy in simulation mode
- Modify policy priority
- Enable file monitoring in Microsoft 365 Defender
- Create a file policy for Microsoft 365 Defender
- Create a DLP policy for Power Platform
Task 1 – Create a DLP policy in simulation mode
In this exercise, you'll create a data loss prevention (DLP) policy to protect sensitive data from being shared by users. The DLP policy that you create will inform your users if they want to share content that contains credit card information and allow them to provide a justification for sending this information. The policy will be implemented in simulation mode because you don't want the block action to affect your users yet.
-
Log into Client 1 VM (SC-400-CL1) as the SC-400-CL1\admin account.
-
In Microsoft Edge, navigate to
https://purview.microsoft.comand log into the Microsoft Purview portal as Joni Sherman. sign in asJoniS@WWLxZZZZZZ.onmicrosoft.com(where ZZZZZZ is your unique tenant ID provided by your lab hosting provider). Joni's password was set in a previous exercise. -
Select Solutions from the left sidebar, then select Data Loss Prevention.
-
On the left sidebar, select Policies.
-
On the Policies page, select + Create policy to start the configuration for creating a new data loss prevention policy.
-
On the Start with a template or create a custom policy page, select Custom as the category, then select Custom policy under Regulations.
-
Select Next.
-
On the Name your DLP policy page enter:
- Name:
Credit Card DLP Policy - Description:
Protect credit card numbers from being shared
- Name:
-
Select Next.
-
On the Assign admin units page select Next.
-
On the Choose locations to apply the policy page, enable the location for Teams chat and channel messages only. If any other locations are selected, deselect them.
-
Select Next.
-
On the Define policy settings page, select Create or customize advanced DLP rules, then select Next.
-
On the Customize advanced DLP rules page, select + Create rule.
-
On the Create rule flyout page, enter
Credit card informationas name in the Name field. -
Under Conditions, select + Add Condition, then select Content contains.
-
In the new Content contains area, select Add, then select Sensitive info types.
-
On the Sensitive info types page, select Credit Card Number then select Add.
-
Select + Add condition, then select Content is shared from Microsoft 365.
-
In the new Content is shared from Microsoft 365 section, select the only with people inside my organization option.
-
Under Actions select + Add an action, then select Restrict access or encrypt the content in Microsoft 365 locations.
-
In the new Restrict access or encrypt the content in Microsoft 365 locations area select Block everyone.
-
Under User notifications, turn On the option for Use notifications to inform your users and help educate them on the proper use of sensitive info., then select the checkbox to Notify users in Office 365 service with a policy tip.
-
Under User overrides select the checkbox to Allow users to override policy restrictions Fabric (including Power BI), Exchange, SharePoint, OneDrive and Teams.
-
Select the checkbox to Require a business justification to override.
-
Under Incident reports, in the Use this severity level in admin alerts and reports dropdown, select Low.
-
At the bottom of the Create rule flyout panel, select Save.
-
Back on the Customize advanced DLP rules, select Next.
-
On the Policy mode page select Run the policy in simulation mode and select the checkbox for Show policy tips while in simulation mode.
-
Select Next.
-
On the Review and finish page review your settings then select Submit.
-
On the New policy created page select Done.
You have now created a DLP policy that scans for credit card numbers in Microsoft Teams chats and channels, allowing users to provide a business justification to override the policy.
Task 2 – Modify a DLP policy
In this task, you'll modify the existing DLP policy created in the previous task to also scan emails for credit card information. This modification ensures that sensitive data is protected across more communication channels.
-
You should still be logged into Client 1 VM (SC-400-CL1) as the SC-400-CL1\admin account, and you should be logged into Microsoft 365 as Joni Sherman.
-
You should still be on the Policies page in Microsoft Purview. If not, open Microsoft Edge and navigate to
https://purview.microsoft.com. Select Solutions > Data Loss Prevention > Policies. -
On the Policies page select the checkbox for the recently created Credit Card DLP Policy, then select Edit policy to open the policy configuration.
-
On the Name your DLP policy page, select Next.
-
On the Assign admin units page select Next.
-
On the Choose locations to apply the policy page, select the checkbox for Exchange email to add this location to your DLP policy.
-
Select Next until you reach the Review and finish page.
-
Select Submit on the Review and finish page to apply the change you made to the policy.
-
Once the policy is updated select Done on the Policy updated page.
You have successfully modified the DLP policy to include email scanning, enhancing the protection of sensitive information.
Task 3 – Create a DLP policy in PowerShell
In this task, you'll use PowerShell to create a DLP policy to protect Contoso employee IDs and prevent them from being shared via Exchange. This policy will notify users attempting to share this sensitive data and block the email if it contains Employee IDs.
-
You should still be logged into Client 1 VM (SC-400-CL1) as the SC-400-CL1\admin account.
-
Open an elevated PowerShell window by right clicking the Windows button in the task bar, then select Terminal (Admin).
-
Run the Connect-IPPSSession cmdlet to connect to the Security & Compliance PowerShell:
Connect-IPPSSession -
Sign in as Joni Sherman
JoniS@WWLxZZZZZZ.onmicrosoft.com(where ZZZZZZ is your unique tenant ID provided by your lab hosting provider) in the Sign in to your account pop-up window. Joni's password was set in a previous exercise. -
Run the New-DlpCompliancePolicy cmdlet to create a DLP policy that scans all Exchange mailboxes:
New-DlpCompliancePolicy -Name "EmployeeID DLP Policy" -Comment "This policy blocks sharing of Employee IDs" -ExchangeLocation All -
Run the New-DlpComplianceRule cmdlet to add a DLP rule to the DLP policy you created in the previous step:
New-DlpComplianceRule -Name "EmployeeID DLP rule" -Policy "EmployeeID DLP Policy" -BlockAccess $true -ContentContainsSensitiveInformation @{Name="Contoso Employee IDs"} -
Run the Get-DLPComplianceRule cmdlet to review the EmployeeID DLP rule:
Get-DLPComplianceRule -Identity "EmployeeID DLP rule"
You have successfully created a DLP policy using PowerShell that scans for Contoso Employee IDs in Exchange.
Task 4 – Test your DLP Policy
In this task you'll test the DLP policy that was created in the previous task.
-
You should still be logged into Client 1 VM (SC-400-CL1) as the SC-400-CL1\admin account and logged into Microsoft 365 as Joni Sherman.
-
Open a Microsoft Edge browser window and navigate to
https://outlook.office.com -
Select the New mail button on the top left to compose a new email message.
-
In the To field, enter
Meganand select Megan Bowen's email address. -
In the subject field enter
Help with employee information. -
In the body of the email enter:
Please help me with the start dates for the following employees: ABC123456 DEF678901 GHI234567 Thank you, Joni Sherman -
Select the Send button in the upper right of the message window to send the email.
-
You should receive a message that the email was undeliverable and blocked by a DLP policy.
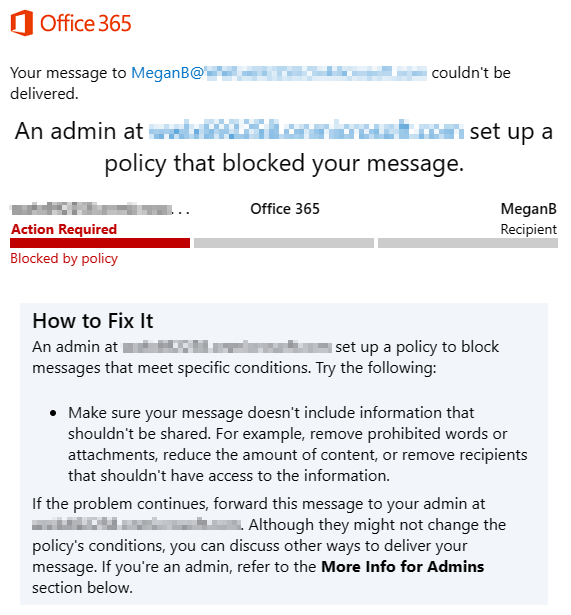
You have successfully tested your DLP policy.
Task 5 – Activate a policy in simulation mode
In this task, you'll activate the Credit Card DLP Policy you created in simulation mode so it enforces its protective actions.
-
You should still be logged into Client 1 VM (SC-400-CL1) as the SC-400-CL1\admin account, and you should be logged into Microsoft 365 as Joni Sherman.
-
In Microsoft Edge, navigate to DLP policies by going to
https://purview.microsoft.com> Solutions > Data Loss Prevention then select Policies from the left sidebar. -
On the Policies page select the checkbox for the Credit Card DLP Policy and select Edit policy to open the policy configuration.
-
Select Next until you reach the Policy mode page and select Turn the policy on immediately.
-
On the Review and finish select Submit.
-
On the Policy updated page select Done.
You have successfully activated the DLP policy, ensuring that any attempts to share credit card information are blocked and require a business justification.
Task 6 – Modify policy priority
After creating two DLP policies, you want to make sure that the more restrictive policy is processed at a higher priority than the less restrictive policy. For this reason, you want to move the EmployeeID DLP Policy into the higher priority.
-
You should still be logged into Client 1 VM (SC-400-CL1) as the SC-400-CL1\admin account, and you should be logged into Microsoft 365 as Joni Sherman.
-
In Microsoft Edge, the Microsoft Purview portal tab should still be open to the Policies page. If not, open Microsoft Edge and navigate to
https://purview.microsoft.com. Select Solutions > Data Loss Prevention > Policies. -
On the Policies page, select the EmployeeID DLP Policy DLP policy.
-
Select Reprioritize from the top navigation ribbon, then select Move to top (highest priority).
-
In the Data loss prevention window, select Refresh and review the priority in the Order column of the policy table.
You have successfully modified the policy priority, ensuring that the most restrictive DLP policy is enforced first when matching content.
Task 7 – Enable file monitoring in Microsoft 365 Defender
You want to use file policies in Microsoft 365 Defender to protect files in your OneDrive and SharePoint Online locations. Before you can create a file policy, you need to enable file monitoring so Microsoft 365 Defender can scan files in your organization.
-
You should still be logged into Client 1 VM (SC-400-CL1) as the SC-400-CL1\admin account.
-
In Microsoft Edge, the Microsoft Purview portal tab should still be open. Sign out of Joni's account by selecting the profile picture of Joni Sherman in the top right. Select Sign out, then close the browser window.
-
Open Microsoft Edge and navigate to
https://security.microsoft.comand log into the Microsoft 365 Defender portal as MOD Administratoradmin@WWLxZZZZZZ.onmicrosoft.com(where ZZZZZZ is your unique tenant ID provided by your lab hosting provider). Admin's password should be provided by your lab hosting provider. -
On the left sidebar, expand System then select Settings.
-
On the Settings page select Cloud Apps.
-
In the left pane within the Cloud apps window, scroll down to the Information Protection section, then select Files.
-
Select the Enable file monitoring checkbox then select Save if it's not already marked.
You successfully enabled file monitoring in Microsoft 365 Defender and can now scan files for sensitive content using file policies.
Task 8 – Create a file policy for Microsoft 365 Defender
In this task, you'll create a file policy in Microsoft 365 Defender to scan files in OneDrive and SharePoint Online for credit card information. The policy will automatically quarantine files containing sensitive data
-
You should still be logged into Client 1 VM (SC-400-CL1) as the SC-400-CL1\admin account.
-
Sign out of the MOD Administrator account by selecting the MA icon in the top right, then selecting Sign out. Close the browser window once you're signed out.
-
Open Microsoft Edge and navigate to
https://security.microsoft.comand log into the Microsoft 365 Defender portal as Joni ShermanJoniS@WWLxZZZZZZ.onmicrosoft.com(where ZZZZZZ is your unique tenant ID provided by your lab hosting provider). Joni's password was set in a previous exercise. -
In the Microsoft 365 Defender portal, in the left navigation, scroll down to the Cloud apps section. Expand Policies then select Policy management.
-
On the Policies page, select + Create policy, then select File policy.
-
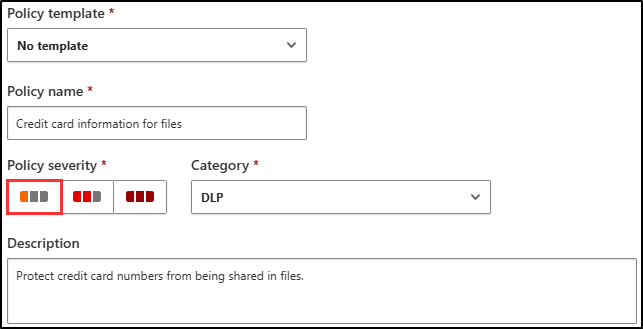
On the Create file policy page, leave the Policy template selection as No template.
-
In the Policy name and Description fields, enter:
- Policy name:
Credit card information for files - Description:
Protect credit card numbers from being shared in files.
- Policy name:
-
Keep the Policy Severity set to Low (one lighted icon) and make sure the Category is set to DLP. For a file policy, this should be the default.
-
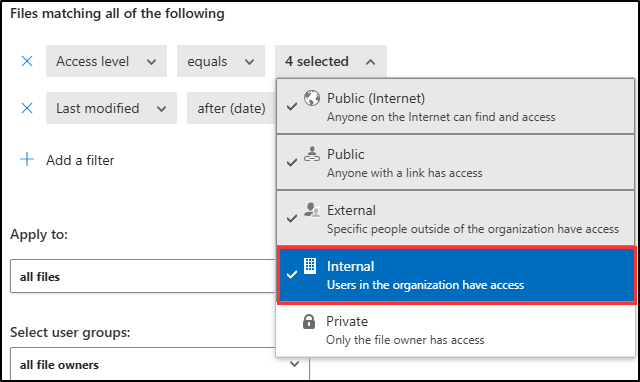
In the Files matching all of the following area, expand the dropdown menu Public (Internet), External, Public, and add Internal.
-
In the Inspection method dropdown menu, select Data Classification Service.
-
In the Choose inspection type... dropdown menu, select Sensitive information type....
-
On the Select a sensitive information type dialog, search for
Credit card, then select the checkbox for Credit Card Number. -
Select Done in the upper right corner of the Select a sensitive information type screen.
-
Under Alerts, select the checkbox for Create an alert for each matching file and review your options. Keep the settings as the default by selecting Save as default settings.
-
In the Governance actions section, expand Microsoft OneDrive for Business and select Put in user quarantine.
-
In the Governance actions section, expand Microsoft SharePoint Online and select the checkbox for Put in user quarantine.
-
Select Create at the bottom of the page to create the file policy.
-
Sign out of Joni's account by selecting the profile picture of Joni Sherman in the top right. Select Sign out, then close the browser window.
You have successfully created a file policy that scans and quarantines files with credit card information in OneDrive and SharePoint.
Task 9 – Create a DLP policy for Power Platform
Your company uses Power Automate flows to share data between SharePoint Online and Salesforce. In this task, you will create a DLP policy for Power Platform that allows your existing flows to keep working but prevents the creation of flows that will share data between SharePoint Online and Apps defined as non-business.
-
You should still be logged into Client 1 VM (SC-400-CL1) as the SC-400-CL1\admin account.
-
In Microsoft Edge, navigate to
https://admin.powerplatform.microsoft.comand log into the Power Platform admin center as MOD Administratoradmin@WWLxZZZZZZ.onmicrosoft.com(where ZZZZZZ is your unique tenant ID provided by your lab hosting provider). Admin's password should be provided by your lab hosting provider. -
In the Power Platform admin center, in the left sidebar, select the drop-down for Policies, then select Data policies.
-
On the Data policies page, select + New Policy.
-
On the Name your policy page, enter
Tenant-wide SharePoint Policyas the policy name, then select Next. -
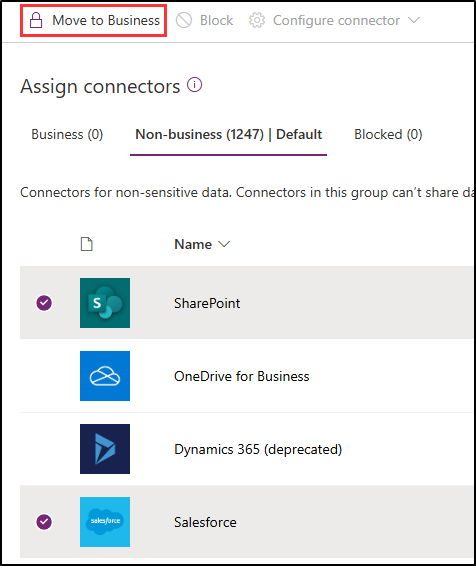
On the Non-business|Default tab on the Assign connectors page, select SharePoint and Salesforce, then select Move to Business at the top of the page.
-
In the Assign connectors page, select the Business tab to make sure both SharePoint and Salesforce now appear in this tab, then select Next.
-
On the Custom connector patterns page select Next.
-
On the Define scope page, select Add all environments, then select Next.
-
On the Review and create policy page review your policy settings, then select Create policy.
-
Sign out of the MOD Administrator account by selecting the MA icon in the top right, then selecting Sign out. Close the browser window once you're signed out.
You have successfully created a Power Platform DLP policy, ensuring that data flow between SharePoint Online and non-business connectors is controlled.