Lab 1 - Exercise 4 - Manage sensitivity labels
Joni Sherman, the System Administrator for Contoso Ltd., is implementing a sensitivity labeling plan to ensure that all employee documents in the HR department are appropriately labeled according to the company's information protection policies. Contoso Ltd. is based in Rednitzhembach, Germany, and aims to comply with internal data handling standards and regional regulations.
Tasks:
- Enable support for sensitivity labels
- Create sensitivity labels
- Publish sensitivity labels
- Apply sensitivity labels
- Configure auto labeling
Task 1 – Enable support for sensitivity labels
In this task, you'll install the necessary modules and enable support for sensitivity labels on your tenant.
-
You should still be logged into Client 1 VM (SC-400-CL1) as the SC-400-CL1\admin account.
-
Open an elevated PowerShell window by right clicking the Windows button in the task bar, then select Terminal (Admin).
-
Confirm the User Account Control window with Yes and press Enter.
-
Run the Install-Module cmdlet to install the latest MS Online PowerShell module version:
Install-Module -Name MSOnline -
Confirm the Nuget security dialog and the Untrusted repository security dialog with Y for Yes and press Enter. This might take a while to complete processing.
-
Run the Install-Module cmdlet to install the latest SharePoint Online PowerShell module version:
Install-Module -Name Microsoft.Online.SharePoint.PowerShell -
Confirm the Untrusted repository security dialog with Y for Yes and press Enter.
-
Run the Connect-MsolService to connect to the MS Online service:
Connect-MsolService -
In the Sign into your account form, sign in as Joni Sherman
JoniS@WWLxZZZZZZ.onmicrosoft.com(where ZZZZZZ is your unique tenant ID provided by your lab hosting provider). Joni's password was set in a previous exercise. -
After signing in, navigate back to the terminal window.
-
Run the Get-Msoldomain cmdlet and save the domain as a variable:
$domain = get-msoldomain -
Use the $domain variable created in the previous step to create a new variable for $adminurl:
$adminurl = "https://" + $domain.Name.split('.')[0] + "-admin.sharepoint.com" -
Run the Connect-SPOService cmdlet using the $adminurl variable created in the previous step:
Connect-SPOService -url $adminurl -
In the Sign into your account form, sign in as MOD Administrator.
admin@WWLxZZZZZZ.onmicrosoft.com(where ZZZZZZ is your unique tenant ID provided by your lab hosting provider). Admin's password should be provided by your lab hosting provider. -
After signing in, navigate back to the terminal window.
-
Run the Set-SPOTenant cmdlet to enable support for sensitivity labels:
Set-SPOTenant -EnableAIPIntegration $true -
Confirm the changes with Y for Yes and press Enter.
-
Close the PowerShell window.
You have successfully enabled support for sensitivity labels for Teams and SharePoint sites.
Task 2 – Create sensitivity labels
In this task, your HR department has requested a sensitivity label to apply to HR employee documents. You'll create a sensitivity label for internal documents and a sublabel for the HR department.
-
You should still be logged into Client 1 VM (SC-400-CL1) as the SC-400-cl1\admin account.
-
Open Microsoft Edge and navigate to
https://purview.microsoft.com. Log into Microsoft Purview as Joni ShermanJoniS@WWLxZZZZZZ.onmicrosoft.com(where ZZZZZZ is your unique tenant ID provided by your lab hosting provider). Joni's password was set in a previous exercise. -
In the Microsoft Purview portal, select Solutions from the left sidebar, then select Information Protection.
-
On the Microsoft Information Protection page, on the left sidebar, select Sensitivity labels.
-
On the Sensitivity labels page select + Create a label.
-
The New sensitivity label configuration will start. On the Provide basic details for this label, enter:
- Name:
Internal - Display name:
Internal - Description for users:
Internal sensitivity label. - Description for admins:
Internal sensitivity label for Contoso.
- Name:
-
Select Next.
-
On the Define the scope for this label page, select Items, then select Files and Emails. If the checkbox for Meetings is selected, make sure it's deselected.
-
Select Next.
-
On the Choose protection settings for labeled items page, select Next.
-
On the Auto-labeling for files and emails page, select Next.
-
On the Define protection settings for groups and sites page, select Next.
-
On the Auto-labeling for schematized data assets (preview) page, select Next.
-
On the Review your settings and finish page, select Create label.
-
On the Your sensitivity label was created page, select Don't create a policy yet, then select Done.
-
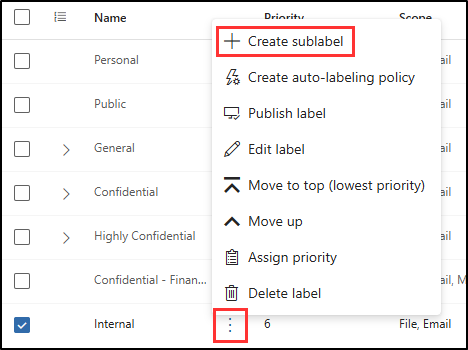
On the Sensitivity labels page, find the newly created Internal sensitivity label. Select the vertical ellipsis (...) next to it, then select + Create sublabel from the dropdown menu.
-
The New sensitivity label wizard will start. On the Provide basic details for this label page enter:
- Name:
Employee data (HR) - Display name:
Employee data (HR) - Description for users:
This HR label is the default label for all specified documents in the HR Department. - Description for admins:
This label is created in consultation with Ms. Jones (Head of HR department). Contact her, when you want to change settings of the label.
- Name:
-
Select Next.
-
On the Define the scope for this label page, select Items, then select Files and Emails. If the checkbox for Meetings is selected, make sure it's deselected.
-
Select Next.
-
On the Choose protection settings for labeled items page, select the Control access option, then select Next.
-
On the Access control page, select Configure access control settings.
-
Configure the encryption settings with these options:
- Assign permissions now or let users decide?: Assign permissions now
- User access to content expires: Never
- Allow offline access: Only for a number of days
- Users have offline access to the content for this many days: 15
- Select the Assign permissions link. On the Assign permissions flyout panel, select the + Add any authenticated users, then select Save to apply this setting.
-
On the Access control page, select Next.
-
On the Auto-labeling for files and emails page, select Next.
-
On the Define protection settings for groups and sites page, select Next.
-
On the Auto-labeling for schematized data assets (preview) page, select Next.
-
On the Review your settings and finish page, select Create label.
-
On the Your sensitivity label was created page, select Don't create a policy yet, then select Done.
You have successfully created a sensitivity label for your organizations internal policies and a sensitivity sublabel for the Human Resources (HR) department.
Task 3 – Publish sensitivity labels
You will now publish the Internal and HR sensitivity label so that the published sensitivity labels will be available for the HR users to apply to their HR documents.
-
You should still be logged into Client 1 VM (SC-400-CL1) as the SC-400-cl1\admin account, and you should be logged into Microsoft Purview as Joni Sherman.
-
In Microsoft Edge, the Microsoft Purview portal tab should still be open. If not, navigate to
https://purview.microsoft.com> Solutions > Information Protection > Sensitivity labels. -
On the Sensitivity labels page select Publish label.
-
The publish sensitivity labels configuration will start.
-
On the Choose sensitivity labels to publish page, select the Choose sensitivity labels to publish link.
-
On the Sensitivity labels to publish flyout panel, select the Internal and Internal/Employee Data (HR) checkboxes, then select Add at the bottom of the flyout panel.
-
Back on the Choose sensitivity labels to publish page, select Next.
-
On the Assign admin units page, select Next
-
On the Publish to users and groups page, select Next.
-
On the Policy settings page, select Next.
-
On the Default settings for documents select Next.
-
On the Default settings for emails select Next.
-
On the Default settings for meetings and calendar events select Next.
-
On the Default settings for Power BI Content select Next.
-
On the Name your policy page, enter:
- Name:
Internal HR employee data - Enter a description for your sensitivity label policy:
This HR label is to be applied to internal HR employee data.
- Name:
-
Select Next.
-
On the Review and finish page, select Submit.
-
On the New policy created, select Done to finish publishing your label policy.
You have successfully published the Internal and HR sensitivity labels. Note that it can take up to 24 hours for changes to replicate to all users and services.
Task 4 – Apply sensitivity labels
In this task, you will create sensitivity labels in Word and Outlook emails. The document created will be stored in OneDrive and sent to an HR employee via email.
-
You should still be logged into Client 1 VM (SC-400-CL1) as the SC-400-cl1\admin account, and you should be logged into Microsoft 365 as Joni Sherman
JoniS@WWLxZZZZZZ.onmicrosoft.com(where ZZZZZZ is your unique tenant ID provided by your lab hosting provider). Joni's password was set in a previous exercise. -
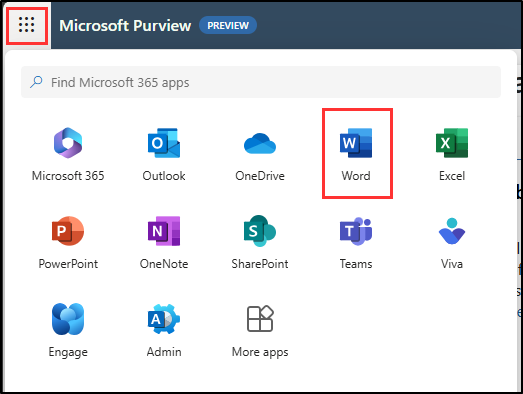
In Microsoft Edge, open a new Word document by selecting the meatball menu in the top left and selecting Word.
-
Select Blank document to create a new document.
-
On the Your privacy option dialogue, select Close.
-
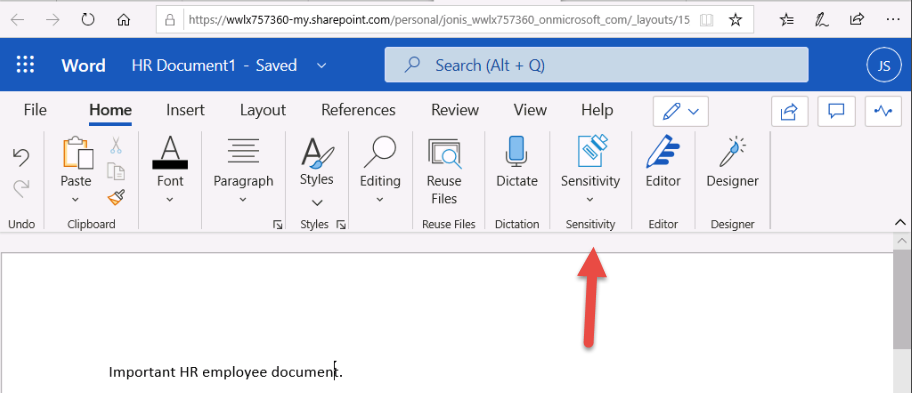
Enter this text in the new blank document:
Important HR employee document. -
Select Sensitivity from the navigation ribbon and select Internal > Employee Data (HR) to apply the newly created sensitivity label to this document.
Note: It can take 24-48 hours for newly published sensitivity labels to be available for application. If the newly created sensitivity labels aren't available, you can use Confidential > All Employees for this exercise.
-
In the upper left of the document, select Document to rename this file, and rename it to
HR Document. Press enter to apply this name change.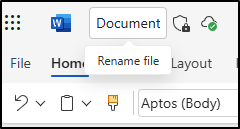
-
Close the tab to return to the Word Online tab. Select the meatball menu on the top left and select Outlook to open Outlook on the web.
-
In Outlook on the web, select New mail.
-
In the To field enter the name:
Allanand select Allan Deyoung from the drop-down list. -
In the subject line, enter:
Employee data for HR -
In the body of the email, enter:
Dear Mr. Deyoung, Please find attached the important HR employee document. Kind regards, Joni Sherman -
Select the paperclip symbol from the top navigation ribbon to add an attachment. Under Suggested files select HR Document.docx.
-
Select Send to send out the email message with attached document.
You have successfully created an HR Word document with a sensitivity label, which was saved onto your OneDrive. You then emailed to document to an HR staff member where the email was also set with a sensitivity label.
Task 5 – Configure auto labeling
In this task, you'll create a sensitivity label that will auto label documents and emails found to contain information related to the European General Data Protection Regulation (GPDR).
-
You should still be logged into Client 1 VM (SC-400-CL1) as the SC-400-cl1\admin account.
-
In Microsoft Edge, navigate to
https://purview.microsoft.comand log into the Microsoft Purview portal as Joni Sherman. -
In the Microsoft Purview portal, select Solutions from the left side bar, then select Information protection. Select Sensitivity labels.
-
On the Sensitivity labels page, find the newly created Internal sensitivity label. Select the vertical ellipsis (...) next to it, then select + Create sublabel from the dropdown menu.
-
The New sensitivity label configuration will start. On the Provide basic details for this label page, enter:
- Name:
GDPR Germany - Display name:
GDPR Germany - Description for users:
This document or email contains data related to the European General Data Protection Regulation (GPDR) for the region Germany. - Description for admins:
This label is auto applied to German GDPR documents.
- Name:
-
Select Next.
-
On the Define the scope for this label page, select Items, then select Files and Emails. If the checkbox for Meetings is selected, make sure it's deselected.
-
Select Next.
-
On the Choose protection settings for labeled items page, select Next.
-
On the Auto-labeling for files and emails page, set the Auto-labeling for files and emails to enabled.
-
In the Detect content that matches these conditions section, select + Add condition > Content contains.
-
In Content contains section select the Add > Sensitive info types.
-
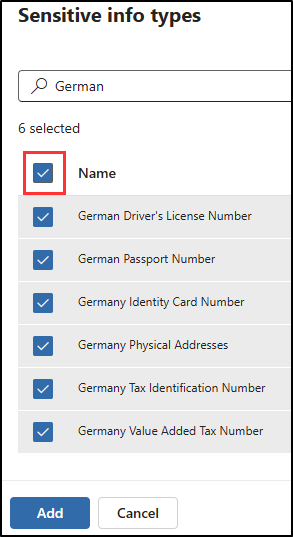
In the Sensitive info types flyout panel, search for
Germanto display sensitive info types related to Germany. -
Select the checkbox next to the Name field to select all sensitive info types related to German, then select Add.
-
Back on the Auto-labeling for files and emails page, select Next.
-
On the Define protection settings for groups and sites page, select Next.
-
On the Auto-labeling for schematized data assets (preview) page, select Next.
-
On the Review your settings and finish page, select Create label.
-
On the Your sensitivity label was created page, select Publish label to users' apps, then select Done.
-
On the Create auto-labeling policy flyout panel, select Review policy to start the configuration to create a new label policy.
-
On the Name your auto-labeling policy page, enter:
- Name:
GDPR Germany policy - Enter a description for your sensitivity label policy:
This auto apply sensitivity labels policy is for the GDPR region of Germany.
- Name:
-
Select Next.
-
On the Assign admin units page, select Next.
-
On the Choose locations where you want to apply the label page, leave the defaults selected, then select Next.
-
On the Set up common or advanced rules page, select Next.
-
On the Define rules for content in all locations page, select Next.
-
On the Decide if you want to test out the policy now or later select Run policy in simulation mode, then select the checkbox for Automatically turn on policy if not modified for 7 days in simulation., then select Next.
-
On the Review and finish page, select Create policy.
-
On the Your auto-labeling policy was created page, select Done.
You have successfully created and published an auto apply sensitivity label for GDPR documents in the region Germany.
It can take up to 24 hours for auto applied sensitivity labels to be applied. This duration will be longer when applied to more than 25,000 documents (that is, the daily limit).