Lab 1 - Exercise 2 - Manage sensitive information types
Contoso Ltd. previously had issues with employees accidentally sending out personal information from customers when working on support tickets in the ticketing solution. To prevent this, you need to create a custom sensitive information type to identify employee IDs in emails and documents.
Tasks:
- Create custom sensitive information types
- Create EDM-based classification information type
- Create EDM-based classification data source
- Create keyword dictionary
- Test custom sensitive information types
Task 1 – Create custom sensitive information types
In this task, you'll create a new custom sensitive information type that recognizes the pattern of employee IDs near the keywords "Employee" and "ID".
-
You should still be logged into Client 1 VM (SC-400-CL1) as the SC-400-CL1\admin account.
-
In Microsoft Edge, navigate to
https://purview.microsoft.comand log into the Microsoft Purview portal asJoniS@WWLxZZZZZZ.onmicrosoft.com(where ZZZZZZ is your unique tenant ID provided by your lab hosting provider). Joni's password was set in a previous exercise. -
On the left sidebar, select Solutions then select Information Protection.
-
On the left sidebar, expand Classifiers then select Sensitive info types.
-
On the Sensitive info types page, select + Create sensitive info type to start the sensitive information type configuration.
-
On the Name your sensitive info type page, enter:
- Name:
Contoso Employee IDs - Description:
Pattern for Contoso employee IDs.
- Name:
-
Select Next.
-
On the Define patterns for this sensitive info type page, select Create pattern.
-
On the New pattern flyout panel on the right, select + Add primary element > Regular expression.
-
On the + Add a regular expression flyout panel on the right, enter:
- ID:
Contoso IDs - Regular expression:
[A-Z]{3}[0-9]{6} - Select the radio button for String match
- ID:
-
Select Done at the bottom of the flyout panel.
-
Back on the New pattern flyout panel, under Supporting elements, select + Add supporting elements or group of elements drop-down menu and select Keyword list.
-
On the Add a keyword list flyout panel on the right, enter:
-
ID:
Employee ID keywords -
Case insensitive:
Employee ID -
Select the radio button for Word match
-
-
Select Done at the bottom of the flyout panel.
-
Back on the New pattern flyout panel, under Character proximity, decrease the Detect primary AND supporting elements value to
100characters. -
Select the Create button at the bottom of the flyout panel.
-
Back on the Define patterns for this sensitive info type page select Next.
-
On the Choose the recommended confidence level to show in compliance policies page use the default value and select Next.
-
On the Review settings and finish page review the settings and select Create. When successfully created select Done.
-
Sign out of Joni's account by selecting the profile picture of Joni Sherman in the top right. Select Sign out, then close the browser window.
-
Close the browser window then open a new browser window.
You have successfully created a new sensitive information type to identify employee IDs in the pattern of three uppercase characters, six numbers, and the keywords 'Employee' or 'IDs' within a range of 100 characters.
Task 2 – Create EDM-based classification information type
In this task, you'll create an Exact Data Match (EDM) based classification with a database schema of employee data.
-
You should still be logged into Client 1 VM (SC-400-CL1) as the SC-400-CL1\admin account.
-
Open Microsoft Edge then navigate to
https://admin.microsoft.com. -
When the Pick an account page is displayed, select Use another account and sign in as MOD Administrator
admin@WWLxZZZZZZ.onmicrosoft.com(where ZZZZZZ is your unique tenant ID provided by your lab hosting provider). Admin's password should be provided by your lab hosting provider. -
From the left pane, expand Teams & groups then select Active teams & groups.
-
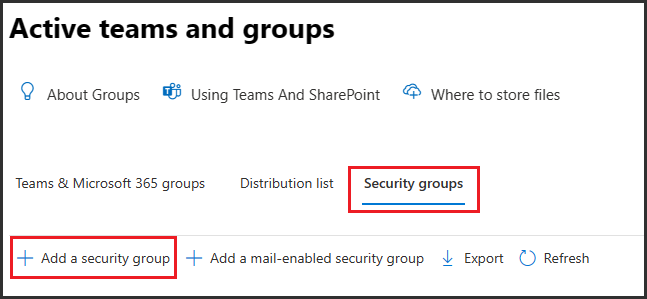
On the Active teams and groups page, on the top navigation ribbon, select Security groups then select + Add a security group.
-
On the Set up the basics screen, enter the following:
- Name:
EDM_DataUploaders - Description:
People who upload data for EDM.
- Name:
-
Select Next.
-
On the Edit settings page, leave the default settings, then select Next.
-
On the Review and finish adding group page, review your settings and select Create group.
-
On the EDM_DataUploaders group created page, select Close.
-
Back on the Active teams and groups page, ensure the Security tab is selected from the top navigation ribbon, then select the Refresh button to display the newly created security group. Select the EDM_DataUploaders group from the list to open the EDM_DataUploaders flyout panel on the right.
-
Select the Members tab then select View all and manage members.
-
On the Members page select + Add members.
-
On the Add members page, select the checkbox to the left of Joni Sherman, then select the Add (1) button at the bottom of the flyout panel.
-
Verify Joni Sherman is listed below Members, then close the flyout panel by selecting the X on the top right of the flyout panel.
-
Sign out of the Mod Administrator account by selecting the MA icon on the top right of the window, then selecting Sign out.
-
Close the browser window and open a new one.
-
Navigate to the Microsoft Purview portal at
https://purview.microsoft.com. -
When the Pick an account page is displayed, select Joni Sherman and sign in.
-
Navigate to Information Protection by selecting Solutions > Information Protection from the left sidebar.
-
On the Information Protection page, expand Classifiers then select EDM classifiers.
-
On the EDM classifiers page, select + Create EDM classifier.
-
Examine the Familiarize yourself with the steps needed to put your classifier to work to understand the workflow for creating EDM classifiers, then select Create EDM classifier.
-
On the Name and describe your EDM classifier page, enter:
- Name:
employeedb - Description:
Employee Database schema
- Name:
-
Select Next.
-
On the Choose a method for defining your schema page, select Manually define your data structure, then select Next.
-
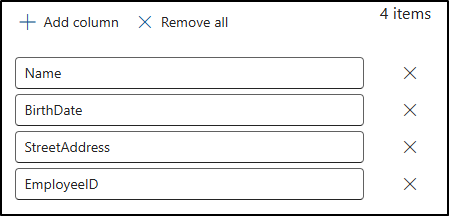
On the Define columns that contain the data you want to detect, enter these columns:
NameBirthDateStreetAddressEmployeeID
You should have four columns. You'll need to select the + Add column button to add new fields for new columns.
-
Select Next.
-
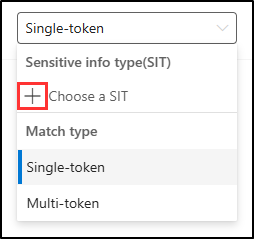
On the Select primary elements page, for the EmployeeID column, expand the Match mode dropdown here Single-token is displayed, and select the + (plus sign) for Choose a SIT.
-
On the Choose a sensitive info type for "EmployeeID" flyout panel on the right, in the search bar, search for
Contoso. -
The Contoso Employee IDs sensitive info type created in a previous task should be displayed. Select the checkbox to the left of this sensitive info type, then select Save.
-
Back on the Select primary elements page, select the checkbox to the right of EmployeeID to identify this field as a Primary element.

-
Select Next.
-
On the Configure settings for data in selected columns, ensure the toggle is set to Yes for Use the same settings for all columns.
-
Select the checkbox for Ignore delimiters and punctuation for data in all columns.
-
Select the dropdown for Choose delimiters and punctuation to ignore dropdown and select Hyphen, Period, Space, Open parenthesis and Close parenthesis, then select Next.
-
On the Configure detection rules for primary elements, leave the default configuration, then select Next.
-
On the Review settings and finish page, select Submit.
-
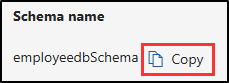
On the You successfully created an EDM classifier page, be sure to copy and paste the Schema name to use in the next task.
-
Once you've captured the schema name, select Done.
-
Leave the browser open with the Microsoft Purview portal.
You have successfully created a new EDM-based classification sensitive information type for identifying employee data from a database file source.
Task 3 – Create EDM-based classification data source
In this task, you'll hash and upload the actual data for the EDM-based classification sensitive information type via the EDM Upload Agent tool.
-
You should still be logged into Client 1 VM (SC-400-CL1) as the SC-400-CL1\admin account, and you should be logged into Microsoft 365 as Joni Sherman.
-
In Microsoft Edge, navigate to
https://go.microsoft.com/fwlink/?linkid=2088639to download the EDM upload agent. -
Once the download is complete, select Open file in the Microsoft Edge browser window to open the Microsoft Exact Data Match Upload Agent Setup wizard.
-
On the Welcome to the Microsoft Exact Data Match Upload Agent Setup Wizard page, select Next.
-
On the End-User License Agreement page, select the I accept the terms in the License Agreement checkbox, then select Next.
-
On the Destination Folder page, don't change the default destination path, then select Next.
-
On the Ready to install Microsoft Exact Data Match Upload Agent page, select Install.
-
If the User Account Control window pops up, select Yes to allow this application to make changes to your device.
-
When the installation finishes, select Finish on the Completed the Microsoft Exact Data Match Upload Agent Setup Wizard page.
-
In your task bar, search for
Notepadin the search field. Select the Notepad app from the Best match section of the search. -
In Notepad, enter:
Name,Birthdate,StreetAddress,EmployeeID Joni Sherman,01.06.1980,1 Main Street,CSO123456 Lynne Robbins,31.01.1985,2 Secondary Street,CSO654321 -
In Notepad, select File and Save As to save the file.
-
Select Documents from the left side pane and enter
EmployeeData.csvas the File name, then select Save. -
Close the Notepad window.
-
right click the Windows symbol in the task bar and select Terminal (Admin).
-
If the User Account Control window pops up, select Yes to allow this application to make changes to your device.
-
In the terminal window, navigate to the EDM Upload Agent directory:
cd "C:\Program Files\Microsoft\EdmUploadAgent" -
Authorize with your account to upload the database to your tenant by running this cmdlet:
.\EdmUploadAgent.exe /Authorize -
When the Pick an account window is displayed, sign in as
JoniS@WWLxZZZZZZ.onmicrosoft.com(where ZZZZZZ is your unique tenant ID provided by your lab hosting provider). Joni's password was set in a previous exercise. -
Back in the terminal window, download the database schema definition of the EDM-based classification sensitive information type by running this script in PowerShell. For the DataStoreName, this is where you'll use the schema name saved from the previous task.
.\EdmUploadAgent.exe /SaveSchema /DataStoreName employeedbSchema /OutputDir "C:\Users\Admin\Documents\"You should get a message that the command completed successfully.
Note: If the last command fails, it possibly takes more time until the EDM_DataUploaders group membership is applied. It can take up to one hour until it is possible to download the schema file. If it fails proceed to the next task and return to this step later.
-
Hash the database file and upload it to the EDM-based classification sensitive information type by running the following script in PowerShell:
.\EdmUploadAgent.exe /UploadData /DataStoreName employeedbSchema /DataFile "C:\Users\Admin\Documents\EmployeeData.csv" /HashLocation "C:\Users\Admin\Documents\" /Schema "C:\Users\Admin\Documents\employeedbSchema.xml"You should get a message that the command completed successfully.
-
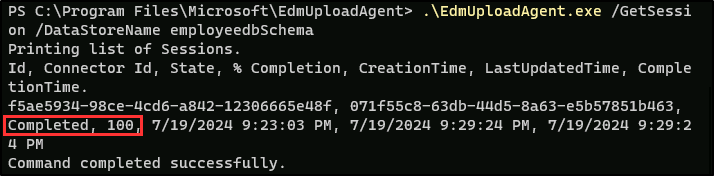
Check the upload progress with this command:
.\EdmUploadAgent.exe /GetSession /DataStoreName employeedbSchema -
In the terminal window, once the status is Completed, your EDM data is ready for use.
Alternatively, you can also refresh the EDM classifiers window in the Microsoft Purview portal to check the status of the hash. Once the status is set to Index complete the hash is complete.
Note: This process time, and you might have to run the GetSession script or refresh the EDM classifiers page a few times before the status shows the hash is complete.

-
Close the PowerShell window.
You have successfully hashed and uploaded a database file for an EDM-based classification sensitive information type.
Task 4 – Create keyword dictionary
Several violations of personal information leakage happened when users sent out emails after colleagues reported on sick leave. When that happened the reason for illness or disease was sent out. We don't want that to happen. In this task, you'll create a keyword dictionary to prevent personal information leakage in emails.
-
You should still be logged into Client 1 VM (SC-400-CL1) as the SC-400-CL1\admin account, and you should be logged into Microsoft 365 as Joni Sherman.
-
The Microsoft Purview portal should still be to the EDM classifiers page in Microsoft Edge. If not, in Microsoft Edge, navigate to
https://purview.microsoft.com> Solutions > Information protection. -
In the left sidebar, expand Classifiers then select Sensitive info types.
-
Select + Create sensitive info type to open the configuration for a new sensitive information type.
-
On the Name your sensitive info type page, enter:
- Name:
Contoso Diseases List - Description:
List of possible diseases of employees.
- Name:
-
Select Next.
-
On the Define patterns for this sensitive info type page, select + Create pattern.
-
On the New pattern flyout panel on the right, under Primary element select + Add primary element, then select Keyword dictionary.
-
On the Add a keyword dictionary page enter:
- Name:
Diseases Dictionary - Keywords:
flu influenza cold bronchitis otitis - Name:
-
Select Done at the bottom of the flyout panel.
-
Back on the New pattern page, under Supporting elements, select + Add supporting elements or group of elements, then select Keyword list to add additional support for the keyword dictionary.
-
On the Add a keyword list page enter:
- ID:
Employee absence - Case insensitive:
employee absence reason - ID:
-
Select Done at the bottom of the flyout panel.
-
Back on the New pattern page, review the configuration and select Create.
-
Back on the Define patterns for this sensitive info type select Next.
-
On the Choose the recommended confidence level to show in compliance policies, leave the default value, then select Next.
-
On the Review settings and finish page, review your settings and select Create. Once your sensitive info type is created, select Done on the Your sensitive info type is created page.
-
Leave the browser window in the Microsoft Purview portal open.
You have successfully created a new sensitive information type based on a keyword dictionary and added more keywords to decrease the false positive rate.
Task 5 – Test custom sensitive information types
Custom sensitive information types should always be tested before using them in policies otherwise data loss or leakage may occur due to a malfunctioning custom search pattern. In this task, you'll test the custom sensitive information types to ensure they recognize the desired patterns.
-
You should still be logged into Client 1 VM (SC-400-CL1) as the SC-400-CL1\admin account, and you should be logged into Microsoft 365 as Joni Sherman.
-
In your task bar, search for
Notepadin the search field. Select the Notepad app from the Best match section of the search. -
In Notepad, enter:
Employee Joni Sherman EMP123456 is absent because of the flu/influenza. -
Select File > Save As.
-
Select Documents on the left side pane and enter
SickTestDataas the File name, then select Save. -
Close the Notepad window.
-
Back in Microsoft Edge, Microsoft Purview portal should still be open on the Sensitive info types page.
-
In the Search bar on the upper right, enter
Contosoand press Enter. -
Select Contoso Employee IDs.
-
Select Test.
-
On the Upload file to test "Contoso Employee IDs" flyout panel on the right, select Upload file.
-
Select Documents from the left pane, select the SickTestData.txt file, then select Open.
-
Select Test to start the analysis.
-
On the Match results page, review the matches, then select Finish to end the test.
-
Navigate back to Sensitive info types and search for
Contosoagain. -
This time select the Contoso Diseases List sensitive info type, then select Test.
-
On the Upload file to test "Contoso Diseases List" flyout panel on the right, select Upload file.
-
On the Upload file to test pane, select Upload file.
-
Select Documents from the left pane, select the SickTestData.txt file, then select Open.
-
Select Test to start the analysis.
-
On the Match results page, review the matches, then select Finish to end the test.
You have successfully tested the two custom sensitive information types and validated the search pattern recognizes the desired patterns.