WWL Tenants - Terms of use
If you are being provided with a tenant as a part of an instructor-led training delivery, please note that the tenant is made available for the purpose of supporting the hands-on labs in the instructor-led training.
Tenants should not be shared or used for purposes outside of hands-on labs. The tenant used in this course is a trial tenant and cannot be used or accessed after the class is over and are not eligible for extension.
Tenants must not be converted to a paid subscription. Tenants obtained as a part of this course remain the property of Microsoft Corporation and we reserve the right to obtain access and repossess at any time.
Lab Setup: Preparing Your Environment for Administration
In this lab, you'll configure and prepare your environment for administration tasks. You'll activate necessary features, set up administrative permissions, and ensure proper configuration of key elements.
Tasks:
- Set user passwords for lab exercises
- Enable Audit in the Microsoft Purview portal
- Enable Search by Name in Microsoft Teams
- Enable information barriers in SharePoint Online and OneDrive
Task - Set user passwords for lab exercises
In this task, you'll set passwords for the user accounts needed for the labs.
-
Log into Client 1 VM (SC-400-CL1) as the SC-400-CL1\admin account. The password should be provided by your lab hosting provider.
-
Open Microsoft Edge and navigate to
https://admin.microsoft.comand log into the Microsoft 365 admin center as the MOD Administrator,admin@WWLxZZZZZZ.onmicrosoft.com(where ZZZZZZ is your unique tenant ID provided by your lab hosting provider). -
On the left navigation pane, expand Users then select Active users.
-
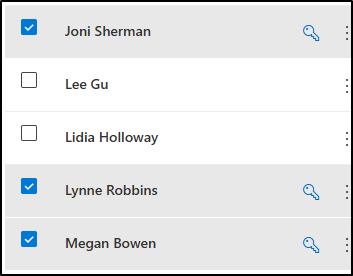
Select the checkbox to the left of Joni Sherman, Lynne Robbins, and Megan Bowen.
These accounts will be used through the lab exercises.
-
Select the Reset password button from the top, navigation ribbon to reset all three passwords.

-
In the Reset Password flyout page on the right, ensure all options are deselected.
This will ensure that you can select a password for the three users being used for exercises, and that these passwords won't need to be reset when you first sign in.
-
In the Password field, enter a password you can remember to reset the user passwords to be used in future exercises.
-
At the bottom of the Reset password flyout page, select the Reset password button.
-
On the Passwords have been reset page, you should see the three user accounts that have been reset. At the bottom of this flyout page, select Close.
You have successfully reset passwords for lab exercises.
Task - Enable Audit in the Microsoft Purview portal
In this task, you'll enable Audit in the Microsoft Purview portal to monitor portal activities.
-
You should still be logged into Client 1 VM (SC-400-CL1) as the SC-400-CL1\admin account and logged into Microsoft 365 with the MOD Administrator account.
-
In Microsoft Edge, navigate to the Microsoft Purview portal,
https://purview.microsoft.com, and log in. -
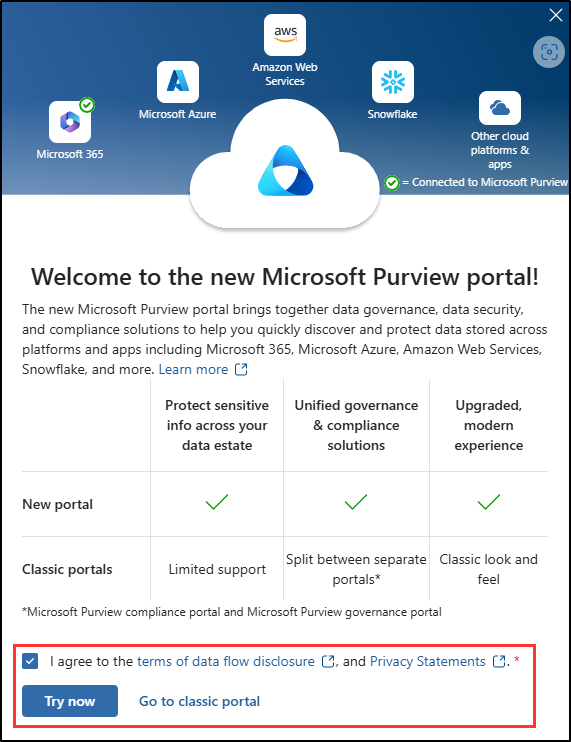
A message about the new Microsoft Purview portal will appear on the screen. Select the option to agree with the terms of data flow disclosure and the privacy statement, then select Try now.
-
Select Solutions from the left sidebar, then select Audit.
-
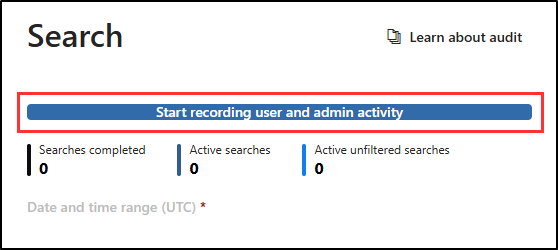
On the Search page, select the Start recording user and admin activity bar to enable audit logging.
-
Once you select this option, the blue bar should disappear from this page.
[!alert] If you receive an error enabling Audit in this exercise, please use these steps as a work around:
- Open an elevated Terminal window by selecting the Windows button with the right mouse button and then select Terminal (Admin).
- Install the ExchangeOnlineManagement module by running
Install-Module -Name ExchangeOnlineManagement- Connect to ExchangeOnlineManagement by running
Connect-ExchangeOnline- When prompted, login by entering the administrator username and password from your lab hosting provider.
- To verify if Audit is enabled, run
Get-AdminAuditLogConfig | FL UnifiedAuditLogIngestionEnabled- If false, then the audit log is turned off.
- To enable Audit, run
Set-AdminAuditLogConfig -UnifiedAuditLogIngestionEnabled $true- If you receive an error that you are unable to run the script in your organization, run
Enable-OrganizationCustomization- Try again to run
Set-AdminAuditLogConfig -UnifiedAuditLogIngestionEnabled $true- To confirm Audit is enabled, run
Get-AdminAuditLogConfig | FL UnifiedAuditLogIngestionEnabled- Once complete, run
Disconnect-ExchangeOnlineto end your session
You have successfully enabled auditing in Microsoft 365.
Task - Enable search by name in Microsoft Teams
In this task, you'll enable the Search by name feature in Microsoft Teams for easy user location. This is needed for configuring information barriers in a later exercise.
-
You should still be logged into Client 1 VM (SC-400-CL1) as the SC-400-CL1\admin account and logged into Microsoft 365 with the MOD Administrator account.
-
In Microsoft Edge, navigate to
https://admin.teams.microsoft.com. -
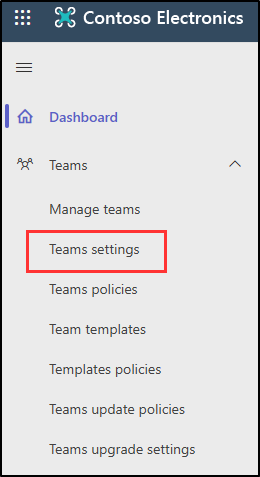
In the left navigation pane, under the Teams dropdown, select Teams settings.
-
Scroll down to Search by name section and toggle the Scope directory search using an Exchange address book policy to On.
-
Select Save at the bottom of the page.
-
On the Changes might take some time to take effect dialogue, select Confirm.
You have successfully enabled the search by name feature in Microsoft Teams for information barriers.
Task - Enable information barriers in SharePoint Online and OneDrive
In this task, you'll enable information barriers in SharePoint Online and OneDrive to ensure secure collaboration.
-
You should still be logged into Client 1 VM (SC-400-CL1) as the SC-400-CL1\admin account.
-
Open an elevated PowerShell window by selecting the Windows button with the right mouse button and then select Windows PowerShell (Admin).
-
Confirm the User Account Control window with Yes.
-
Run the following cmdlet to install the latest version of the SharePoint Online PowerShell module:
Install-Module -Name Microsoft.Online.SharePoint.PowerShell -
If prompted to install the PowerShell NuGet provider, enter Y to install the provider.
-
If prompted to install from an untrusted repository, enter Y to install the module from the PSGallery.
-
Run the following cmdlet to connect to the admin center for SharePoint Online:
Connect-SPOService -Url https://WWLxZZZZZZ-admin.sharepoint.comNote: Be sure to update ZZZZZZ. ZZZZZZ is your unique tenant ID provided by your lab hosting provider.
-
Login with the MOD Administrator password provided by your lab hosting provider.
-
To enable information barriers in SharePoint and OneDrive, run the following command:
Set-SPOTenant -InformationBarriersSuspension $false -
Close the PowerShell window once this is complete.
You have successfully enabled information barriers in SharePoint Online and OneDrive.