Lab 23: Add terms of use and acceptance reporting
Login type: Microsoft 365 admin
Lab scenario
Microsoft Entra terms of use policies provide a simple method that organizations can use to present information to end users. This presentation ensures users see relevant disclaimers for legal or compliance requirements. This article describes how to get started with terms of use (ToU) policies.
You must create and enforce a ToU policy for your organization.
Estimated time: 20 minutes
Exercise 1 - Set up a Term of Use and test them
Task 1 - Add terms of use
Once you have finalized your terms of use document, use the following procedure to add it.
-
Sign in to Microsoft Entra admin center at
https://entra.microsoft.comas your Global Administrator.Note: You may be prompted to complete Multi-Factor Authentication (MFA) during sign-in. Follow the prompts to configure or verify your authentication method before continuing.
-
In the left navigation menu, expand the ID Governance, select Entitlement management.
-
On the **Identity Governance Getting Started** page, in the left navigation, under Terms of use select Terms of use. -
On the **Identity Governance Terms of use** page, on the top menu, select + New terms. 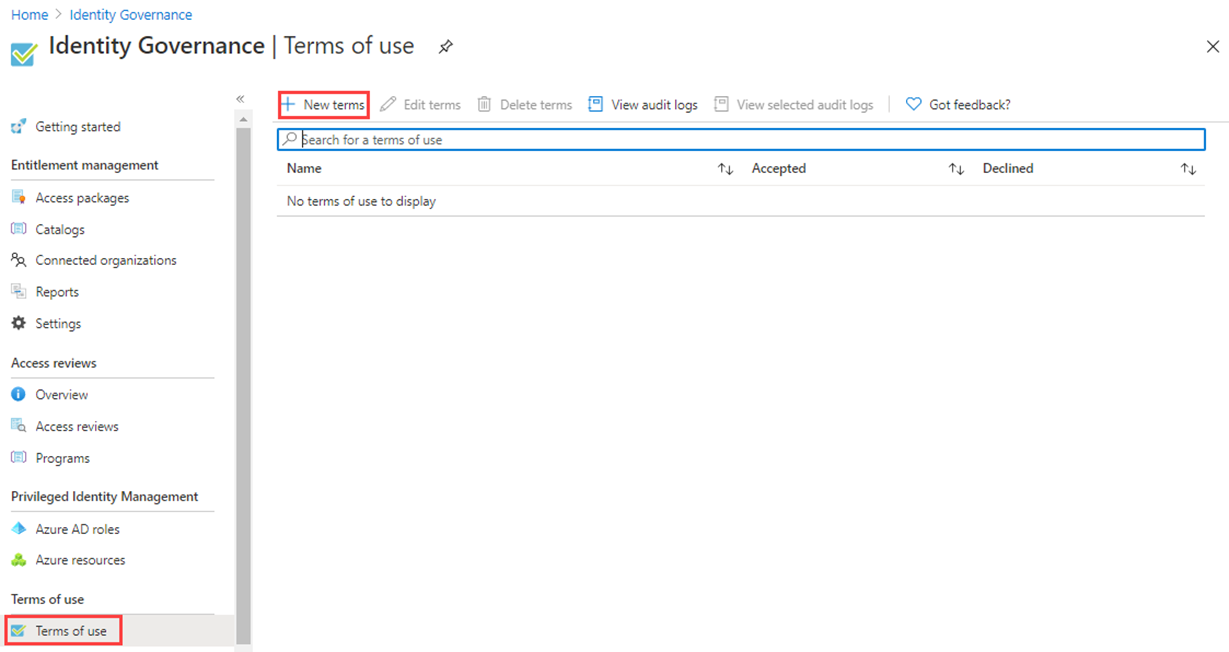
-
In the Name box, enter Testing terms of use.
Note: This is the terms of use that will be used in the Azure portal.
-
Select the Terms of use document box, browse to your finalized terms of use PDF and select it.
ToU File Provided - browse to the github repo AllFiles/Labs/Lab26 to get a sample Terms-of-User PDF document for use in this lab.
-
Select English for the language for your terms of use document.
Note: The language option allows you to upload multiple terms of use, each with a different language. The version of the terms of use that an end user will see will be based on their browser preferences.
-
In the Display name box, enter Contoso Terms of Use.
Note: This is the title that users see when they sign in.
-
To require end users to view the terms of use prior to accepting them, set Require users to expand the terms of use to On.
-
To require end users to accept your terms of use on every device they are accessing from, set Require users to consent on every device to Off. Users may be required to install additional applications if this option is enabled.
Warning - Consent on every device will require users to register each device with Microsoft Entra ID prior to getting access. It is a good practice to require this setting to On; however for the purpose of a cleaner lab, we are using Off.
-
If you want to expire terms of use consents on a schedule, set Expire consents to On. When set to On, two additional schedule settings are displayed.
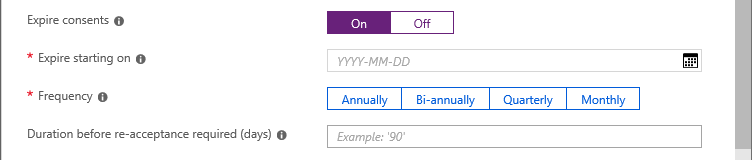
-
Use the Expire starting on and Frequency settings to specify the schedule for terms of use expirations. The following table shows the result for a couple of example settings:
Expire starting on Frequency Result Today’s date Monthly Starting today, users must accept the terms of use and then reaccept every month. Date in the future Monthly Starting today, users must accept the terms of use. When the future date occurs, consents will expire and then users must reaccept every month. For example, if you set the expire starting on date to Jan 1 and frequency to Monthly, here is how expirations might occur for two users:
User First accept date First expire date Second expire date Third expire date Alice Jan 1 Feb 1 Mar 1 Apr 1 Bob Jan 15 Feb 1 Mar 1 Apr 1 -
Use the Duration before re-acceptance requires (days) setting to specify the number of days before the user must reaccept the terms of use. This allows users to follow their own schedule. For example, if you set the duration to 30 days, here is how expirations might occur for two users:
User First accept date First expire date Second expire date Third expire date Alice Jan 1 Jan 31 Mar 2 Apr 1 Bob Jan 15 Feb 14 Mar 16 Apr 15 Note: It is possible to use the Expire consents and Duration before re-acceptance requires (days) settings together, but typically you use one or the other.
-
Under Conditional Access, select Custom policy.
- Possible choices and when to use them:
Template Description Access to cloud apps for all guests A Conditional Access policy will be created for all guests and all cloud apps. This policy impacts the Azure portal. Once this is created, you might be required to sign-out and sign-in. Access to cloud apps for all users A Conditional Access policy will be created for all users and all cloud apps. This policy impacts the Azure portal. Once this is created, you will be required to sign-out and sign-in. Custom policy Select the users, groups, and apps that this terms of use will be applied to. Create Conditional Access policy later This terms of use will appear in the grant control list when creating a Conditional Access policy. IMPORTANT - Conditional Access policy controls (including terms of use) do not support enforcement on service accounts. We recommend excluding all service accounts from the Conditional Access policy.
Custom Conditional Access policies enable granular terms of use, down to a specific cloud application or group of users. For more information, see https://docs.microsoft.com/en-us/azure/active-directory/conditional-access/require-tou.
-
When complete, select Create.
Continued Task 1 - Create the Conditional Access Policy
-
When the terms of use is created, you will automatically be redirected to the Conditional access policy page. On the page, in the Name box, enter Enforce ToU.
-
Under Assignments, select 0 users or agents(Preview) selected.
-
On the Include tab, select Select users and groups, and then mark Users and groups check box.
-
In the Select users and groups pane, select *Adele Vance account and then select Select.
Warning - If you choose your administrator account, like all conditional access policies, be sure you have another account with enough permissions to change the conditional access policy. This is to ensure your administrator account will not be locked out should the conditional access policy result in an undesirable outcome.
-
In the Target resources, select No target resource selected.
-
Verify Resources (formerly cloud apps) is selected and then select All resources (formerly ‘All cloud apps’).
-
Under Access controls, in the Grant section, select 0 controls selected.
-
In the Grant pane, select Testing terms of use and then select Select.
-
Under Enable policy, select On.
-
Select Create.

-
If you chose to use your own account, you can refresh your browser. You will be prompted to sign in again. When you sign in, you will be required to accept the terms of use.
Task 2 - Log in as Adele
-
Open a new InPrivate browser window.
-
Sign in to Microsoft Azure portal at
https://portal.azure.com. -
If comes up saying you are already logged in, Select on the logged in users name in the upper-right of the screen and choose Sign in with a different account.
-
Log in as Adele:
Setting Value to enter User Name AdeleV@<your domain name>.onmicrosoft.comPassword Enter the tenant’s admin password(Refer the Lab Resources tab to retrieve the tenant admin password) -
Validate Adele’s login with the MFA request.
-
View the Terms of Use.
-
You can choose to Accept or Decline.
Note: If you choose decline then during a future login as AdeleV you will again be required to view and accept the Terms of Use.
Note: Terms of Use may take a few minutes to appear or you can logout and log back in to the portal.
Task 3 - View report of who has accepted and declined
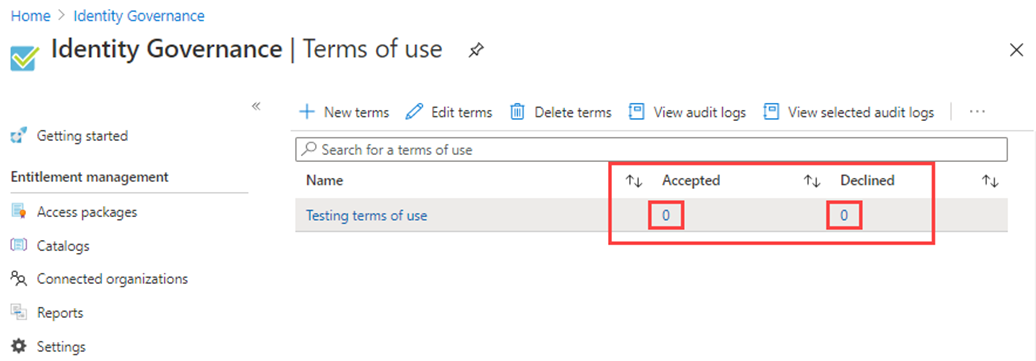
The Terms of use page shows a count of the users who have accepted and declined. These counts and who accepted/declined are stored for the life of the terms of use.
-
In Microsoft Azure portal, search for Identity Governance and select it.
-
On the Identity Governance page, from the left navigation menu, expand Terms of use, and then select Terms of use.
-
For a terms of use, select the numbers under Accepted or Declined to view the current state for users.
-
In this exercise you may not have any accepted or declined terms of use. In the following example, the Accepted value was selected. You can see the reported user information for those that have accepted the terms of use.
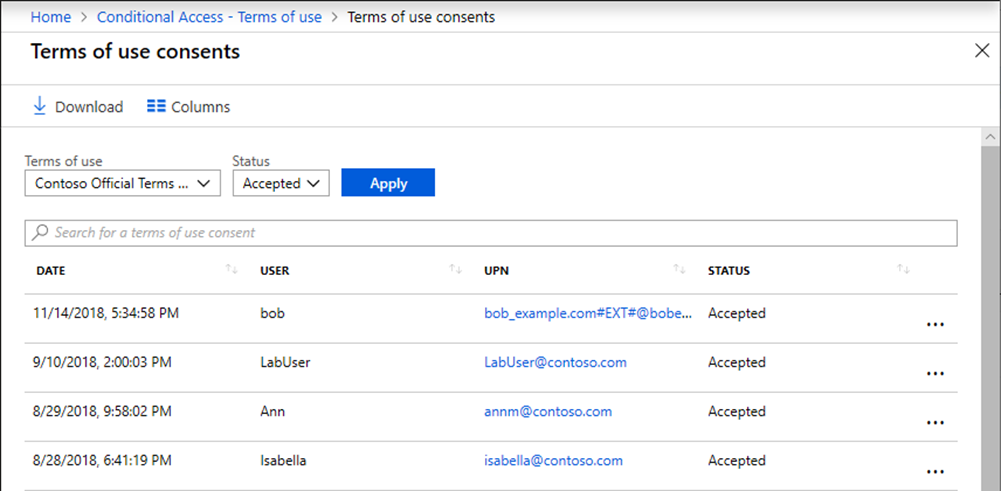
-
On the Terms of Use Consents page select Download to download a consents report.
-
On the **Identity Governance Terms of Use** page, highlight Testing terms of use and select View selected audit logs to view the audit logs activity.
Task 4 - What terms of use looks like for users
-
Once a terms of use is created and enforced, users who are in scope will see the terms of use page.
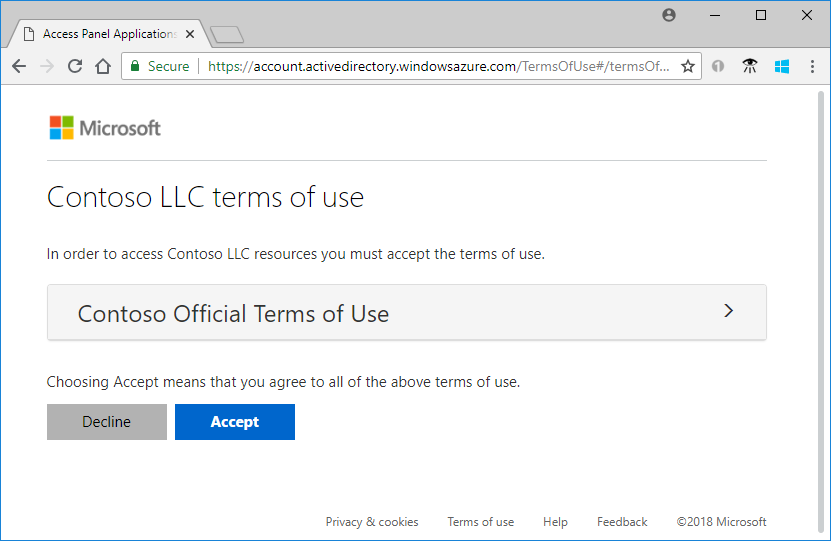
-
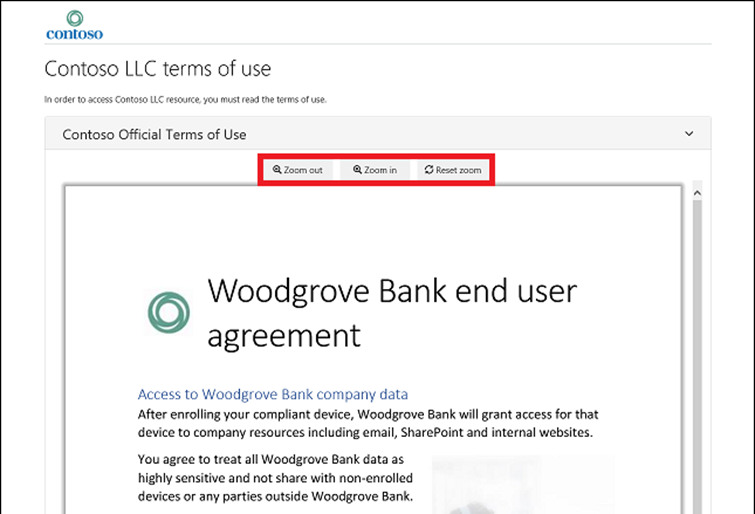
Users can view the terms of use and, if necessary, use buttons to zoom in and out.
-
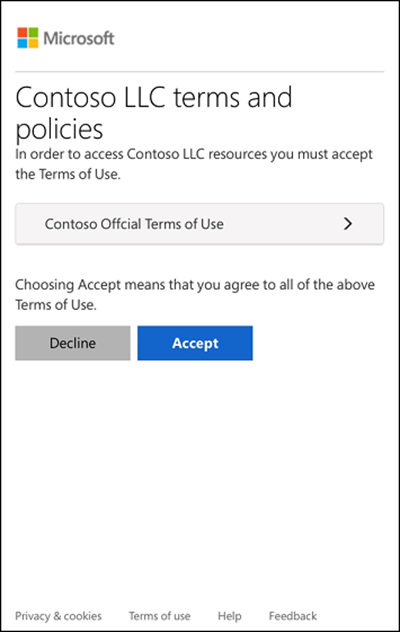
On mobile devices, the terms of use will be displayed similar to the following example.
Task 5 - How users can review their terms of use
Users can review and see the terms of use that they have accepted by using the following procedure.
-
Browse to
https://myapps.microsoft.comand then sign in using your user account. -
Select the user profile photo and then select View account. On the Overview page, select VIEW SETTINGS AND PRIVACY.

-
On the Settings & Privacy page, select the Privacy tab.
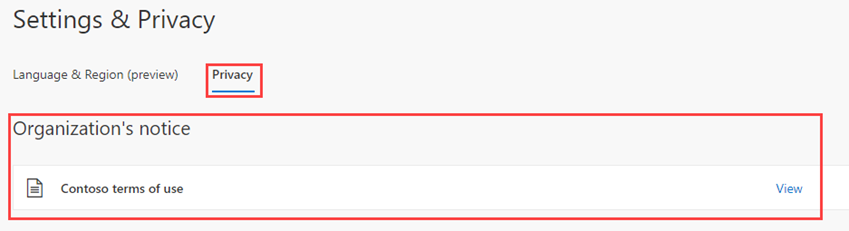
-
Under Organization’s notice, you can review the terms of use you have accepted.
Task 6 - Edit terms of use details
You can edit some details of terms of use, but you can’t modify an existing document. The following procedure describes how to edit the details.
-
Sign in to Microsoft Entra admin center at
https://entra.microsoft.comas your Global Administrator. -
In the left navigation menu, expand the ID Governance, select Entitlement management.
-
On the **Identity Governance Getting Started** page, in the left navigation, select Terms of use. -
Select the terms of use you want to edit.
Note: You have to click on open space, not directly on name of the Terms or Use.
-
On the top menu, select Edit terms.
-
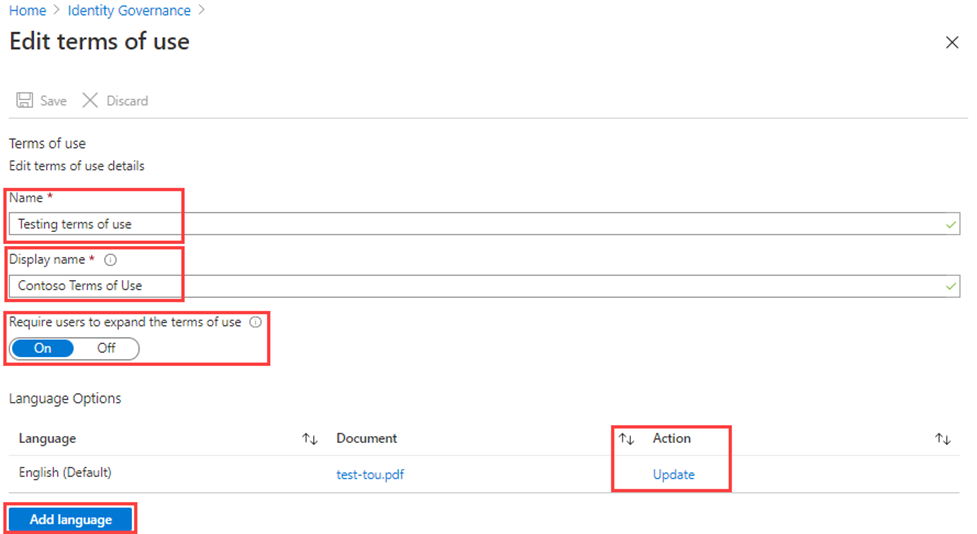
In the Edit terms of use pane, you can change the following:
-
Name – this is the internal name of the ToU that is not shared with end users
-
Display name – this is the name that end users can see when viewing the ToU
-
Require users to expand the terms of use – Setting this to On will force the end user to expand the terms of use document before accepting it.
-
Update an existing terms of use document.
-
You can add a language to an existing ToU If there are other settings you would like to change, such as require users to consent on every device, expire consents, duration before reacceptance, or Conditional Access policy, you must create a new terms of use.
-
- Once you are done, select Save to save your changes.
Task 7 - Update an existing terms of use document
You may, on occasion, be required to update the terms of use document.
-
Select the terms of use you want to edit.
-
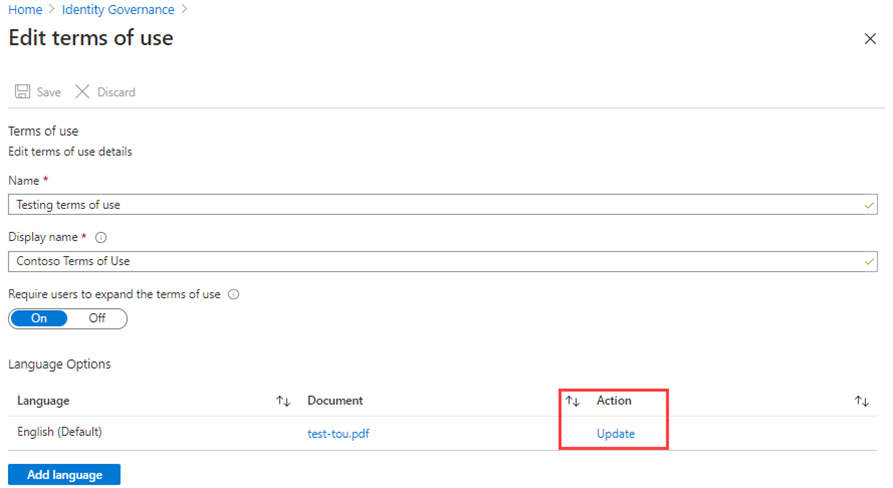
Select Edit terms.
-
In the Language Options table, identify the terms of use language you want to update and then, in the Action column, select Update.
-
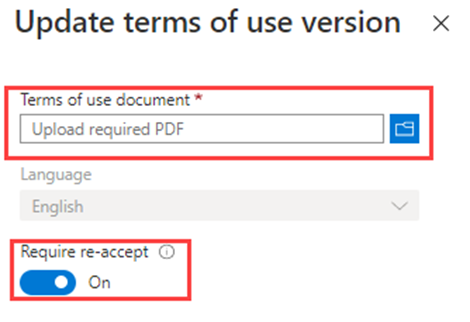
In the Update terms of use version pane, you can upload a new version of your terms of use document.
-
Additionally, you can use the Require reaccept toggle button if you want to require your users to accept this new version the next time they sign in. If you do not require your users to re-accept, their previous consent will stay current and only new users who have not consented before or whose consent expires will see the new version.
-
Once you have uploaded your new pdf and decided on re-accept, select Add.
-
You will now see the most recent version under the Document column.
Exercise summary
In this exercise, you created a terms of use policy, enforced it through Conditional Access, signed in as a target user to accept it, and reviewed acceptance reporting. This exercise showed how to require users to acknowledge legal or compliance notices before accessing resources.