Lab 22: Create and manage a catalog of resources in Microsoft Entra entitlement management
Login type: Microsoft 365 admin
Lab scenario
A catalog is a container of resources and access packages. You create a catalog when you want to group related resources and access packages. Whoever creates the catalog becomes the first catalog owner. A catalog owner can add additional catalog owners. You must create and configure a catalog in your organization.
Estimated time: 15 minutes
Exercise 1 - Building out resources in Entitlement Management
Task 1 - Create a catalog
-
Sign in to Microsoft Entra admin center at
https://entra.microsoft.comas your Global Administrator.Note: You may be prompted to complete Multi-Factor Authentication (MFA) during sign-in. Follow the prompts to configure or verify your authentication method before continuing.
Important - To use and configure Microsoft Entra ID terms of use, you must have:
- Microsoft Entra ID Premium P1, P2, EMS E3, or EMS E5 subscription.
- If you don’t have one of these subscriptions, you can get Microsoft Entra ID Premium trial.
- One of the following administrator accounts for the directory you want to configure:
- Global Administrator
- Security Administrator
- Conditional Access Administrator
-
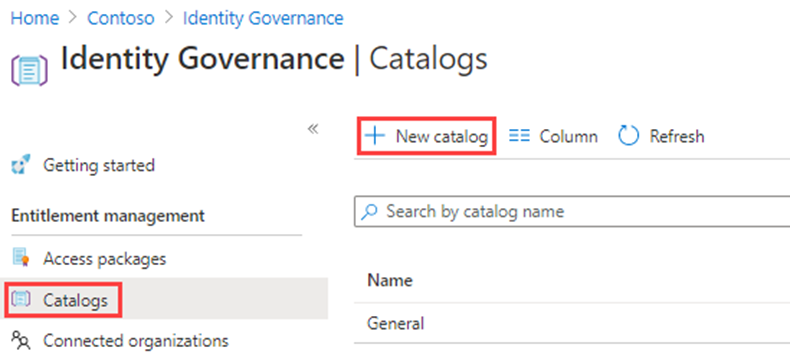
In the left navigation menu, expand the ID Governance, select Entitlement management.
-
On the **Identity Governance Getting Started** page, in the left navigation, under Catalogs select Catalogs. -
On the top menu, select + New Catalog.
-
In the New catalog pane, in the Name box, enter Marketing.
-
In the Description box, enter For marketing department users. Users will see this information in an access package’s details.
-
Under Enabled, select Yes.
- Enabled for external users select No. This setting allows users in selected external directories to be able to request access packages in this catalog. No changes will be made to this setting.
-
You may choose to enable the catalog for immediate use or disable if you intend to stage it or keep it unavailable until you intend to use it. For this exercise, the catalog does not need to be enabled.
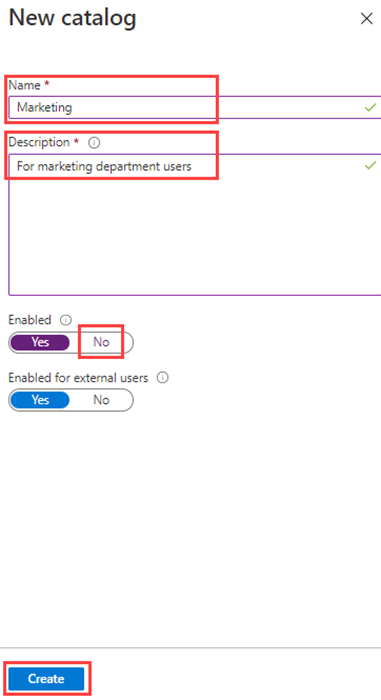
- Select Create.
Task 2 - Add resources to a catalog
To include resources in an access package, the resources must exist in a catalog. The types of resources you can add are groups, applications, and SharePoint Online sites. The groups can be cloud-created Microsoft 365 Groups or cloud-created Microsoft Entra security groups. The applications can be Microsoft Entra enterprise applications, including both SaaS applications and your own applications federated to Microsoft Entra ID. The sites can be SharePoint Online sites or SharePoint Online site collections.
-
On the Identity Governance page, if necessary, select Catalogs.
-
In the Catalogs list, select Marketing.
-
In the left navigation, under Manage, select Resources.
-
On the menu, select + Add resources.
-
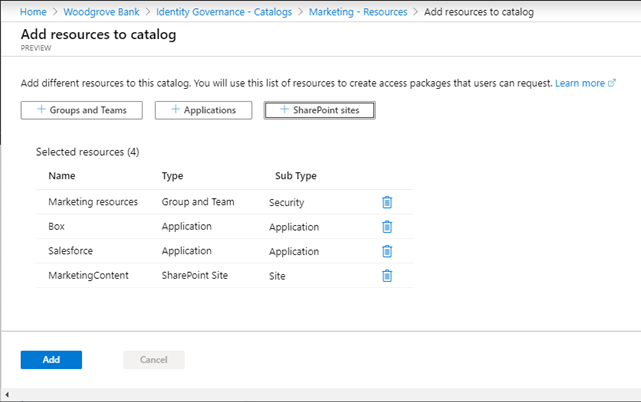
In the Add resources to catalog page, review the available options. Add the following items:
Resource Type Value Groups and Teams Retail Applications Box Applications Salesforce SharePoint sites Brand - pick this SharePoint from your list of available sites -
You may not have any resources in Groups and Teams, Applications, or SharePoint sites. Select any resource category and then select a resource from that category.
-
For this exercise, it is okay to choose any resource you may have available.
-
When finished, Select Add. These resources can now be included in access packages within the catalog.
Task 3 - Add additional catalog owners
The user that created a catalog becomes the first catalog owner. To delegate management of a catalog, you add users to the catalog owner role. This helps share the catalog management responsibilities.
-
If necessary, in the Microsoft Entra admin center, expand the ID Governance, select Entitlement management, select Catalogs and then select Marketing.
-
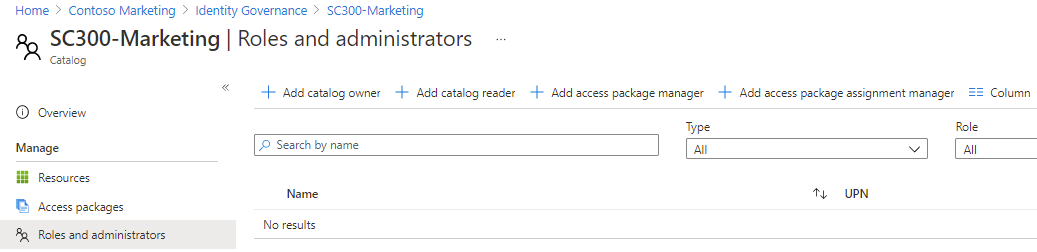
In the Marketing catalog page, in the left navigation menu, select Roles and administrators.
-
On the top menu, review the available roles and then select + Add catalog owner.
-
In the Select members pane, select your Adele Vance and then select Select.
-
Review the newly added role in the Roles and administrators list.
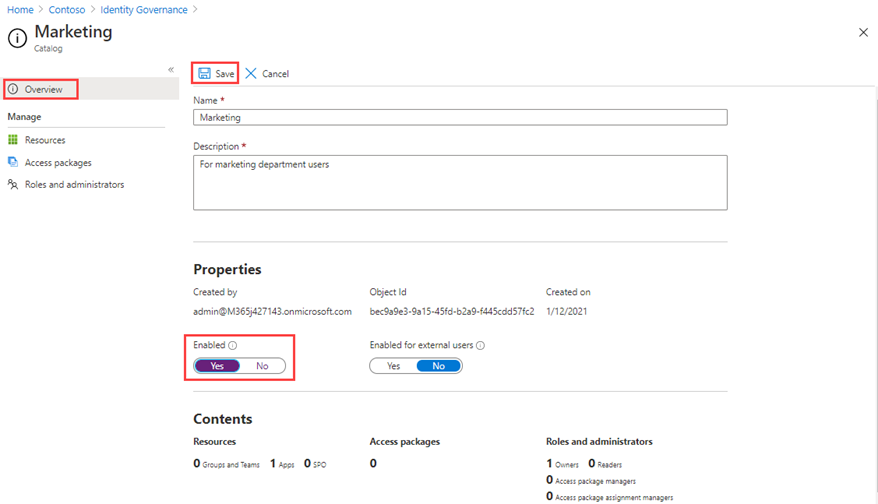
Task 4 - Edit a catalog
You can edit the name and description for a catalog. Users see this information in an access package’s details.
-
In the Marketing page, in the left navigation, select Overview.
-
On the top menu, select Edit.
-
Review the setting and, under Properties > Enabled, select Yes.
-
Select Save.
Task 5 – Create access reviews for guest users
Microsoft Entra Identity Governance provides access reviews to help manage and control the access lifecycle for guest users.
-
In the Microsoft Entra admin center, expand the ID Governance, select Access reviews.
-
On the **Identity Governance Access reviews** page, select + New access review. -
On the Create an access review page, in the Resource review box, select Select.
-
On the New access review page, under the Select what to review, open the Select review dropdown and select Teams + Groups.
-
Under the Review scope, select All Microsoft 365 groups with guest users.
-
Under the Scope, select Guest users only.
-
Select Next: Reviews.
-
In the Reviews, configure who reviews and approves access and when access is reviewed and expires.
- Under the Select reviewers section, select Group owner(s) as the reviewers.
Guest users should not be allowed to review their own access, which is a recommended identity governance practice.
-
Under Duration (in days), leave the default value of 3, then select the Review recurrence and Start date for the review.
- On the Settings tab, configure the review behavior.
- Enable Auto apply results to resource.
- For If reviewers don’t respond, select Remove access.
- Select Review + create, then select Create to create the new access review.
Task 6 - Delete a catalog
You can delete a catalog, but only if it does not have any access packages.
-
In the Marketing catalog’s Overview page, on the top menu, select Delete.
-
In the Delete dialog box, review the information and then select No.
Note: we are keeping the catalog for use in the next lab.
Exercise summary
In this exercise, you created a catalog and managed resources in Microsoft Entra Entitlement Management. This exercise showed how catalogs group resources for delegated, package-based access management.