Lab 19 - Register an application
Login type: Microsoft 365 admin
Estimated time: 30 minutes
Exercise 1 - Register an application
Task 1 - App registration
Registering your application establishes a trust relationship between your app and the Microsoft identity platform. The trust is unidirectional: Your app trusts the Microsoft identity platform—not the other way around.
-
Sign in to Microsoft Entra admin center at
https://entra.microsoft.comas your Global Administrator.Note: You may be prompted to complete Multi-Factor Authentication (MFA) during sign-in. Follow the prompts to configure or verify your authentication method before continuing.
-
In the left navigation, under Entra ID, select App registrations.
-
On the App registrations page, on the menu, select + New registration.
-
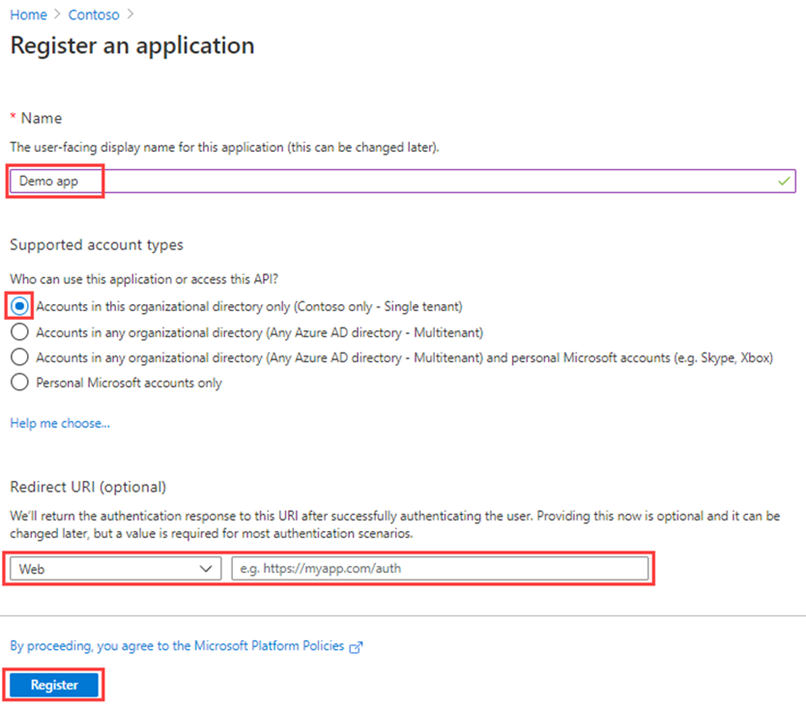
On the Register an application blade, register an app named Demo app using the default values. You do not need to enter the redirect URI.
-
Select the Register button.
-
When complete, you will be directed to the Demo app page.
Task 2 - Configure platform settings
Settings for each application type, including redirect URIs, are configured in Platform configurations in the Microsoft Entra admin center. Some platforms, like Web and Single-page applications, require you to manually specify a redirect URI. For other platforms, like mobile and desktop, you can select from redirect URIs generated for you when you configure their other settings.
To configure application settings based on the platform or device you’re targeting:
Add and modify redirect URIs for your registered applications by configuring their platform settings.
-
Select your application in App registrations in the Microsoft Entra admin center.
-
Under Manage, select Authentication (Preview).
-
Under Redirect URI configurations, select + Add Redirect URI.
-
In Select a platforms to add redirect URI, select the tile for your application type (platform) to configure its settings.
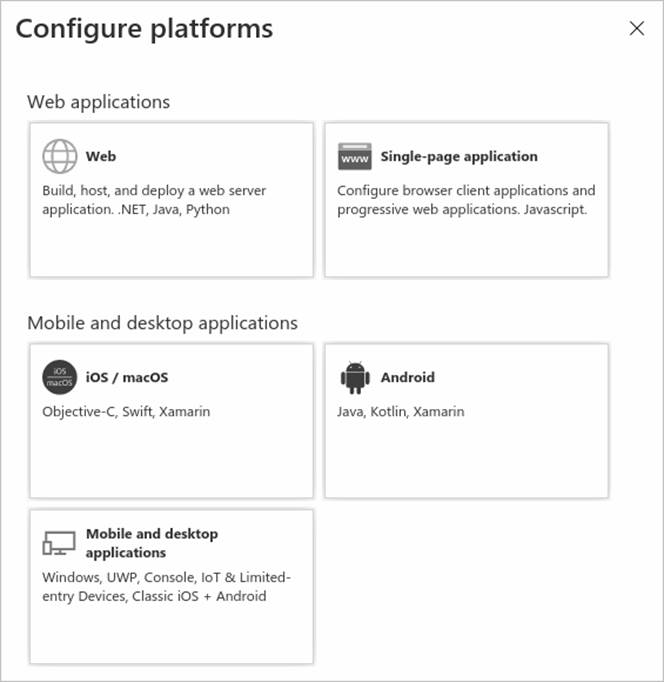
Platform Configuration settings Web Enter a Redirect URI for your app, the location where Microsoft identity platform redirects a user’s client and sends security tokens after authentication. Select this platform for standard web applications that run on a server. Single-page application Enter a Redirect URI for your app, the location where Microsoft identity platform redirects a user’s client and sends security tokens after authentication. Select this platform if you’re building a client-side web app in JavaScript or with a framework like Angular, Vue.js, React.js, or Blazor WebAssembly. iOS/macOS Enter the app Bundle ID, found in XCode in Info.plist or Build Settings. A redirect URI is generated for you when you specify a Bundle ID. Android Enter the app Package name, which you can find in the AndroidManifest.xml file, and generate and enter the Signature hash. A redirect URI is generated for you when you specify these settings. Mobile and desktop applications Select one of the Suggested redirect URIs or specify a Custom redirect URI. For desktop applications, we recommend: https://login.microsoftonline.com/common/oauth2/nativeclient. Select this platform for mobile applications that aren’t using the latest Microsoft Authentication Library (MSAL) or are not using a broker. Also select this platform for desktop applications. -
Select Web as your platform.
-
Enter
https://localhostfor the Redirect URI. -
Select Configure to complete the platform configuration.
Task 3 - Add credentials, certificate and client secret
Credentials are used by confidential client applications that access a web API. Examples of confidential clients include web apps, other web APIs, and service-type and daemon-type applications. Credentials allow your application to authenticate as itself, requiring no interaction from a user at runtime.
You can add both certificates and client secrets (a string) as credentials to your confidential client app registration.
Note: Sometimes called a public key, certificates are the recommended credential type, because as they provide a higher level of assurance than a client secret. When using a trusted public certificate, you can add the certificate using the Certificates & secrets feature. Your certificate must be one of the following file types: .cer, .pem, .crt.
Note: The client secret, also known as an application password, is a string value your app can use in place of a certificate to identify itself. It’s the easier of the two credential types to use. It’s often used during development, but is considered less secure than a certificate. You should use certificates in your applications running in production.
-
Select your application in App registrations in the Microsoft Entra admin center.
-
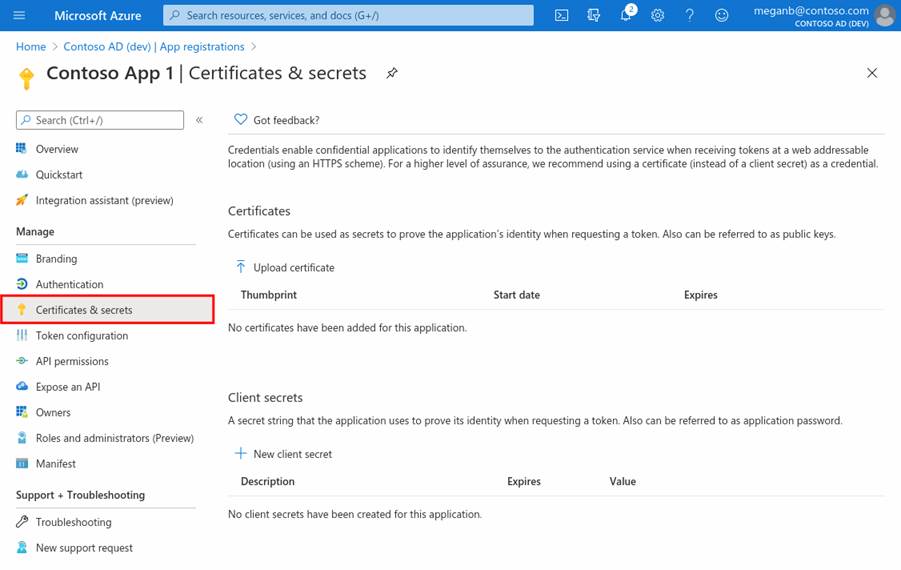
Select Certificates & secrets, then select + New client secret.
-
Add a description for your client secret and duration
- Description: SC300 lab secret
- Duration: 90 days (3 months)
-
Select Add.
-
Save the secret’s value in notepad for use in your client application code; The Certificate & Secrets page will display the new secret value. It’s important you copy this value as it’s only shown this one time; if you refresh your page and come back, it will only show as a masked value.
With your web App registered, you’re ready to add the scopes that your API’s code can use to provide granular permission to consumers of your API.
Task 4 - Add a scope
The code in a client application requests permission to perform operations defined by your web API by passing an access token along with its requests to the protected resource (the web API). Your web API then performs the requested operation only if the access token it receives contains the scopes (also known as application permissions) required for the operation.
First, follow these steps to create an example scope named Employees.Read.All:
-
Select your application in App registrations in the Microsoft Entra admin center.
-
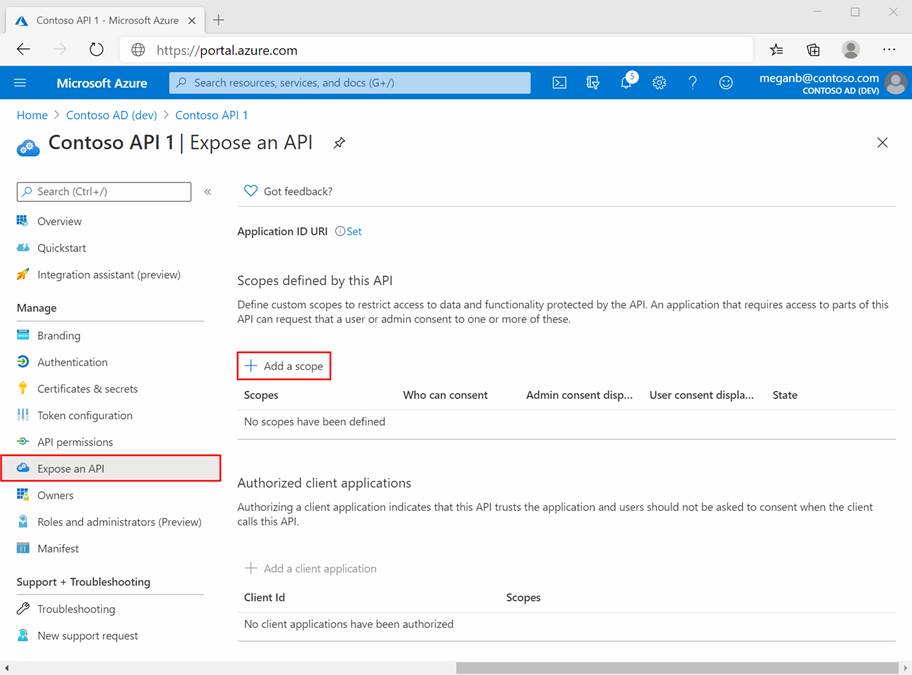
Under Manage, select Expose an API, and then select + Add a scope.
-
You’re prompted to set an Application ID URI. Set the value to api://DemoAppAPI
Note: The App ID URI acts as the prefix for the scopes you’ll reference in your API’s code, and it must be globally unique. You can use the default value provided, which is in the form api://<application-client-id>, or specify a more readable URI like
https://contoso.com/api. -
Select Save and continue.
-
Next, specify the scope’s attributes in the Add a scope pane. For this walk-through, use the values in the 3rd column - Value.
Field Description Value Scope name The name of your scope. A common scope naming convention is resource.operation.constraint. Employees.Read.All Who can consent Whether this scope can be consented to by users or if admin consent is required. Select Admins only for higher-privileged permissions. Admins and users Admin consent display name A short description of the scope’s purpose that only admins will see. Read-only access to employee records Admin consent description A more detailed description of the permission granted by the scope that only admins will see. Allow the application to have read-only access to all employee data. User consent display name A short description of the scope’s purpose. Shown to users only if you set Who can consent to Admins and users. Read-only access to your employee records User consent description A more detailed description of the permission granted by the scope. Shown to users only if you set Who can consent to Admins and users. Allow the application to have read-only access to your employee data. -
Set the State to Enabled, and then select Add scope.
-
(Optional) To suppress prompting for consent by users of your app to the scopes you’ve defined, you can pre-authorize the client application to access your web API. Pre-authorize only those client applications you trust since your users won’t have the opportunity to decline consent.
-
Under Authorized client applications, select Add a client application.
-
Enter the Application (client) ID of the client application you want to pre-authorize. For example, that of a web application you’ve previously registered.
-
Under Authorized scopes, select the scopes for which you want to suppress consent prompting, then select Add application.
-
If you followed this optional step, the client app is now a pre-authorized client app (PCA), and users won’t be prompted for their consent when signing into it.
-
Task 5 - Add a scope requiring admin consent
Next, add another example scope named Employees.Write.All that only admins can consent to. Scopes that require admin consent are typically used for providing access to higher-privileged operations, often by client applications that run as backend services or daemons that don’t sign in a user interactively.
-
To add the Employees.Write.All example scope, follow the steps above and specify these values in the Add a scope pane:
Field Example value Scope name Employees.Write.All Who can consent Admins only Admin consent display name Write access to employee records Admin consent description Allow the application to have write access to all employee data. User consent display name None (leave empty) User consent description None (leave empty) -
Make sure the State is set to Enabled then select Add Scope.
Note: If you successfully added both example scopes described in the previous sections, they’ll appear in the Expose an API pane of your web API’s app registration, similar to this image:

As shown in the image, a scope’s full string is the concatenation of your web API’s Application ID URI and the scope’s Scope name.
Note: For example, if your web API’s application ID URI is
https://contoso.com/apiand the scope name is Employees.Read.All, the full scope is:https://contoso.com/api/Employees.Read.AllNote: Next, you will configure a client app’s registration with access to your web API and the scopes you defined by following the steps above. Once a client app registration is granted permission to access your web API, the client can be issued an OAuth 2.0 access token by the Microsoft identity platform. When the client calls the web API, it presents an access token whose scope (scp) claim is set to the permissions you’ve specified in the client’s app registration. You can expose additional scopes later as necessary. Consider that your web API can expose multiple scopes associated with several operations. Your resource can control access to the web API at runtime by evaluating the scope (scp) claim(s) in the OAuth 2.0 access token it receives.
Exercise summary
In this exercise, you registered an application in Microsoft Entra ID and exposed an API by defining application ID URI and scopes. This exercise showed how applications are represented in Microsoft Entra ID and how they expose permissions to clients.
Exercise 2 - Manage app registration with a custom role
Task 1 - Create a new custom role to grant access to manage app registrations
You need to create a new custom role for app management. This new role should be limited to only the specific permissions required to perform credential management.
-
Sign in to Microsoft Entra admin center at
https://entra.microsoft.comusing a Global administrator account. -
In the left navigation, under Entra ID, select Roles & admins.
-
Select + New custom role from the top menu.

-
In the New custom role dialog, on the Basics tab, in the name box, enter My custom app role.
-
Review the remaining options and then select Next.
-
On the Permissions tab, review the available permissions.
-
In the Search by permission name or description box, enter credentials.
-
In the results, select the Manage permissions and then select Next.
    microsoft.directory/servicePrincipals/managePasswordSingleSignOnCredentials  -   Manage password single sign-on credentials or service principals.
    microsoft.directory/servicePrincipals/synchronizationCredentials/manage    -   Manage application provisioning secrets and credentials.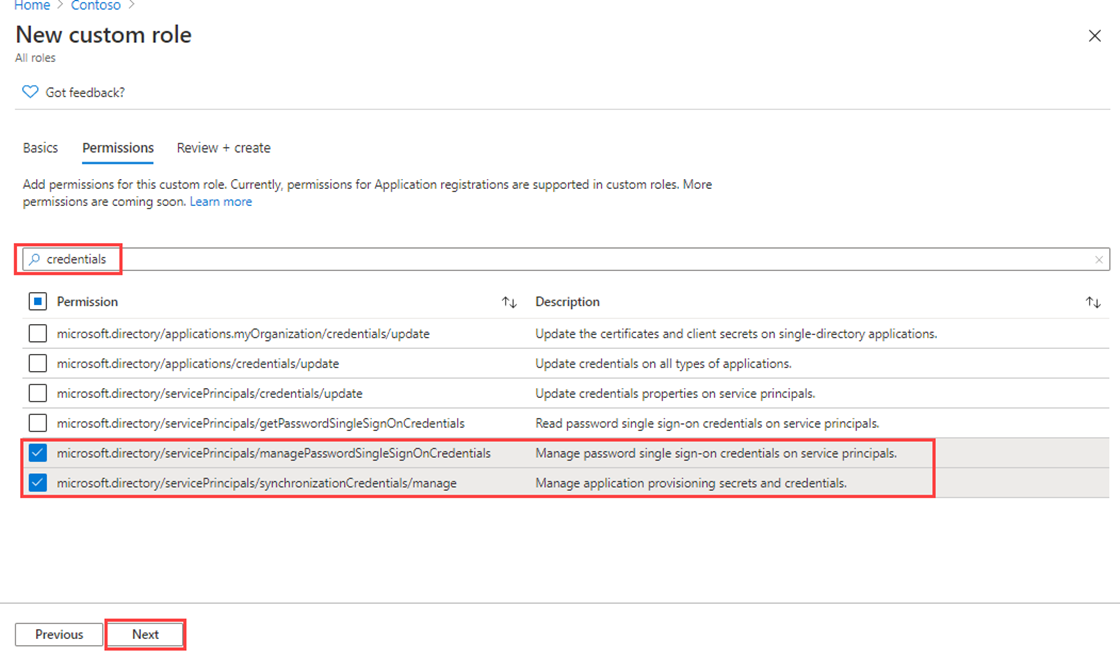
Why pick those two - For application provisioning these two items are the bare minimum permissions needed to enable and enforce single sign-on for the application or service principal being created; and be able to assign the enterprise application to a set of users or groups. Other permissions could also be granted. You can get a full list of available permissions at
https://docs.microsoft.com/azure/active-directory/roles/custom-enterprise-app-permissions. -
Select Next.
-
Review the changes and then select Create.
Exercise summary
In this exercise, you created a custom directory role with a focused set of credential-management permissions. This exercise showed how custom roles support fine-grained, least-privilege app governance.