Lab 15 - Configure an Multifactor authentication registration policy
Login type = Microsoft 365 admin
Lab scenario
Multifactor authentication provides a means to verify who you are using more than just a username and password. It provides a second layer of security to user sign-ins. For users to be able to respond to MFA prompts, they must first register for Microsoft Entra Multifactor Authentication. You must configure your Microsoft Entra organization’s MFA registration policy to be assigned to all users.
Estimated time: 10 minutes
Exercise 1 - Set up MFA registration policy
Task 1 - Policy configuration
-
Sign in to Microsoft Entra admin center at
https://entra.microsoft.comusing a Global Administrator account.Note: You may be prompted to complete Multi-Factor Authentication (MFA) during sign-in. Follow the prompts to configure or verify your authentication method before continuing.
-
In the left navigation menu, under Entra ID, select Identity Secure Score.
-
On the **Security Identity Secure Score, in the left navigation menu under the **Protect, select Identity protection. -
On the **Identity protection Dashboard, in the left navigation menu under the **Protect, select Multifactor authentication registration policy. 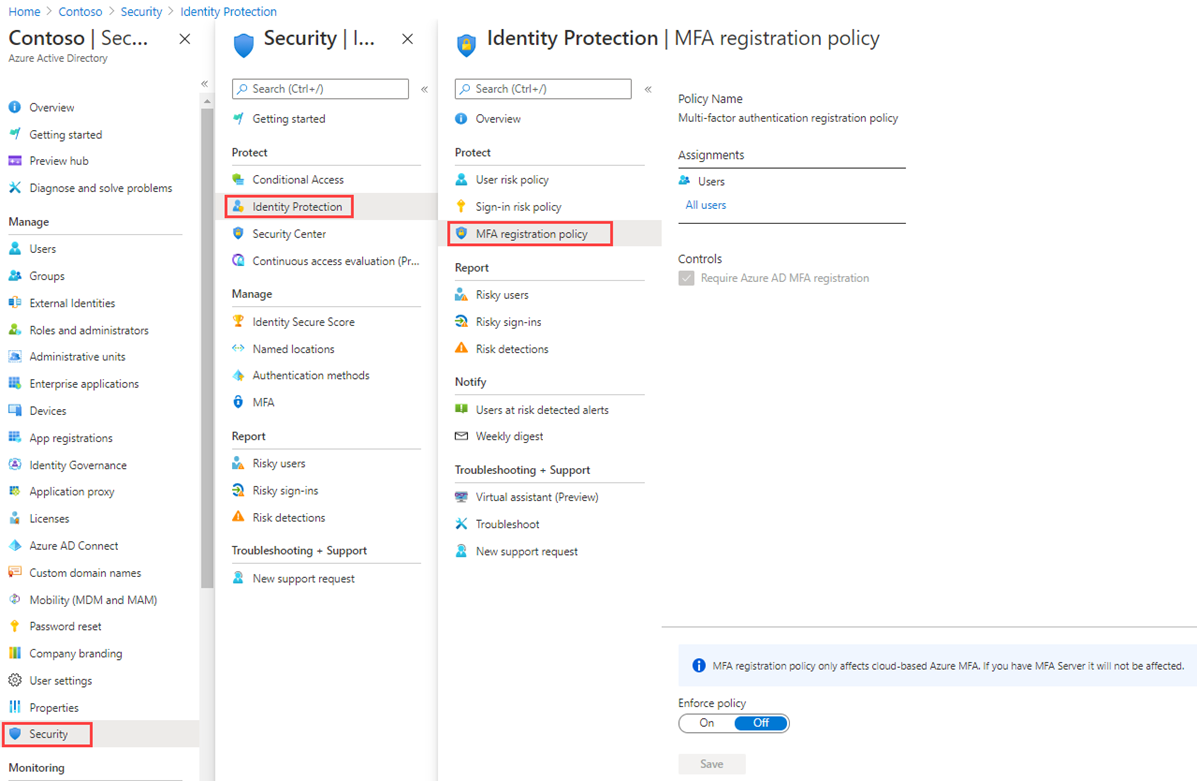
-
Under Assignments
-
Under Assignments, select All users and review the available options.
-
You can select from All users or Select individuals and groups if limiting your rollout.
-
Additionally, you can choose to exclude users from the policy.
- Under Controls, notice that the Require Microsoft Entra ID multifactor authentication registration is selected and cannot be changed.
Task 2 - Configure Microsoft Entra Identity Protection policy for MFA registration
Note: Microsoft Entra Identity Protection requires Microsoft Entra ID Premium P2 to be activated.
-
On the Microsoft Entra admin center, in the left navigation menu, expand the ID Protection, select Dashboard.
-
On the **Identity protection Dashboard, in the left navigation menu under the **Protect, select Multifactor authentication registration policy. -
Under Assignments, select All users under Users, and select a user to enforce MFA.
-
Find the field Policy enforcement in the dialog. Set the value to Enabled.
-
Select Save.

This will require the user to complete the MFA registration the next time they attempt to login.
- From a private browser, navigate to
https://login.microsoftonline.com. Enter a user name and password from the tenant. Note the additional security information requirements that the user is asked to enter.
Exercise summary
In this exercise, you configured the Microsoft Entra ID Protection MFA registration policy. This exercise showed how to ensure users register for MFA before risky activity occurs.