Lab 13 - Implement and test a conditional access policy
Login type = Microsoft 365 admin
Lab scenario
Your organization needs to be able to limit user access to its internal applications. You must deploy an Microsoft Entra conditional access policy.
Note - For Conditional Access Policies, you can turn off Security Defaults, the key points to remember are from the training. Additional information on Security defaults can be found at this link: https://docs.microsoft.com/en-us/azure/active-directory/fundamentals/concept-fundamentals-security-defaults
Estimated time: 20 minutes
Exercise 1 - Set a conditional access policy to block DebraB from accessing Sway
Task 1 - Confirm DebraB has access to Sway
-
Launch a new InPrivate browser window.
-
Connect to to Office at
https://www.office.com. -
When prompted, log in as DebraB:
| Setting | Value |
|---|---|
| Username | DebraB@<your lab domain>.onmicrosoft.com |
| Password | Enter the provided password |
-
Bypass the welcome and introduction screens.
-
Open the Apps page, then then select on the Sway icon to see that it loads correctly.
-
Log out of Office and close your browser session.
Task 2 - Create a conditional access policy
Microsoft Entra conditional access is an advanced feature of Microsoft Entra ID that allows you to specify detailed policies that control who can access your resources. Using Conditional Access, you can protect your applications by limiting users’ access based on things like groups, device type, location, and role.
-
Sign in to Microsoft Entra admin center at
https://entra.microsoft.comusing a Global Administrator account.Note: You may be prompted to complete Multi-Factor Authentication (MFA) during sign-in. Follow the prompts to configure or verify your authentication method before continuing.
-
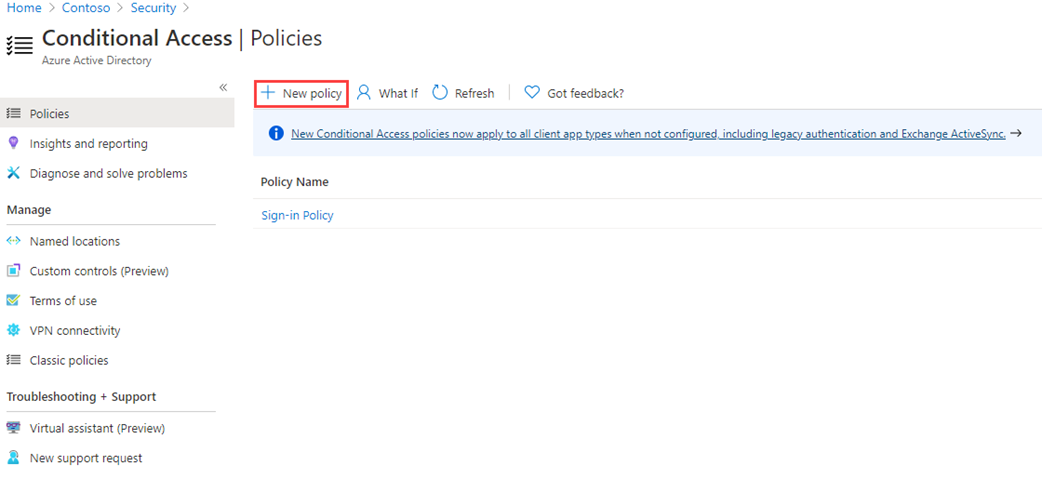
In the left navigation, under Entra ID, select Conditional access.
-
On the Overview, select + Create new policy.
-
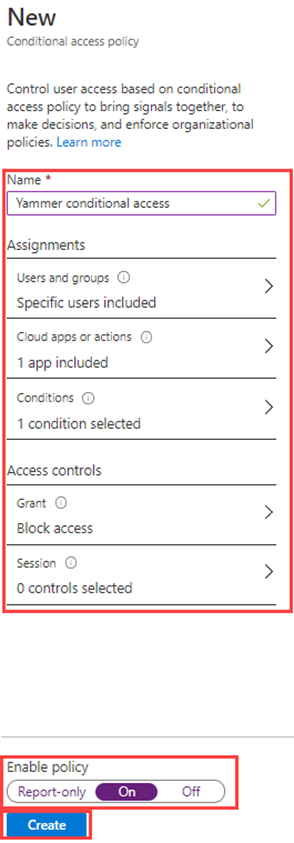
In the Name box, enter Block Sway for DebraB.
Note: Using this naming to help you quickly recognize the policy and its function.
-
Under Assignments, select 0 users or agents(Preview) selected.
-
On the Include tab, select Select users and groups, and then mark Users and groups check box.
-
In the Select users and groups pane, select DebraB account and then select Select.
-
In the Target resources, select No target resource selected.
-
Verify Resources (formerly cloud apps) is selected and then select Select resources, then in the Select specific resources select None.
-
In the Resources pane, search for Sway and select Sway and then select Select.
-
Under Access controls, within the Grant section, select 0 controls selected.
-
In the Grant pane, select Block access and then select Select.
Note: This policy is being configure for the exercise only and is being used to quickly demonstrate a conditional access policy.
-
Under Enable policy, select On, and then select Create.
Task 3 - Test the conditional access policy
You should test your conditional access policies to ensure they working as expected.
-
Open a new InPrivate browser tab, then go to Microsoft Sway at
https://sway.cloud.microsoft.When prompted, sign in as DebraB:
Setting Value Username DebraB@<your lab domain>.onmicrosoft.comPassword Enter the provided password -
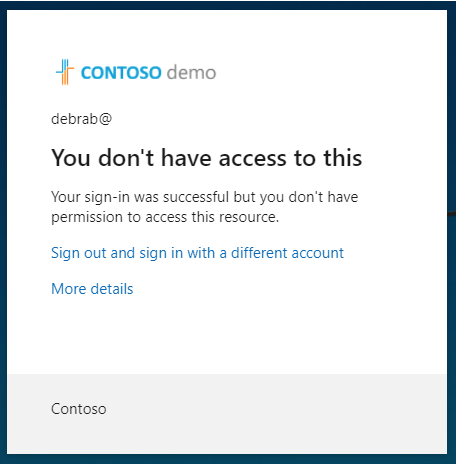
Verify you are prevented from accessing Microsoft Sway.
-
If you are signed in, close the tab, wait 1 minute, and then retry.
Note: If you are auto-logged into Sway as DebraB, then you will need to manually log out. Your credentials / access were cached. Once you log out and sign-in, your Sway session should deny access.
-
Close the tab and return to Conditional Access.
-
In the left navigation, select Policies to view the list of Conditional Access policies.
-
Select the Block Sway for DebraB policy.
-
Under Enable policy, select Off and then select Save.
Exercise summary
In this exercise, you created a Conditional Access policy that blocks a user from a specific cloud app and validated the block. This exercise showed how policies enforce app-level access decisions.
Exercise 2 - Test conditional access policies with “What if”
Task - Use What if to test conditional access policies
-
Open the Microsoft Entra admin center.
-
In the left navigation, under Entra ID, select Conditional access.
-
In the navigation pane, select Policies.
-
Select What if from the top menu.
-
On the What if page, under Identity, verify Select identity type is set to Users.
-
Under User, select Edit user, then select DebraB.
-
Under Target resource, verify Select target type is set to Cloud apps.
-
Under Cloud apps, select + Select cloud app, then select Sway.
-
Under Sign-in conditions, select Device platform, then select Windows.
-
Select Client app, then select Browser.
-
Select What if. Review the results at the bottom of the page under Policies that will apply and Policies that will not apply.
This report allows you to test the effectiveness of Conditional Access policies before enabling them.
Exercise summary
In this exercise, you used the What If tool to model how a Conditional Access policy would apply to a sign-in. This exercise showed how to validate policy impact before enabling it for users.
Exercise 3 - Configure sign in frequency controls using a conditional access policy
Task - Use the Microsoft Entra admin center to configure conditional access
As part of your company’s larger security configuration, you must test a conditional access policy that can be used to control sign in frequency
-
Open the Microsoft Entra admin center.
-
In the left navigation, under Entra ID, select Conditional access.
-
On the Overview, select + Create new policy.
-
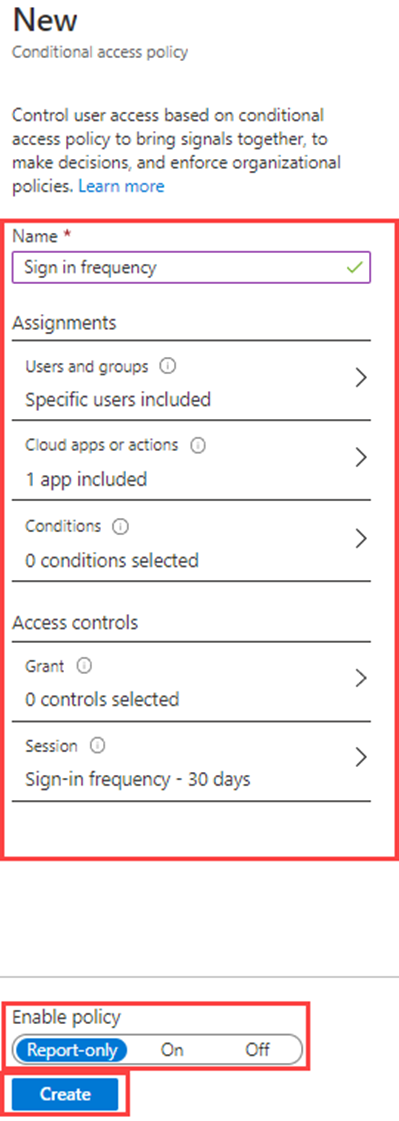
In the Name box, enter Sign in frequency.
-
Under Assignments, select 0 users or agents(Preview) selected.
-
On the Include tab, mark Select users and groups, then select the Users and groups check box.
-
In the Select users and groups pane, select Grady Archie account and then select Select.
-
Select Target Resources - No target resources selected.
-
Within the Include make sure Select resources is selected, then in the Select specific resources select None.
-
In the Resources pane, search for Office 365, then select it.
-
Under Access controls, in the Session section, select 0 controls selected.
-
In the Session pane, select Sign-in frequency.
-
In the value box, enter 30.
-
Select the units dropdown, then select Days.
-
Select Select.
-
Under Enable policy, select Report-only, and then select Create.
Note: Report-only mode is a new Conditional Access policy state that allows administrators to evaluate the impact of Conditional Access policies before enabling them in their environment. With the release of report-only mode:
- Conditional Access policies can be enabled in report-only mode.
- During sign-in, policies in report-only mode are evaluated but not enforced.
- Results are logged in the Conditional Access and Report-only tabs of the Sign-in log details.
- Customers with an Azure Monitor subscription can monitor the impact of their Conditional Access policies using the Conditional Access insights workbook.
Exercise summary
In this exercise, you configured session controls to require users to reauthenticate at a defined frequency, in report-only mode. This exercise showed how session controls reduce risk for long-lived sessions.