Learning Path 5 - Lab 1 - Exercise 1 - Configure your Microsoft Sentinel environment
Lab scenario
You are a Security Operations Analyst working at a company that is implementing Microsoft Sentinel. You are responsible for setting up the Microsoft Sentinel environment to meet the company requirement to minimize cost, meet compliance regulations, and provide the most manageable environment for your security team to perform their daily job responsibilities.
Note: An interactive lab simulation is available that allows you to click through this lab at your own pace. You may find slight differences between the interactive simulation and the hosted lab, but the core concepts and ideas being demonstrated are the same.
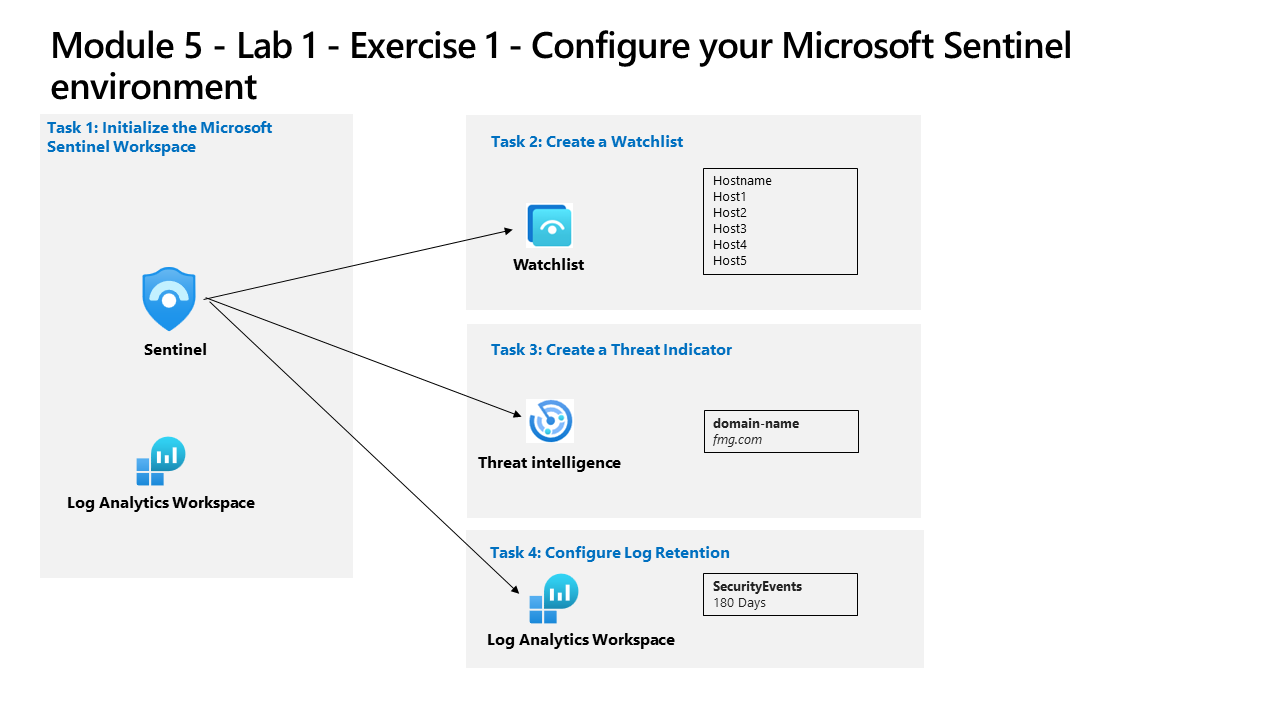
Task 1: Initialize the Microsoft Sentinel Workspace
In this task, you will create a Microsoft Sentinel workspace.
-
Log in to WIN1 virtual machine as Admin with the password: Pa55w.rd.
-
Open the Edge browser.
-
In the Edge browser, navigate to the Azure portal at https://portal.azure.com.
-
In the Sign in dialog box, copy and paste in the Tenant Email account provided by your lab hosting provider and then select Next.
-
In the Enter password dialog box, copy and paste in the Tenant Password provided by your lab hosting provider and then select Sign in.
-
In the Search bar of the Azure portal, type Sentinel, then select Microsoft Sentinel.
-
Select + Create.
-
Next, select the Log Analytics workspace you created earlier, for example uniquenameDefender and select Add. The activation could take a few minutes.
Note: If you do not see a Log Analytics workspace here, please refer to Module 3, Exercise 1, Task 2 to create one.
-
In Microsoft Sentinel you should be in the General section News & Guides and see a notice stating Microsoft Sentinel free trial activated. Press the OK button.
-
Navigate around the newly created Microsoft Sentinel workspace to become familiar with the user interface options.
Task 2: Create a Watchlist
In this task, you will create a watchlist in Microsoft Sentinel.
-
In the search box at the bottom of the Windows 10 screen, enter Notepad. Select Notepad from the results.
-
Type Hostname then enter for a new line.
-
From row 2 of the notepad, copy the following hostnames, each one in a different line:
Host1 Host2 Host3 Host4 Host5 -
From the menu select, File - Save As, Name the file HighValue.csv, change the file type to All files(.) and select Save. Hint: The file can be saved in the Documents folder.
-
Close Notepad.
-
In Microsoft Sentinel, select the Watchlist option under the Configuration area.
-
Select + New from the command bar.
-
In the Watchlist wizard, enter the following:
General setting Value Name HighValueHosts Description High Value Hosts Watchlist alias HighValueHosts -
Select, Next: Source >.
-
Select Browse for files under Upload file and browse for the HighValue.csv file you just created.
-
In the SearchKey field select Hostname.
-
Select Next: Review and Create >.
-
Review the settings you entered and select Create.
-
The screen returns to the Watchlist page.
-
Select the HighValueHosts watchlist and on the right pane, select View in logs.
Important: It could take up to ten minutes for the watchlist to appear. Please continue to with the following task and run this command on the next lab.
Note: You can now use the _GetWatchlist(‘HighValueHosts’) in your own KQL statements to access the list. The column to reference would be Hostname.
-
Close the Logs window by selecting the ‘x’ in the top-right and select OK to discard the unsaved edits.
Task 3: Create a Threat Indicator
In this task, you will create an indicator in Microsoft Sentinel.
-
In Microsoft Sentinel, select the Threat intelligence option in the Threat management area.
-
Select + Add New from the command bar.
-
Review the different indicator types available in the Types dropdown. Select the domain-name.
-
For Domain, enter a domain name, for example type contoso.com.
-
For the Threat types, select + Add and type in malicious-activity. Select Apply.
-
Enter a Description
-
For the Name, enter the same value used for the Domain.
-
Set the Valid from field to today’s date.
-
Select Apply.
-
Select the Logs option under the General area. You might want to disable the “Always show queries” option and close the Queries window to run the KQL statements.
-
Run the following KQL statement.
ThreatIntelligenceIndicatorNote: It could take up to five minutes for the indicator to appear.
-
Scroll the results to the right to see the DomainName column. You can also run the following KQL statement to just see the DomainName column.
 ThreatIntelligenceIndicator
 | project DomainName
Task 4: Configure log retention
In this task, you will change the retention period for the SecurityEvent table.
-
In Microsoft Sentinel, select the Settings option under the Configuration area.
-
Select Workspace settings.
-
In Log Analytics workspace, select the Tables option under the Settings area.
-
Search and select the table SecurityEvent, and then select the ellipsis button (…).
-
Select Manage Table.
-
Select 180 days for Total retention period. Notice that Archive period is only 150 days, since it uses 30 days from the (default) Interactive retention.
-
Select Save to apply the changes.