Bonus Lab: Build a canvas app using Copilot
WWL Tenants - Terms of Use If you are being provided with a tenant as a part of an instructor-led training delivery, please note that the tenant is made available for the purpose of supporting the hands-on labs in the instructor-led training. Tenants should not be shared or used for purposes outside of hands-on labs. The tenant used in this course is a trial tenant and cannot be used or accessed after the class is over and is not eligible for extension. Tenants must not be converted to a paid subscription. Tenants obtained as a part of this course remain the property of Microsoft Corporation and we reserve the right to obtain access and repossess at any time.
Scenario
Bellows College is an educational organization with multiple buildings on campus. Campus visitors are currently recorded in paper journals. The information is not captured consistently, and there are no means to collect and analyze data about the visits across the entire campus.
Campus administration would like to modernize their visitor registration system where access to the buildings is controlled by security personnel and all visits are required to be pre-registered and recorded by their hosts.
In this lab, you will use Copilot to create a new canvas application for logging visits.
High-level lab steps
We will follow the below outline to design the canvas app:
-
Describe the app you want to build
-
Use Copilot to modify the supporting table structure
## Prerequisites
- Completion of Module 1 Lab 0 - Validate lab environment
Exercise 1: Use Copilot to build a college visits application.
Objective: In this exercise, you will create a canvas app by connecting to an Campus visits table.
Task #1: Create the initial application
-
Navigate to
https://make.powerapps.com. -
You may need to reauthenticate - select Sign in and follow instructions, if needed.
-
Select the Dev One environment at the top right, if it is not already selected.
-
Select + Create from the left navigation of the screen. Under the Create your apps section, select Start with Copilot.
-
In the Get started with Copilot box, enter the following text.
Create an application that logs visits to a college campus. -
Select the Generate button.
Copilot will begin to build a table structure to support your application.
IMPORTANT: When using generative AI, you will not always get the same exact results. It is possible that your table will not exactly match the table created for another student.
-
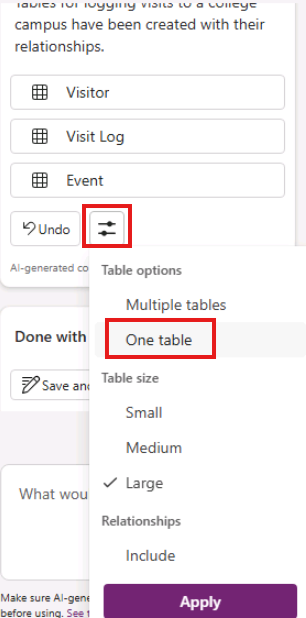
On right hand side, select table structure in Copilot window and then select Table options.
-
Select One table option and then select Apply.
To see the table structure, select the table and click on View data button
-
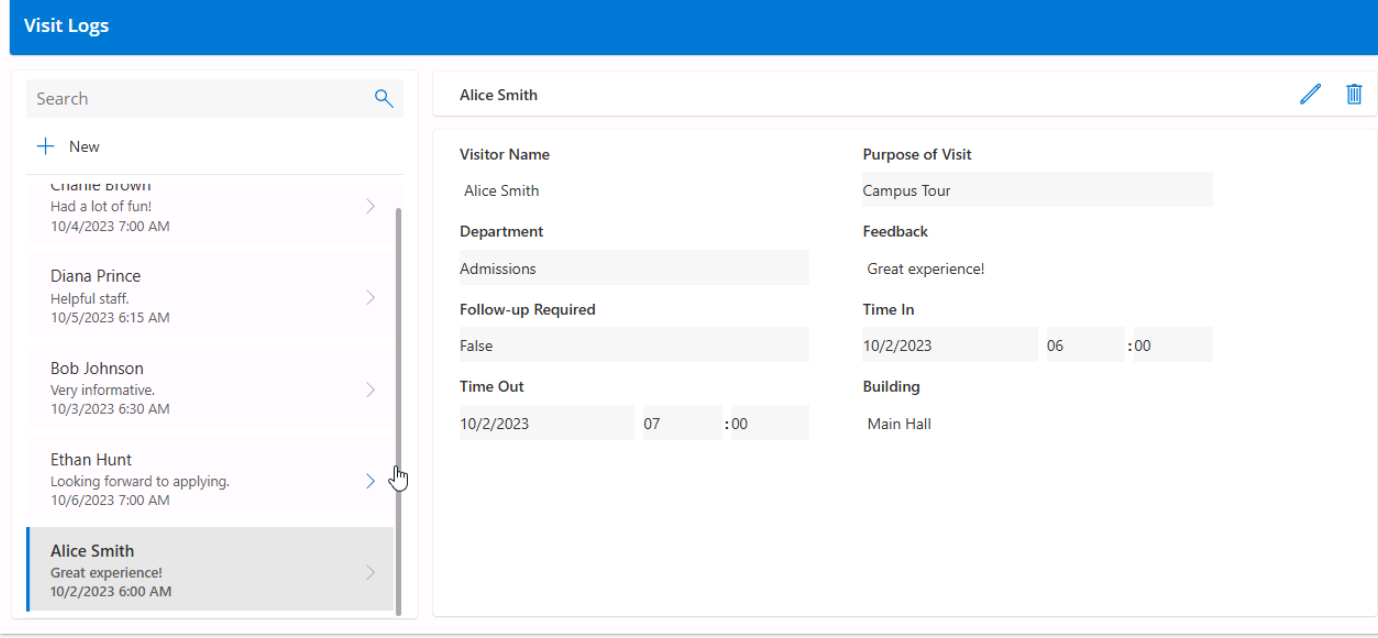
In the What would you like to do next? box, enter the text: Add two columns, Time in and Time out in the table. Both should be date and time fields.
-
Select the Go button or press Enter.
-
Scroll to the side of the table and verify that the Time in and Time out columns are created.
Since we are logging the visitors in and out time, we no longer need any other visit date fields.
- Locate the Visit Date field (or equivalent field) and in the What would you like to do next? box, enter the text: Remove the Visit Date Field (or equivalent field).
If required, update the field name to be removed from relevant table name.
-
Select the Go button.
-
Remove any additional date fields that might be present other than Time in and Time out.
Initially, a field such as a Purpose field was formatted with a text data type was added. We are going to have Copilot change it to a drop-down (Choice) menu.
-
In the What would you like to do next? enter the following text: Change the Purpose field to a choice menu with the following choices: Campus Tour, Career Fair, Meet with Professor, Student Counseling, Other.
-
Select the Go button.
-
Since we also want to capture the building number, in the What would you like to do next?, enter: Add a building column.
-
Select the Go button.
-
Once you are happy with your table, select the Save and open app button.
-
If necessary, On the Done working? screen, select Don’t ask me again, and select the Save and open app button.
Congratulations, you have used Copilot to create a new app.