Lab 3: How to build a model-driven app
WWL Tenants - Terms of Use If you are being provided with a tenant as a part of an instructor-led training delivery, please note that the tenant is made available for the purpose of supporting the hands-on labs in the instructor-led training. Tenants should not be shared or used for purposes outside of hands-on labs. The tenant used in this course is a trial tenant and cannot be used or accessed after the class is over and is not eligible for extension. Tenants must not be converted to a paid subscription. Tenants obtained as a part of this course remain the property of Microsoft Corporation and we reserve the right to obtain access and repossess at any time.
Scenario
Bellows College is an educational organization with multiple campuses and programs. Many of Bellow Colleges instructors and administrators need to attend events, and purchase items. Historically tracking these expenses has been a challenge.
Campus administration would like to modernize their expense reporting system by providing employees with a digital way to report expenses.
Throughout this course, you will build applications and perform automation to enable the Bellows College employees to manage expenses.
High-level lab steps
As part of creating the model-driven app, you will complete the following:
-
Create a new model-driven app named Employee Expense Management.
-
Edit the app navigation to reference the required tables.
-
Customize the forms and views of the required tables for the app.
We will work with the following components:
-
Views: Views allow the user to display the existing data in the form table.
-
Forms: This is where the user creates/updates new rows in the tables.
Both will be integrated to the model-driven app for a better user-experience.
Prerequisites
- Completion of Module 1 Lab 0 - Validate lab environment
Things to consider before you begin
-
What changes should we make to improve the user experience?
-
What should we include in a model-driven app based on the data model we have built?
-
What customizations can be made on the sitemap of a model-driven app?
Exercise 1: Customize Views and Forms
Objective: In this exercise, you will customize views and forms of the custom created tables that will be used in the model-driven app.
Task #1: Edit the Expense Report Form
-
If you are not already, sign in to https://make.powerapps.com
-
Select the Dev One environment at the top right if it isn’t already selected.
-
Using the navigation on the left, select Tables, and open the Expense Report table.
If you do not see the Expense report table, make sure you are in the correct environment (Step 2).
-
Under the Data experiences section, select Forms and open the Information form with Main Form type. (Important: Make sure you select the form with the form type of Main.)
IMPORTANT: Since by default all forms are named Information, make sure to verify that the form you select has a Form Type of Main and not something else. By default, the form has two fields: Name and Owner.
-
On the right side of the screen on the Properties panel, select the Display Name field, and change it to
Report Information. -
Select Table columns from the left navigation pane and add the following fields below the Owner field by dragging columns to the form or simply clicking column names:
-
Description
-
Report Purpose
-
Report due date
-
Report Total Amount
-
-
Drag the Status Reason column and drop it in the form header.
The header is the top right area of the form. You may need to collapse the Properties panel on the right side of the screen to see the field on the form.
-
Select Owner field. In the Properties panel, change the Label to
Requestor. -
Select the Save and publish button at the top right and wait for the save and publish to complete.
-
If the Edit view opened in a new browser tab or window, close it. Otherwise, select 🡠 Back at the top left of the screen. You should now be back to the Expense Report table Forms.
-
Using the breadcrumbs in the upper left (Tables > Expense Report > Forms). Select Expense Report to return to the Expense Report Table properties screen.
Task #2: Edit the Active Expense Reports view
In this task, we will modify the default Active Expense Reports view and create a new view for expense reports due today.
-
Under the Data experiences section, select Views and open your Active Expense Reports view.
-
Add the following fields to the view by either clicking or dragging and dropping the fields:
-
Report Purpose
-
Report due date
-
Report Total Amount
-
-
Select the drop-down menu on the Created On column and select Remove. The field Created On will now be removed from the view.
-
Resize the individual column widths as suits to fit the data.
-
Under Sort by … select the X to remove Report Name and instead, select Report Total Amount.
-
Select Report Total Amount to change the sort order to Larger to smaller.
-
Select the Save and publish button at the top right and wait for the publishing to complete.
Task #3: Create a new view for Reports due today
Now, we will clone the view to create a new view for reports due today.
IMPORTANT: Make sure that you do not close the Active Expense Reports view, as we will be leveraging it to create the Reports due today view.
-
Select Save As.
-
Change the Name to
Expense Reports Due Todayand select Save. -
Select Edit filters, in the Properties panel.
-
Select + Add, select Add row.
-
Select Report due date as field, then change Equals to Today as the condition in the drop-down.
-
Select the … More commands on the Status row and select Delete to delete that filter condition.
-
Select Ok to save the condition. The view is now filtered to show only records where the Report due date is today.
-
Add the Reimbursement Amount field to the view.
-
Select the Save and publish button at the top right and wait for the publishing to complete.
Exercise 2: Create the model-driven app
Objective: In this exercise, you will create a model-driven app, customize the sitemap, and test the app.
For simplicity and time’s sake, we will not be addressing all of the Expense Report columns in this lab.
Task #1: Create the app
-
If you are not already, sign in to https://make.powerapps.com
-
Select the Dev One environment at the top right, if it is not already selected.
-
Select Solutions on the left navigation.
-
Open Expense Management Solution.
-
Select +New, select APP and then select Model-driven app.
-
Enter
Employee Expense Managementfor Name and select Create. -
After your new model-driven application loads, select the + Add page button.
-
On the Add page screen, choose Dataverse table.
-
Select the following tables:
-
Expense Report
-
Contact
-
-
After you have both tables, select Add.
-
Using the navigation icons on the left side of the screen, select Navigation.
-
On the Navigation Pane, select New Group below where it says Navigation. You may need to expand the menu on the left.
-
On the right side of the screen, in the Display options section, change the Title property to
Reports. -
Select Save and wait until the changes are saved.
-
Once the Save is complete, select the Publish button to publish your changes. Wait for the publishing to complete.
Task #2: Test the app
Start the application
- Select the Play button, the model-driven app will load in a new tab.
Create a new Contact
-
The app should open to the My Active Contacts view. If it does not, select Contacts on the left navigation.
-
Select + New from the command bar.
-
Enter First Name as
Johnand Last Name asDoe. -
Provide your personal email as Email. This will be used in a future lab, where you will receive an email.
-
Select Save & Close.
-
You should now see the created contact on the My Active Contacts view.
Create a new Expense Report
-
Select Expense Reports from the left-hand navigation (Also known as the sitemap.)
-
Select + New.
-
Enter the fields as follows:
-
Report Name:
New Test Report -
Report Purpose: select Conference
-
Report due date: Select Today’s date
-
-
Select Save & Close. This will create the new Test Report and you should be able to see it on the Active Expense Reports view.
-
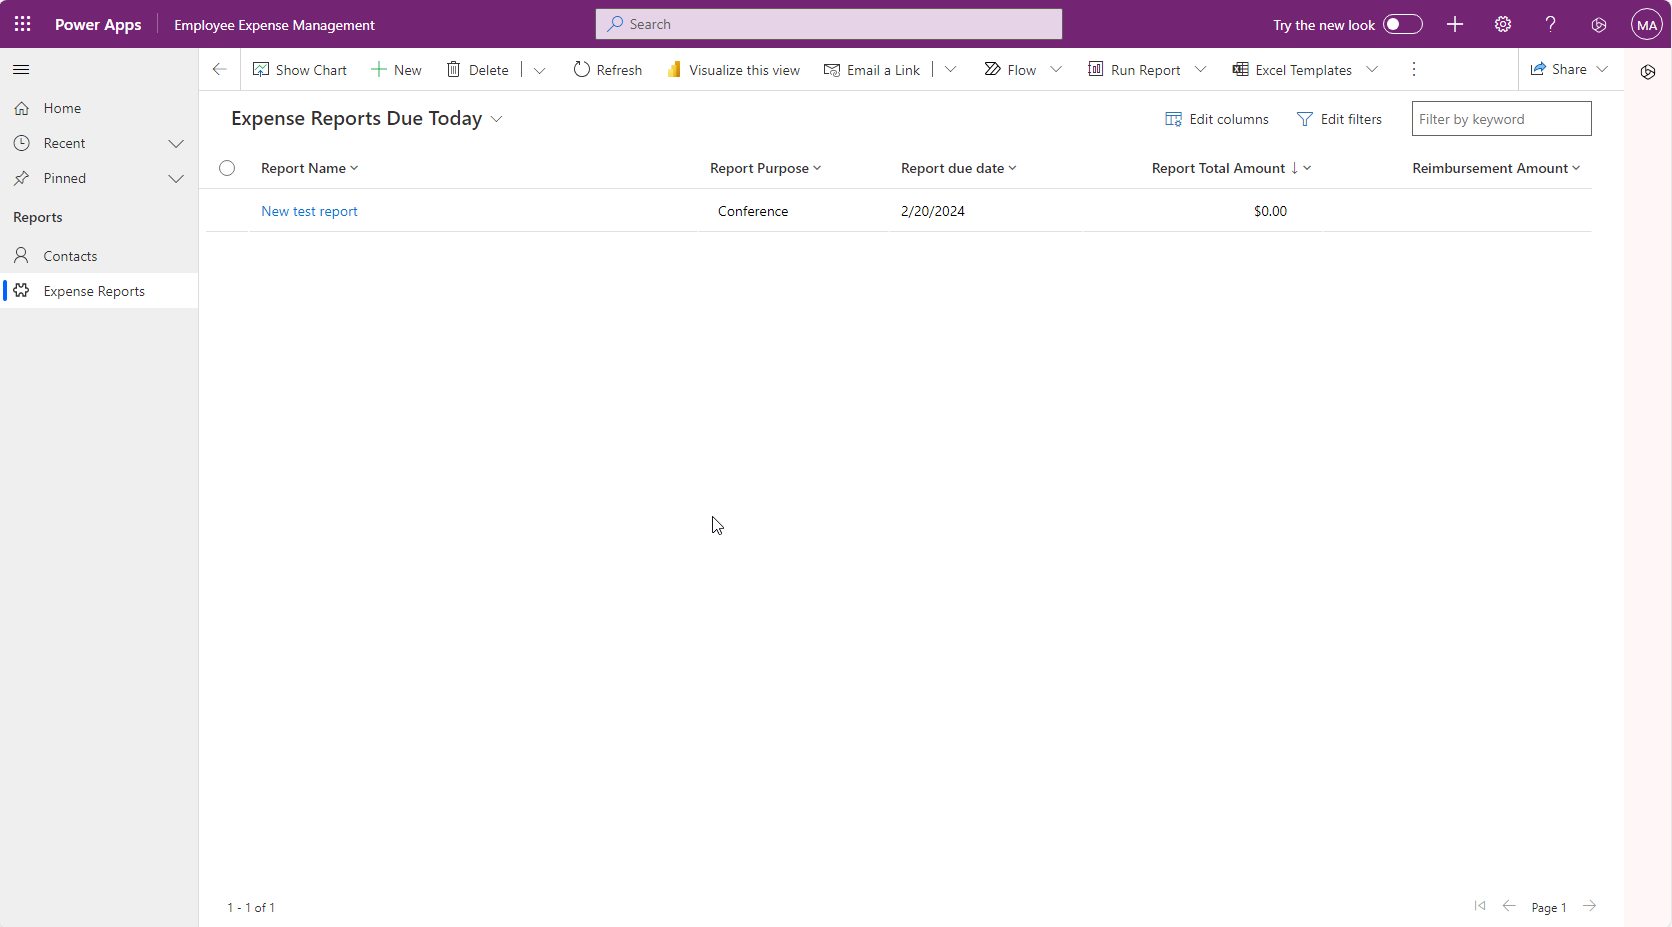
Change view to Expense Reports Due Today by using the drop-down next to Active Expense Reports.
-
You may add some more test records.
Your running model-driven app should look approximately like the following:
Congratulations! You have created and configured your first model-driven app.