Practice Lab 4 - Create a Power Automate flow
Estimated time: 30 minutes
Lab objectives
In this lab, you will learn to:
- Navigate the Power Automate maker experience
- Create an automated cloud flow triggered by a Dataverse event
- Add conditions and actions to a flow
- Send an email notification using a built-in connector
- Test and monitor a flow
Scenario
Contoso wants to automatically notify the facilities team whenever a new high-priority facilities request is submitted. You will create an automated cloud flow that triggers when a new row is added to the Facility Request table and sends an email notification if the priority is High or Urgent.
Exercise 1: Create an automated cloud flow
- In a new Browser window, navigate to https://make.powerautomate.com (or select Power Automate from the app launcher) and sign in.
- Change the Environment from Contoso (default) to Dev One
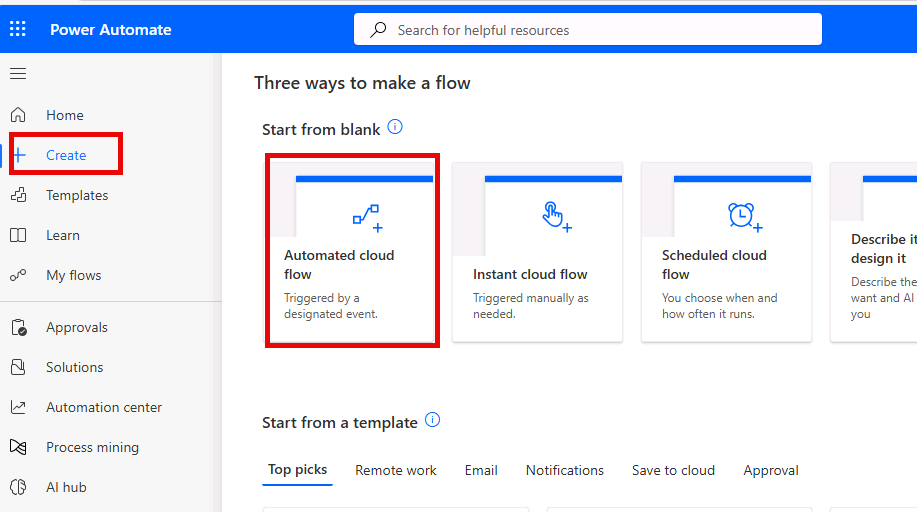
- Select + Create from the left navigation.
-
Select Automated cloud flow.
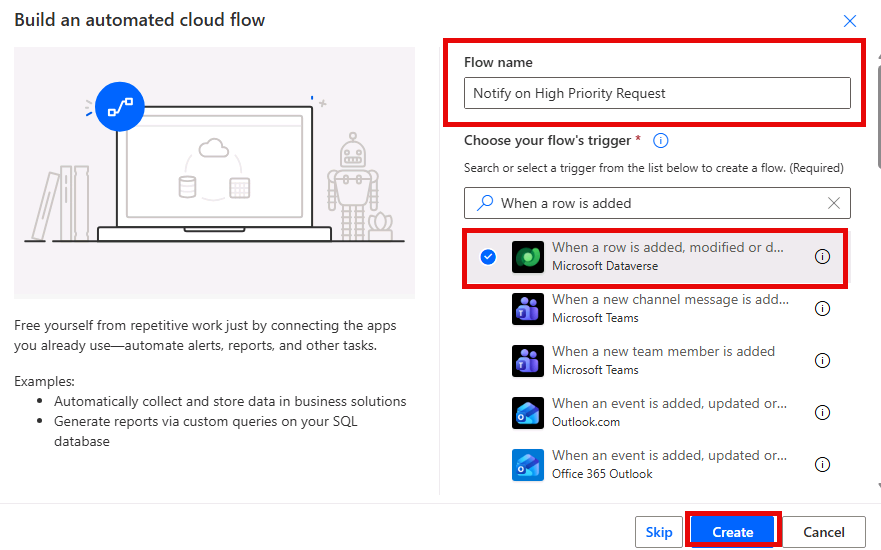
- Name the flow Notify on High Priority Request.
- In the trigger search box, search for “When a row is added” and select When a row is added, modified or deleted (Microsoft Dataverse).
-
Select Create.
Exercise 2: Configure the flow
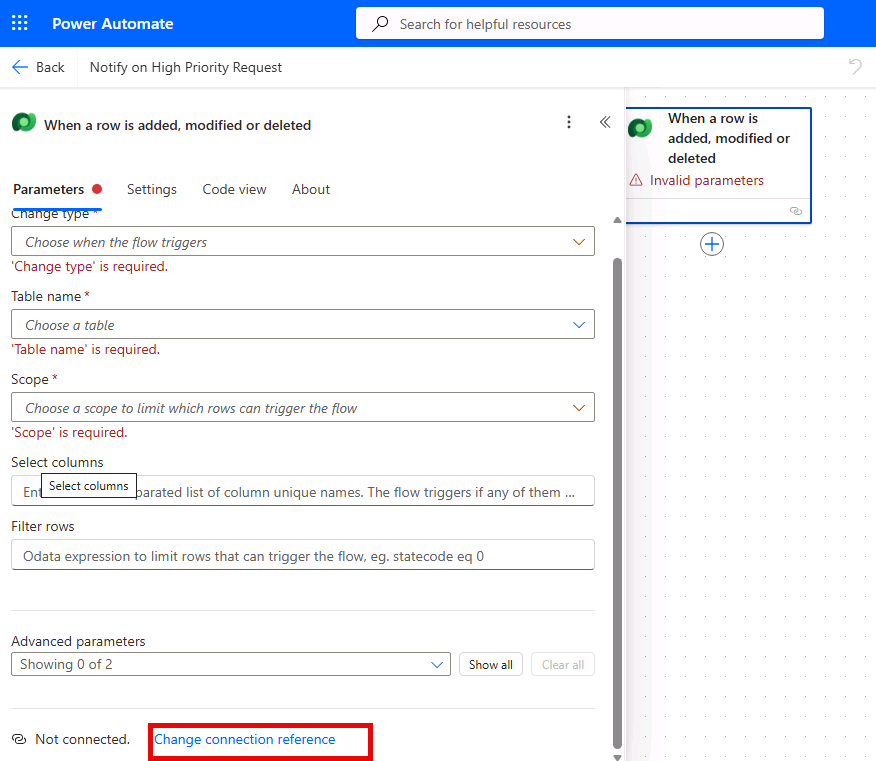
[!NOTE] It’s possible that your trigger step will say Invalid Parameters, if that is the case, it means that you need to configure a new connection. If your trigger says Invalid Parameters, follow the steps below:
- Select the when a row is added, modified, or deleted trigger.
-
In the Parameters pane, select Change connection reference.
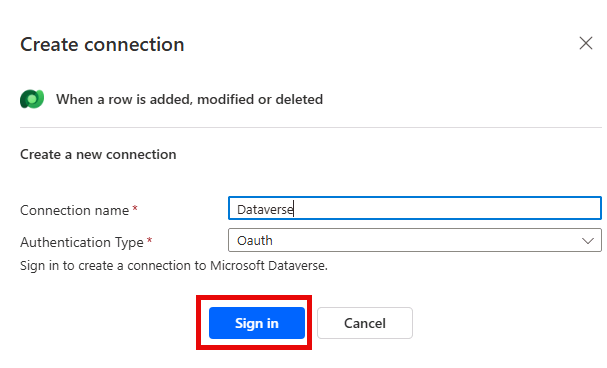
- Select Add New.
- Configure the connection as follows:
- Connection name: Dataverse
- Authentication Type: Oauth
-
Select the Sign in button.
- Select the MOD Administrator account.
Once you have configured the connection reference, we can configure the trigger.
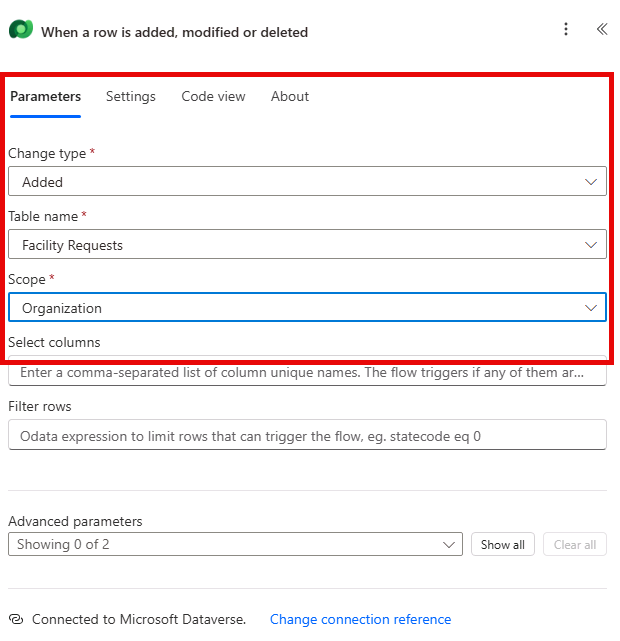
- In the trigger step, configure the following settings:
- Change type: Select Added.
- Table name: Select Facility Requests (the table you created earlier).
-
Scope: Select Organization (to trigger for all users).
-
Below the When a row is added, modified or deleted trigger, select + to add an action.
-
Search for
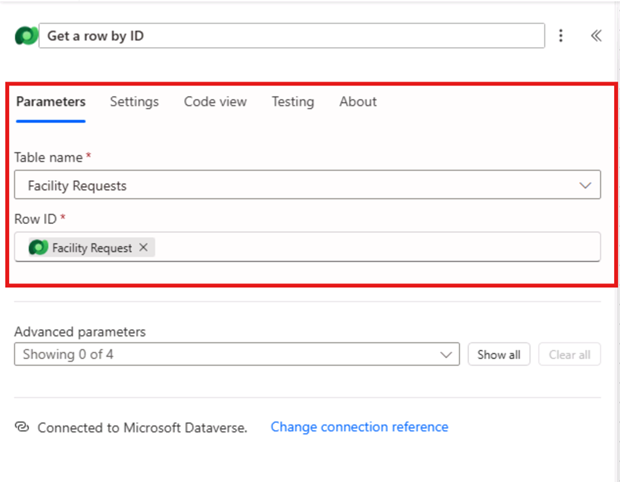
Get a row by IDand select Get a row by ID under Microsoft Dataverse. - In the Get a row by ID step, configure the following settings:
- Table name: Select Facility Requests (the table you created earlier).
- Row ID: In Dynamic content, select Facility Request.
- In the Copilot pane on the right, enter the following command:
Add a condition to see if the Priority is equal to high.
We only want to send a notification for high-priority requests. Add a condition to check the priority value.
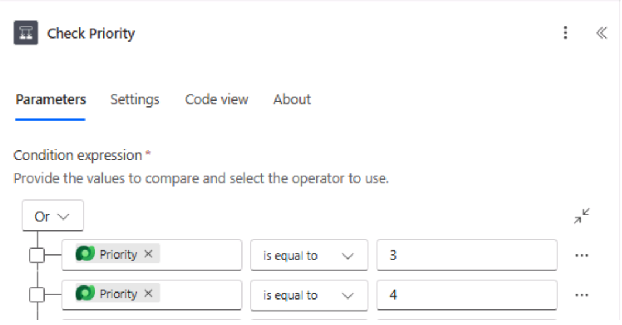
- Select the newly added condition, and configure as follows:
- In the left box, select Choose a value, and then in Dynamic content, under Get a row by ID, select Priority.
- Set the operator to is equal to.
- In the right box, enter the integer value for High. To find this value, navigate to the Priority column in the Facility Request table and check the choice values.
- Repeat the configuration for the Urgent value
-
Change the And dropdown to Or.
Your completed condition should be Priority is equal to High and Priority is equal to Urgent, using the integer values from your Priority column.
Now that we have our condition, we are going to configure the Notification email
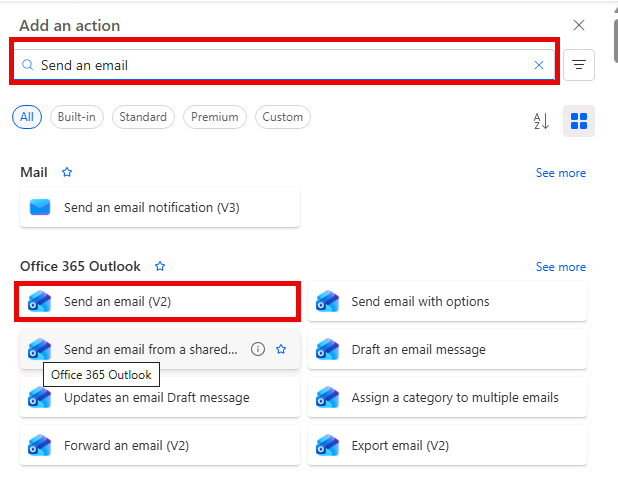
- In the If True/Yes branch of the condition, select the + button to Add an action.
-
Search for “Send an email” and select Send an email (V2) from the Office 365 Outlook connector.
- Select Sign in and select the MOD Administrator account
[!NOTE] You may need to select the Sign in button. (You may receive a browser had blocked the connection authentication popup window. If so, select the Popup icon in the address bar and choose Always allow pop-ups and redirects from https://make.powerautomate.com)
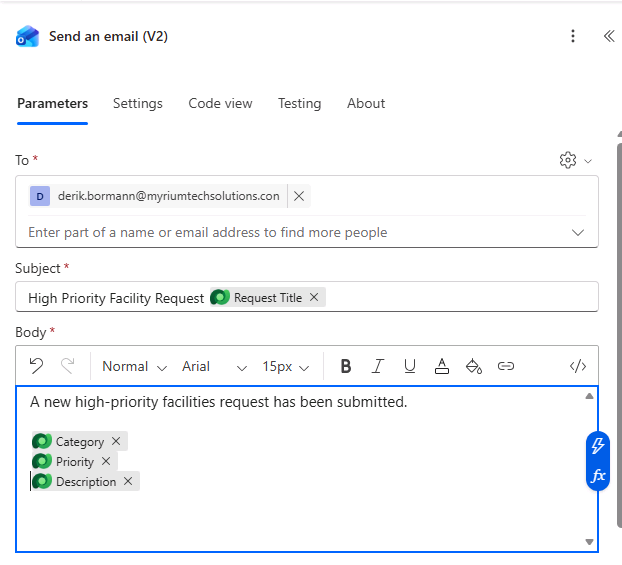
- Configure the email:
- To: Enter your own email address (for testing purposes).
- Subject: Enter
High Priority Facility Request:and insert the Request Title from Dynamic content. - Body: Enter
A new high-priority facilities request has been submitted.and add the following fields from Dynamic content under Get a row by ID on separate lines:- Category
- Priority
- Description
Your completed email should resemble the image below:
- Leave the If False/No branch empty (no action needed for non-high-priority requests).
Exercise 3: Save and test
- Select Save in the upper right.
- Test the flow:
- Open your Facility Request table (in make.powerapps.com > Tables or through the model-driven app).
- Add a new row with Priority set to High.
- Return to Power Automate, select My flows, and then in the 28-day run history section, verify the flow ran successfully.
- Check your email inbox for the notification.
- If the flow did not trigger or failed, select the run entry to see step-by-step details and identify where the error occurred. Select Resubmit to rerun the flow.