Practice Lab 1 - Create a data model
Estimated time: 30 minutes
Introduction
Welcome to the PL-900: Microsoft Power Platform Foundations hands-on lab guide. These labs are designed to give you practical, introductory experience with the core components of the Microsoft Power Platform.
Lab Scenario: Contoso facilities requests
Throughout these labs, you will work within a common business scenario: Contoso Corporation needs a simple system for employees to submit facilities and maintenance requests (such as broken equipment, room setup, or supply orders). The facilities team needs to track, prioritize, and resolve these requests.
Each lab builds a different part of this solution using a different Power Platform component. While the labs are thematically related, each lab is self-contained and can be completed independently in any order.
Prerequisites
Before starting these labs, ensure you have the following:
- A Microsoft 365 account with Power Platform access (a trial environment is acceptable)
- A Power Platform environment with Dataverse provisioned
- A modern web browser (Microsoft Edge or Google Chrome recommended)
- Maker-level permissions in your Power Platform environment
Estimated Time: 30 minutes
Lab objectives
In this lab, you will learn to:
- Navigate the Dataverse environment within the Power Apps Maker portal
- Create a custom table to store facilities request data
- Add columns of various data types to the table
- Create a simple Choice column
- Enter sample data into your new table
Scenario
Contoso needs a central place to store facilities request data. You will create a Dataverse table called Facility Request that captures the key information needed to track each request: a title, description, category, priority, status, and the date the request was submitted.
Exercise 1: Build a data model from scratch
Task 1: Create the Facility Request table
- Navigate to https://make.powerapps.com and sign in with the credentials provided (Available from the Resources tab of your lab environment. Use Administrative Username and Administrative Password).
- Ensure you are in the correct environment (Dev One) by checking the Environment picker in the upper-right corner of the screen.
- In the left navigation pane, select Tables.
- Select + New table drop down, and from the menu that appears choose Table (advanced properties)
- In the table Properties panel, set the Display name to Facility Request. (Note: The plural name will auto-populate.)
-
Select the Primary Column tab, and set the Display name to Request Title
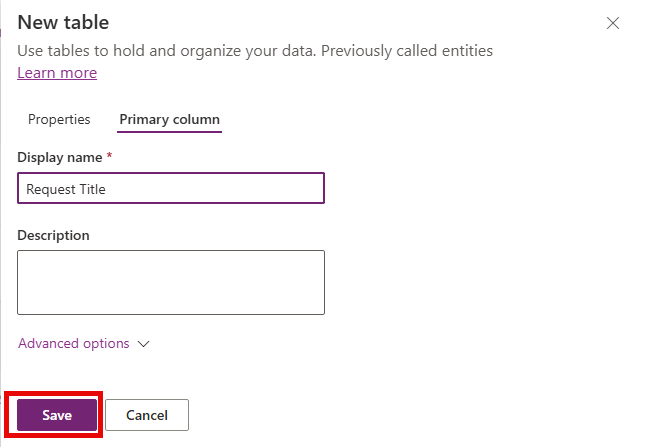
- Select the Save button to create your new table.
Task 2: Add columns to the table
Next, we will need to create some columns to store information from each request. We are going to add the columns below:
| Column Display Name | Data Type | Additional Settings |
|---|---|---|
| Description | Multiple Lines of Text | Max length: 2000 |
| Date Requested | Date Only | Behavior: User Local |
| Estimated Cost | Currency | Leave defaults |
| Category | Choice | Choices: Maintenance, Equipment, Supplies, Room Setup, Other |
| Priority | Choice | Choices: Low, Medium, High, Urgent |
| Status | Choice | Choices: New, In Progress, Completed, Cancelled (Default: New) |
- Ensure that your Facility Request table is open in the maker portal.
- Under Facility Request columns and data select the + button.
- Configure your new column as follows:
- Display name: Description
- Data Type: Multiple Lines of Text (Plain Text)
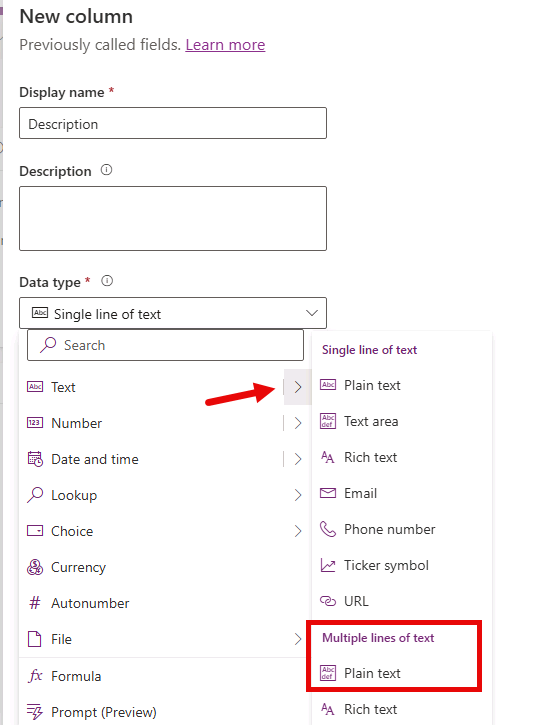
- Expand Advanced options and ensure the Maximum character count is 2000.
- Select the Save button.
- Under Facility Request columns and data select the + button again.
- Configure your new column as follows:
- Display name: Date Requested
- Data Type: Date and time
- Format: Date Only
-
Expand Advanced Options and set Time Zone adjustment to User Local.
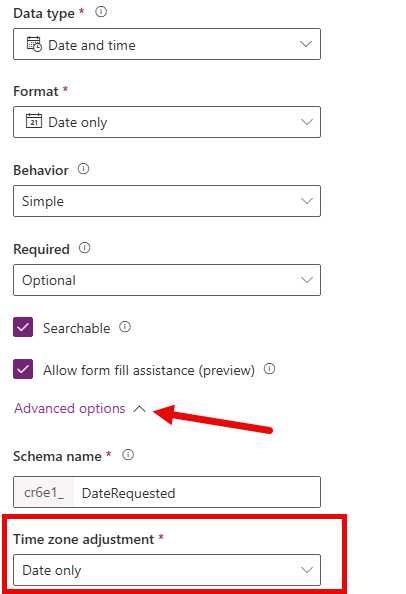
- Select the Save button.
- Under Facility Request columns and data select the + button again.
- Configure your new column as follows:
- Display name: Estimated Cost
- Data Type: Currency
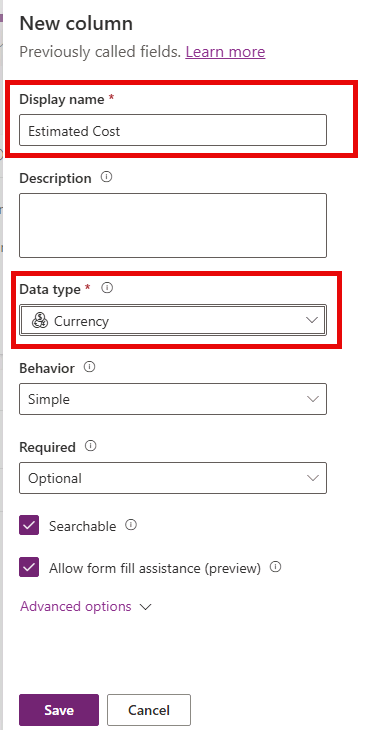
- Select the Save button.
- Under Facility Request columns and data select the + button again.
- Configure your new column as follows:
- Display name: Category
- Data Type: Choice (Choice)
- Under Sync with global choice?, select No.
- Under Choices, set the Label to Maintenance.
- Select + New Choice and set the label to Equipment.
- Repeat the last step until you have added the following labels:
- Supplies
- Room Setup
- Other
-
Set Default Choice to None
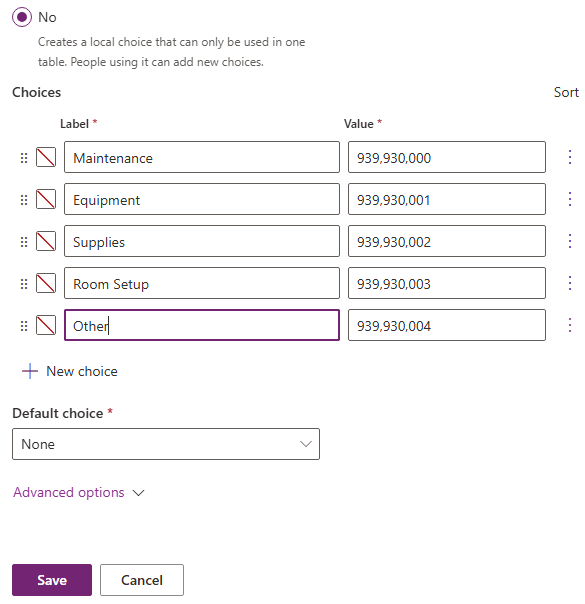
- Select the Save button.
- Repeat steps 13 – 20 to add the following choice columns with values:
| Column Display Name | Data Type | Additional Settings |
|---|---|---|
| Priority | Choice | Choices: Low, Medium, High, Urgent |
| Status | Choice | Choices: New, In Progress, Completed, Cancelled (Default: New) |
Task 3: Enter sample data
Next, we are going to add some sample data so when we build apps from the tables, there will be data to display.
- Ensure that you still have the Facility Request table editor open.
- Select Edit, then select + New row (or select the first empty row) and enter the following sample records:
| Request Title | Category | Priority | Status |
|---|---|---|---|
| Broken printer in Room 201 | Equipment | High | New |
| Order paper supplies for Floor 3 | Supplies | Low | New |
| Conference room setup for Monday | Room Setup | Medium | In Progress |
- Fill in reasonable values for the Description, Date Requested, and Estimated Cost columns for each record.
- After entering all records, verify your data appears correctly in the grid view.
Exercise 2: Build a data model with Copilot assistance
There are many ways that you can build tables in Dataverse. In addition to the manual way we just did, you can also use tools like Copilot to assist you.
[!IMPORTANT] When using Copilot your results can sometimes vary. For that reason, we are going to provide more guidance than specific step by steps to reflect the actual experience a bit more.
Task 1: Create the Room table
- In the left navigation pane, select Tables.
- Under Tables, select Start with a blank table.
-
Change the name of the table from Table1 to Room.
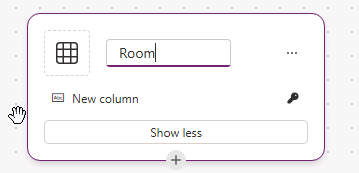
- Next, we are going to rename the New Column to Room Name.
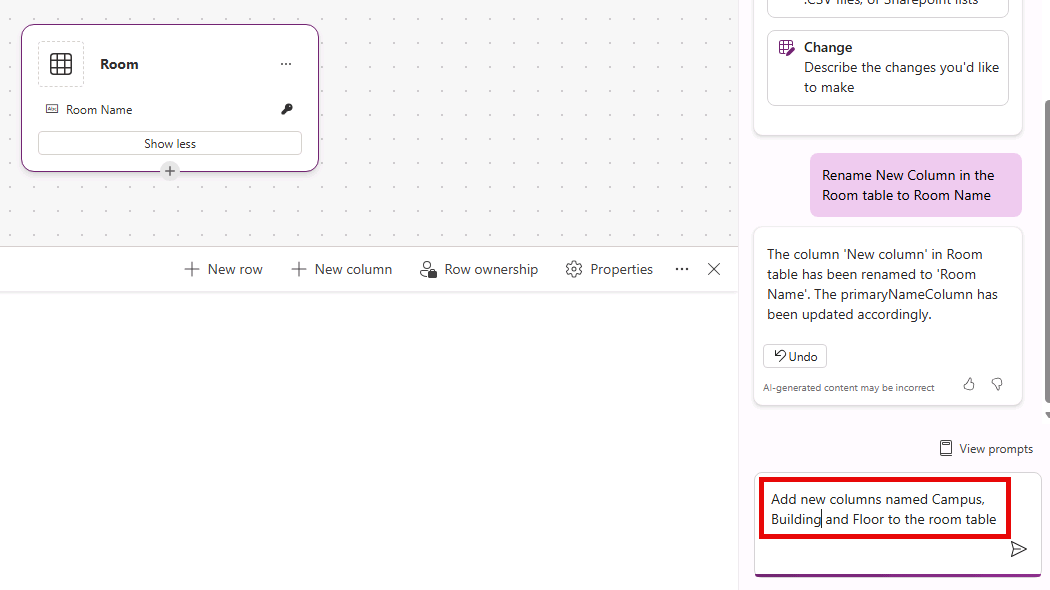
- In the Copilot pane, enter the text:
Rename New Column in the Room table to Room Name.
- In the Copilot pane, enter the text:
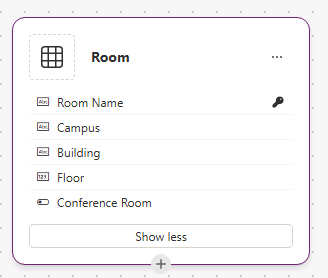
Next, we need to add some additional new columns to the table:
| Column Display Name | Data Type |
|---|---|
| Campus | Text |
| Building | Text |
| Floor | Text |
| Conference Room | Yes/No |
- In the Copilot pane, add the text columns listed above.
- Enter the text:
Add new columns named Campus, Building, and Floor to the room table.
- Enter the text:
-
In the Copilot pane, add the Conference Room Yes/No column.
- Enter the text:
Add a new yes/no column named Conference Room to the Room table
- Enter the text:
-
Your completed Room table will resemble the image below:
Now that your table is created, add the following sample data to your table:
| Room | Campus | Building | Floor | Conference Room |
|---|---|---|---|---|
| 301 A | North | HighPoint | 3 | Yes |
| 233 | South | Seirra | 2 | No |
| 401 B | East | Jacobson | 4 | Yes |
-
Select the Save and exit button to create your new Room table.
-
In the Done working? dialog, select Save and exit.
Task 2: Create a Room Lookup field in the Facility Request table.
Next, we are going to add a lookup column to the Facility Request table, that will allow you to select a room from the Rooms table.
- In the left navigation pane, select Tables.
- Select All, and in the Search field, enter
Facility. - Open the Facility Request Table
- Under Schema, select Columns
- Select + New Column, and configure as follows:
- Display Name: Room
- Data Type: Lookup
-
Related Table: Room
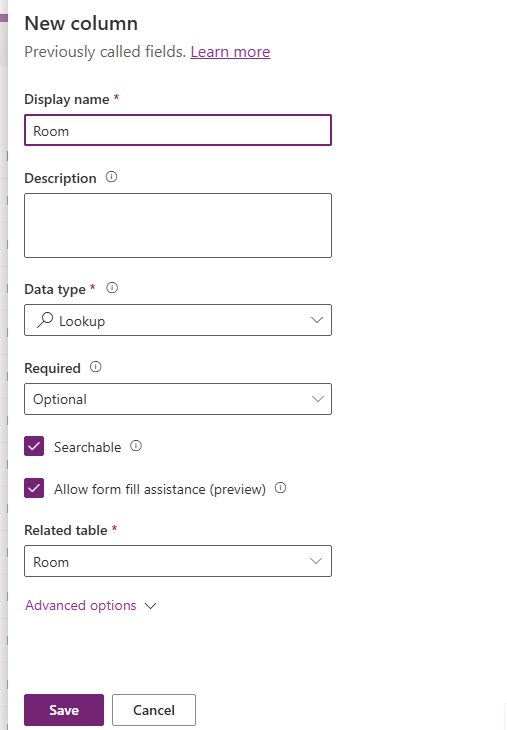
- Select the Save button.