Practice Lab 5 - Configure a model-driven app
Scenario
In this lab, you will configure a model-driven app.
What you will learn
- How to configure navigation for a model-driven app
- How to restrict views in a model-driven app
High-level lab steps
- Add groups to navigation
- Move tables in navigation
- Restrict views in the app
Prerequisites
- Must have completed Lab 2: Data model, Lab 3: Create model-driven app, and Lab 4: Configure forms and views
Detailed steps
Exercise 1 - Configure model-driven app
In this exercise, you will configure navigation and tables a model-driven app.
Task 1.1 – Configure groups
-
Navigate to the Power Apps Maker portal https://make.powerapps.com.
-
Make sure you are in the Dev One environment.
-
Select Solutions.
-
Open the Property listings solution.
-
In the Objects pane on the left, select Apps.
-
Select the Property Management app, select the Commands menu (…), and select Edit > Edit in new tab.
-
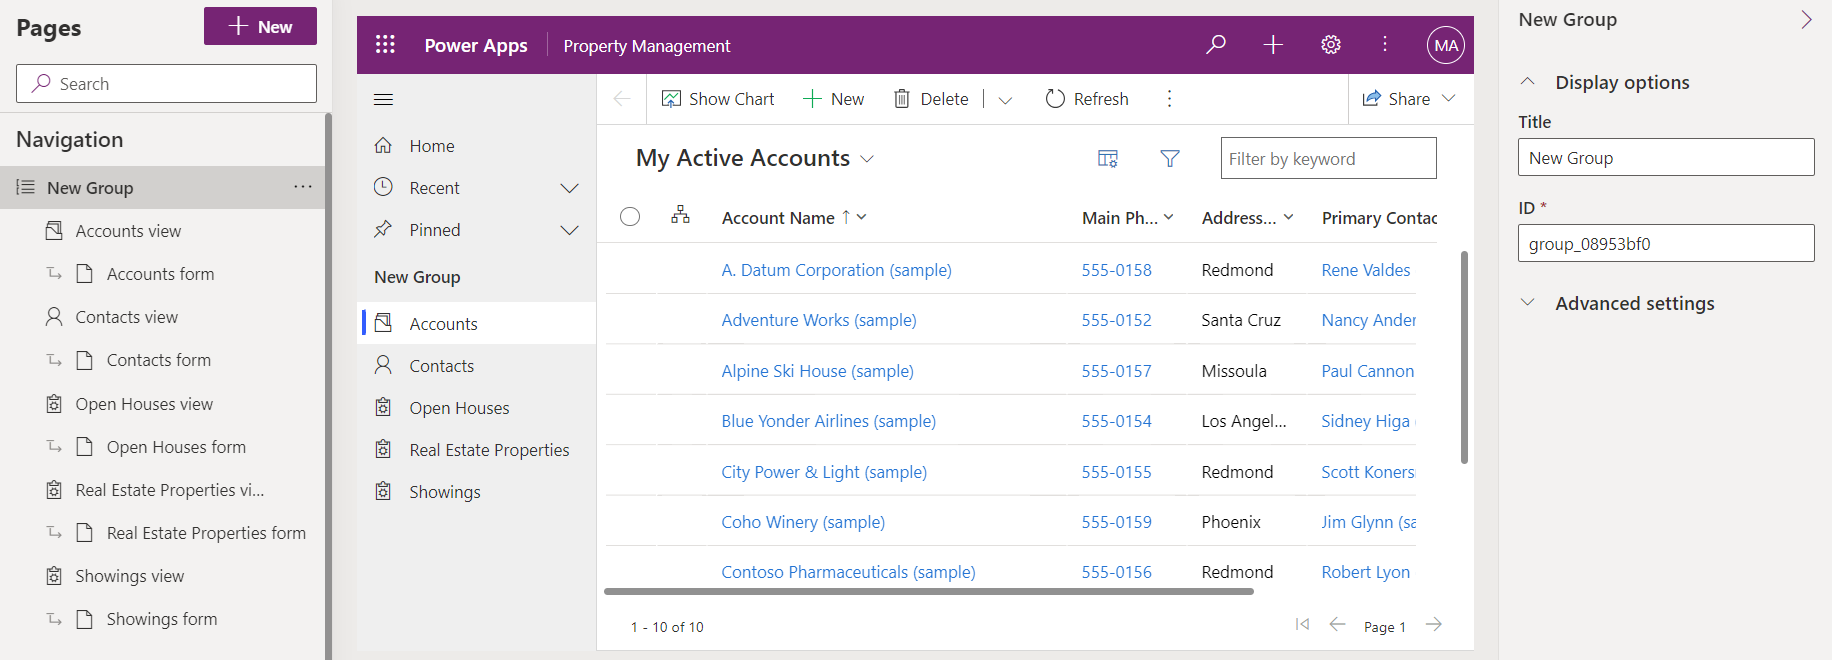
Select New Group in the Navigation pane.
-
In the properties pane, enter
Clientsfor Title. -
Select Navigation, select the Commands menu (…) and select New group.
-
In the properties pane, enter
Propertiesfor Title. -
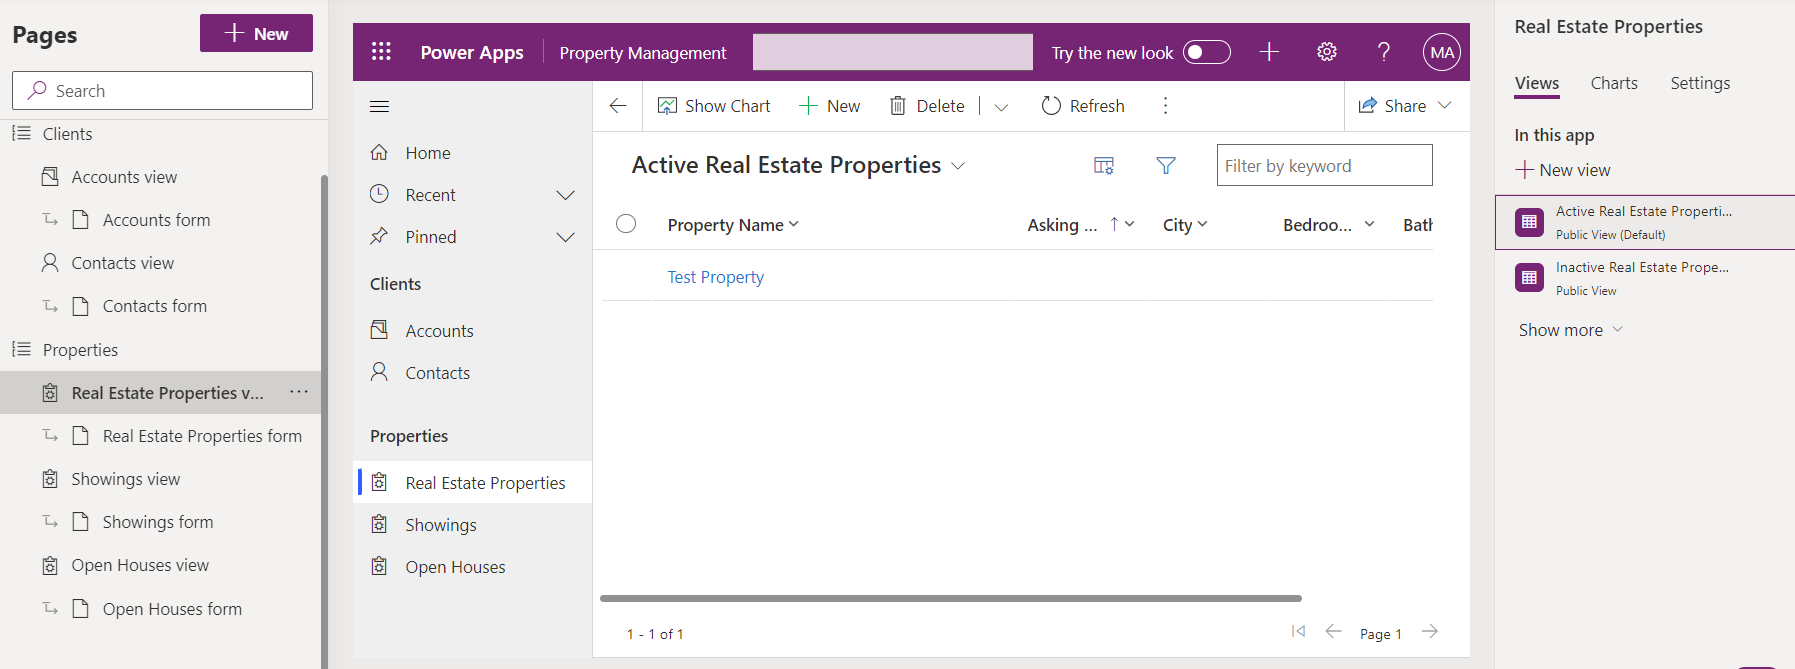
In the Navigation pane, select Showings view, select the Commands menu (…) and select Move down.
-
In the Navigation pane, select Real Estate Properties view, select the Commands menu (…) and select Move down.
-
In the Navigation pane, select Open Houses view, select the Commands menu (…) and select Move down three times.
Task 1.2 – Restrict views
-
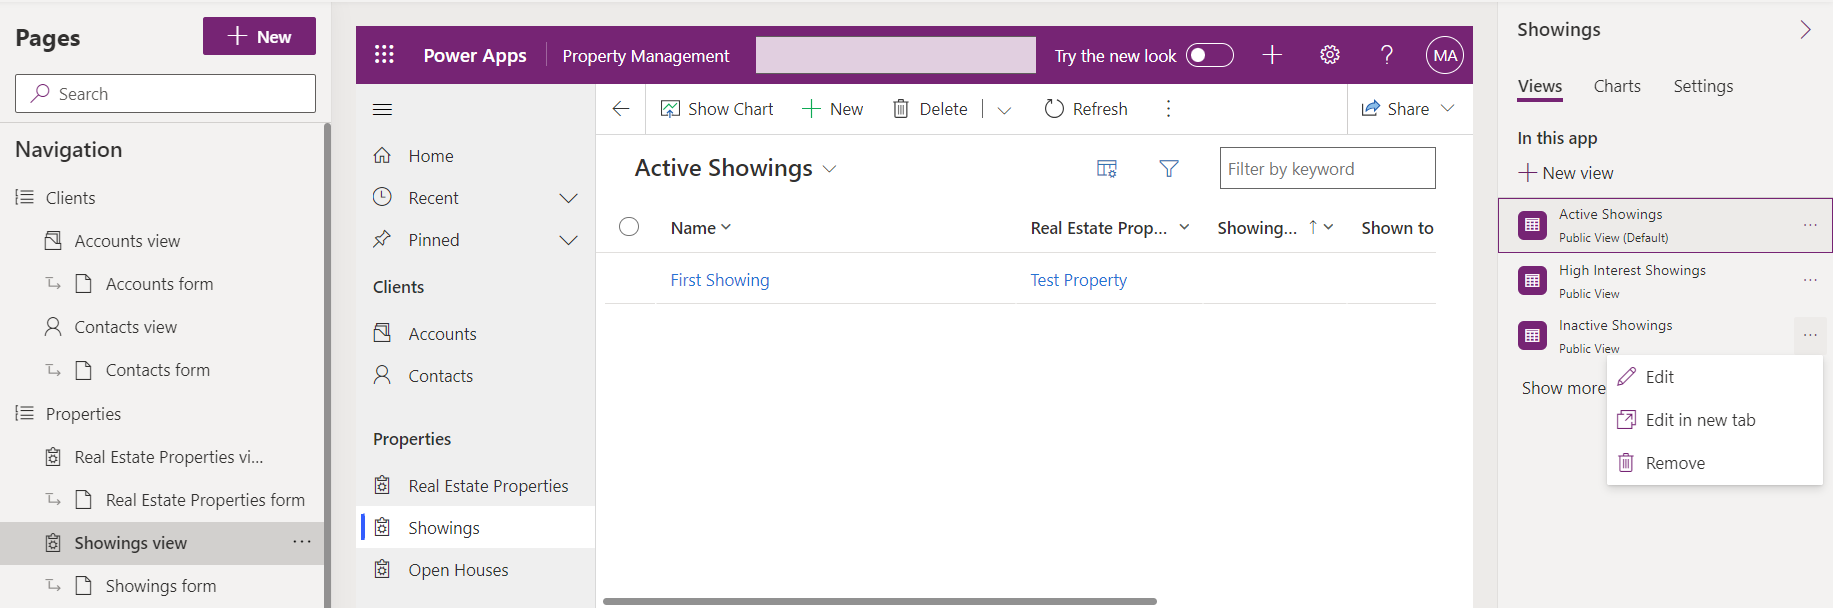
In the Navigation pane, select Showings view.
-
In the Showings pane, select the Views tab.
-
Select the Inactive Showings view, in the right-hand pane, and select the Commands menu (…) and select Remove.
-
Select Save and Publish.
-
Close the app designer and select Done.