Unattended Flows
Scenario
In this lab, you will deploy the solution to run unattended flows in a new test environment.
High-level lab Objectives
-
Configure VM for unattended execution
-
Configure a machine group
-
Create and configure an Azure Key Vault
-
Use Key Vault in automations
-
Configure and use environment variables
-
Transport the solution from dev to test
Exercise #1: Configure VM
In this exercise, you will configure the Virtual Machine.
Task #1: Configure VM
- Go to your Azure portal https://portal.azure.com/, go to Virtual machines and and open the Funding virtual machine.
- Click the Connect button.
-
Select Download RDP File. Select Keep to download the file and launch the remote desktop connection file.
-
Select Use a different account if needed, enter Funding for Username, enter the password you created in lab00, and click OK.
-
If prompted, click Yes to connect anyway and complete the setup.
-
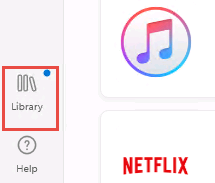
On the VM, open the Microsoft Store app and go to Library.
-
Locate Power Automate in the list and select Open.
-
Wait while any updates are installed.
-
Launch Power Automate provide your Power Platform admin login credentials and Sign in to Power Automate Desktop.
-
Go to Settings and under Machine settings select Open machine settings.
-
Select the Install app button.
-
On the installer, check the box to agree to the terms of use then select the Install button.
-
Select Launch app.
-
On the Machine settings section, select the Machine environment dropdown and select your Test environment.
-
Click Change.
-
Select the Machine group tab.
-
Click + New machine group.
-
Enter Funding for Machine group name and click Create.
-
Click on the Funding machine group you created.
-
Click Add machine.
-
Click Add machine again.
-
Click Got it.
-
You should now see the Joined machine group with one machine.
- Go to your Local computer and copy the Labs folder located in your C:\ drive.
-
Go back to the Remote desktop and open file explorer.
-
Browse to C:\ and paste the Labs folder you copied. This folder must be in the same location on both computers.
- Browse to C:\Labs\Resources\Funding manager app and launch the Woodgrove Bank Funding Manager.exe app. If prompted, download .NET and install. Then try to launch Woodgrove Bank Funding Manager.exe again.

-
The app should install and launch. Close the application.
-
Launch Microsoft Edge.
-
Click Settings and select Extensions.
- Click Open Microsoft Edge Add-ons website.
- Search for Power Automate extensions and click to open Microsoft Power Automate.
- Click Get or turn it on if already installed.
Exercise #2: Key Vault
In this exercise, you will create a Key Vault.
Task #1: Create Key Vault
-
In your Local machine, go to your Azure portal.
-
Click Subscriptions.
-
Open the subscription.
-
Select Resource providers.
-
Search for Microsoft.PowerPlatform and select it.
-
Click Register.
-
Click Home.
-
Click + Create a resource.
-
Search for key vault and select Key Vault.
-
Click Create.
-
Select Funding for Resource group, type FundingFL (Replace FL with your initials) for Key vault name and select Review + create.
-
Review the values and select Create.
-
Wait for the deployment to complete.
-
Select Go to resource.
-
Select Access controm (IAM).
-
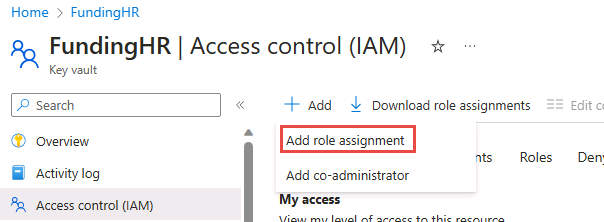
Click + Add and select Add role assignment.
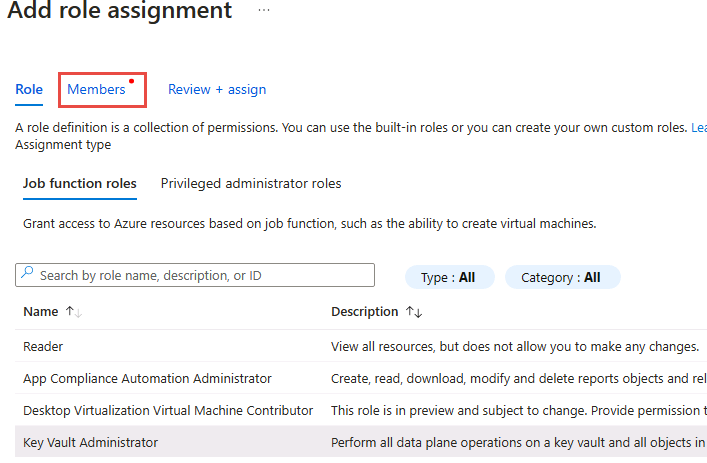
- Select Key Vault Administrator and then Members tab.
-
Click + select members
-
Select your username and then click Select.
-
Click Review + assign
-
Click Review + assign again.
-
Click + Add and select Add role assignment again.
-
Select Key Vault Secret User and then Members tab.
-
Click + select members.
-
Search for dataverse and select Dataverse.
-
Click Select.
-
Click Review + assign.
-
Click Review + assign again.
-
Select Secrets and then + Generate/Import.
- Enter FundingPassword for Name, enter pass@word1 for Value, and select Create.
Exercise #3: Environment Variables
In this exercise, will create environment variables and use them in the flows.
Task #1: Create environment variables
-
In your Local machine, navigate to https://make.powerapps.com/ and make sure you are in your Dev environment.
-
Select Solutions and open the Construction Funding solution.
-
Click + New and select More | Environment variable.
- Enter Funding Run Mode for Display name, select Text for Data type, enter Unattended for Default value, go to the Current value section, and click + New value.
-
Enter Attended and click Save.
-
Select environment variables and click to open variable you just created.
- Click on the … button of the Current value and select Remove from this solution. We are removing the value from the solution, so it won’t move to test/production.
-
Close the edit pane.
-
Click + New and select More | Environment variable again.
-
Enter Funding Password for Display name, select Secret for Data type, enter secretid for Default value, select Azure Key Vault for Secret Store, and click + New Azure Key Vault secret reference.
-
DO NOT navigate away from this page. Start a new browser window or tab and navigate to your Azure portal.
-
Click to open the FundingFL Key Vault you created. Remember the name of the Key Vault (FL will be your initials)
-
Copy the Subscription ID.
- Go back to the environment variable and paste it in the Azure subscription Id field.
- Enter Funding for Resource group name, FundingFL (FL will be your initials) for Azure Key Vault name, and FundingPassword for Secret name. These values must match what you used or you will see an error at the top of the panel.
-
Click Save again.
-
Select Environment variables and open the Funding Password variable you just created.
-
Click on the … button of the current value and select Remove from this solution.
-
Close Edit pane.
-
Select Cloud flows, select the CF Manage Inspection Process flow, and click Edit.
-
Expand the Run a flow built with Power Automate for desktop step.
-
Click on the Run Mode dropdown and select Custom Value.
-
Select the Funding Run Mode environment variable from the dynamic content pane. This will allow us to determine if the desktop flow runs attended or unattended in each environment the solution is imported into.
-
Click Save and wait for the flow to be saved.
-
Click on the back button.
-
Select Cloud flows, select the CF Manage Woodgrove Funding Process flow, and click Edit.
-
Expand the Run a flow built with Power Automate for desktop step.
-
Click on the Run Mode dropdown and select Enter custom value.
-
Select the Funding Run Mode environment variable from the dynamic content pane.
-
Click the + Insert a new step after the trigger and select Add an action.
-
Select the Perform an unbound action action from the Microsoft Dataverse connector.
- Select RetrieveEnvironmentVariableSecretValue for Action name, enter rc_FundingPassword for EnvironmentVariableName, click on the … Menu button, and select Settings.
- Turn on Secure Outputs and click Done. This ensures the value is not visible when someone views the run details after execution.
-
Expand the Run a flow built with Power Automate for desktop step again.
-
Remove the current Password value and select RetrieveEnvironmentVariableSecretValueResponse from the dynamic content pane.
-
Click on the … Menu button and select Settings.
-
Turn on Secure Inputs and click Done.
-
Click Save and wait for the flow to be saved.
Exercise #4: Export Solution
In this exercise, will export the Builder Risk Service and the Construction Funding solutions.
Task #1: Export solution
-
In your Local machine, navigate to https://make.powerapps.com/ and make sure you are in your Dev environment.
-
Select Solutions, select the Builder Risk Service solution and click Export solution.
-
Click Publish and wait for the publishing to complete.
-
Click Next.
-
Select Managed and click Export.
-
Wait for the export to complete and click Download.
-
Select the Construction Funding solution and click Export solution.
-
Click Publish and wait for the publishing to complete.
-
Click Next.
-
Select Managed and click Export.
-
Wait for the solution to be exported.
-
Click Download.
-
Click to open the Construction Funding solution.
- Select Cloud flows, select the Process Construction Funding Request flow and click Turn Off. We are doing this simply so we can use the same shared email for testing, in a real solution you would use separate mailboxes for dev/test/production.
Exercise #5: Import Solution
In this exercise, will import the Builder Risk Service and Construction Funding solutions and test the flows.
Task #1: Import solution
-
Select your Test environment.
-
Select Solution and click Import solution.
-
Click Browse.
-
Select the BuilderRiskService_1_0_0_1_managed.zip solution you exported and click Open.
-
Click Next.
-
Click Import and wait for the import to complete.
-
Click Import solution again.
-
Click Browse.
-
Select the ConstructionFunding_1_0_0_1_managed.zip solution you exported and click Open.
-
Click Next.
-
Click Next again.
-
Click on the drop down for the Builder Risk Service connection and select + New connection.
-
DO NOT navigate away from this page. Start a new browser window or tab and navigate to https://adatumbuilderrisktest.azurewebsites.net/
-
Click on the API Key link.
-
Copy the API Key.
-
Go back to the Builder Risk Service connection, paste the API Key you copied and click Create.
-
Close the connections browser tab or window.
-
Click Refresh.
-
Click on the Office 365 connection dropdown and select + New connection.
-
Click Create.
-
Select your credentials.
-
Close the connections browser tab or window.
-
Click Refresh.
-
Click on the Desktop flows connection dropdown and select + New connection.
-
Enter Funding for Domain and username, enter the password you created in lab00, and click Create.
-
Close the connections browser tab or window.
-
Click Refresh.
-
Click on the Dataverse connection dropdown and select + New connection.
-
Click Create.
-
Select your credentials.
-
Close the connections browser tab or window.
-
Click Refresh.
-
Click Next.
-
DO NOT navigate away from this page. Start a new browser window or tab and navigate to your Azure portal.
-
Click to open the Key Vault.
- Copy the Subscription ID. For this lab you will use the same subscription you used for the Dev. Usually, you would create a different subscription for Dev, Test, and Production.
- Paste the text below in the Funding Password field. Replace [SubscriptionID] with subscription id you copied and replace [FL] with your initials.
/subscriptions/[SubscriptionID]/resourceGroups/Funding/providers/Microsoft.KeyVault/vaults/Funding[FL]/secrets/FundingPassword
- Click Import and wait for the import to complete.
- Import should succeed. Note: If it takes more than five minutes to import, check History to see if it failed. If you didn’t have the correct Key Vault information this can occur.
-
Publish all customizations and wait for the publishing to complete.
-
Click to open the Construction Funding solution.
-
Select Cloud flows and open the Create Test Data flow.
-
Click Run.
-
Click Run flow.
-
Click Done.
-
Wait for the run to complete.
-
Select the Process Construction Funding Request cloud flow and turn it on if it not already turned on.
Task #2: Test
- Go to your remote desktop and Sign out. Make sure you choose sign out and not disconnect as unattended flows won’t run when you are signed in.
-
Go to the resources folder of the lab and open the Test folder.
-
You will attach the Attachment AI Test file when you send the email.
-
Send an email to Funding@yourdomain.onmicrosoft.com make sure the subject of the email is MC3747 and you attach the Attachment AI Test.pdf file.
-
Navigate to https://make.powerapps.com/ and make sure you have the Test environment selected.
-
Select Solutions and click to open the Construction Funding solution.
-
Select Cloud flows and open the Process Construction Funding Request flow.
-
Review the 28-day run history.
-
You should see a flow run with a Status of Running. Select the timestamp to open the flow run details.
-
Wait for the flow run to complete.
-
The flow run should succeed, and you should get an email back with the Subject line Draw approved.


