Practice Lab 11 – Azure Functions
Scenario
In this lab you will create an Azure Function that will handle routing inspections. Every morning people call in to request inspections on their permits. They must call before 9:30 AM and once that period ends all the inspections for the day must be assigned and sequenced for the inspectors. To accomplish this, you will build an Azure Function that runs on a schedule, queries pending inspections and assigns them to inspectors. Given the limited time to complete the lab, we’ve simplified the routing and sequencing decisions.
High-level lab steps
As part of building the Azure Function, you will complete the following:
- Configure an application user for the app along with a security role
- Build the function logic to route the requests
- Deploy the Azure Function
Things to consider before you begin
- Could we have used Dynamics 365 Universal Resource Scheduling instead of custom code?
- Could we have used Power Automate instead of custom code?
- Remember to continue working in your DEVELOPMENT environment. We’ll move everything to production soon.
Starter solution
A starter solution file for this lab can be found in the C:\Labfiles\L11\Starter folder.
Completed solution
Completed solution files for this lab can be found in the C:\Labfiles\L11\Completed folder.
Resources
Complete source code files for this lab can be found in the C:\Labfiles\L11\Resources folder.
Exercise 1: Configure an Azure AD application user and add the user to Dataverse
Objective: In this exercise, you will configure an application user that will be used to connect the Azure Function back to Microsoft Dataverse.
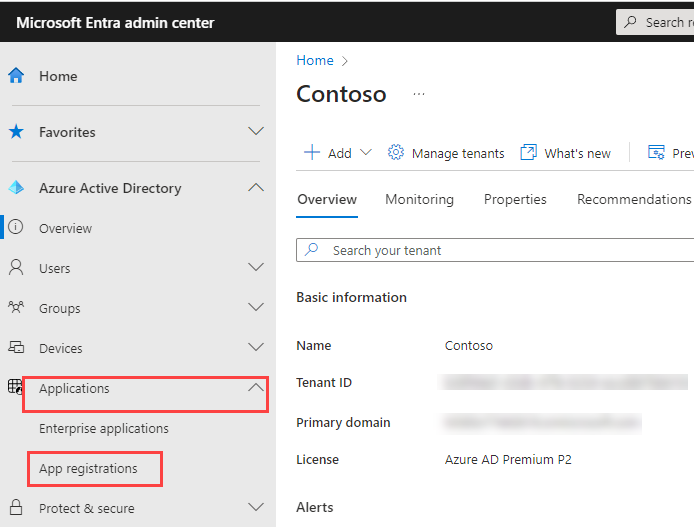
Task 1.1: Register Azure AD Application
- Navigate to Azure Active Directory.
-
Sign in to the Azure Active Directory portal.
Note: You must be logged in with an organization account in the same tenant as your Microsoft Dataverse Environment. This does NOT have to be the account for your Azure subscription.
-
Expand Applications and select App registrations.
-
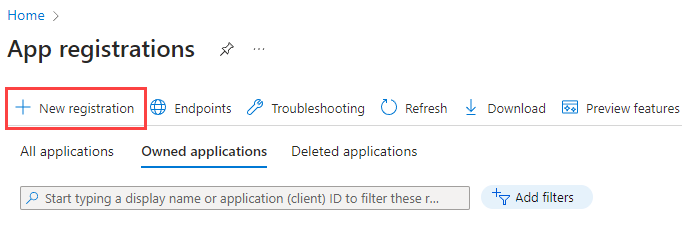
Select + New registration.
-
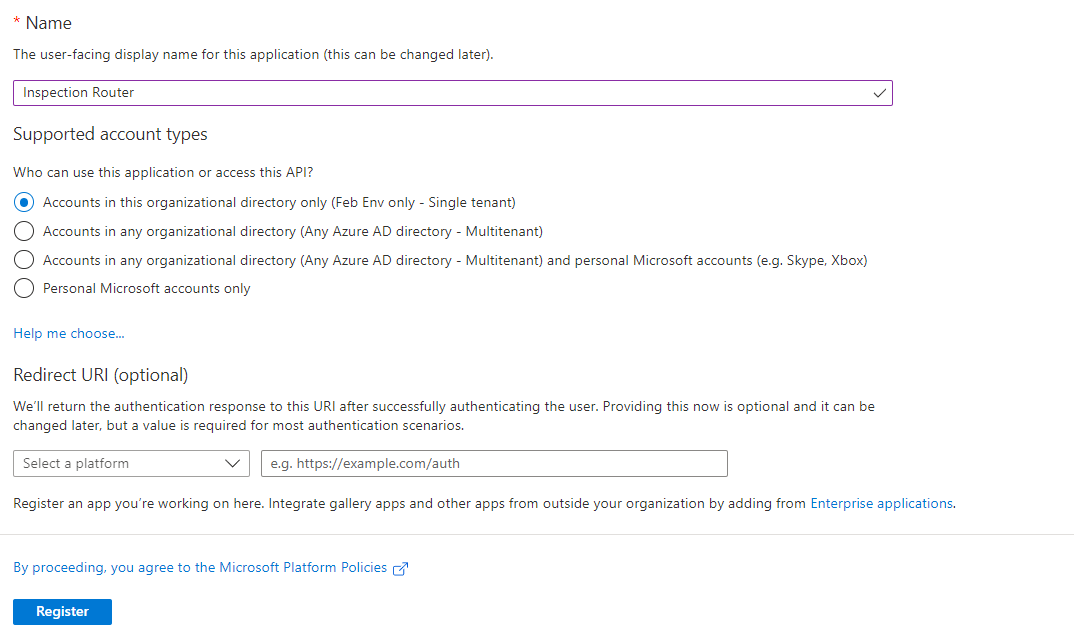
Enter
Inspection Routerfor Name -
Select Accounts in this organizational directory only for Supported account types.
-
Select Register.
Task 1.2: Enable OAuth 2.0
-
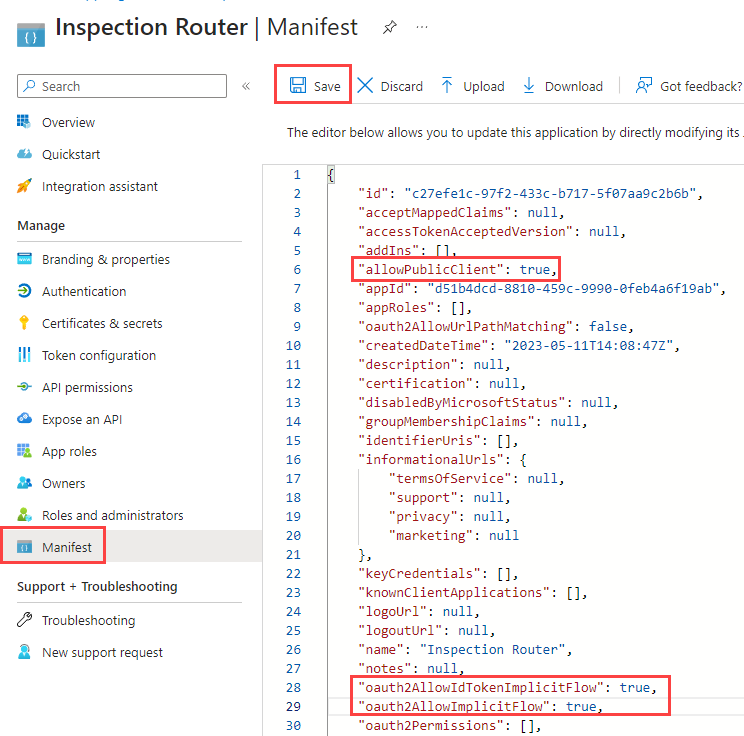
Select Manifest.
-
Set allowPublicClient to true.
-
Set oauth2AllowIdTokenImplicitFlow to true.
-
Set oauth2AllowImplicitFlow to true.
-
Select Save.
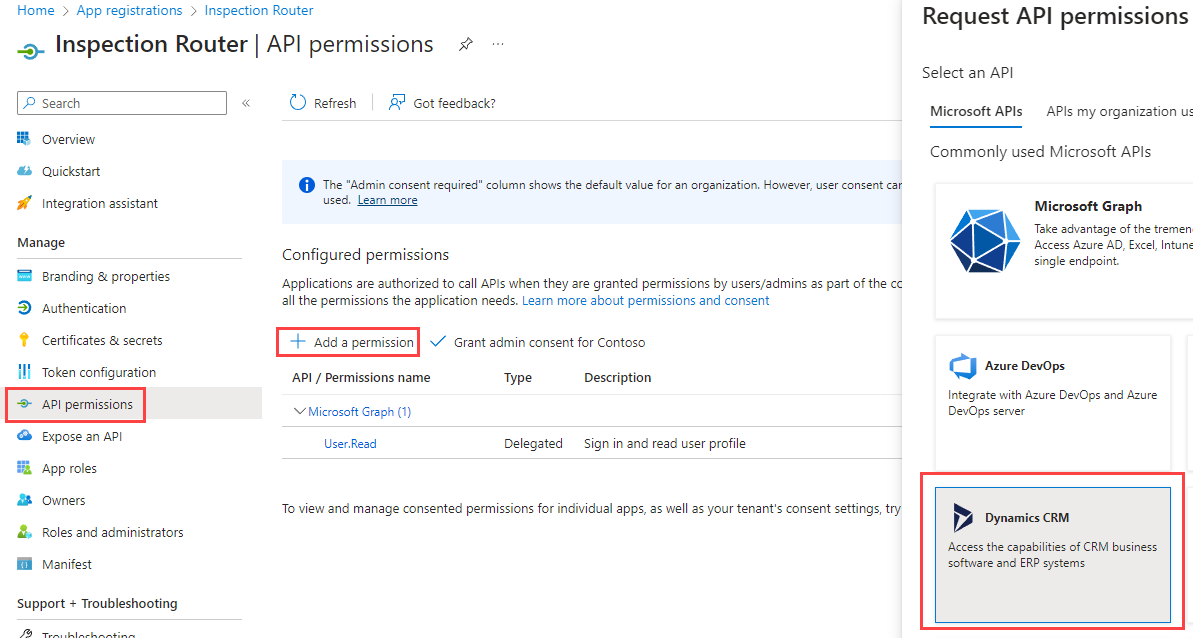
Task 1.3: API Permissions
-
Select API permissions.
-
Select +Add a permission.
-
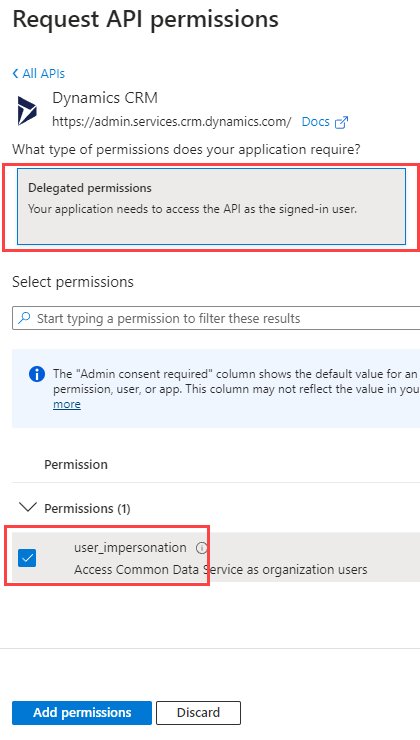
Select Dynamics CRM.
-
Select Delegated permissions.
-
Check user_impersonation.
-
Select Add permissions.
Task 1.4: Client secret
-
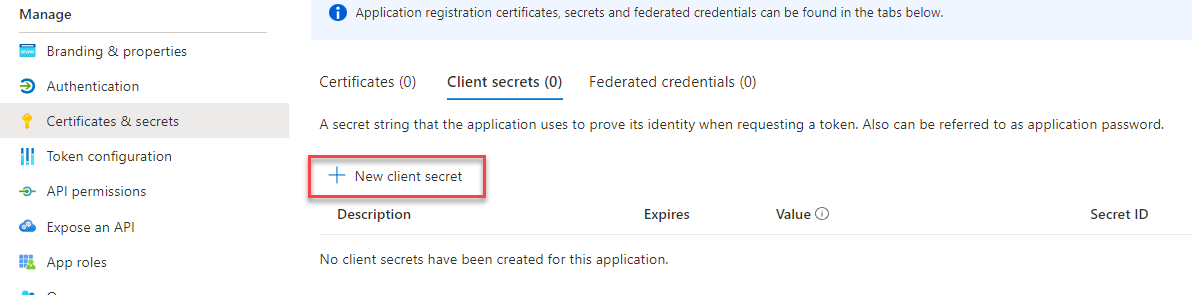
Select Certificates & secrets.
-
Click + New client secret.
-
Enter
Inspection Routingfor Description, select (365 days) 12 months for Expires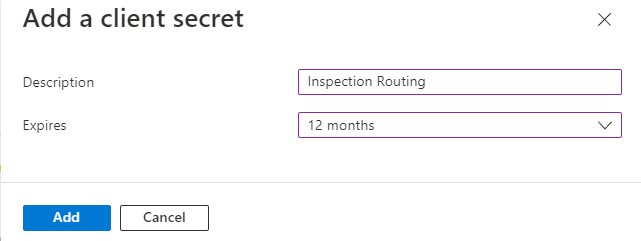
-
Select Add.
-
Copy the Value and save it on a notepad. You will need this value in future tasks.

-
Select Overview

-
Copy the Application (client) ID. and save it on a notepad. You will need this value in future tasks.
Task 1.5: Dataverse security role
In this task, you will create the security role needed for the routing logic.
-
Open the Permit Management solution.
- Navigate to Power Apps maker portal and make sure you have the Development environment selected.
- Select Solutions.
- Open the Permit Management solution.
-
Create security role.
-
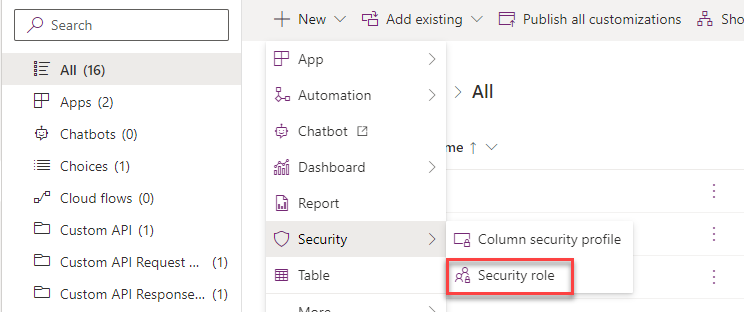
Select + New and then select Security and select Security role.
-
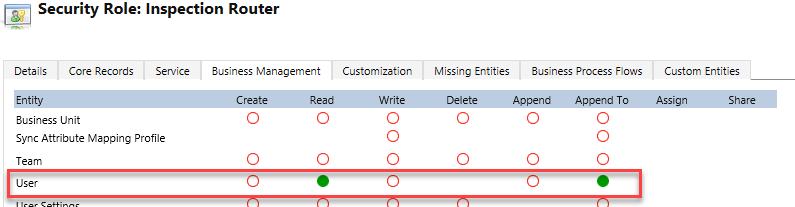
Enter
Inspection Routerfor Role Name and then select the Save con. -
Select the Business Management tab.
-
Locate the User table and set the Read and Append To privileges to Organization.
-
Select the Custom Entities tab.
-
Locate the Inspection table and set the Read, Write, Append, and Assign privileges to Organization.

-
Select Save and Close.
-
Select Done.
-
Task 1.6: Add Application user to Dataverse
In this task, you will create the application user in Dataverse and associate it with the Azure AD app that you just registered.#
-
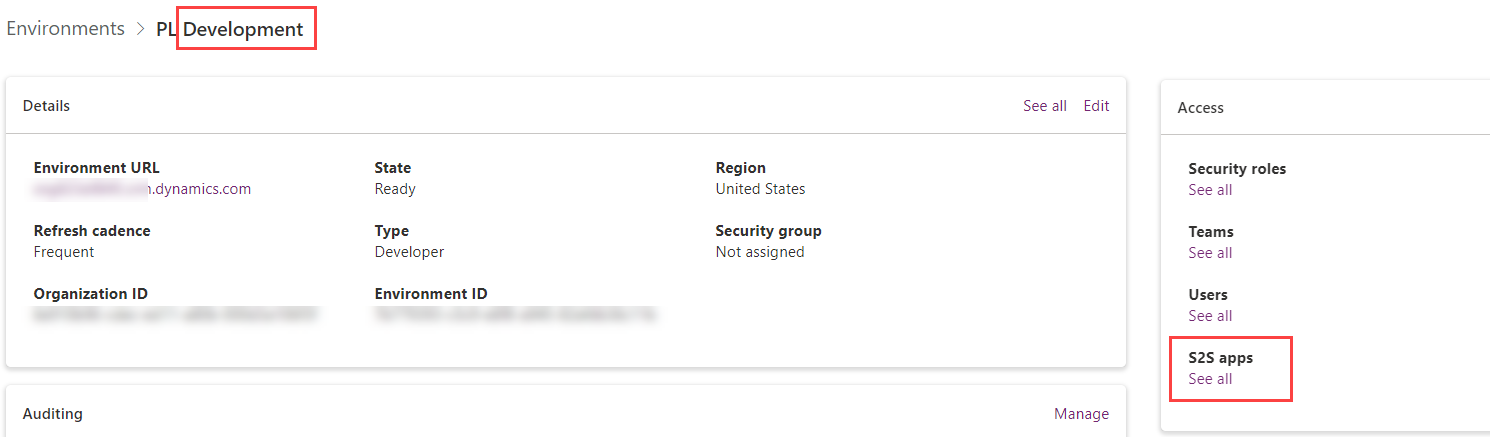
Navigate to the Power Platform admin center.
-
Select Environments.
-
Select your Development environment.
-
Select See all under S2S apps.
-
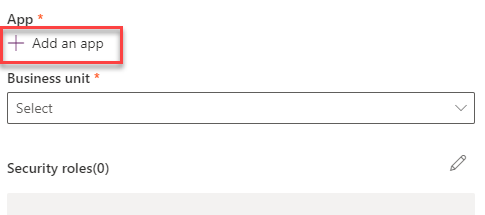
Select + New app user.
-
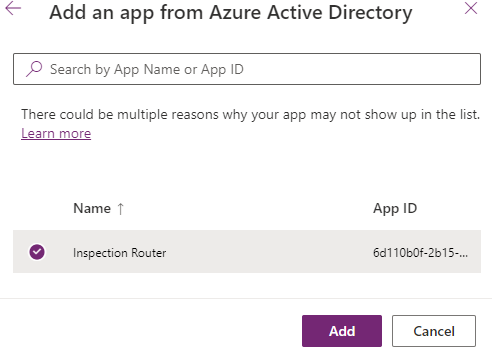
Select + Add an app.
-
Select the Inspection Router Azure AD app registration and then select Add.
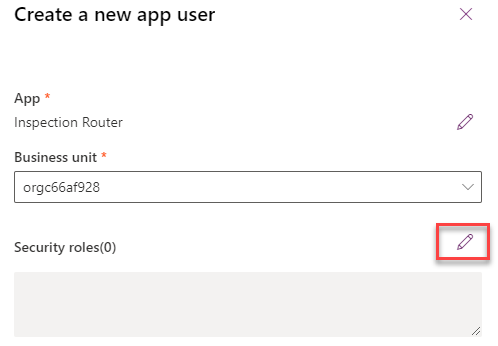
-
Select your root Business Unit.
-
Select the edit icon under Security roles.
-
Select the Inspection Router security role
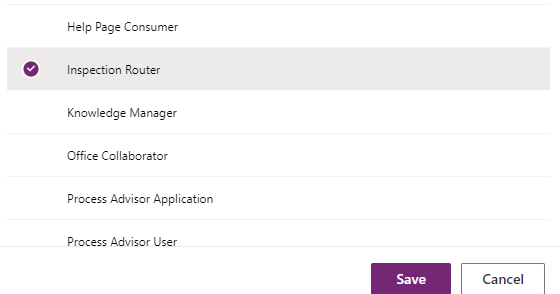
-
Select Save.
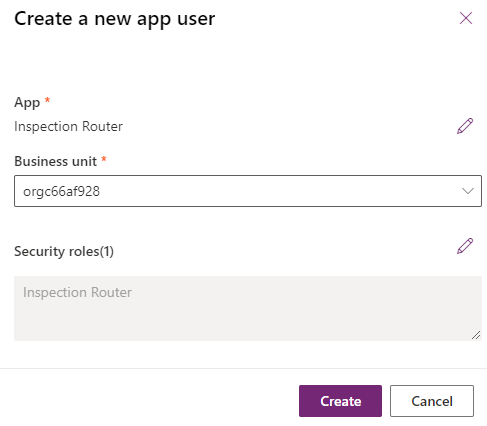
-
Select Create.
Exercise 2: Create Azure Function for Inspection Routing
Objective: In this exercise, you will create the Azure function that will route the inspections.
Task 2.1: Azure resources
-
Create Resource group.
-
Sign in to the Azure portal
https://portal.azure.comand login with the credentials used when redeeming your Azure Pass.. -
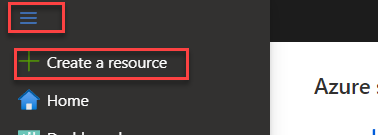
Select Show portal menu and then select + Create a resource.
-
Search for
resource groupand select Resource group.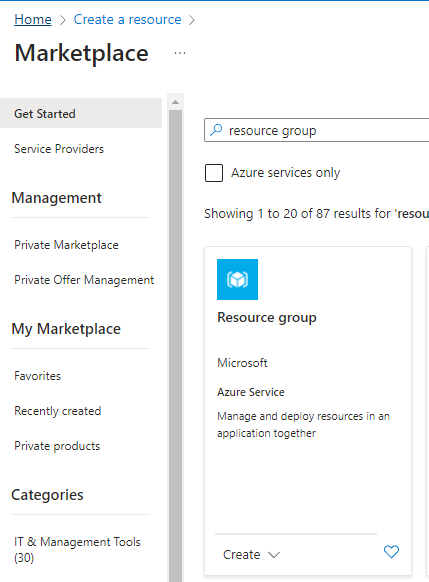
-
Click on the Resource group tile.
-
Select Create.
-
Select your Azure Pass - Sponsorship subscription.
-
Enter
PL400for resource group.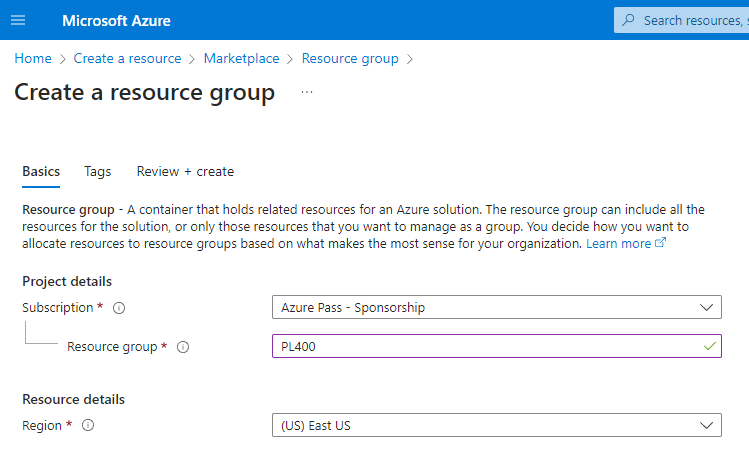
-
Select Review + create.
-
Select Create.
-
-
Create Storage account.
-
Select Show portal menu and then select + Create a resource.
-
Search for
storage accountand select Storage account by Microsoft. -
Click on the Storage account tile.
-
Select Create.
-
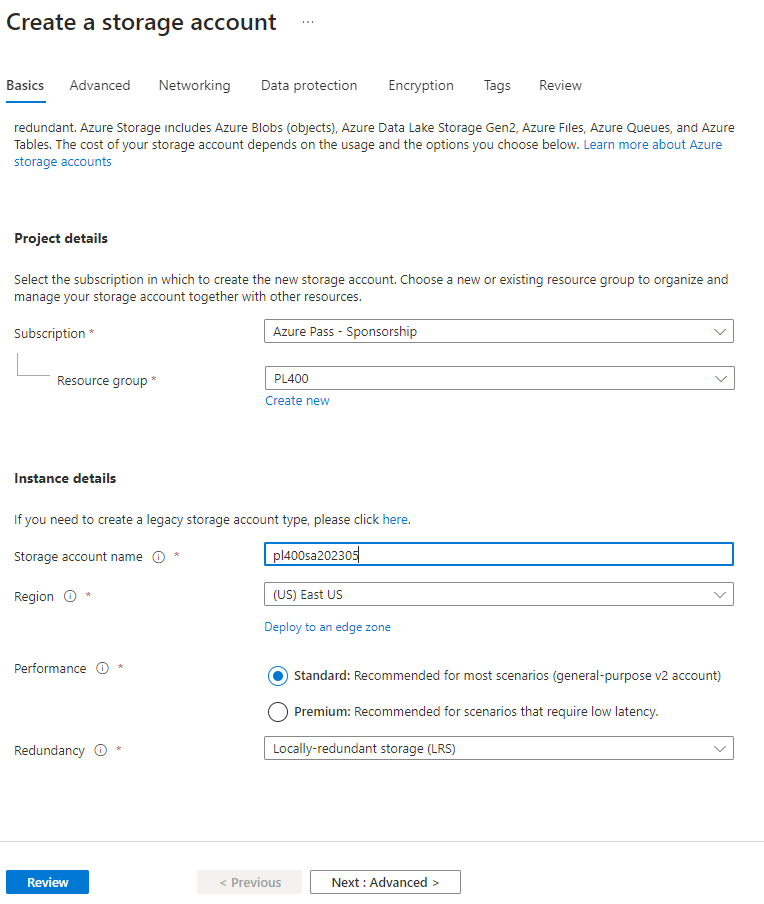
Select your Azure Pass - Sponsorship subscription.
-
Select the PL400 for resource group.
-
Enter
pl400safollowed by a unique number for Storage account name.Note: Storage account name must be unique across Azure.
-
Select Standard for Performance.
-
Select Locally-redundant storage (LRS) for Redundancy.
-
Select Review.
-
Select Create.
-
-
Create Function app.
-
Select Show portal menu and then select + Create a resource.
-
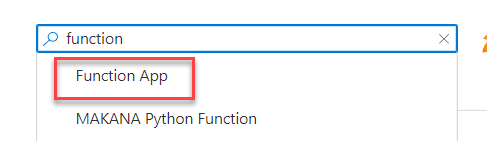
Search for
function appand select Function App by Microsoft.
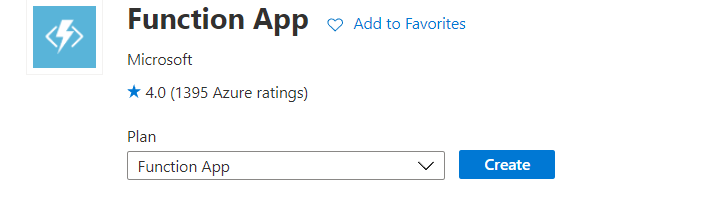
-
Click on the Function App tile.
-
Select Create.
-
Select Create.
-
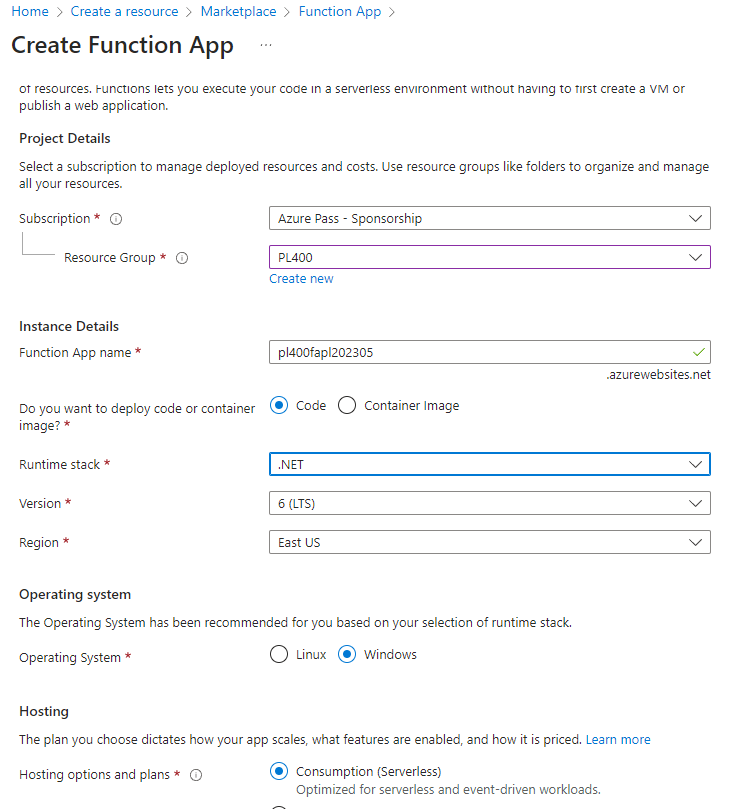
Select your Azure Pass - Sponsorship subscription.
-
Select the PL400 for resource group.
-
Enter
pl400fafollowed by your initials and a unique number for Function App name.Note: Function app name must be unique across Azure. Wait until you see a green tick to confirm the name is unique.
-
Select .NET for Runtime stack
-
Select 6 (LTS) for Version
-
Select Consumption for Hosting options and plans.
-
Select Next : Storage.
-
Select the storage account you just created.
-
Select Review + create.
- Select Create.
-
Task 2.2: Create Function using Visual Studio
-
Create Azure Function project in Visual Studio.
-
Start Visual Studio.
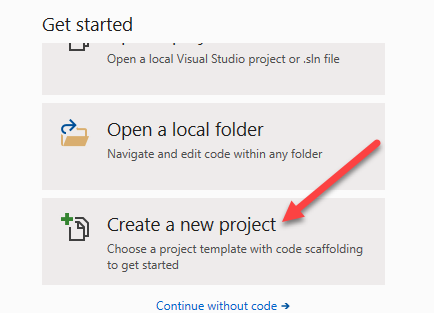
- Select Create a new project.
-
Search for
functions.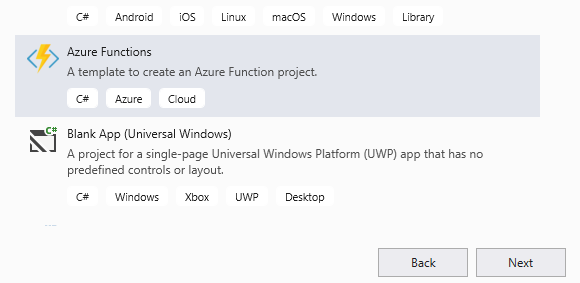
-
Select Azure Functions and then select Next.
-
Enter
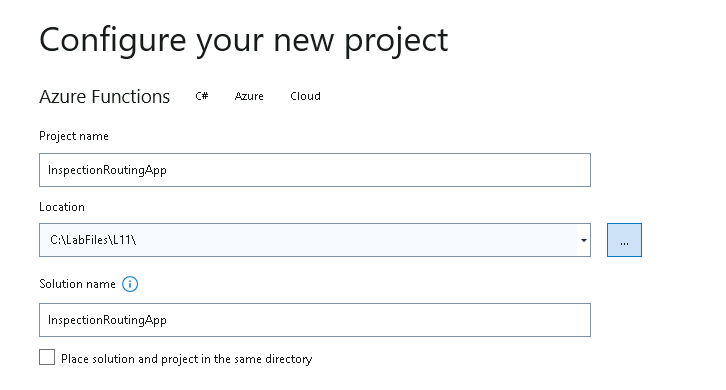
InspectionRoutingAppfor Name. -
Change the location to C:\LabFiles\L11.
-
Select Create.
-
Select .NET Core 3 (LTS).
-
Select Timer Trigger.
-
Change the Schedule to
0 0 0 * * *(Midnight Every Day).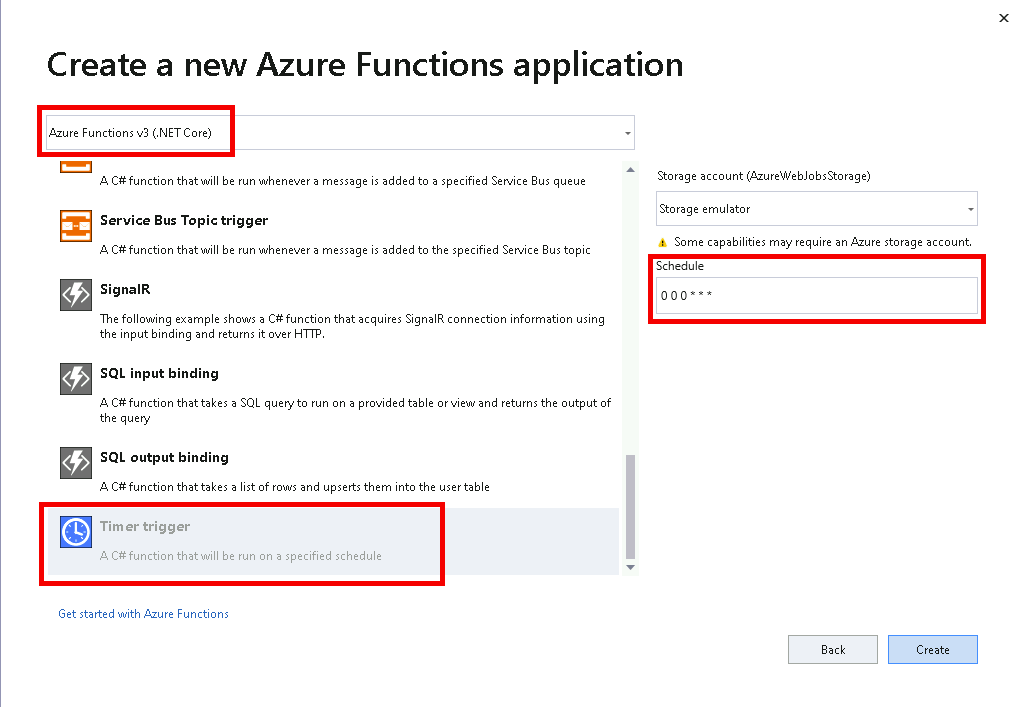
- Select Create.
-
-
Rename and run the Function.
-
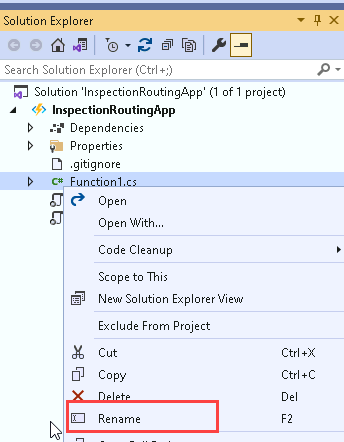
In Solution Explorer, right click on Function1.cs and select Rename.
-
Rename the function file as
InspectionRouter.cs.
-
Select Yes to rename references.
-
Open InspectionRouter.cs file.
-
Rename the function Function1 to
InspectionRouter.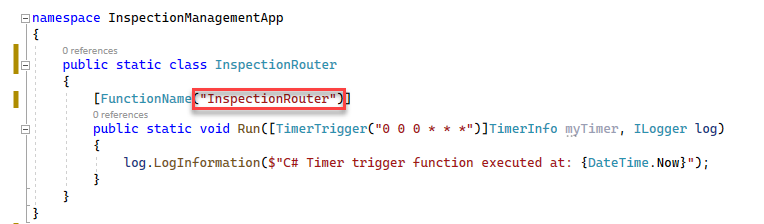
-
-
Add NuGet packages.
-
In Solution Explorer, right-click the InspectionRoutingApp project and select Manage NuGet Packages….
-
Select the Browse tab.
-
Search for
identitymodeland select the Microsoft.IdentityModel.Clients.ActiveDirectory NuGet package.
-
Select Install.
-
Select OK.
-
Select I Accept.
-
Search for
crmwebapiand select the Xrm.Tools.CrmWebAPI by David Yack NuGet package.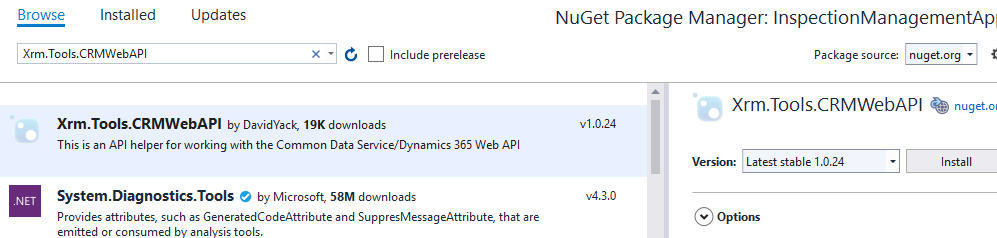
Note: This is a community library designed to work with the Microsoft Dataverse Web API. When you are building this type of extension you can use any oData V4 library you prefer. Make sure you select the one developed by DavidYack.
-
Select Install.
-
Select OK.
-
Select I Accept.
-
Close the NuGet: Permit console tab.
-
-
Edit the local settings file.
-
Open the local.settings.json file.

-
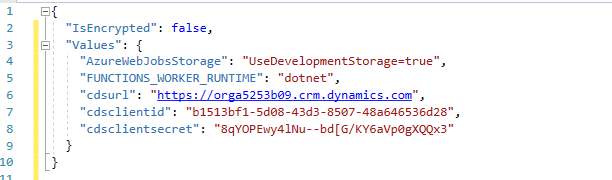
Add the Values below to local.settings
,
"cdsurl": "",
"cdsclientid": "",
"cdsclientsecret": ""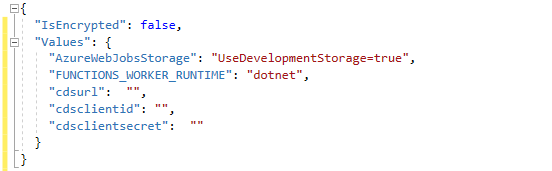
-
Find the client secret you saved in the notepad and paste as the cdsclientsecret.
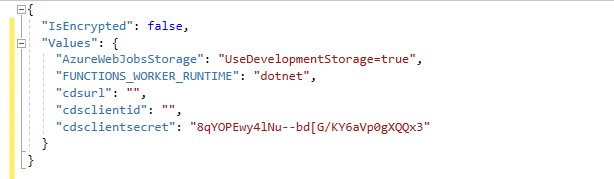
-
Find the application (client) ID in the notepad and paste as the cdsclientid.
-
Find the Dataverse environment URL in the notepad and paste as the cdsurl.
-
Save and close the local.settings.json file.
-
-
Add using statements to the function class.
-
Open the InspectionRouter.cs file
-
Add the using statements below
using System.Threading.Tasks;
using Xrm.Tools.WebAPI;
using Microsoft.IdentityModel.Clients.ActiveDirectory;
using Xrm.Tools.WebAPI.Results;
using System.Dynamic;
using Xrm.Tools.WebAPI.Requests;
using System.Collections.Generic;
-
-
Create a method that will create the Web API.
-
Add the method below inside the InspectionRouter class.
private static async Task<CRMWebAPI> GetCRMWebAPI(ILogger log) { return null; } -
Add the local variables below before the return line on the GetCRMWebAPI method.
var clientID = Environment.GetEnvironmentVariable("cdsclientid", EnvironmentVariableTarget.Process); var clientSecret = Environment.GetEnvironmentVariable("cdsclientsecret", EnvironmentVariableTarget.Process); var crmBaseUrl = Environment.GetEnvironmentVariable("cdsurl", EnvironmentVariableTarget.Process); var crmurl = crmBaseUrl + "/api/data/v9.2/"; -
Create Authentication Parameters.
AuthenticationParameters ap = await AuthenticationParameters.CreateFromUrlAsync(new Uri(crmurl)); -
Create Client Credential passing your Client Id and Client Secret.
var clientcred = new ClientCredential(clientID, clientSecret); -
Get Authentication Context.
// CreateFromUrlAsync returns endpoint while AuthenticationContext expects authority // workaround is to downgrade adal to v3.19 or to strip the tail var auth = ap.Authority.Replace("/oauth2/authorize", ""); var authContext = new AuthenticationContext(auth); -
Get Token.
var authenticationResult = await authContext.AcquireTokenAsync(crmBaseUrl, clientcred); -
Return the Web API. Replace the return null line with the code below.
return new CRMWebAPI(crmurl, authenticationResult.AccessToken);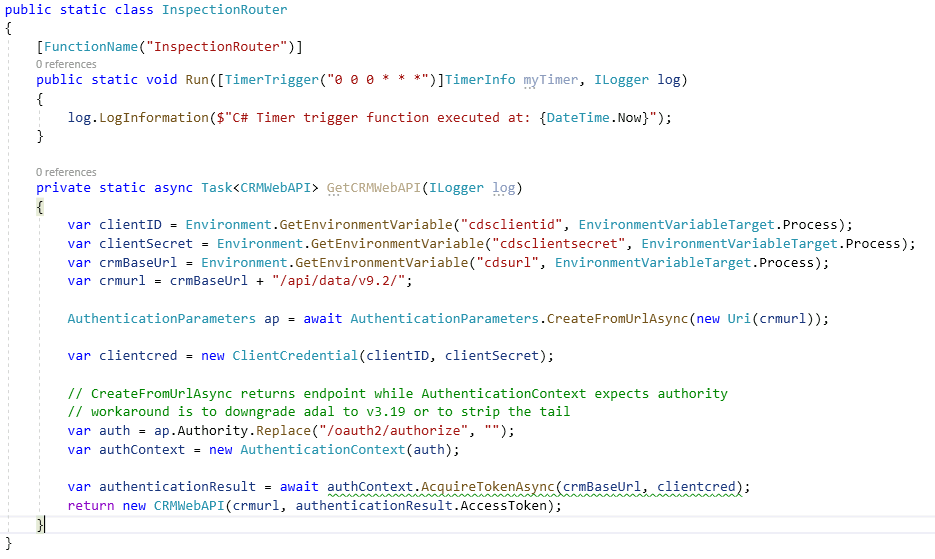
-
-
Call the Web API.
-
Call the GetCRMWebAPI method and Execute WhoAmI.
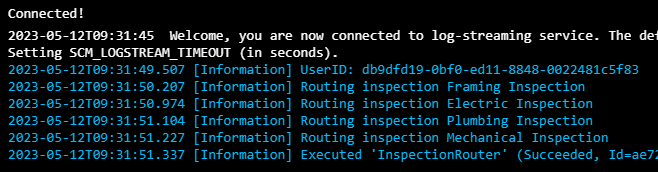
CRMWebAPI api = GetCRMWebAPI(log).Result;
dynamic whoami = api.ExecuteFunction("WhoAmI").Result;
log.LogInformation($"UserID: {whoami.UserId}");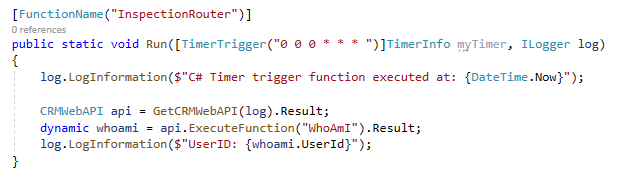
-
Task 2.3: Get Inspections and Users and Assign Inspections
-
Create a method that will get all active inspections that are New Request or Pending, and schedule them for today
-
Add the method below inside the InspectionRouter class.
private static Task<CRMGetListResult<ExpandoObject>> GetInspections(CRMWebAPI api) { return null; } -
Create FetchXML query. Add the code below before the return line of the GetInspections method.
var fetchxml = @"<fetch version=""1.0"" mapping=""logical"" >
   <entity name=""contoso_inspection"" >
      <attribute name=""contoso_inspectionid"" />
      <attribute name=""contoso_name"" />
      <attribute name=""ownerid"" />
      <attribute name=""contoso_inspectiontype"" />
      <attribute name=""contoso_sequence"" />
      <attribute name=""contoso_scheduleddate"" />
      <filter type=""and"" >
         <condition value=""0"" operator=""eq"" attribute=""statecode"" />
         <condition attribute=""contoso_scheduleddate"" operator=""today"" />
         <condition attribute=""statuscode"" operator=""in"" >
            <value>1</value>
            <value>330650001</value>
         </condition>
      </filter>
   </entity>
</fetch>";
[!NOTE] 1 is the value of the Inspection New Request status reason and 330650001 id the value of the Inspection Pending status reason. If the Pending status reason is different for your environment, change the code to match your value.
-
Get the list of Inspections.
var inspections = api.GetList<ExpandoObject>("contoso_inspections", QueryOptions: new CRMGetListOptions() { FetchXml = fetchxml }); -
Return the Inspections. Replace the return = null line with the code below.
return inspections;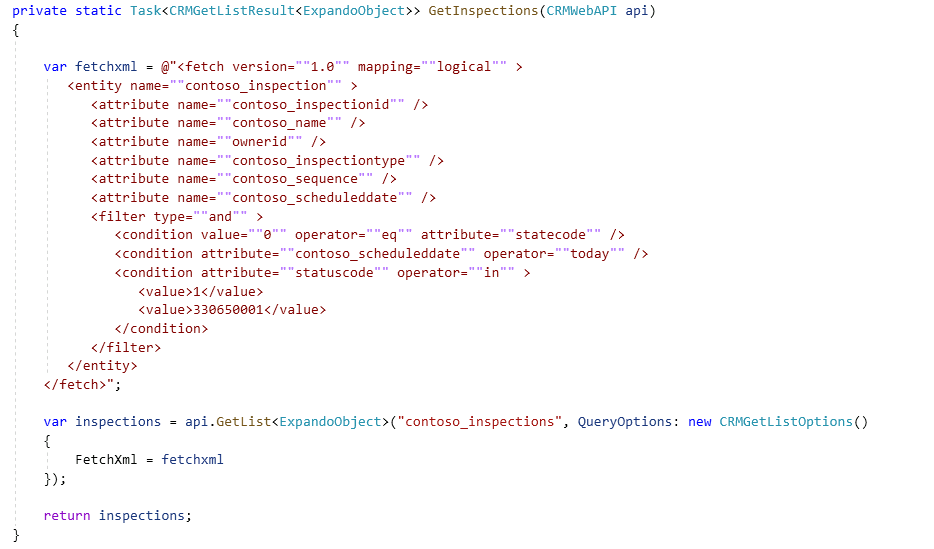
-
-
Call the GetInspections method from the Run method.
-
Go back to the Run method.
-
Call the GetInspections method.
var inspections = GetInspections(api).Result;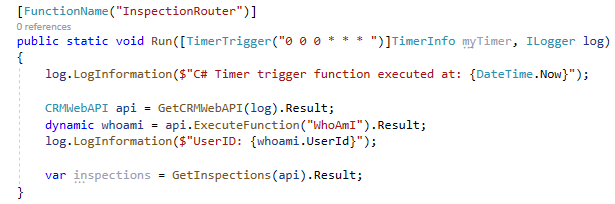
-
-
Create a method that will get all users.
-
Add the method below inside the class.
private static Task<CRMGetListResult<ExpandoObject>> GetUsers(CRMWebAPI api) { var users = api.GetList<ExpandoObject>("systemusers"); return users; } -
Call the GetUsers method from the Run method.
var users = GetUsers(api).Result;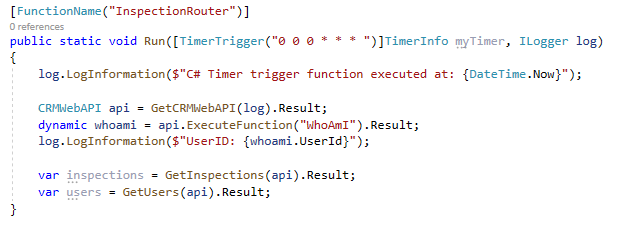
-
-
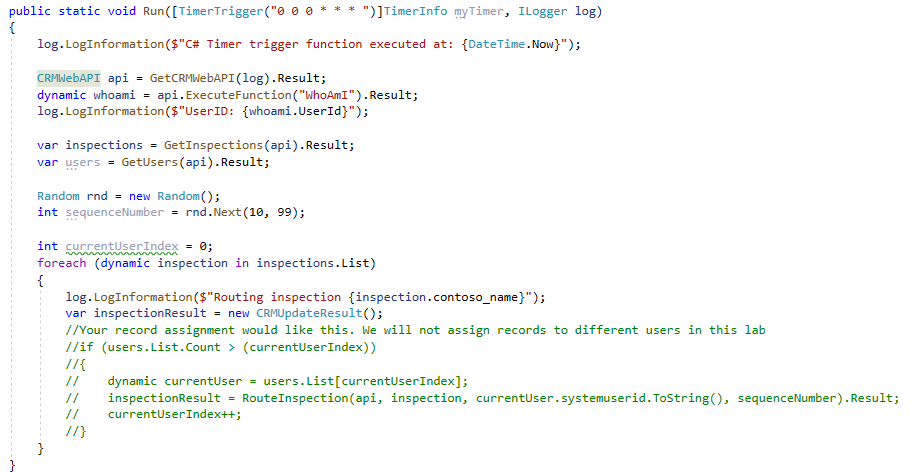
Create a method that will assign inspections to users.
-
Add the method below to the class.
private static async Task<CRMUpdateResult> RouteInspection(CRMWebAPI api, dynamic inspection, string userId, int sequenceNumber)
{
   dynamic updateObject = new ExpandoObject();
   ((IDictionary<string, object>)updateObject).Add
   ("ownerid@odata.bind", "/systemusers(" + userId + ")");
   updateObject.contoso_sequence = sequenceNumber.ToString();
   return await api.Update("contoso_inspections", new Guid(inspection.contoso_inspectionid), updateObject);
}
-
-
Create two-digit random number.
-
Add the code below to the Run method.
Random rnd = new Random();
int sequenceNumber = rnd.Next(10, 99);
-
-
Assign Inspections
-
Go through the Inspections and call the RouteInspection method.
int currentUserIndex = 0; foreach (dynamic inspection in inspections.List) { log.LogInformation($"Routing inspection {inspection.contoso_name}"); var inspectionResult = new CRMUpdateResult(); // Your record assignment would look like this. We will not assign records to different users in this lab // if (users.List.Count > (currentUserIndex)) //{ // dynamic currentUser = users.List[currentUserIndex]; // inspectionResult = RouteInspection(api, inspection, currentUser.systemuserid.ToString(), sequenceNumber).Result; //currentUserIndex++; //} } -
We will not assign inspection records to other users in this lab.
-
Assign inspections to the Inspection Router. Add the code below inside foreach.
// We will instead assign inspections to the user you are currently logged in as
inspectionResult = RouteInspection(api, inspection, whoami.UserId.ToString(), sequenceNumber).Result;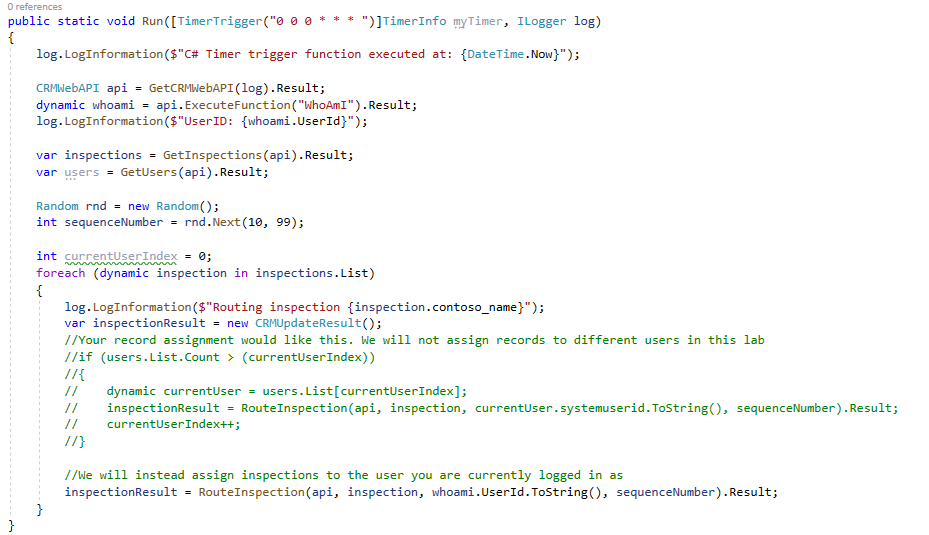
-
Select the Save icon.
-
In Solution Explorer, right-click on the project and select Build.
-
The Build should succeed with 0 errors.
-
Exercise 3: Publish and test
Objective: In this exercise, you will publish the Azure function to Azure, update the app settings, and test the function.
Task 3.1: Publish to Azure
-
Publish the function to Azure.
-
In Solution Explorer, right click on the project and select Publish.
-
Select Azure and then select Next.
-
Select Azure Function App (Windows) and then select Next.
-
Sign in with user that has an Azure subscription.
-
Select your Azure Pass - Sponsorship subscription.
-
Expand the PL400 resource group.
-
Select the function app you created in the earlier exercise.
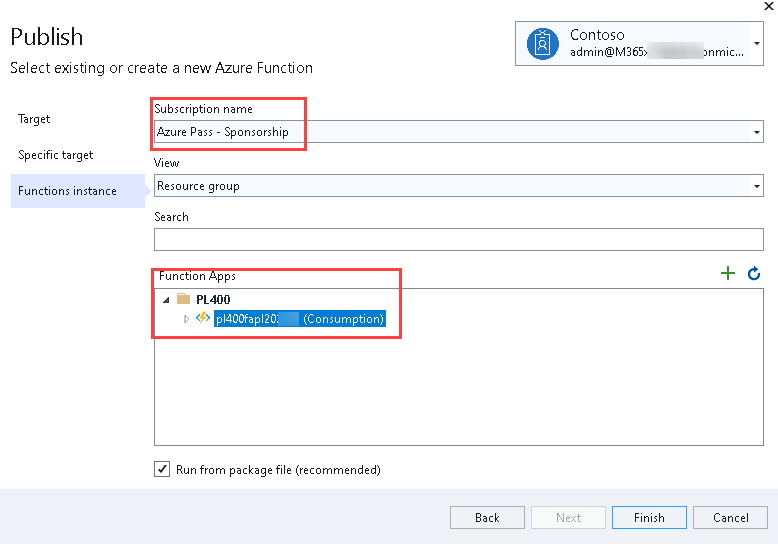
-
Select Finish.
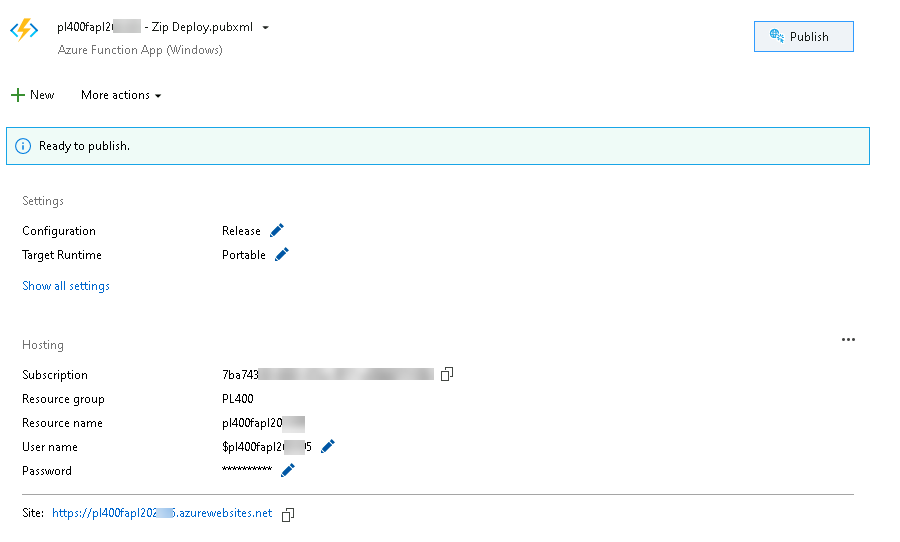
-
Select Publish.
-
Select Yes.

-
Wait for the function application to be successfully published to Azure.
-
Select File and Exit.
-
-
Open function application settings.
-
Go back to you Azure portal.
-
Select All Resources, search for
pl400fa, and open the function you published.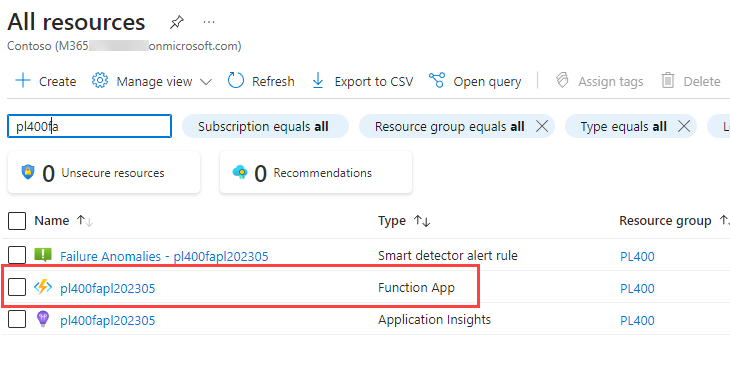
-
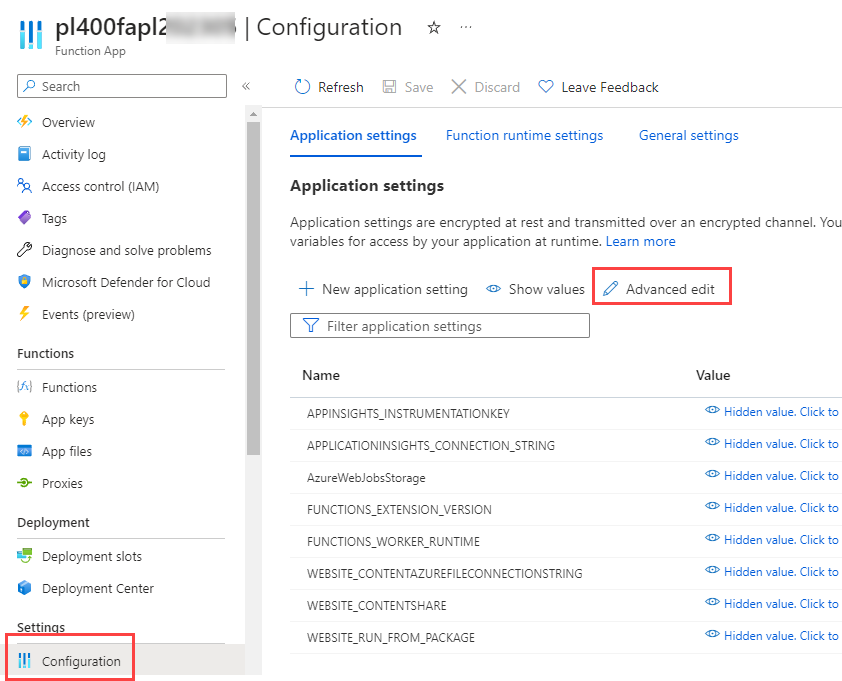
Scroll down to Settings and select Configuration.
-
-
Update function app settings.
-
Select Advanced edit.
-
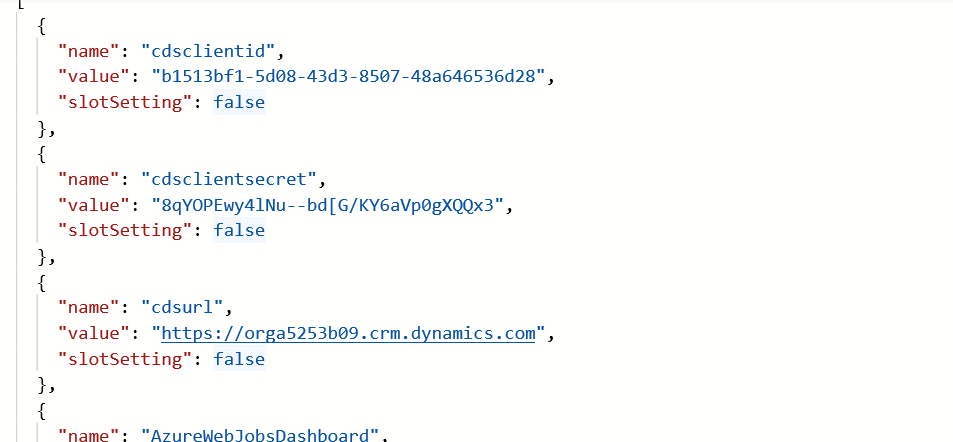
Paste the json below at the top of the settings.
  {
     "name": "cdsclientid",
     "value": "[clientid]",
     "slotSetting": false
  },
  {
     "name": "cdsclientsecret",
     "value": "[clientsecret]",
     "slotSetting": false
  },
  {
     "name": "cdsurl",
     "value": "[cdsurl]",
     "slotSetting": false
  },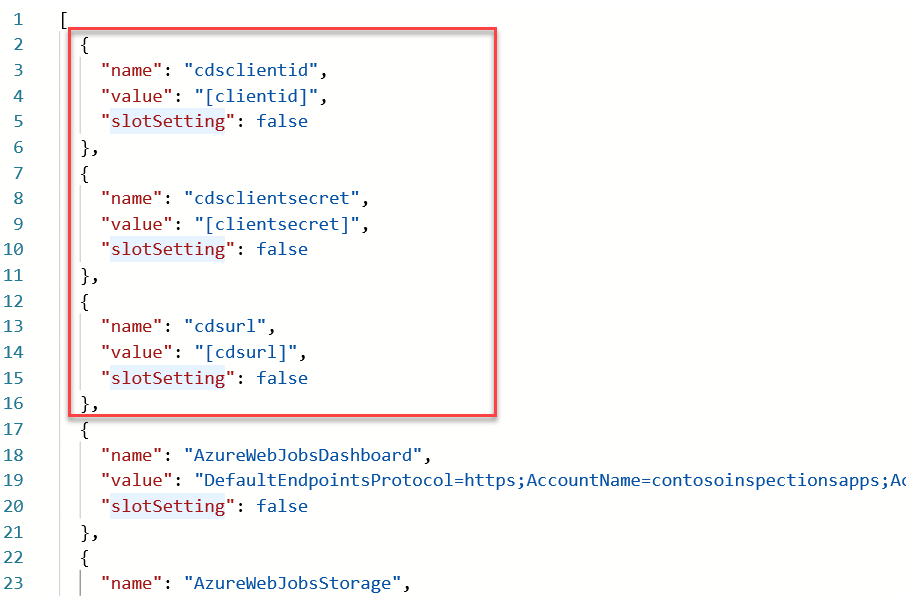
-
Go back to Visual Studio and open the local.settings.json file.
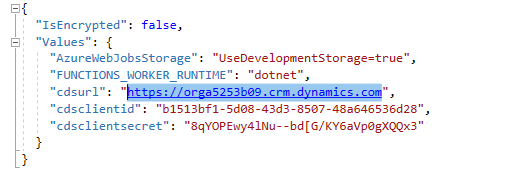
-
Copy the cdsclientid, cdsclientsecret and cdsurl values from the local.settings.json file and replace [cdsclientid], [cdsclientsecret] and [cdsurl].
-
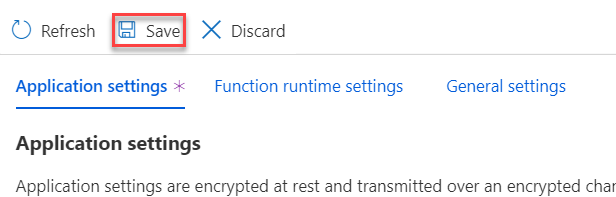
Select OK.
-
Select Save.
-
Select Continue.
-
Task 3.2: Test
-
Timezone.
- Navigate to the Power Apps maker portal https://make.powerapps.com.
- Make sure you are in the Development environment.
- Select Apps.
-
Select the Permit Management app, select the ellipses (…) and select Play.
-
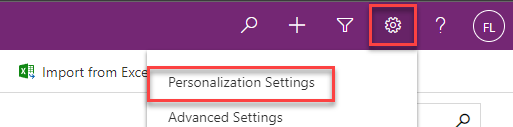
Select Settings and then select Personalization and Settings.
-
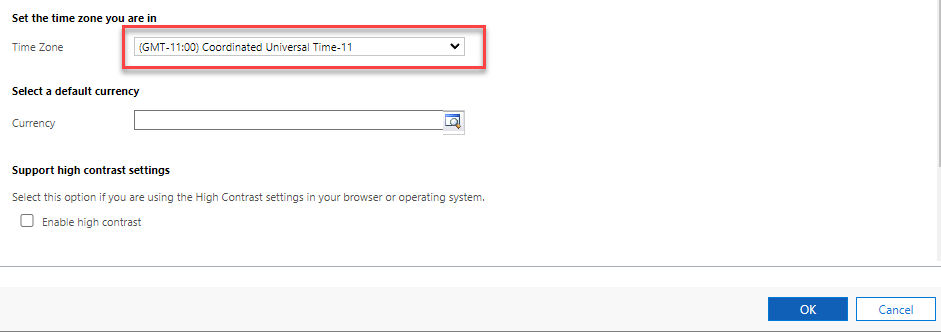
Change the Time Zone to (GMT-11:00) Coordinated Universal Time-11 and then select OK. This will ensure the query results will produce the same results regardless of your time zone.
-
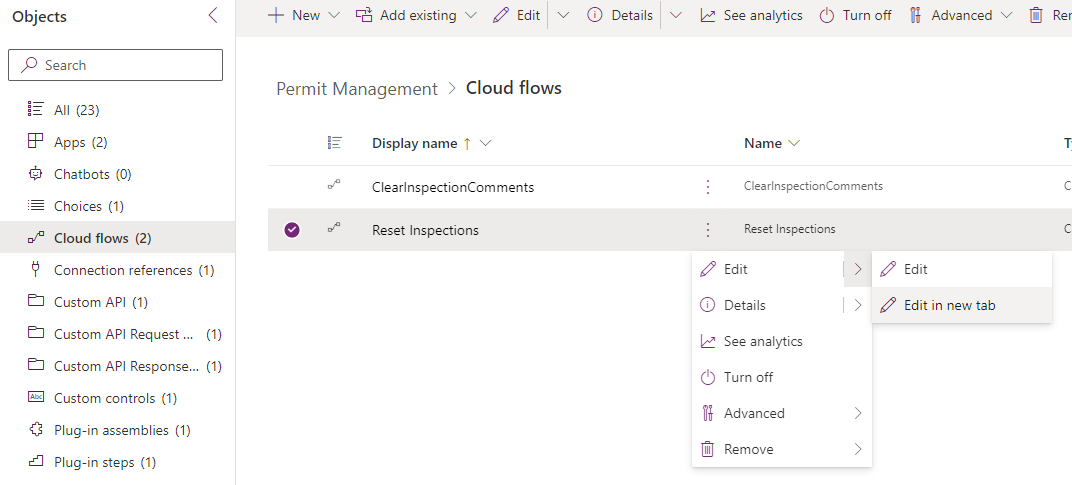
Reset inspections test data.
- Navigate to Power Apps maker portal and make sure you have the Development environment selected.
- Select Solutions.
- Open the Permit Management solution.
- Select Cloud flows.
-
Select the ellipses … for the Reset Inspections flow, select Edit and select Edit in new tab.
-
Select the Loop step.
-
Select the Update Inspection step.
-
Click in Scheduled Date.
-
Select the Expression tab.
-
Enter
utcNow().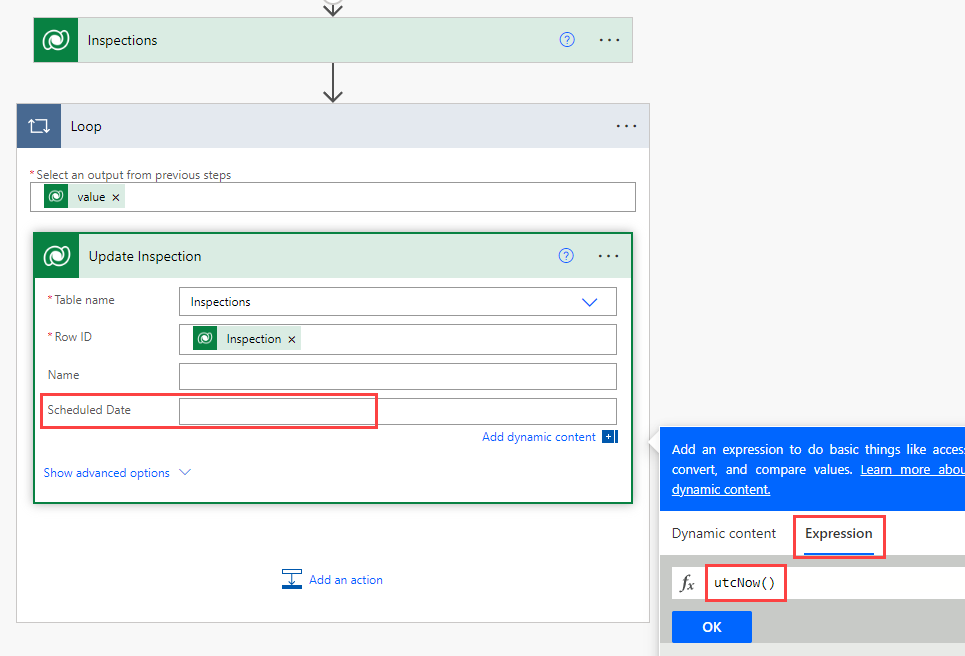
-
Select OK.
-
Select Save.
-
Select Test.
-
Select Manually.
-
Select Test.
-
Select Run flow.
-
Select Done.
-
Close the flow editor.
- All inspections records should be set to Pending and scheduled for today.
-
Run the function.
-
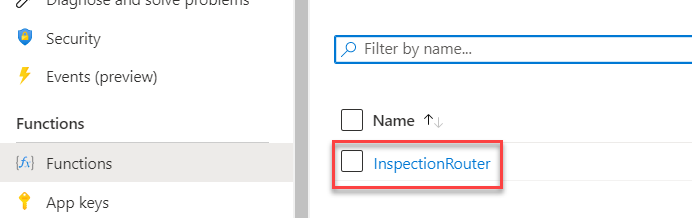
Go to your Azure portal.
-
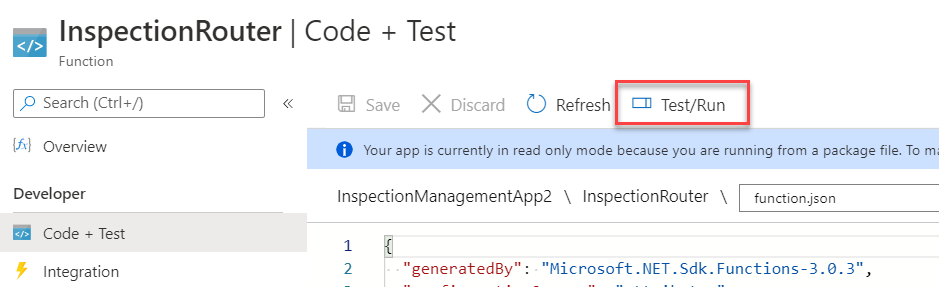
Select the Functions tab in the Overview pane and open the function you published.
-
Select Code + Test.
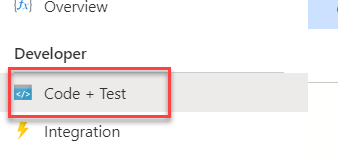
-
Select Test/Run.
-
Select Run.
-
The function should run and succeed.
-
-
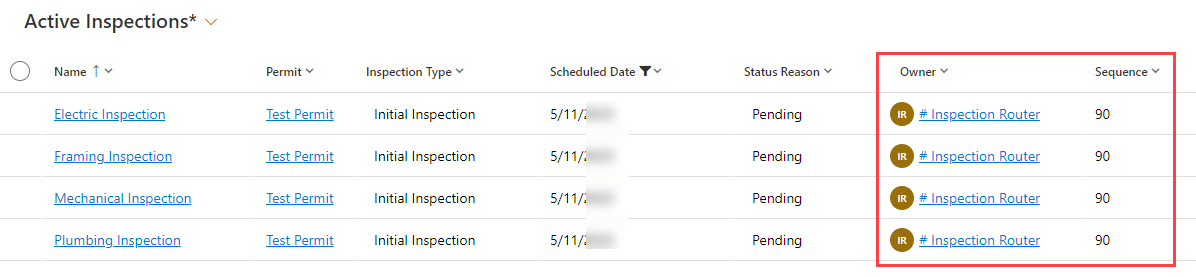
Confirm record assignments.
-
Go back to the Permit Management application.
-
Select Inspections.
-
The Owner of the inspections should now be the Inspection Router and .
-