Practice Lab 10 – Dataverse Plug-ins
Scenario
In this lab you will build two plug-ins. The first plug-in will run when a new permit record is created, and it will check that there are no other permits that exists for the build sites that are locked. If a locked permit is found, the plug-in will block the creation of this new permit. The second plug-in will hook up and run when the Lock Permit custom API is invoked. In the prior module we defined the custom API, and now with the plug-in step registered on execution of the custom API, it will perform the lock permit business logic.
High-level lab steps
As part of building the plug-ins, you will complete the following activities.
- Create two plug-ins.
- Implement logic to work with a plug-in registered on a table event.
- Implement logic to work with a plug-in registered for a Custom API.
- Deploy the plug-ins and associate them with your solution.
- Use the plug-in trace log to see trace message from the plug-in.
Things to consider before you begin
- Do we know what events will trigger the plug-ins?
- Could what we are doing with the plug-in, be done using Power Automate?
- Remember to continue working in your DEVELOPMENT environment. We’ll move everything to production soon.
Starter solution
A starter solution file for this lab can be found in the C:\Labfiles\L10\Starter folder.
Completed solution
Completed solution files for this lab can be found in the C:\Labfiles\L10\Completed folder.
Resources
Complete source code files for this lab can be found in the C:\Labfiles\L10\Resources folder.
[!IMPORTANT] You should have installed .NET 4.6.2 and Power Apps CLI in an earlier lab. If you have not completed the steps in the Power Platform Tools lab, you must complete those before starting this lab.
Exercise 1: Permit creation validation plug-in
Objective: In this exercise, you will create a plug-in that will run on create of a permit. This plug-in will check if there are any locked permits for the selected build site of the new permit and block the creation of the new permit.
Task 1.1: Status Reason values
-
Open the Permit Management solution.
- Navigate to Power Apps maker portal and make sure you have the Development environment selected.
- Select Solutions.
- Open the Permit Management solution.
-
Find the values of the Permit table Status Reason column.
-
In the Objects pane on the left-hand side expand Tables then expand Permit table.
-
Select Columns.
-
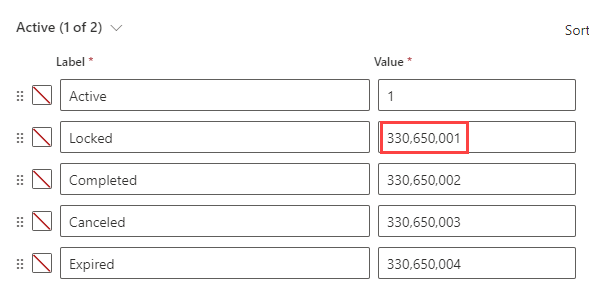
Select the Status Reason column.
-
Copy the value of the Locked option.
-
You will need this value in a future step.
-
Select Cancel.
-
-
Find the values of the Inspection table Status Reason column.
-
In the Tree view expand the Inspection table.
-
Select Columns.
-
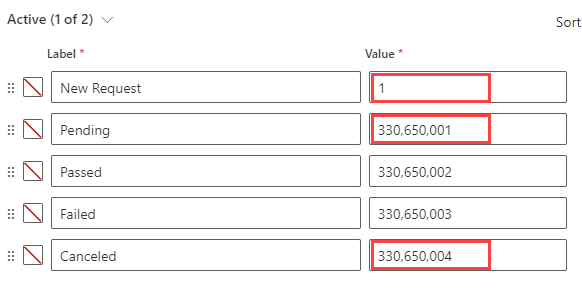
Select the Status Reason column.
-
Copy the value of the New Request option.
-
Copy the value of the Pending option.
-
Copy the value of the Canceled option.
-
You will need these values in a future step.
-
Select Cancel.
[!NOTE] Record these values on a notepad, you need them later in this lab.
-
Task 1.2: Create the plug-in
-
Start the developer command prompt tool.
-
Create a folder named named ContosoPackageProject for the code component.
-
Run the following commands.
cd C:\LabFiles\L10
mkdir ContosoPackageProject
cd ContosoPackageProject
-
-
Create a project for a Dataverse plug-in.
-
Initialize the component. This command will create a set of files that will implement a plug-in. You will customize these files as we continue.
pac plugin init -
Dataverse plug-in class library creation should be successful.

-
Run the command below to open the project in Visual Studio.
start ContosoPackageProject.csproj
-
-
Rename the Plugin1 class file.
-
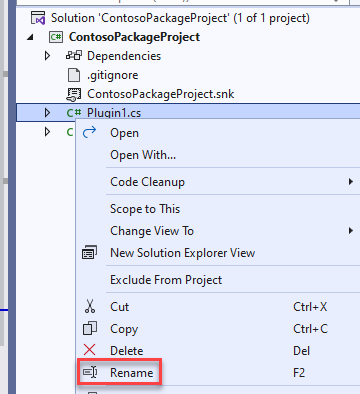
Right click on Plugin1.cs and select Rename.
-
Rename the class as
PreOperationPermitCreate. -
Select Yes on the rename references popup.
-
Open PreOperationPermitCreate.cs file.
-
-
Get the Target Table.
- Add the using statement below to the top of the class.
using Microsoft.Xrm.Sdk.Query;-
In the ExecuteDataversePlugin method After the comment
// TODO: Implement you custom business logicadd the code below.var permitEntity = context.InputParameters["Target"] as Entity; -
To get the Build Site table reference, add the below code after permitEntity variable definition.
var buildSiteRef = permitEntity["contoso_buildsite"] as EntityReference; -
To add Trace Messages, add the below mentioned code after buildSiteRef variable definition.
localPluginContext.Trace("Primary Entity Id: " + permitEntity.Id);
localPluginContext.Trace("Build Site Entity Id: " + buildSiteRef.Id);
-
Create FetchXML and that will get the count of locked permits matching the build site id and call retrieve multiple.
-
Create the FetchXML string. Replace 330650001 with the locked option value of the status reason column of your Permit table.
string fetchString = "<fetch output-format='xml-platform' distinct='false' version='1.0' mapping='logical' aggregate='true'><entity name='contoso_permit'><attribute name='contoso_permitid' alias='Count' aggregate='count' /><filter type='and' ><condition attribute='contoso_buildsite' uitype='contoso_buildsite' operator='eq' value='{" + buildSiteRef.Id + "}'/><condition attribute='statuscode' operator='eq' value='330650001'/></filter></entity></fetch>"; -
Run the FetchXML query by using RetrieveMultiple.
localPluginContext.Trace("Calling RetrieveMultiple for locked permits");
var response = localPluginContext.InitiatingUserService.RetrieveMultiple(new FetchExpression(fetchString));
-
-
Throw an exception if a locked permits was found.
-
Get the locked permits Count frm the result of the query.
int lockedPermitCount = (int)((AliasedValue)response.Entities[0]["Count"]).Value; -
Check if the Count is more than 0 and throw InvalidPluginExecutionException.
localPluginContext.Trace("Locked Permit count : " + lockedPermitCount); if (lockedPermitCount > 0) { throw new InvalidPluginExecutionException("Too many locked permits for build site"); } -
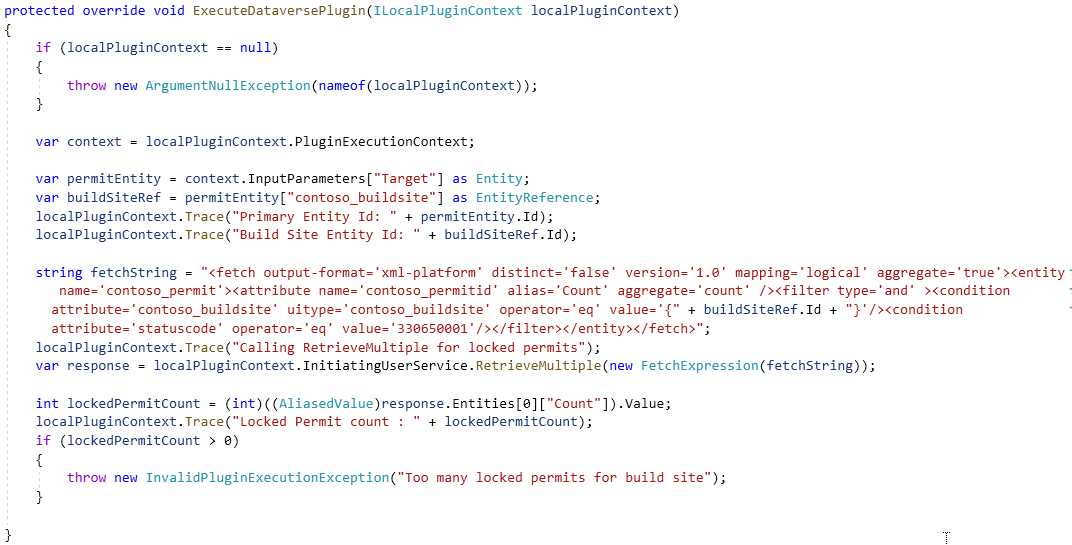
Delete the generated comments from the ExecuteDataversePlugin method.
-
The ExecuteDataversePlugin method should now look like the image below.
-
-
Build the project.
- Select the Save icon.
- In Solution Explorer, right-click the ContosoPackageProject project and select Build.
- Check the Output window and make sure that the build has succeeded. If it does not, go back and review your work compared the steps documented here.
Task 1.3: Deploy the plug-in
-
Start the Plug-in Registration Tool.
-
Return to command prompt.
-
Run the command below to launch the Plugin Registration Tool (PRT).
pac tool prt
-
-
Connect to your Dataverse environment.
-
Select + CREATE NEW CONNECTION.
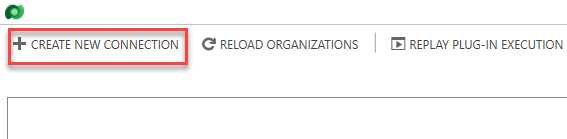
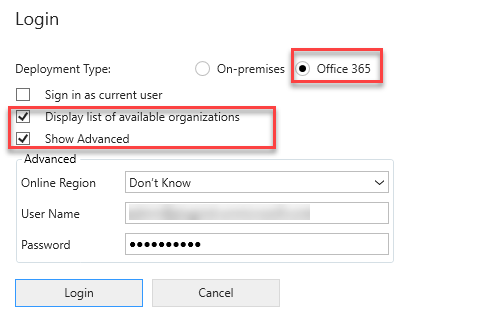
- Select Office 365 for Deployment Type.
- Check Display list of available organizations.
- Check Show Advanced.
-
Enter your tenant credentials.
-
Select Login.
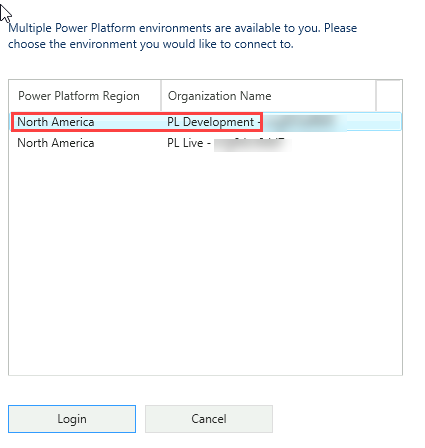
- Select your Development environment and select Login.
-
-
Register the plug-in assembly.
-
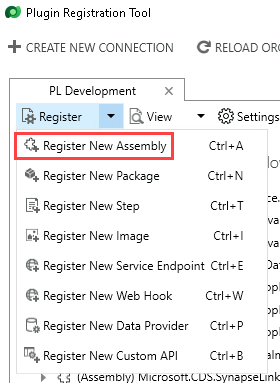
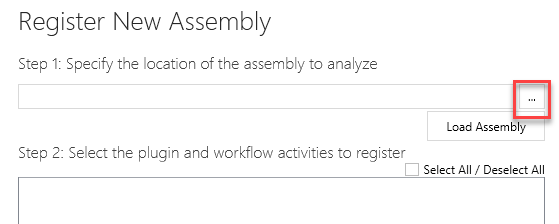
Select Register and select Register New Assembly.
-
Select the ellipses ….
-
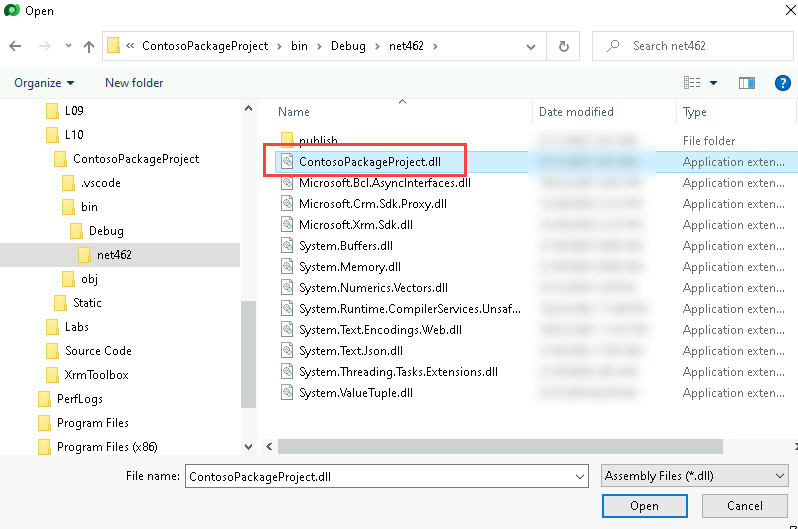
Browse to the bin/debug/net462 folder of your plug-in project ContosoPackageProject.
-
Select the ContosoPackageProject.dll file and select Open.
-
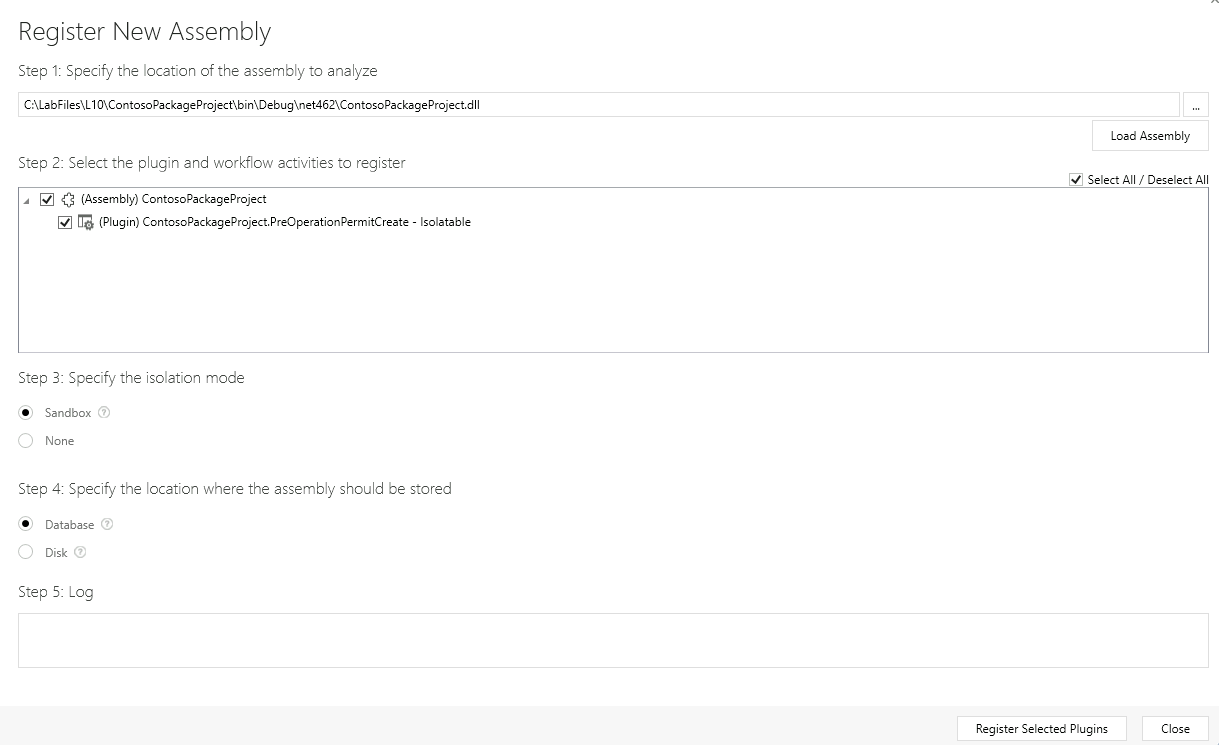
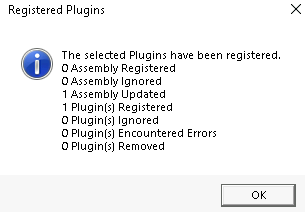
Select Register Selected Plugins.

-
Select OK
-
-
Register step on create of permit table.
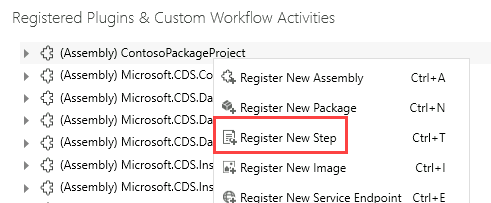
- Right-click on the ContosoPackageProject assembly and select Register New Step.
-
Enter
Createfor Message. -
Enter
contoso_permitfor Primary Table. -
Select PreOperation from dropdown for Event Pipeline Stage of Execution.
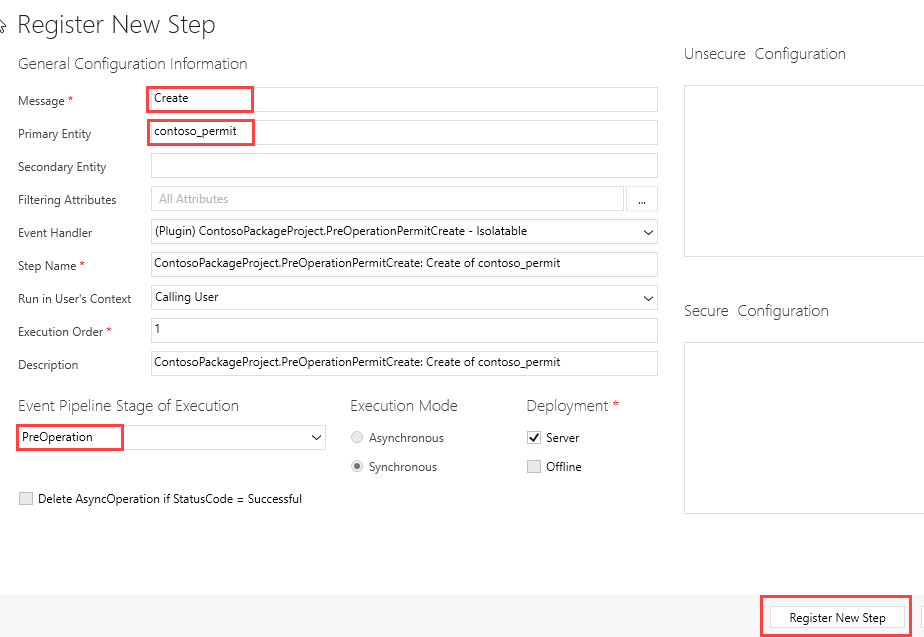
-
Select Register New Step.
-
Select Close in the Warning - no Filter on Attributes detected popup window.
-
Step should now be registered in the assembly plugin.

Exercise 2: Create plug-in for Custom API
Objective: In this exercise, you will create and register a plug-in that will be invoked when the lock permit Custom API is used. This plug-in will be used to implement the business logic of locking the permit. Specifically, it will update the permit to indicate it is locked and then cancel any pending inspections.
[!NOTE] If you did not create the Custom API in a prior lab, you need to go back and create the Custom API.
Task 2.1: Add a new plug-in to the project
-
Open ContosoPackageProject solution in Visual Studio.
-
Create new class.
- In Solution Explorer, right-click the ContosoPackageProject project and select Add and then select New Item.
-
Select Class and name the class
LockPermitCancelInspections.cs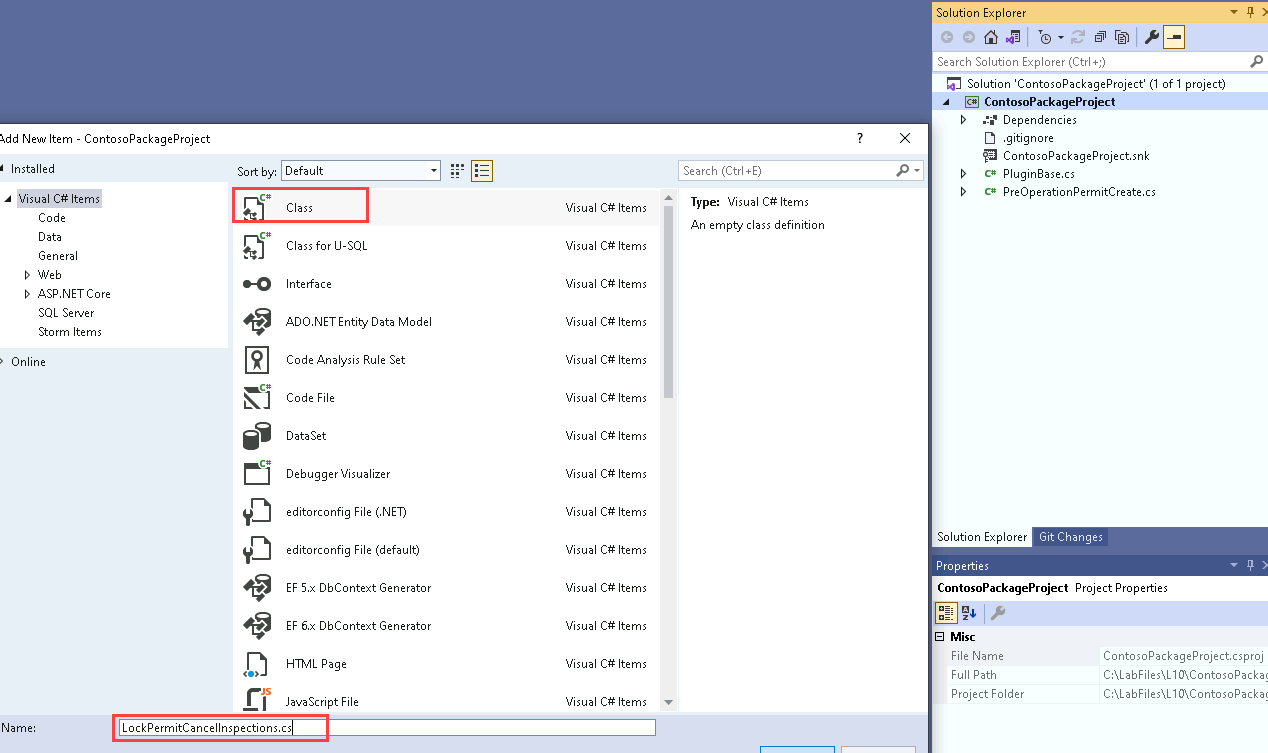
- Select Add.
-
Add using statements to the new class, make the class public, and inherit from PluginBase.
-
Add the using statements below to the LockPermitCancelInspections class.
using System.Text.RegularExpressions; using Microsoft.Xrm.Sdk; using Microsoft.Xrm.Sdk.Query; -
Change the LockPermitCancelInspections class to be public and inherit from the PluginBase class.
public class LockPermitCancelInspections : PluginBase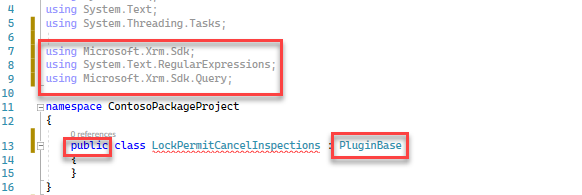
-
-
Override the ExecuteDataversePlugin method and get the reason value from the input parameter.
-
Add the code below inside the LockPermitCancelInspections class.
public LockPermitCancelInspections(string unsecureConfiguration, string secureConfiguration)
: base(typeof(PreOperationPermitCreate))
{

}

protected override void ExecuteDataversePlugin(ILocalPluginContext localPluginContext)
{
    if (localPluginContext == null)
    {
        throw new ArgumentNullException(nameof(localPluginContext));
    }

}
-
-
Get the target Entity Reference, define Entity, set status reason to Locked, and update the permit record.
-
Get the target Entity Reference and define an Entity object. Add the below code inside the ExecuteDataversePlugin method.
var permitEntityRef = localPluginContext.PluginExecutionContext.InputParameters["Target"] as EntityReference; Entity permitEntity = new Entity(permitEntityRef.LogicalName, permitEntityRef.Id); -
Set the Status Reason to Locked.
localPluginContext.Trace("Updating Permit Id : " + permitEntityRef.Id);
permitEntity["statuscode"] = new OptionSetValue(330650001);
[!NOTE] 330650001 is the value of the Locked Status Reason option and statuscode is the name of the status reason column. If the Locked status reason is different for your environment, change the code to match your value.
-
Update the Permit record.
localPluginContext.PluginUserService.Update(permitEntity);
localPluginContext.Trace("Updated Permit Id " + permitEntityRef.Id);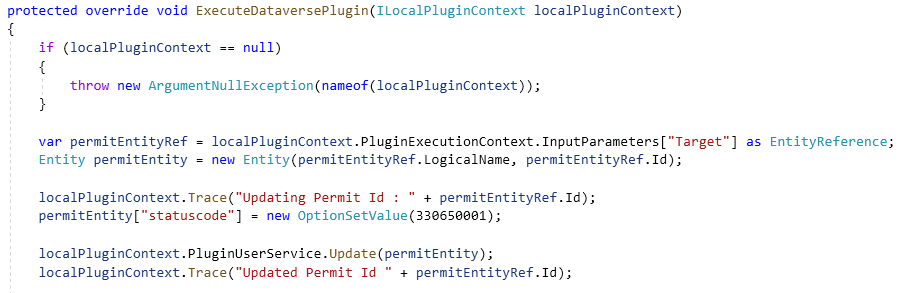
-
Task 2.2: Get related inspections and cancel the inspections
-
Create query and condition expressions.
-
Create the QueryExpression. Add the code below to the ExecuteDataversePlugin method.
QueryExpression qe = new QueryExpression
{
    EntityName = "contoso_inspection",
    ColumnSet = new ColumnSet("statuscode"),
};
qe.Criteria.AddCondition("contoso_permit", ConditionOperator.Equal, permitEntityRef.Id);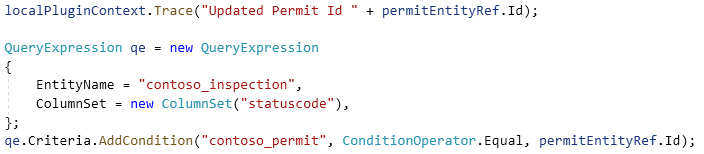
-
-
Retrieve the inspections and iterate through the returned records.
-
Run the QueryExpression query by using Retrieve Multiple.
localPluginContext.Trace("Retrieving inspections for Permit Id " + permitEntityRef.Id); var inspectionsResult = localPluginContext.PluginUserService.RetrieveMultiple(qe); localPluginContext.Trace("Retrieved " + inspectionsResult.Entities.Count + " inspection records"); -
Create a variable that will keep track of the canceled Inspections count and Iterate through the returned entities.
int canceledInspectionsCount = 0;
foreach (var inspection in inspectionsResult.Entities)
{

}
-
-
Retrieve the selected status reason option and check if it is set to new request or pending.
-
Get the currently selected value of the Status Reason. Add the code below inside the foreach loop.
var currentValue = inspection.GetAttributeValue<OptionSetValue>("statuscode"); -
Check if the inspection is New Request or Pending and increment the count. This should be placed inside the foreach loop.
if (currentValue.Value == 1 || currentValue.Value == 330650001)
{

}
[!NOTE] 1 is the value of the Inspection New Request status reason and 330650001 id the value of the Inspection Pending status reason. If the Pending status reason is different for your environment, change the code to match your value.
-
-
Cancel the inspections that are pending or new request.
-
Set the Status Reason selected value to Canceled. Add the code below inside the if statement inside the foreach loop.
inspection["statuscode"] = new OptionSetValue(330650004);[!NOTE] 330650004 is the value of the Inspection Canceled status reason. If the Canceled status reason is different for your environment, change the code to match your value.
-
Update the Inspection and add Trace messages.
localPluginContext.Trace("Canceling inspection Id : " + inspection.Id);
localPluginContext.PluginUserService.Update(inspection);
localPluginContext.Trace("Canceled inspection Id : " + inspection.Id);
canceledInspectionsCount++;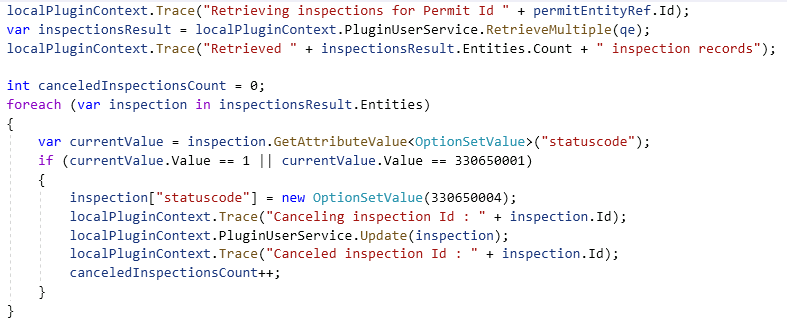
-
Task 2.3: Set Output Parameter and Create Note record
-
Check if at least one Inspection was canceled and CanceledInspectionsCount output Parameter.
-
Check if at least one Inspection was canceled. Add the code below after the foreach loop.
if (canceledInspectionsCount > 0) { } -
Set the CanceledInspectionsCount output parameter. Add the code below inside the if statement outside the foreach loop.
localPluginContext.Trace("Canceled " + canceledInspectionsCount + " inspection records");
localPluginContext.PluginExecutionContext.OutputParameters["CanceledInspectionsCount"] = canceledInspectionsCount;
-
-
Check if the Input Parameters contain reason and create the Note record.
-
Check if Reason contains in the InputParameters. Add the code below after the last if statement.
if (localPluginContext.PluginExecutionContext.InputParameters.ContainsKey("Reason")) { } -
Build the Note record. Add the code below inside the if statement.
localPluginContext.Trace("building a note record"); Entity note = new Entity("annotation"); note["subject"] = "Permit Locked"; note["notetext"] = "Reason for locking this permit: " + localPluginContext.PluginExecutionContext.InputParameters["Reason"]; note["objectid"] = permitEntityRef; note["objecttypecode"] = permitEntityRef.LogicalName; -
Create the Note record. Add the code below inside the if statement.
localPluginContext.Trace("Creating a note record"); var createdNoteId = localPluginContext.PluginUserService.Create(note); -
Check if the Note record was created.
if (createdNoteId != Guid.Empty)
    localPluginContext.Trace("Note record was created");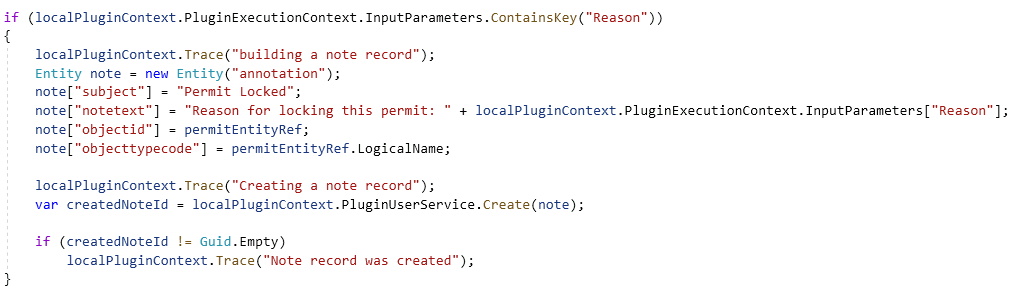
-
-
Build the project.
- Select the Save icon.
- In Solution Explorer, right-click the ContosoPackageProject project and select Build.
- Check the Output window and make sure that the build has succeeded. If it does not, go back and review your work compared the steps documented here.
-
Select File and Close Solution.
-
Select Save.
-
Select Save.
Task 2.4: Deploy the plug-in
-
If you do not have the Plugin Registration Tool running already, follow instructions above to run the tool and connect to the environment.
-
Update the assembly.
-
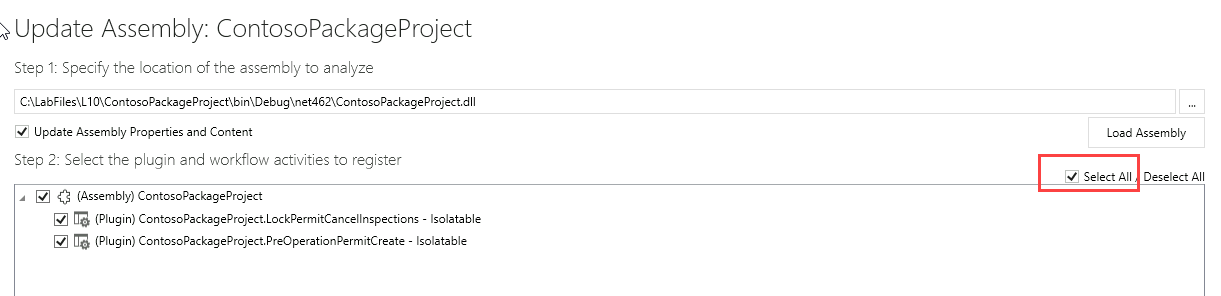
Select the ContosoPackageProject assembly and select Update.

-
Select the ellipses ….
-
Browse to the bin/debug/net462 folder of your plugin project ContosoPackageProject.
-
Select the ContosoPackageProject.dll file and select Open.
-
Check the Select All checkbox.
-
Select Update Selected Plugins.
-
Select OK.
-
-
Add plug-in to solution.
- Navigate to Power Apps maker portal and make sure you have the Development environment selected.
- Select Solutions.
-
Open the Permit Management solution.
-
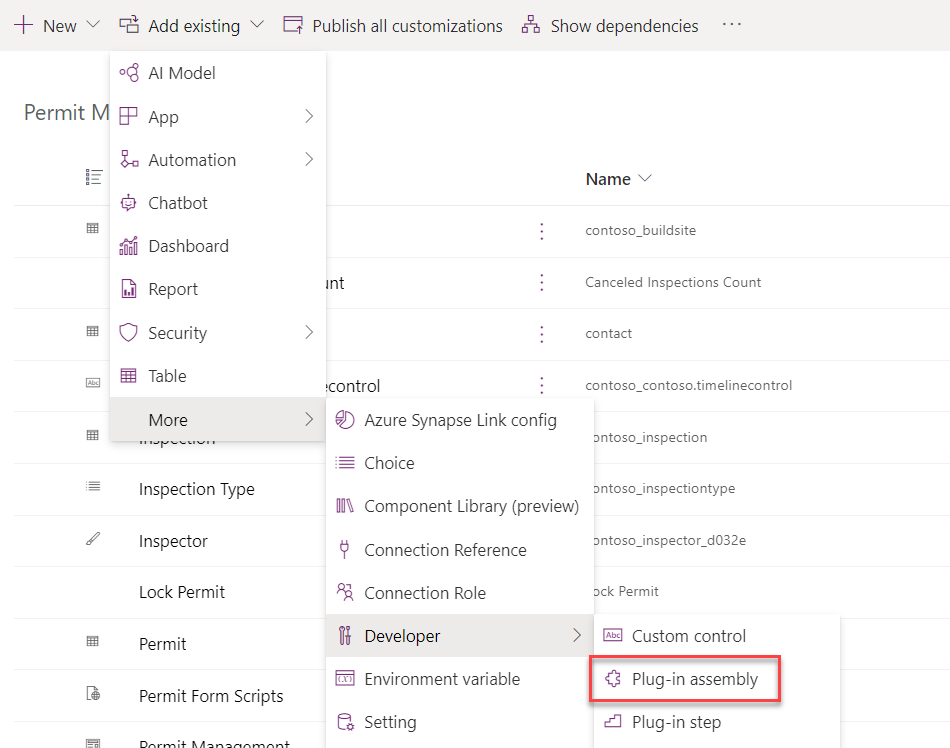
Select Add existing and select More and Developer and Plug-in assembly.
-
Select the ContosoPackageProject assembly and then select Add.
-
Select Add existing and select More and Developer and Plug-in step.
- Select the ContosoPackageProject.PreOperationPermitCreate step and then select Add.
-
Configure the custom API.
-
Select Custom API and open the Lock Permit custom API.

-
Scroll down and select ContosoPackageProject.LockPermitCancelInspections for Plugin Type.

-
Select Save & Close.
-
Select Done.
-
Exercise 3: Test Plug-ins
Objective: In this exercise, you will test the plug-ins you created.
Task 3.1: Enable Trace Logs
-
Enable Trace logs in XrmToolBox.
-
Launch XrmToolBox.
-
Select the Tools tab in XRMToolBox.
-
Search for
traceand select Plugin Trace Viewer. -
Select Yes to connect to an organization.
-
Select your Dev connection and select OK.
-
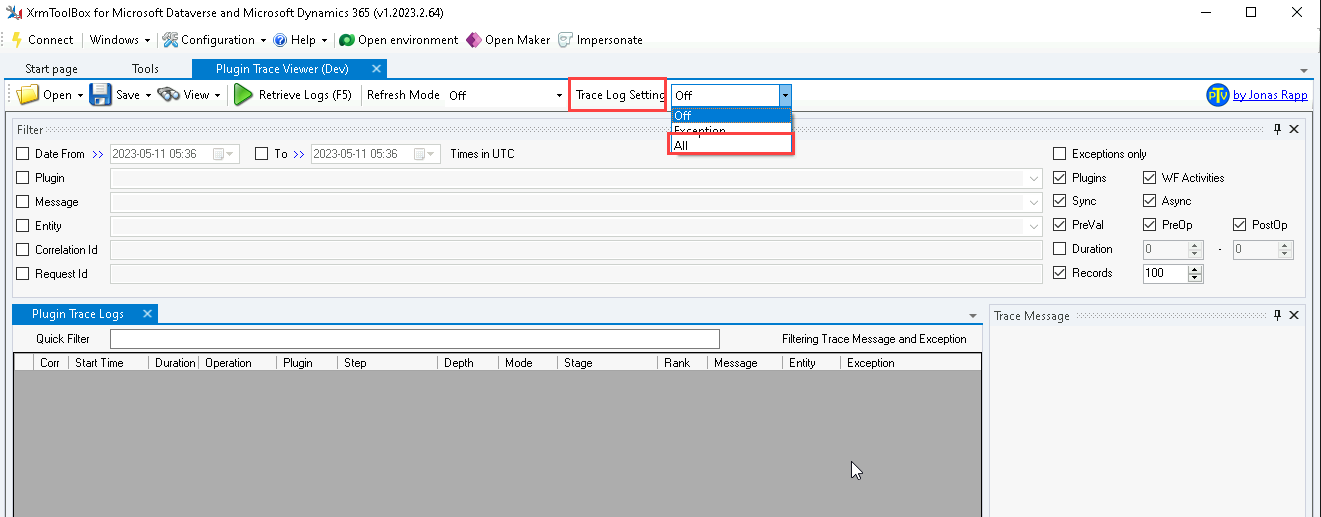
Change Trace Log Setting to All.
-
Set Enable Plug-in Logging to Plug-in Trace Log to All and select OK.
-
Select OK.
-
Select OK.
-
Leave XrmToolBox open.
-
-
Test data.
- Navigate to the Power Apps maker portal https://make.powerapps.com.
- Make sure you are in the Development environment.
- Select Apps.
- Select the Permit Management app, select the ellipses (…) and select Play.
-
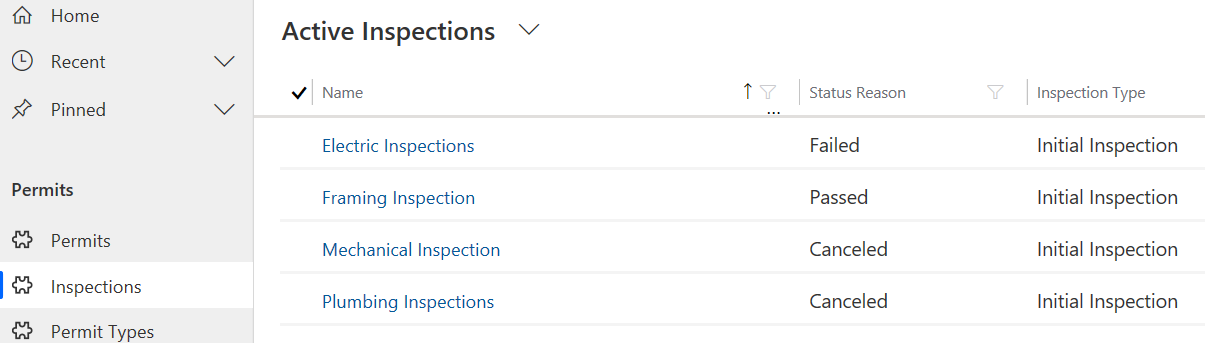
Select Inspections.
-
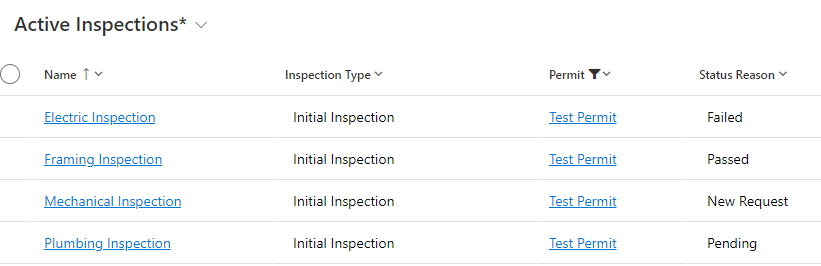
You should have four inspections for Test Permit; one Failed, one Passed, one New Request, and one Pending. If not, edit and update the records.
Task 3.2: Test Lock plug-in
-
Lock Permit.
-
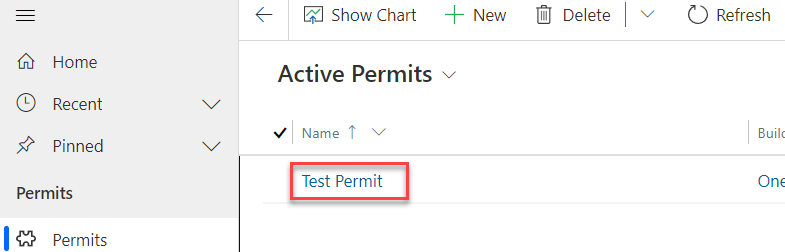
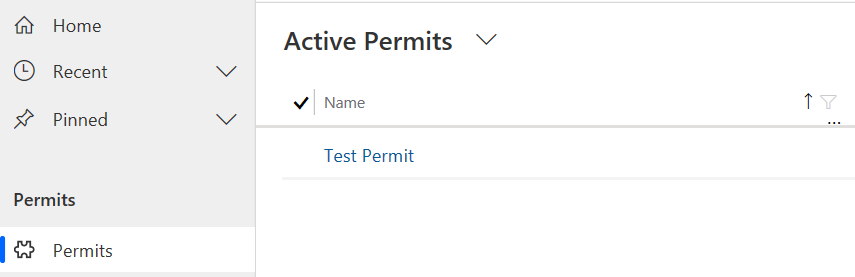
Select Permits.
-
Open the Test Permit.
-
Make sure the Status Reason is set to Active.
-
Select the Lock Permit button.
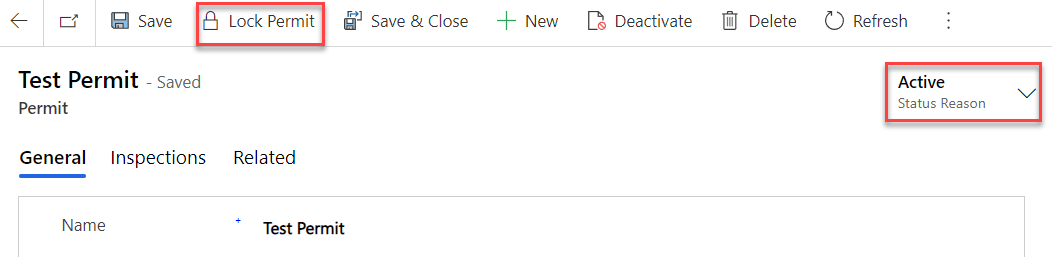
-
The Custom API should run. Select Refresh.

-
The Status Reason value should change to Locked.

-
A note should have been added to the Timeline.
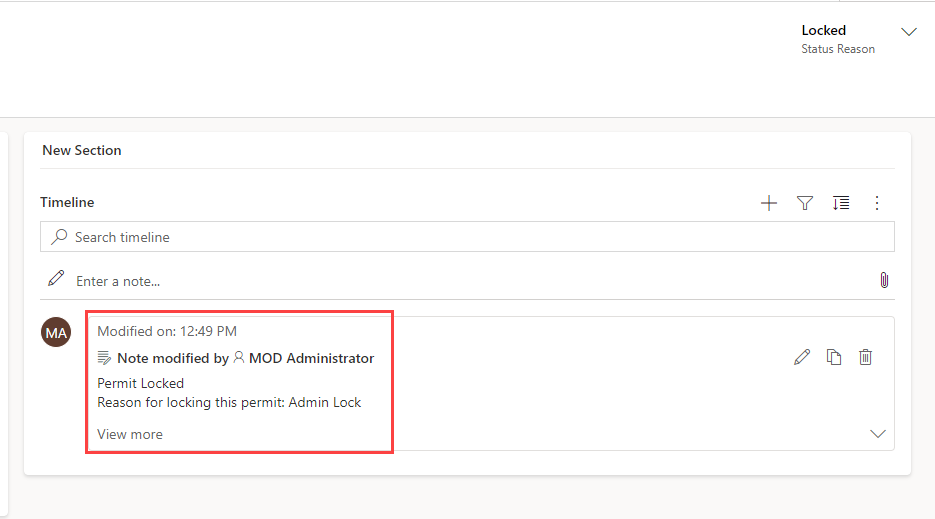
-
-
Check if the Pending and New Request Inspections are canceled.
-
Select Inspections.
-
You should now have two canceled inspections.
-
Task 3.3: Test Restrict New Permit creation plug-in
-
Try to create new Permit record for the One Microsoft Way Build Site.
-
Select Permits.
-
Select + New.
-
Provide Name as
Test Permit Two. -
Select New Construction for Permit Type, One Microsoft Way for Build Site, and Jon Doe for Contact.
-
Select today’s date for the Start Date.
-
Enter
4000for New Size.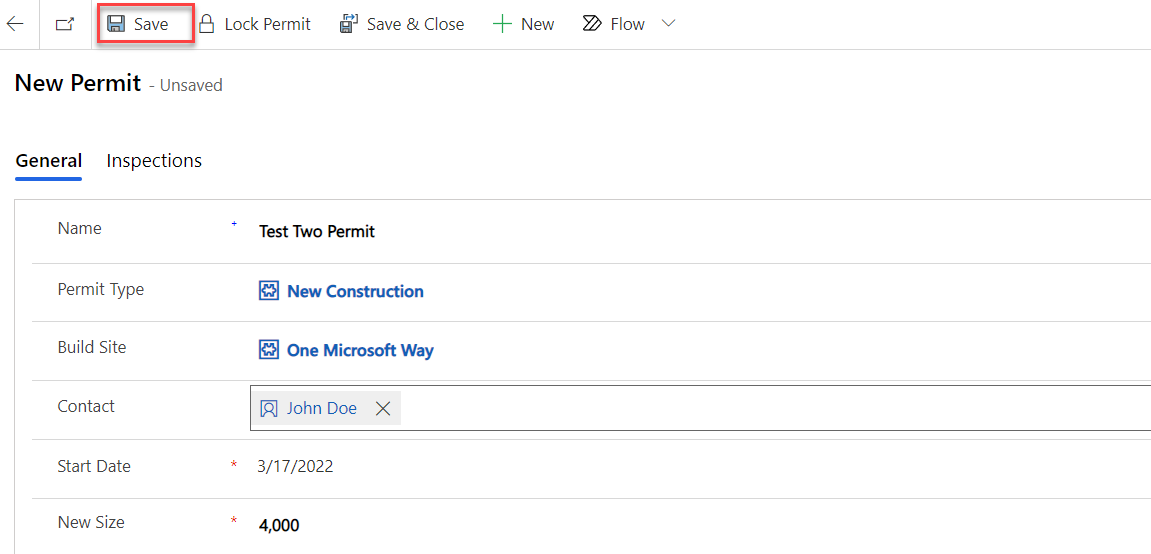
-
Select Save.
-
You should get the error below.
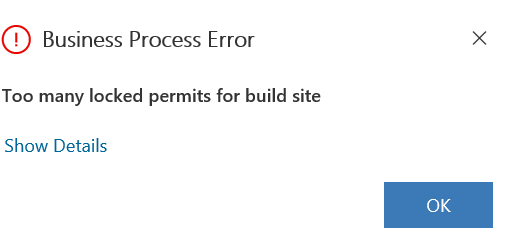
-
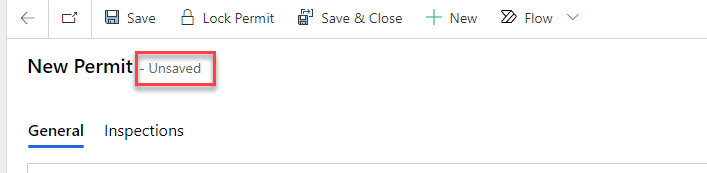
The record should not get created.
-
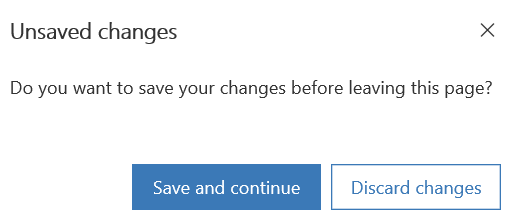
Select OK.
-
Select Permits.
-
Select Discard changes.
-
The Test Two permit has not been created.
-
Exercise 4: Trace Log
Objective: In this exercise, you will check the Plugin Trace logs.
Task 4.1: Plugin Trace Viewer
-
Open Plugin trace Log.
-
Go back to XrmToolBox.
-
Select the Plugin Trace Viewer tab.
-
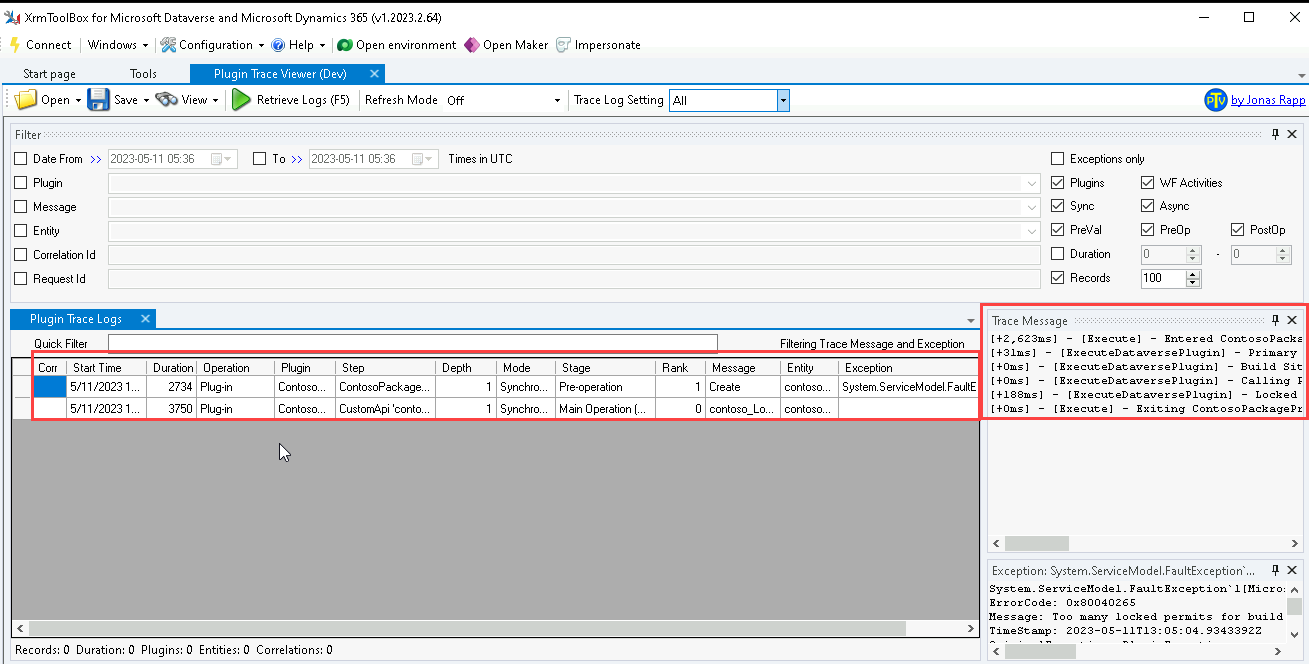
Select Retrieve Logs (F5).
-
You should see at least two logs.
-
-
View the trace logs.
-
Select the log with the contoso_LockPermit message and view the trace message in the right-hand pane. The trace messages should looks similar to.
Entered ContosoPackageProject.PreOperationPermitCreate.Execute() Correlation Id: f67c48f1-7946-4322-bc0b-de0950fffbec, Initiating User: 69d46714-c7eb-ed11-8849-000d3a17a888 Updating Permit Id : f9068d71-f9ec-ed11-8848-0022481c5f83 Updated Permit Id f9068d71-f9ec-ed11-8848-0022481c5f83 Retrieving inspections for Permit Id f9068d71-f9ec-ed11-8848-0022481c5f83 Retrieved 4 inspection records Canceling inspection Id : 18c39160-82ed-ed11-8848-0022481c5f83 Canceled inspection Id : 18c39160-82ed-ed11-8848-0022481c5f83 Canceling inspection Id : de46fb89-82ed-ed11-8848-0022481c5f83 Canceled inspection Id : de46fb89-82ed-ed11-8848-0022481c5f83 Canceled 2 inspection records building a note record Creating a note record Note record was created Exiting ContosoPackageProject.PreOperationPermitCreate.Execute() -
Select the log with the Create message and view the trace message in the right-hand pane. The trace messages should looks similar to.
Entered ContosoPackageProject.PreOperationPermitCreate.Execute() Correlation Id: 8d662516-cfba-4143-951c-f2423e743cc2, Initiating User: 69d46714-c7eb-ed11-8849-000d3a17a888
Primary Entity Id: d12a656d-fcef-ed11-8848-0022481c5f83
Build Site Entity Id: d4518341-f9ec-ed11-8848-0022481c5f83
Calling RetrieveMultiple for locked permits
Locked Permit count : 1
Exiting ContosoPackageProject.PreOperationPermitCreate.Execute()
-
Exercise 5: Plug-in performance (Optional)
Objective: In this exercise, you see if you can improve the performance of the plugins.
Task 5.1: Improve performance of LockPermitCancelInspections
-
Filter the records in the QueryExpression to only return inspections to canceled.
qe.Criteria.AddCondition("statuscode", ConditionOperator.In, new object[] { 1,330650001 });or
qe.Criteria.FilterOperator = LogicalOperator.And;
FilterExpression statusfilter = new FilterExpression();
statusfilter.FilterOperator = LogicalOperator.Or;
statusfilter.AddCondition("statuscode", ConditionOperator.Equal, 1);
statusfilter.AddCondition("statuscode", ConditionOperator.Equal, 330650001);
qe.Criteria.AddFilter(statusfilter);