Practice Lab 9 – Azure
Scenario
This lab focuses on both inbound and outbound integration with Azure. In this lab you will:
1) Use the event publishing capability of Microsoft Dataverse. When a permit results in changing the size of the build site, an external taxing authority needs to be notified so they can evaluate if additional taxing is required. You will configure Microsoft Dataverse to publish permits with size changes using the Webhook. To simulate the taxing authority receiving the information you will create a simple Azure function to receive the post.
- Build a custom connector that can be used from Power Apps and Power Automate. Custom connectors describe existing APIs and allow them to be used easily. In this lab, you will build an API that has common calculations used by inspectors so that they can be used by applications. After building the API, you will create a custom connector definition to make it available to Power Apps and Power Automate.
High-level lab steps
- Import solution and test data
- Create an Azure function and configure as a webhook
- Create an Azure function and use in a custom connector
Starter solution
A starter solution file for this lab can be found in the C:\Labfiles\L09\Starter folder.
Completed solution
Completed solution files for this lab can be found in the C:\Labfiles\L09\Completed folder.
Resources
Complete source code files for this lab can be found in the C:\Labfiles\L09\Resources folder.
Lab environment
If you are using your own tenant and already have the solution installed you should skip to Exercise 4.
Otherwise, if you are starting a new lab you will need to:
- Download the lab files
- Use the Dev One environment
- Import the solution and data
in order to complete the lab.
Exercise 1: Download lab files
In this exercise, you will download the lab files from GitHub.
Task 1.1: PowerShell
-
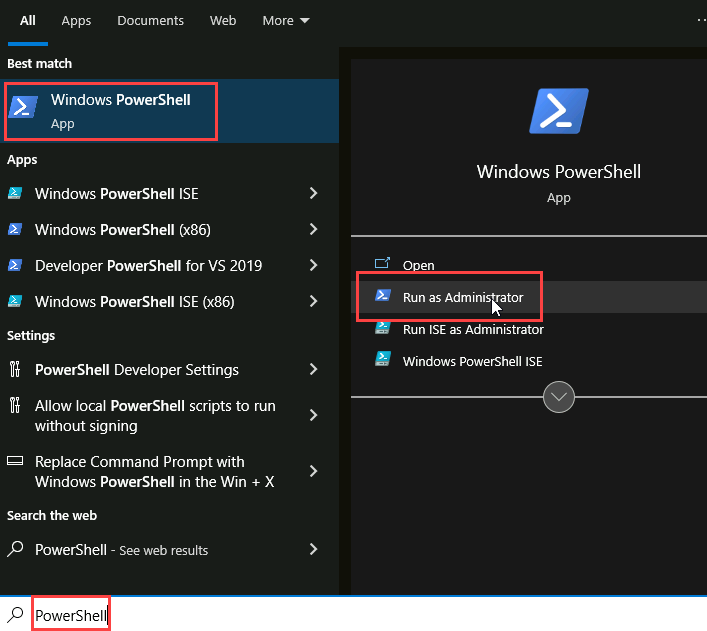
From the lab virtual machine, select the Windows Start icon and search for PowerShell then open PowerShell as Administrator.
-
Select Yes if prompted.
-
Run the following commands to download the latest version of the lab files to the virtual machine.
[!NOTE] If any of the commands fail run them again until they are successful.
-
Create folder for lab files.
New-Item -Path "C:\" -Name "LabFiles" -ItemType "directory" -
Download ZIP file from GitHub.
([System.Net.WebClient]::new()).DownloadFile('https://github.com/MicrosoftLearning/PL-400_Microsoft-Power-Platform-Developer/archive/master.zip', 'C:\LabFiles\master.zip') -
Expand ZIP file.
Expand-Archive -Path 'C:\LabFiles\master.zip' -DestinationPath 'C:\LabFiles' -
Move files to C:\Labfiles
Move-item -Path "C:\LabFiles\PL-400_Microsoft-Power-Platform-Developer-master\Allfiles\Labs\*" -Destination "C:\LabFiles" -confirm: $false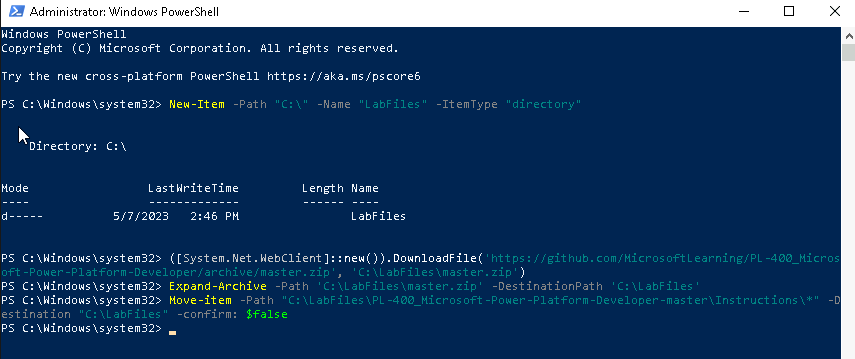
-
Delete files not required for labs.
Remove-item 'C:\LabFiles\PL-400_Microsoft-Power-Platform-Developer-master' -recurse -force -
Delete zip file.
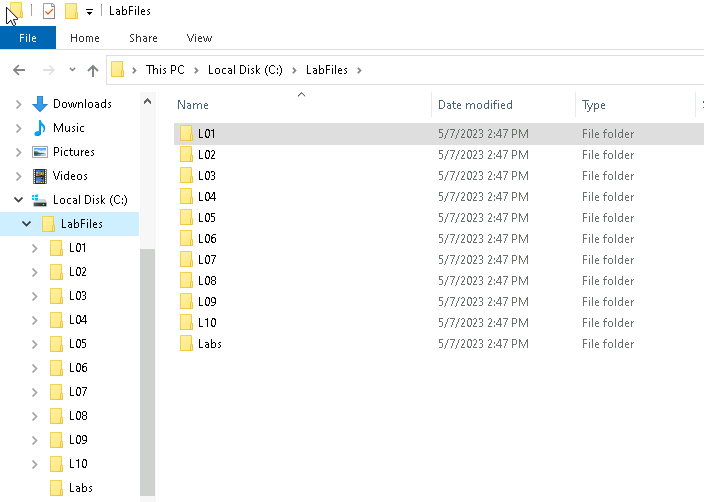
Remove-item 'C:\LabFiles\master.zip'[!NOTE] Please note, the files are copied to C:\Labfiles and whenever asked to navigate to a lab files, you should use this location.
-
Close the PowerShell window.
Exercise 2: Import Permit Management solution
In this exercise, you will import the solution into the Dev One environment.
Task 2.1: Import solution
-
Navigate to
https://make.powerapps.com -
Make sure you are in the Dev One environment.
-
Select Solutions.
-
Select Import solution.
-
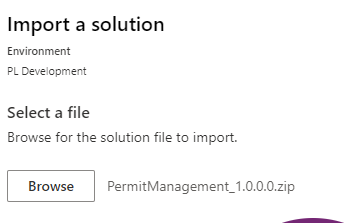
Select Browse and locate the PermitManagement_1.0.0.0.zip file and select Open.
Note: This file is located in the Labfiles/L09 folder on your machine.
-
Select Next.
-
Select Import.
The solution will import in the background. This may take a few minutes.
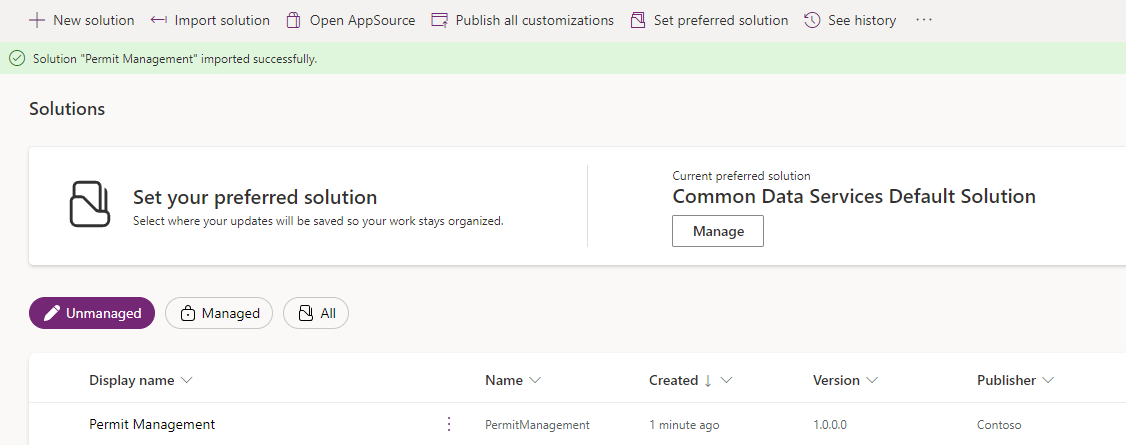
Alert: Wait until the solution has finished importing before continuing to the next step.
-
When the solution has imported successfully, open the Permit Management solution.
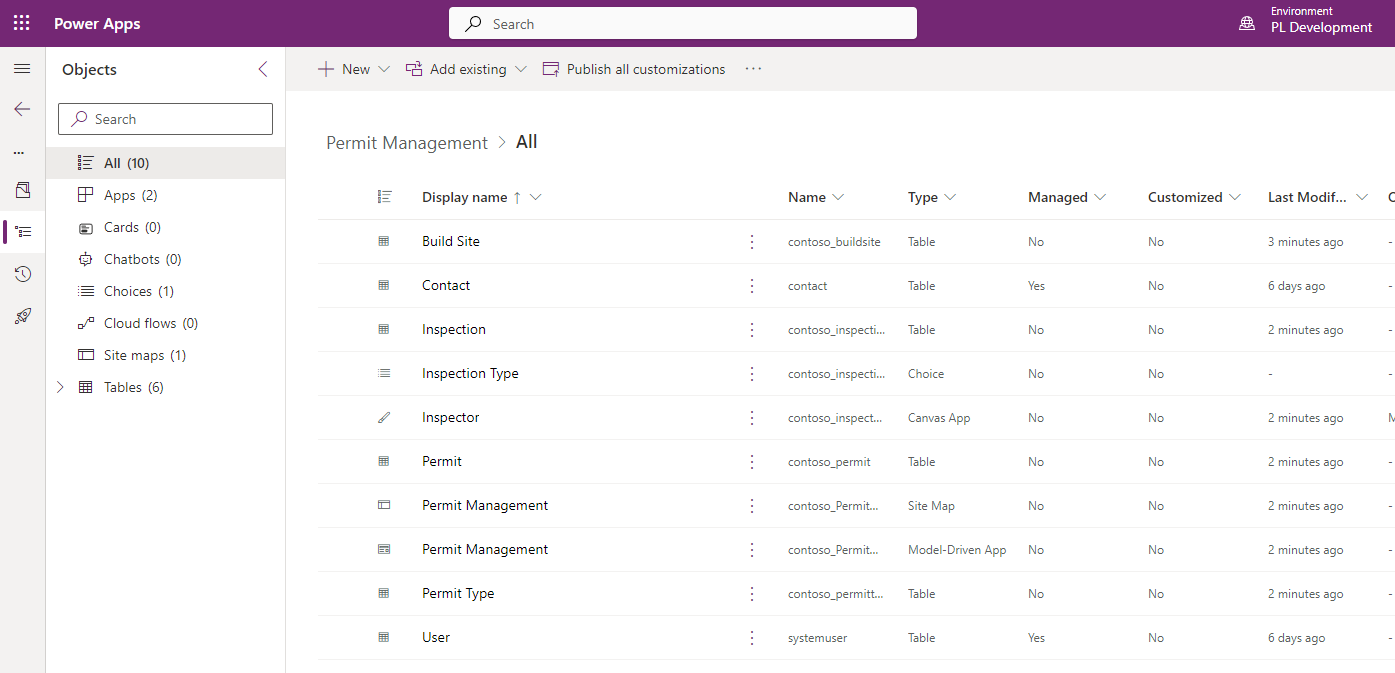
-
In the solution, select the Overview page.
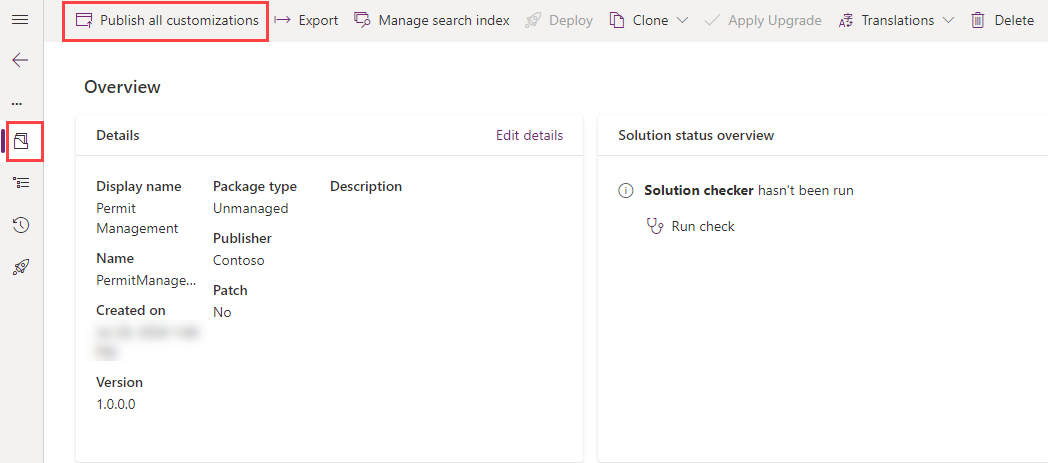
-
Select Publish all customizations.
Exercise 3: Import data
In this exercise, you will import data the into the Dev One environment using the Configuration Migration Tool.
Task 3.1: Import data with the Configuration Migration Tool
-
Open a Command Prompt.
-
Launch the Configuration Migration Tool using the following command:
pac tool cmt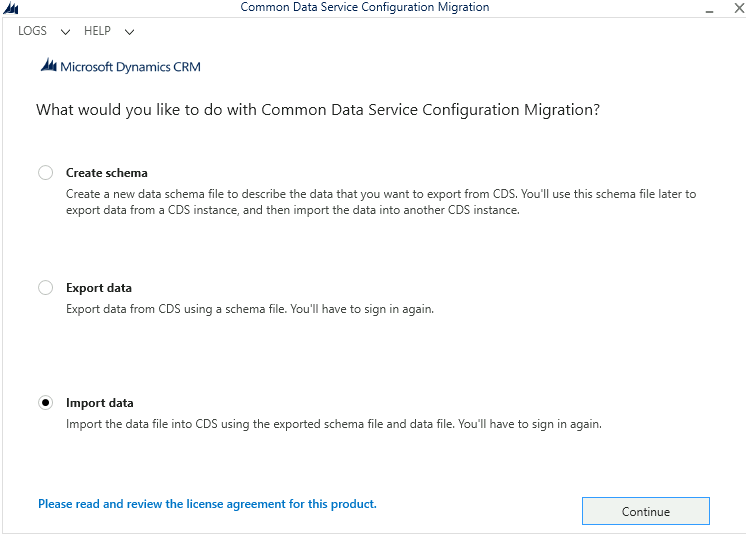
-
Select Import data.
-
Select Continue.
-
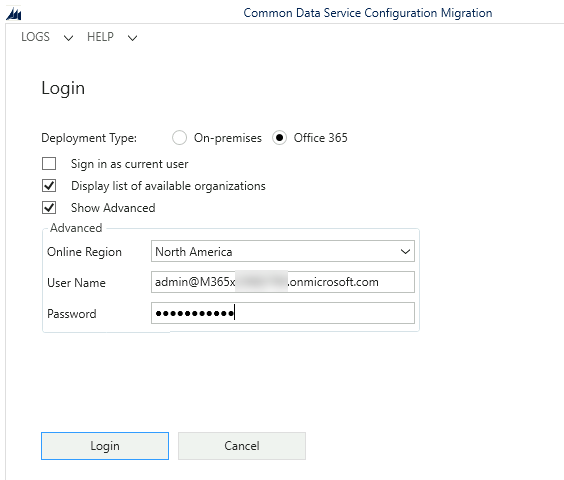
Select Office 365 for Deployment Type.
-
Check Display list of available organizations.
-
Check Show Advanced.
-
Select Don’t know for Online Region.
-
Enter your Microsoft 365 tenant credentials.
-
Select Login.
-
Select the Dev One environment.
-
Select Login.

-
Select the ellipsis (…) menu and locate and select PermitManagementAzuredata.zip file.
Note: This file is located in the Labfiles/L09 folder on your machine.
-
Select Open. The data file will be validated.
-
Select Import Data. The import process will take approximately a minute.
-
Select Exit.
-
Select the X to close the Configuration Migration Tool.
Exercise 4: Create an Azure Function
Objective: In this exercise, you will create an Azure Function that will be the endpoint to accept and log incoming web requests.
High-level steps for webhook
As part of configuring the event publishing, you will complete the following:
- Create an Azure Function to receive the Webhook post
- Configure Microsoft Dataverse to publish events using a Webhook
- Test publishing of events
Task 4.1: Create a storage account
-
Create Storage account.
-
Select Show portal menu and then select + Create a resource.
-
Search for
storage accountand select Storage account by Microsoft. -
Click on the Storage account tile.
-
Select Create.
-
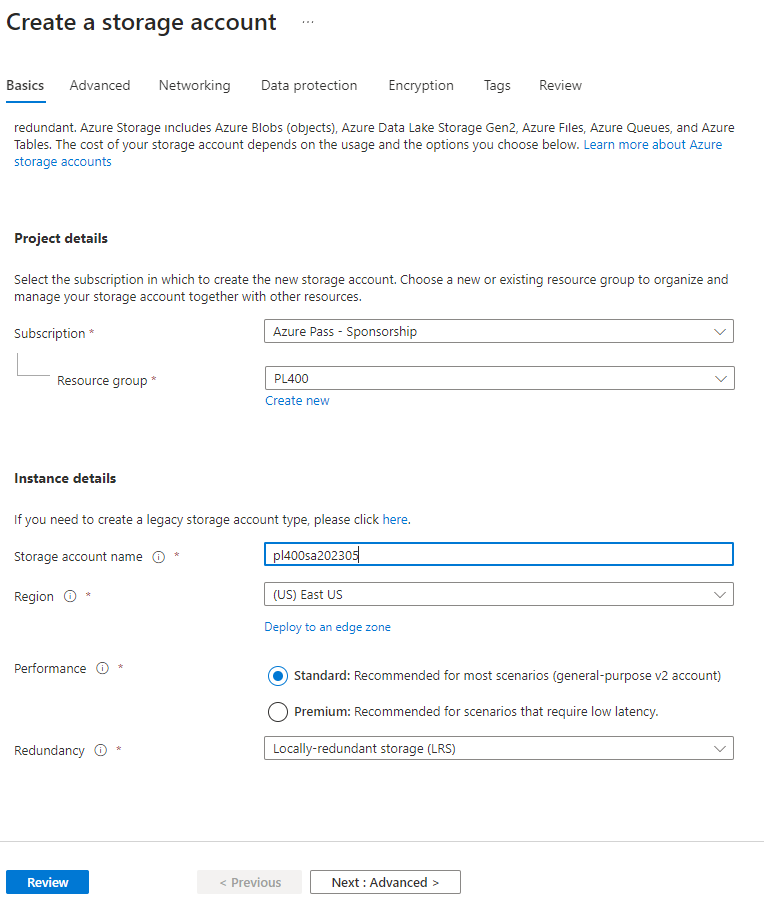
Select the Azure subscription.
-
Select the PL400 for resource group.
-
Enter
pl400safollowed by a unique number for Storage account name.Note: Storage account name must be unique across Azure.
-
Select Standard for Performance.
-
Select Locally-redundant storage (LRS) for Redundancy.
-
Select Review + create.
-
Select Create.
-
Task 4.2: Create a Function App in the Azure Portal
-
Create function app.
-
Sign in to the Azure portal
https://portal.azure.com. -
Select Show portal menu and then select + Create a resource.
-
Search for
function appand select Function App by Microsoft.

- Click on the Function App tile.

-
Select Create.
-
Select the Consumption tile.
-
Select Select.
-
Select the Azure subscription.
-
Select the PL400 for resource group.
-
Enter
pl400whfollowed by your initials and a unique number for Function App name.Note: Function app name must be unique across Azure. Wait until you see a green tick to confirm the name is unique.
-
Select .NET for Runtime stack
-
Select 8 (LTS), in-process model for Version
-
Select Next : Storage.
-
Select the storage account you created in the previous task.
-
Select Review + create.
-
Select Create and wait for the function app to be deployed.
Note: If the function app deployment fails with an error message stating SubscriptionIsOverQuotaForSku, try redeploying the function app in a different region such as Canada Central.
-
Task 4.3: Create an Azure Function in the Azure Portal
-
Create a new function
-
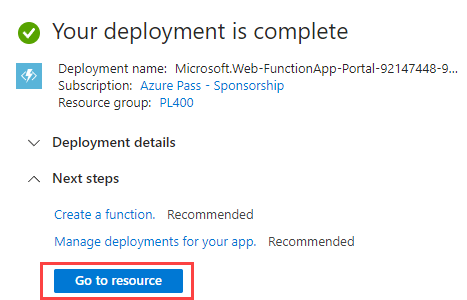
Select Go to resource.
-
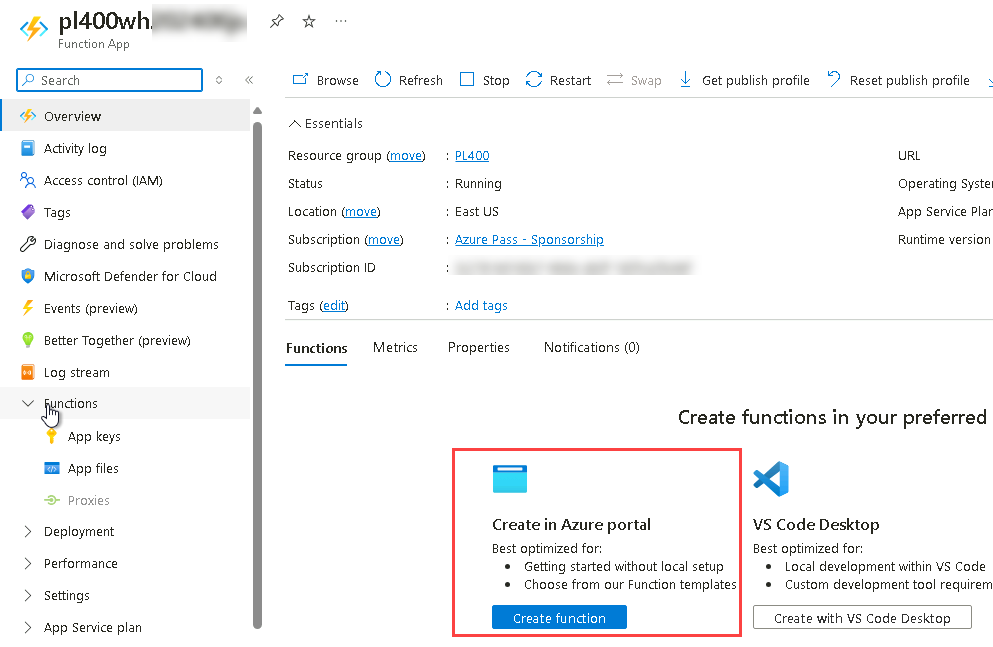
Select the Functions tab.
-
Select Create function under Create in Azure portal.
-
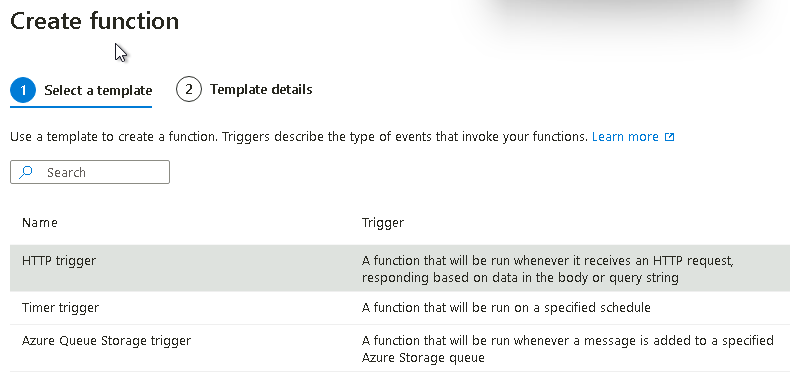
Select HTTP trigger for Template.
-
Select Next.
-
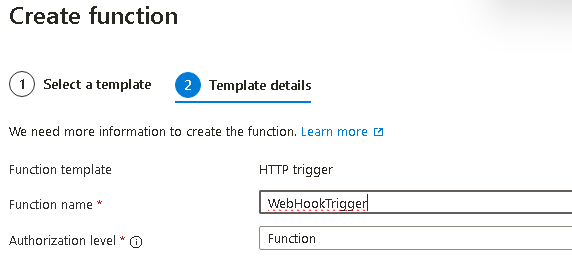
Enter
WebHookTriggerfor Function name. -
Select Function for Authorization level.
-
Select Create.
-
-
Test the function
-
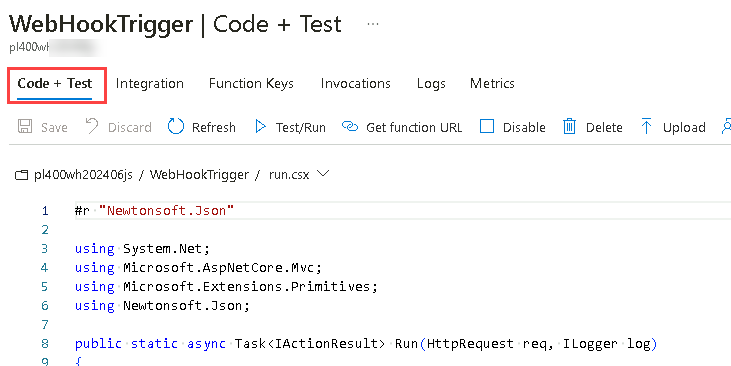
Select the Code + Test tab.
-
Select Test/Run.

-
Select Run.
-
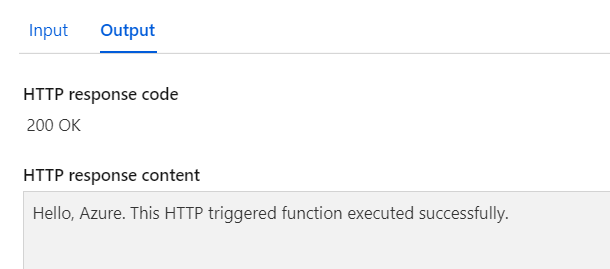
You should see Hello, Azure in the output.
-
Close the test pane.
-
-
Edit the function
-
Replace the entire Task method with the method below.
public static async void Run(HttpRequest req, ILogger log) { log.LogInformation("C# HTTP trigger function processed a request."); string requestBody = await new StreamReader(req.Body).ReadToEndAsync(); dynamic data = JsonConvert.DeserializeObject(requestBody); string indentedJson = JsonConvert.SerializeObject(data, Formatting.Indented); log.LogInformation(indentedJson); } -
Save your changes.
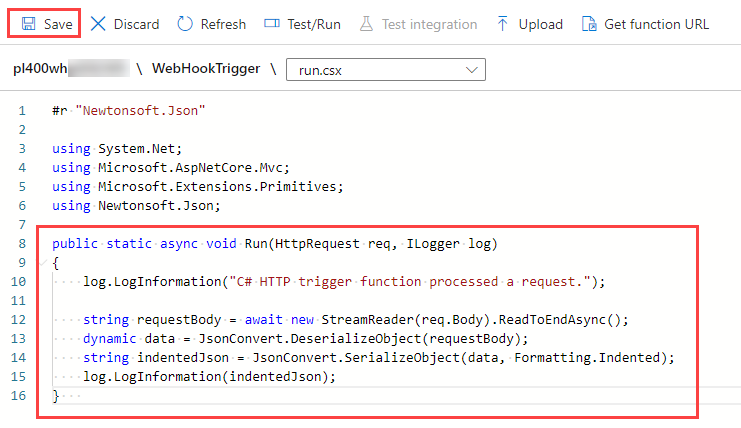
-
-
Remove HTTP output
-
Select the Integration tab.
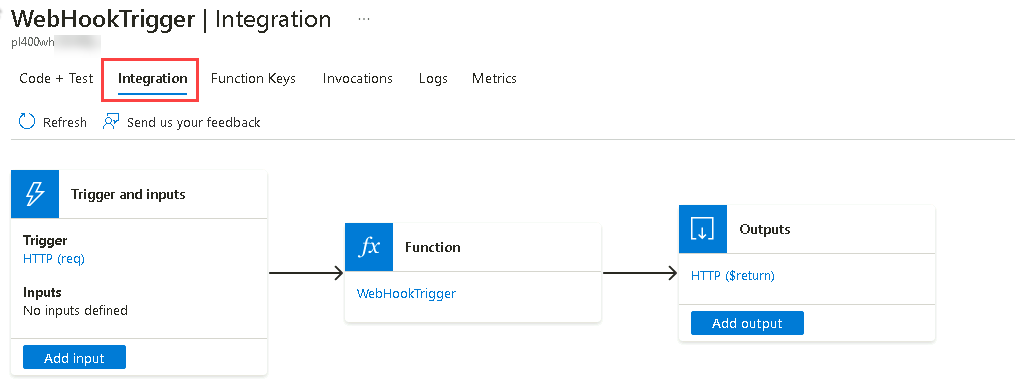
-
Select the HTTP Output.
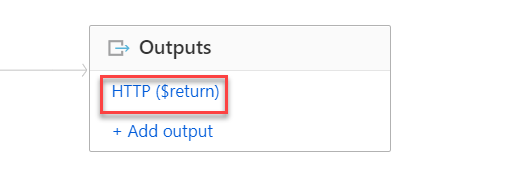
-
Select Delete.
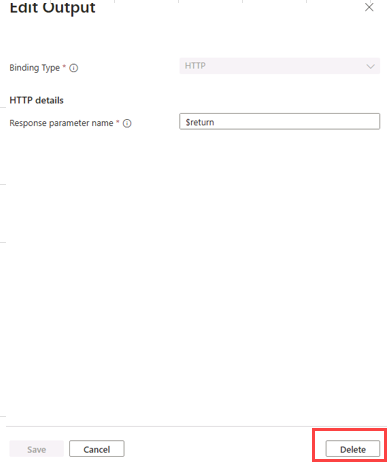
-
Select Delete.
-
-
Get the function endpoint
-
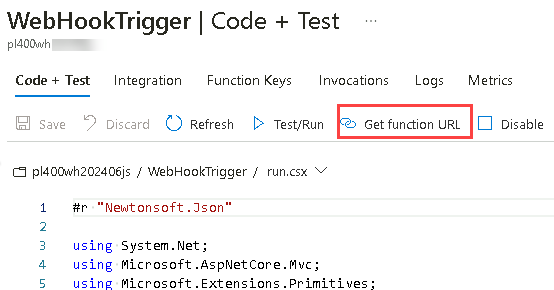
Select the Code + Test tab and then select Get function URL.
-
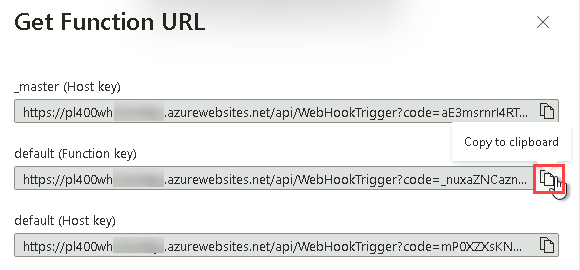
Select Copy to clipboard against the default (Function key) and then select Close.
-
Save the URL in a notepad, you will need it in the next exercise.
-
-
Get the function key
-
Select the Function Keys tab.

-
Select Copy to clipboard against the default key.
-
Save the key in a notepad, you will need it in the next exercise.
-
Exercise 5: Configure Webhook
Task 5.1: Configure publishing to a webhook
-
Start the Plug-in Registration Tool.
-
Start the developer command prompt tool.
-
Run the command below to launch the Plugin Registration Tool (PRT).
pac tool prt
-
-
Connect to your Dataverse environment.
-
Select + CREATE NEW CONNECTION.

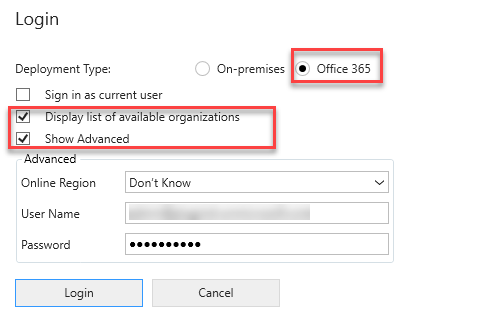
- Select Office 365 for Deployment Type.
- Check Display list of available organizations.
- Check Show Advanced.
-
Enter your tenant credentials.
-
Select Login.
- Select the Dev One environment and select Login.
-
-
Register webhook.
-
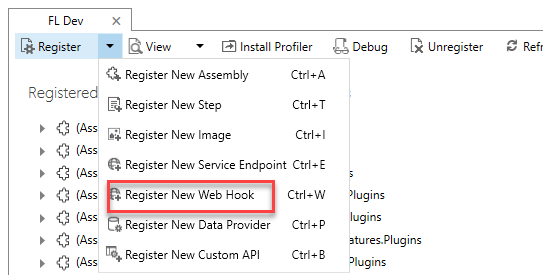
Select Register and then select Register New Web Hook.
-
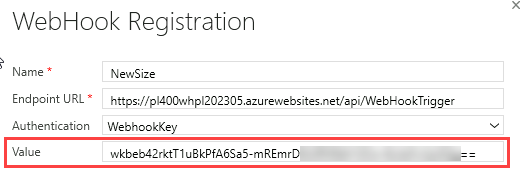
Enter
NewSizefor Name. -
Go to the notepad where you saved the function URL and copy everything before the ?.

-
In the Plugin Registration Tool, paste the URL you copied in the Endpoint URL field.

-
Select WebhookKey for Authentication.
-
Go back to the notepad and copy the function key.
-
In the Plugin Registration Tool, paste the key you copied in the Value field.
-
Select Save
-
-
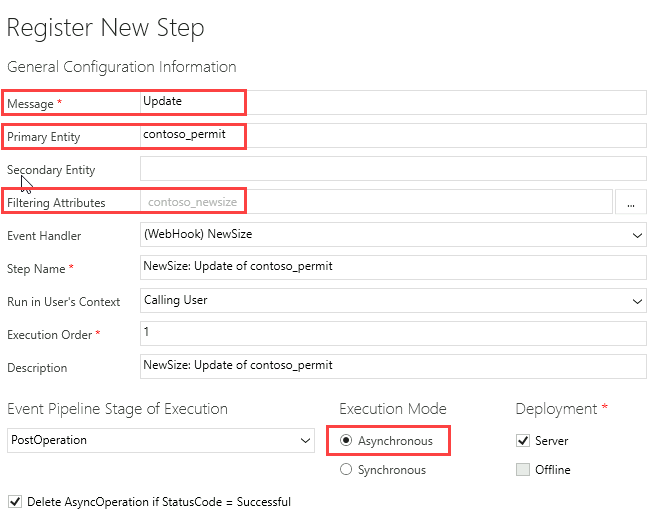
Register new step on update of new size column.
-
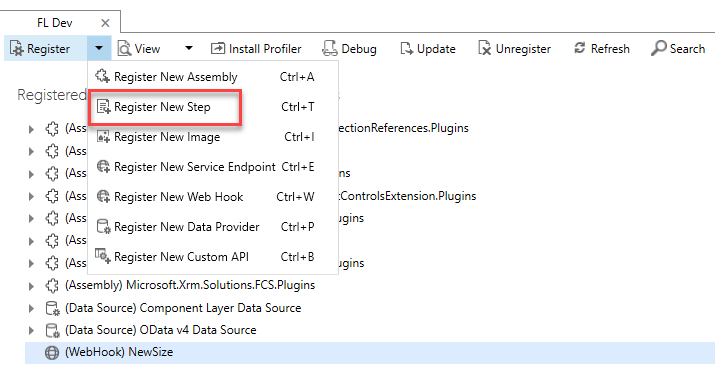
Select the Webhook you registered, select Register and then select Register New Step.
-
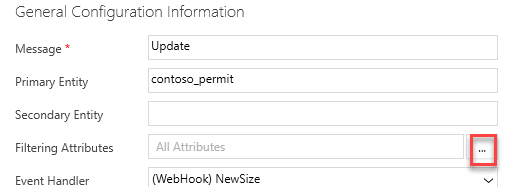
Enter
Updatefor Message. -
Enter
contoso_permitfor Primary Entity. -
Select Filtering Attributes.
-
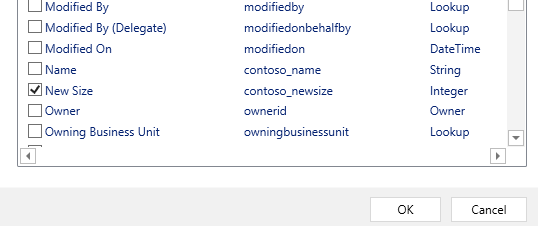
Uncheck Select All.
-
Select New Size.
-
Select OK.
-
Select PostOperation from dropdown for Event Pipeline Stage of Execution.
-
Select Asynchronous for Execution Mode
-
Select Register New Step.
-
Step should now be registered in the WebHook.
-
-
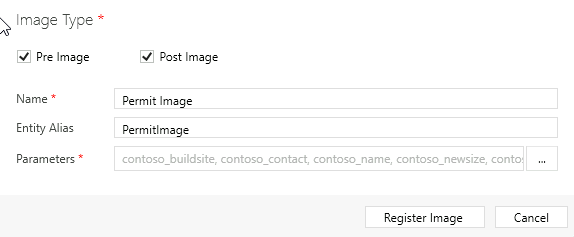
Register images.
-
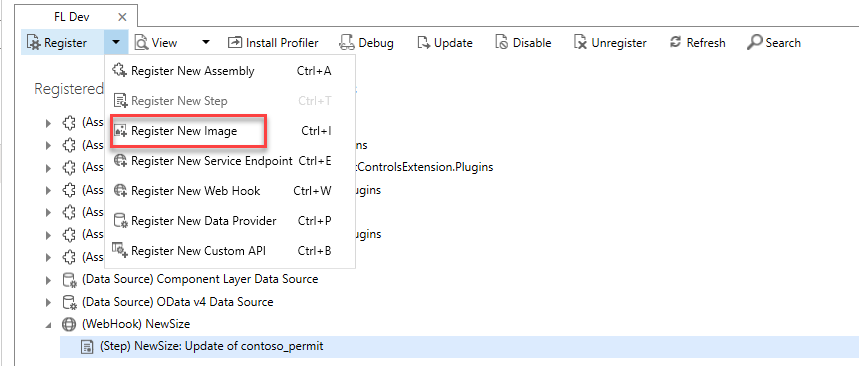
Select the NewSize step you created, select Register and then select Register New Image.
-
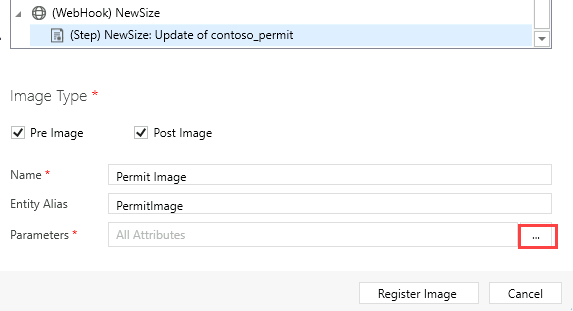
Check Pre Image.
-
Check Post Image.
-
Enter
Permit Imagefor Name. -
Enter
PermitImagefor Entity Alias. -
Select the Parameters button.
-
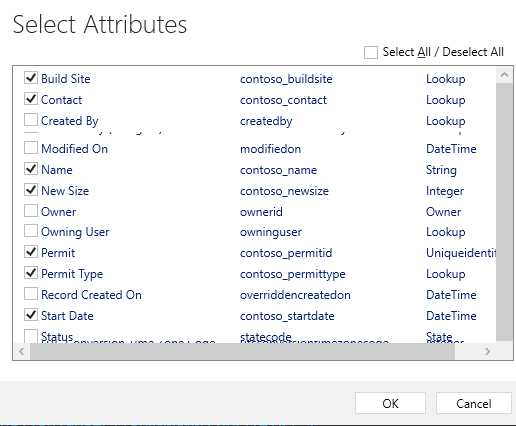
Uncheck Select All.
-
Select Build Site, Contact, Name, New Size, Permit Type, and Start Date.
-
Select OK.
-
Select Register Image.
-
Task 5.2: Test the Webhook
-
Configure formatted output when monitoring the function.
-
Sign in to the Azure portal
https://portal.azure.com. -
Select All Resources, search for
pl400wh, and open the function app you created earlier in the lab. -
Select the Functions tab.
-
Select WebHookTrigger in the Functions tab.
-
In the App Insight Logs dropdown, select Filesystem Logs.

-
Select Ok.
-
-
Update Permit record.
- Navigate to the Power Apps Maker portal
https://make.powerapps.com/. - Select Apps.
- Select the Permit Management app, select the ellipses (…) and select Play.
- Select Permits.
-
Open the Test Permit record.

-
Change the New Size to 5000.
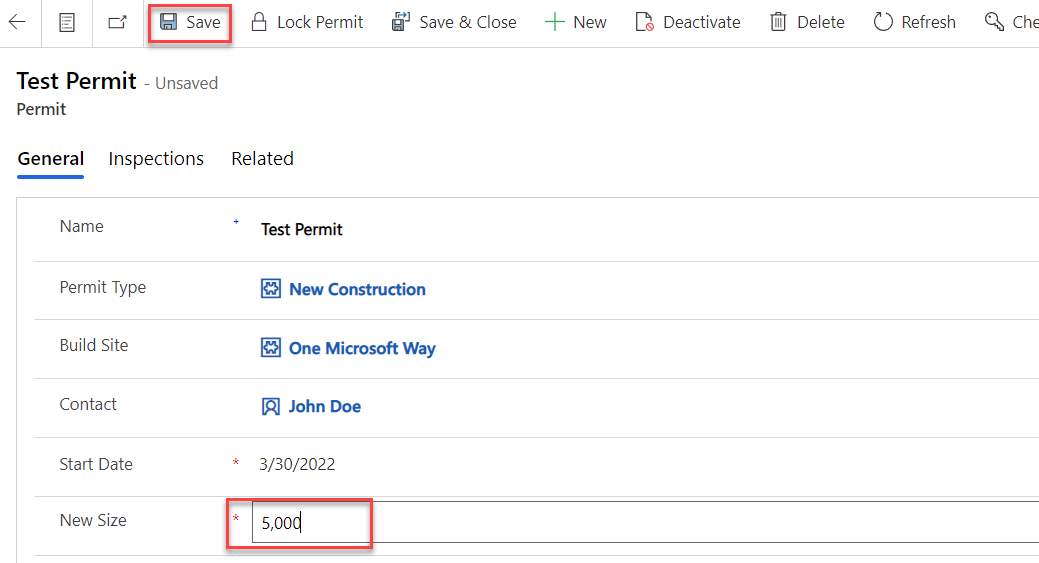
- Select Save.
- Navigate to the Power Apps Maker portal
-
Check Azure logs.
-
Go back to your Azure Function.
-
You should see logs like the image below. The Output is a serialized context object.
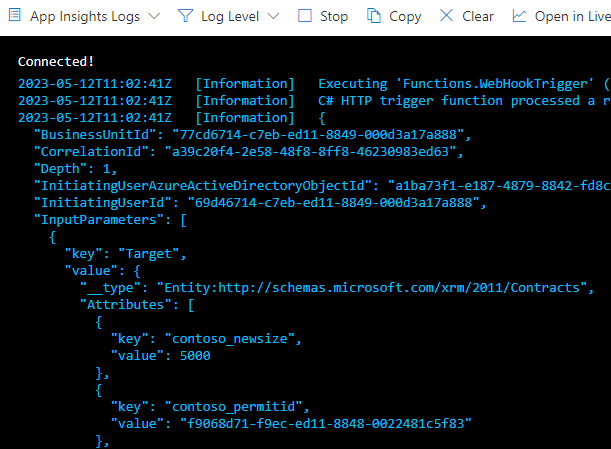
-
Select Clear.

-
-
Confirm the function executes only when the New Size value changes
-
Go back to the Test Permit record.
-
Change the Start Date to tomorrow’s date and select Save.
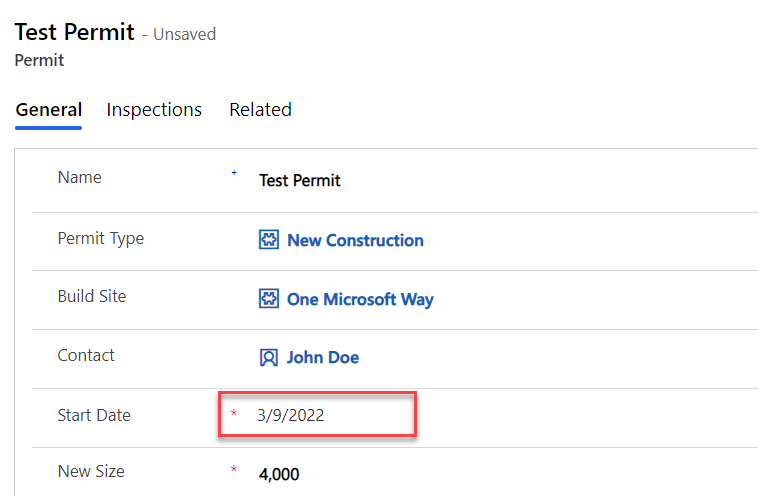
-
Go back to your Azure Function.
-
The log is empty and the function did not execute.
-
-
Update Permit record.
-
In the Permit Management app, select Permits.
-
Open the Test Permit record.
-
Change the New Size to 4000.
-
Select Save.
-
-
Check Azure logs.
-
Go back to your Azure Function.
-
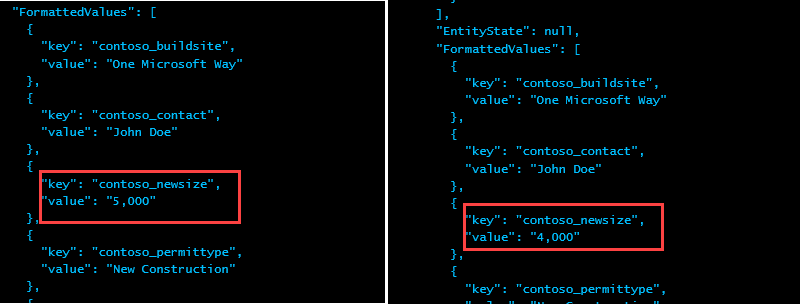
The logs should now show both Pre and Post entity images. In this case you should see the old value 5000 in Pre image and the new value 4000 in the Post image
-
Task 5.3: Add webhook to the solution
-
Add webhook to solution.
- Navigate to the Power Apps Maker portal
https://make.powerapps.com/. - Select Solutions.
-
Open the Permit Management solution.
-
Select Add existing and select More and Developer and Service endpoint.
-
Select the NewSize webhook and then select Add.
-
Select Add existing and select More and Developer and Plug-in step.
- Select the NewSize: Update of contoso_permit step and then select Add.
- Navigate to the Power Apps Maker portal
Exercise 6: Create the Azure Function for a custom connector
Objective: In this exercise, you will create an Azure function that will calculate the CPM.
The connector could have multiple actions defined on it. However, for our lab we will define a single action Get Required CPM – where CPM stands for Cubic X Per Minute. In some regions this would be Cubic Feet Per Minute, and in others it could be Cubic Meters Per Minute. The action we are building will take the dimensions of a room and the number of air exchanges required by policy. The action logic will calculate the required CPM for that configuration. If you want, you can add additional actions to support other inspection type scenarios to the API and the custom connector.
After building the API and the custom connector you will modify the inspector app. You will use the same connector and invoke an action from Power Automate.
High-level steps for custom connector
As part of configuring the custom connector, you will complete the following
- Create an Azure function
- Create a custom connector in a solution
- Configure the security and actions on the custom connector
- Test the custom connector
- Configure a canvas app to use the connector
Task 6.1: Create Azure Function for CPM Calculation
-
Create function
-
Sign in to the Azure portal
https://portal.azure.com. -
Select All Resources, search for
pl400wh, and open the function app you created earlier in the lab. -
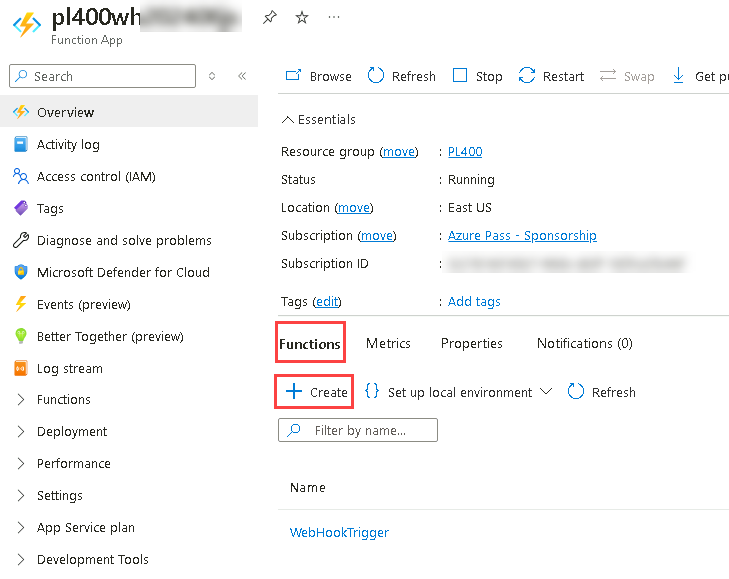
Select the Functions tab.
-
Select + Create.
-
Select HTTP trigger for Template.
-
Select Next.
-
Enter
CPMTriggerfor Function name. -
Select Function for Authorization level.
-
Select Create.
-
-
Add the Using Statements and CPMCalcRequest class to the function.
-
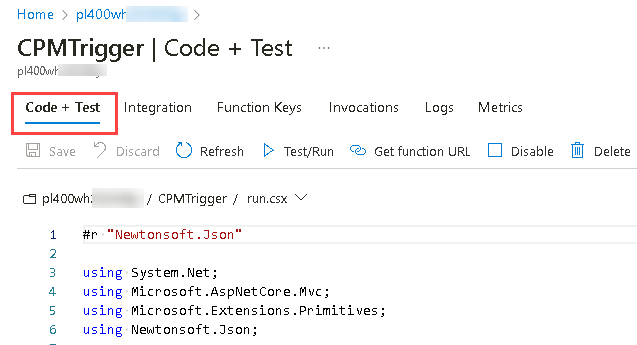
Select the Code + Test tab.
-
Add the Using Statements below to the function.
using Microsoft.Extensions.Logging;
using Newtonsoft.Json.Linq;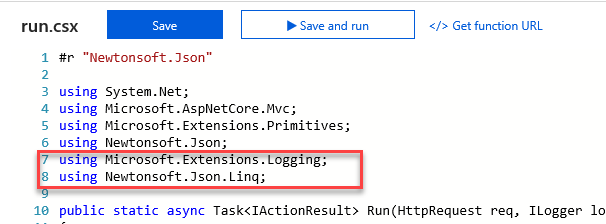
-
-
Clean up the Run method
-
Go to the Run method.
-
Remove everything but the log line from the Run method.

-
-
Add class for the request.
-
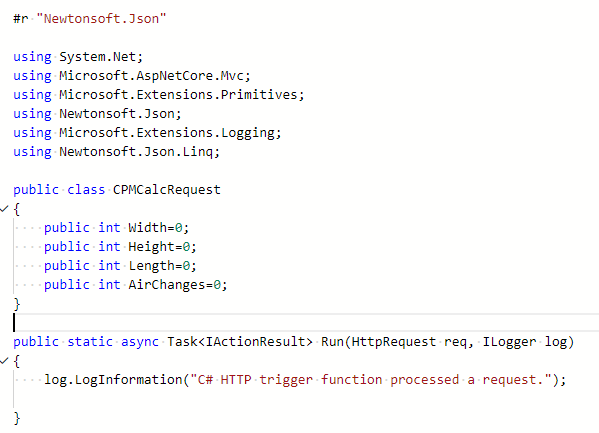
Add the public class below to the function. This will describe the request that will be sent from the applications using the API.
public class CPMCalcRequest
{
    public int Width=0;
    public int Height=0;
    public int Length=0;
    public int AirChanges=0;
}
-
-
Get the Request body and deserialize it as CPMCalcRequest.
-
Get the request Body from the request argument. Add the code below inside the Run method.
string requestBody = await new StreamReader(req.Body).ReadToEndAsync(); -
Deserialize the request body. Add the code below inside the Run method.
CPMCalcRequest calcReq = JsonConvert.DeserializeObject<CPMCalcRequest>(requestBody);

-
-
Calculate the CPM and return it form the Run method
-
Calculate the CPM and log the calculated value. Add the code below inside the Run method.
var cpm = ((calcReq.Width*calcReq.Height*calcReq.Length) * calcReq.AirChanges) / 60; log.LogInformation("CPM " + cpm); -
Return the calculated CPM. Add the code below inside the Run method.
return (ActionResult)new OkObjectResult(new{
    CPM = cpm
});
-
Select Save.
-
-
Select Test/Run.
-
In the Body copy the following input values.
{ "Width": 10, "Height": 15, "Length": 10, "AirChanges": 6 } -
Select Run.
-
the result should be as follows.
{ "cpm": 150 } -
Close the Test pane.
-
Get the function endpoint
-
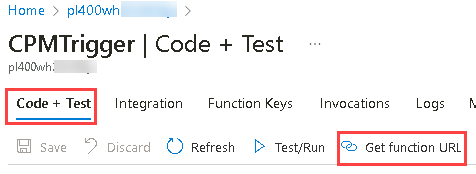
Select the Code + Test tab and then select Get function URL.
-
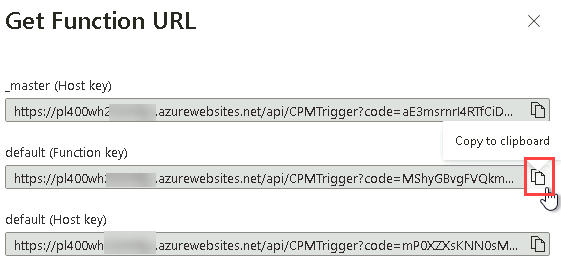
Select Copy to clipboard against the default (Function key) and then select Close.
-
Save the URL in a notepad, you will need it in the next exercise.
-
-
Get the function key
-
Select the Function Keys tab.

-
Select Copy to clipboard against the default key.
-
Save the key in a notepad, you will need it in the next exercise.
-
Exercise 7: Create the Custom Connector
Objective: In this exercise, you will create the Custom Connector. This same approach could be used to describe any existing API you create or that has been created by any third party.
Task 7.1: Create the Custom Connector
-
Open the Permit Management solution
- Navigate to the Power Apps Maker portal
https://make.powerapps.com/. - Select Solutions.
- Open the Permit Management solution.
- Navigate to the Power Apps Maker portal
-
Create Custom Connector
-
Select + New and select Automation and select Custom connector.

-
Enter
CPM Calculatorfor Connector Name.
-
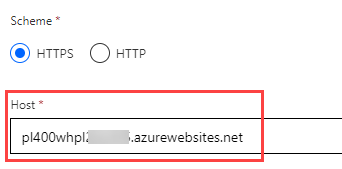
Locate the Host column and paste the Function URL you copied in Exercise 7.
-
Remove https:// and everything after .net.
-
-
Add API key for security.
-
Select Security ->.

-
Select API Key for Authentication type.

-
Enter
API Keyfor Parameter label. -
Enter
codefor Parameter name -
Select Query for Parameter Location.
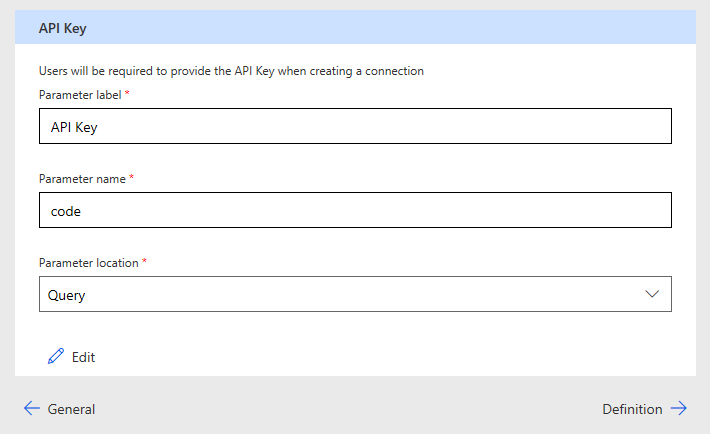
-
-
Define action.
-
Select Definition.

-
Select New Action. The action describes each operation that the API has. These can be manually defined like we are doing here or can be imported from Open API for larger APIs.
-
Enter
CPM Calculatorfor Summary -
Enter
Calculates CPMfor Description. -
Enter
GetRequiredCPMfor Operation ID.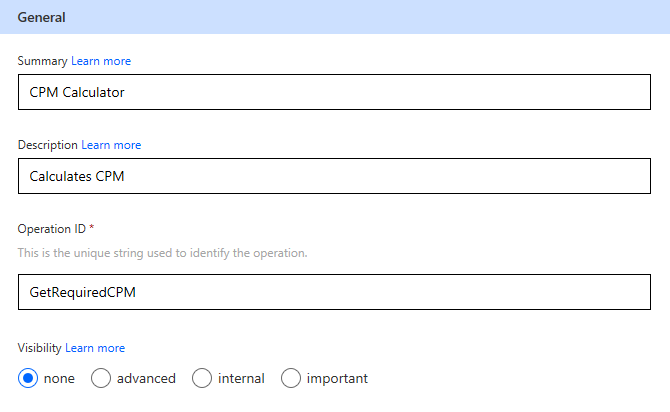
-
Under Request, select + Import from Sample.

-
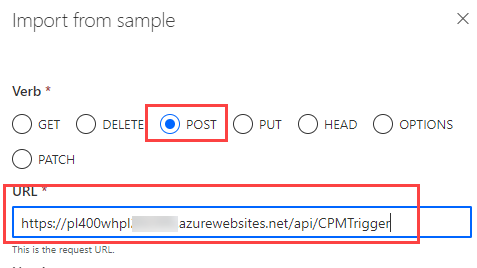
Select POST for Verb.
-
Paste the function URL from your notepad and remove everything after CPMTrigger.
-
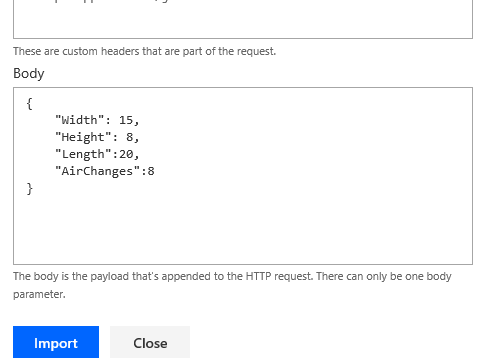
Paste the json below in the Body field.
{
    "Width": 15,
    "Height": 8,
    "Length":20,
    "AirChanges":8
}
-
Select Import.
-
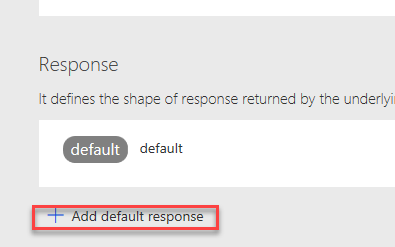
Under Response, select + Add default response.
-
Paste the json below in the Body.
{"cpm":200}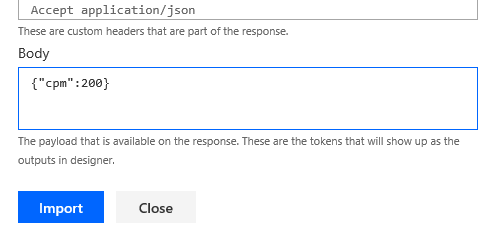
-
Select Import.
-
-
Create connector.
-
Select Create Connector and wait for the connector to be created.

-
-
Test the connector
-
Advance to Test.

-
Select + New connection. This will open a New window.

-
Go back to the notepad and copy the function key.
-
Go back to the connector and paste the value you copied.
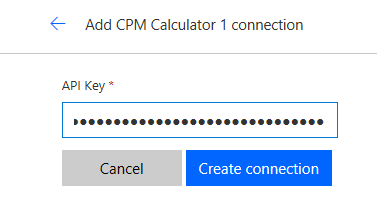
-
Select Create connection.
-
Select the Refresh icon.

-
The connection should be selected.
-
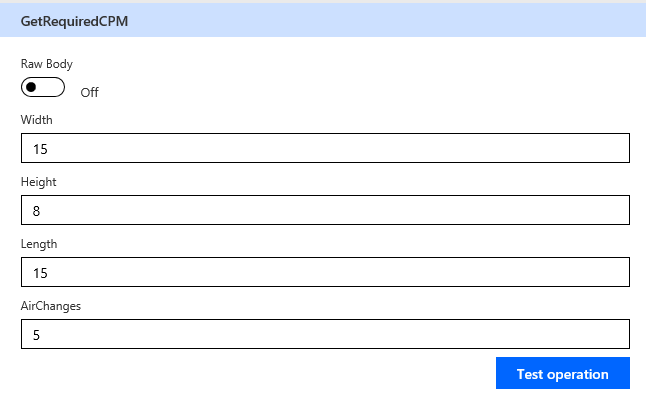
Enter test data,
- Enter 15 for Width.
- Enter 8 for Height.
- Enter 15 for Length.
- Enter 5 for AirChanges..
-
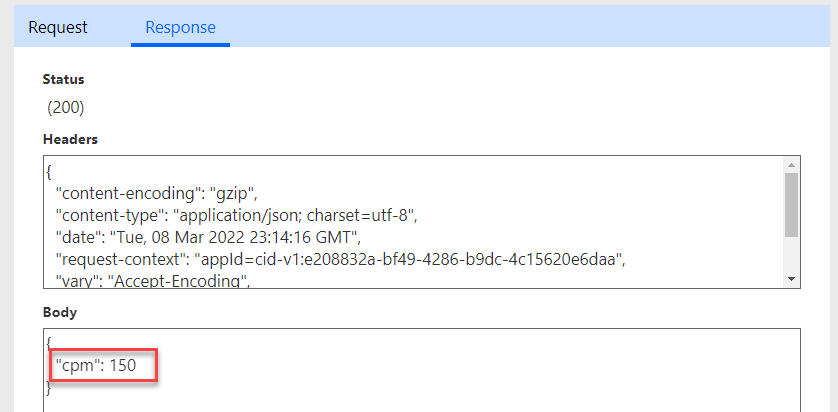
Select Test operation.
-
You should get a CPM value back.
-
Select Close,
-
Close the Custom connectors tab.
-
Select Done.
-
Exercise 8: Test Connector
Objective: In this exercise, you will use the Custom Connector from a canvas app.
Task 8.1: Test in Canvas app
-
Open the Permit Management solution
- Navigate to the Power Apps Maker portal
https://make.powerapps.com/. - Select Solutions.
- Open the Permit Management solution.
- Navigate to the Power Apps Maker portal
-
Edit the Inspector canvas app.
-
Select Apps and select to open the Inspector Canvas app.

-
-
Add new screen to the application.
-
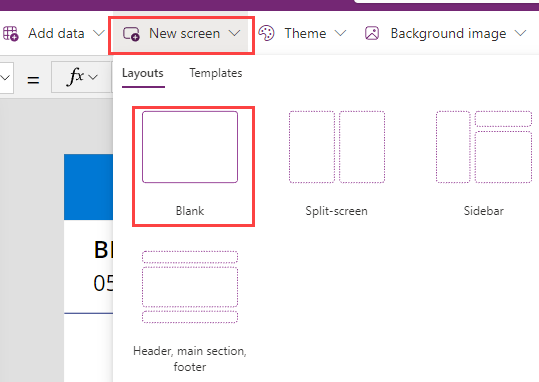
Select New Screen and then select Blank.
-
Rename the screen
CPM Calc Screen.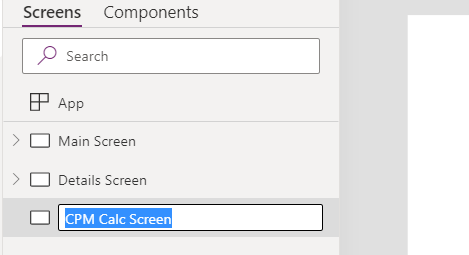
-
-
Add Input Text to the new screen.
-
Select the CPM Calc Screen.
-
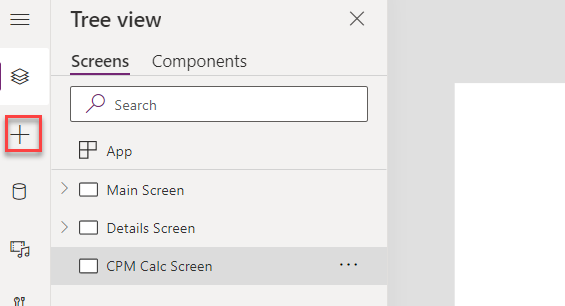
Select + Insert tab.
-
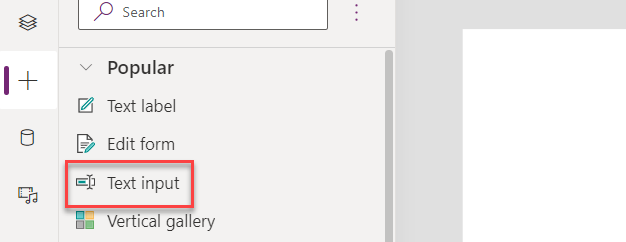
Select Text input.
-
Select the Tree View.

-
Rename the Text Input
Width Text. -
Remove the Default property of the Width text input.

-
Change the HintText property of the Width text input to
"Provide Width".

-
The Width Text input should now look like the image below.

-
-
Add Height, Length, and Air Change Input Text controls.
-
Copy the Width Text.
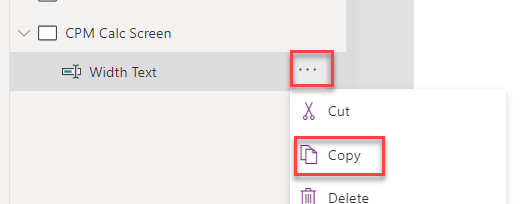
-
Paste the text input you copied to the CPM Calc Screen by selecting Paste and Paste again.

-
Paste the text input you copied to the CPM Calc Screen two more times.
-
The CPMCalcScreen should now have total of four text inputs.
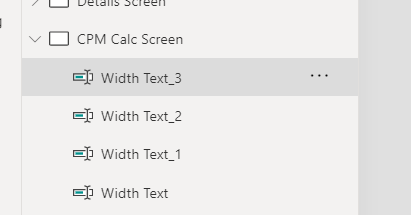
-
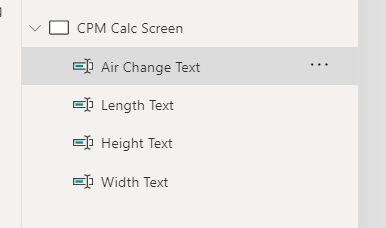
Rename the input text controls Height Text, Length Text, and Air Change Text.
-
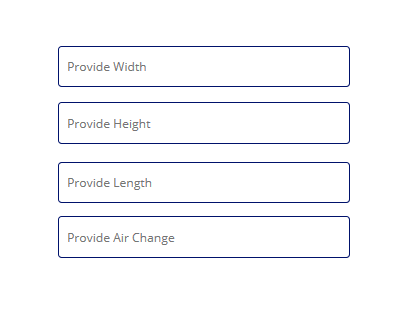
Change the HintText for the three text inputs you renamed to Provide Height, Provide Length, and Provide Air Change, respectively.
-
Resize and reposition the text inputs as shown in the image below.
-
-
Add button.
-
Select + Insert tab.
-
Select Button.
-
Select the Tree view tab.
-
Rename the button to
Calculate Button. -
Change the Text value of the button to
"Submit". -
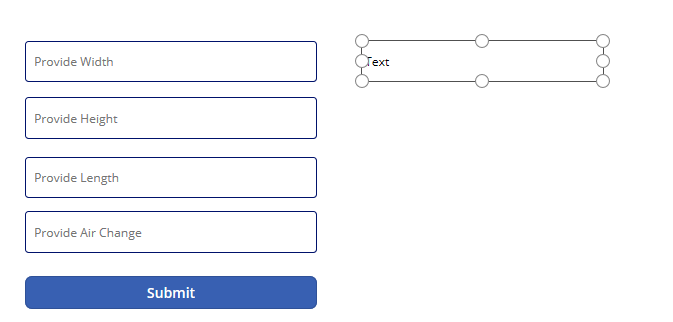
Resize and reposition the button as shown in the image below.

-
-
Add the result label to the screen
-
Select + Insert tab.
-
Select Text label.
-
Select the Tree view tab.
-
Rename the label to
Result Label. -
Place the label to the right of the text inputs.
-
-
Add the Custom Connector to the app.
-
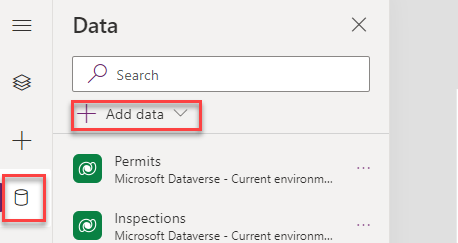
Select the Data tab.
-
Select + Add data.
-
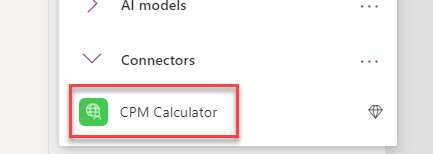
Expand Connectors.
-
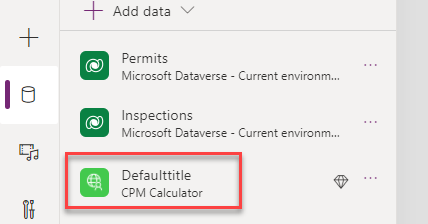
Select CPM Calculator.
-
Select CPM Calculator again.
-
-
Get the calculated value when the button is selected
-
Select the Tree view tab.
-
Select Calculate Button.
-
Set the OnSelect property of the Calculate Button to the formula below.
Set(CalculatedValue, Concatenate("Calculated CPM ", Text(Defaulttitle.GetRequiredCPM({Width: 'Width Text'.Text, Height: 'Height Text'.Text, Length: 'Length Text'.Text, AirChanges: 'Air Change Text'.Text}).cpm)))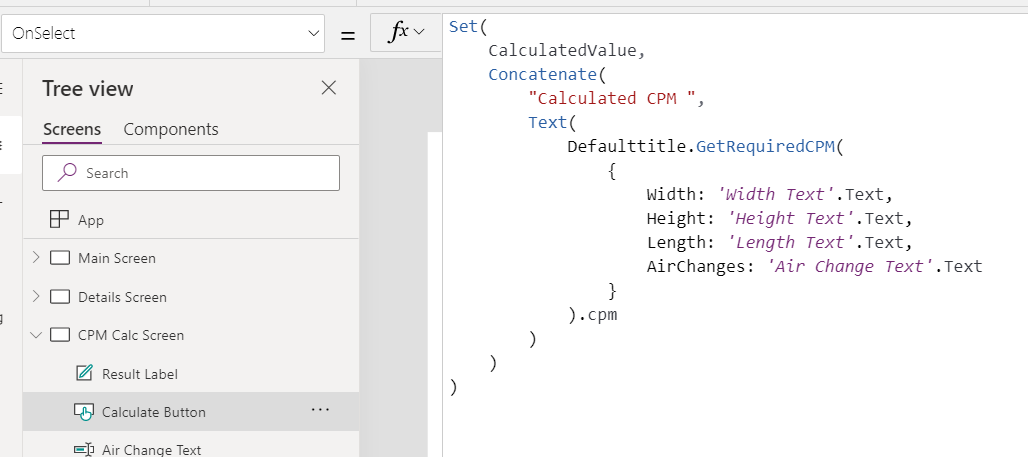
-
Select the Result Label and set the Text property to the CalculatedValue variable.

-
-
Add button to the Main screen.
-
Select the Main Screen.
-
Go to the Insert tab and select Button.
-
Select the Tree view tab.
-
Rename the button to
CPM Button. -
Change the Text value of the button to
"CPM Calculator". -
Place the button on the bottom right of the Main Screen.
-
-
Navigate to the CPM Calc screen.
-
Select the CPM Button button.
-
Set the OnSelect property of the CPM Button to the formula below.
Set(CalculatedValue, ""); Navigate('CPM Calc Screen', ScreenTransition.None);
-
-
Test the app.
- Select the Main Screen and select Preview the app.

-
Select CPM Calculator.
-
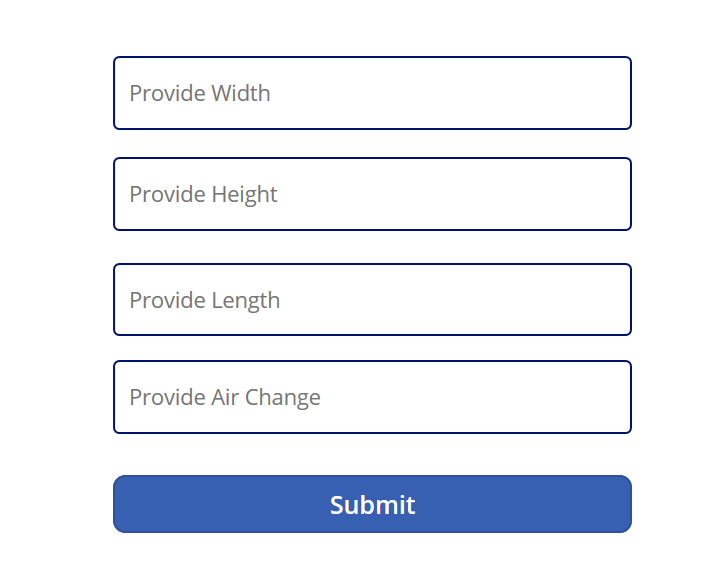
The CPM Calc screen should load.
-
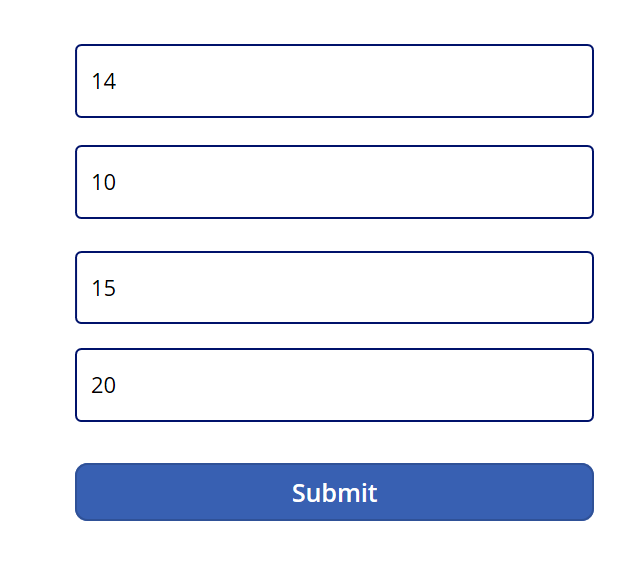
Enter values into the four fields and select Submit. You can notice the loading dots on top of the screen, which confirms that the request has been initiated.
-
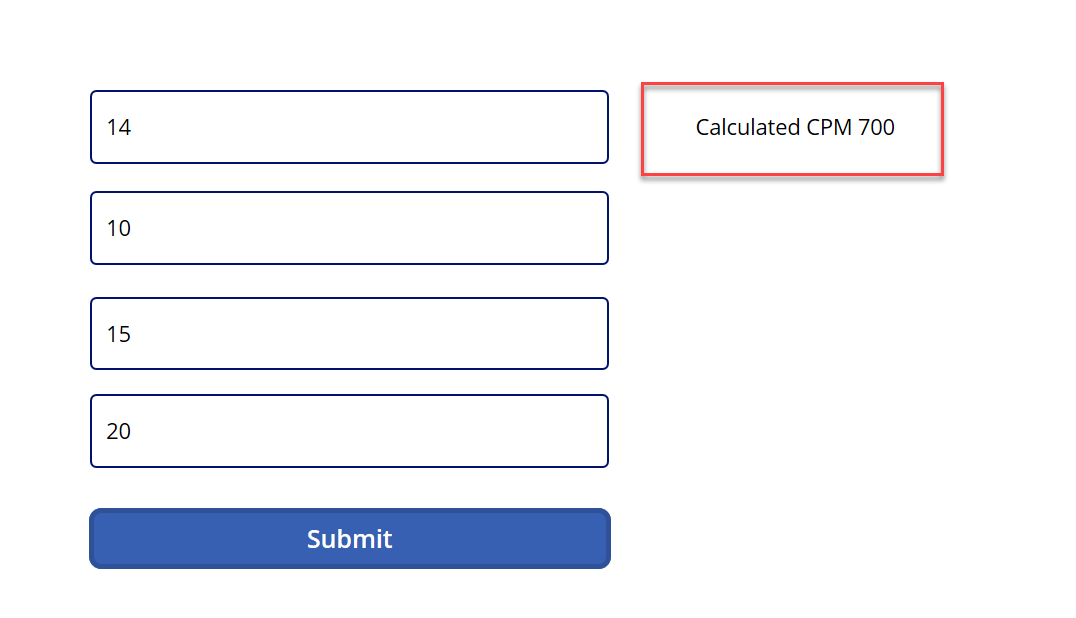
The Result Label should show the calculated result from the Custom Connector.
-
Close the Preview.
-
Save and publish the app.
- Click the Save icon.
- Click the Publish icon.
- Select Publish this version.
- Click the <- Back icon.
- Select Leave.