Practice Lab 8 - Client scripting
Scenario
In this lab, you will implement client-side logic that will use the web API to evaluate the permit type associated with the permit record and use the client scripting API to manipulate the form controls.
You will also customize the command bar to introduce a new lock permit button that will invoke a custom API to perform the lock permit logic. The server-side logic for the lock permit custom API will be implemented later in the course. Right now, you will just add the button and the logic to invoke the custom API.
High-level lab steps
As part of building the client-side logic, you will complete the following:
- Setup a folder to contain your client script
- Upload and register the client script on the form
- Build logic to use the web API to retrieve the permit type record associated with the permit
- Build logic based on the permit type settings to hide and show the inspections tab on the form
- Build logic to set columns as required/not required based on the permit type settings
- Modify the command bar
- Build logic to invoke the lock permit custom API when the command bar button is selected
Things to consider before you begin
- Are there alternative designs that would be viable and not require code?
- Remember to continue working in your DEVELOPMENT environment. We will move everything to production soon.
Starter solution
A starter solution file for this lab can be found in the C:\Labfiles\L08\Starter folder.
Completed solution
Completed solution files for this lab can be found in the C:\Labfiles\L08\Completed folder.
Resources
Complete code files for this lab can be found in the C:\Labfiles\L08\Resources folder.
Exercise 1: Prepare and load resources
Objective: In this exercise, you will create, organize, and load your JavaScript web resources.
Task 1.1: Use Visual Studio Code to create resources
In this task, you will set up a folder to contain the JavaScript web resource files in this course.
-
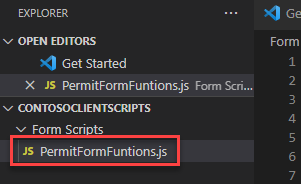
Create a folder named named ContosoClientScripts for the JavaScript code.
- Open a Command Prompt.
- Run the following commands.
cd C:\LabFiles\L08
mkdir ContosoClientScripts
cd ContosoClientScripts
-
Launch Visual Studio Code.
- Run the following command.
code .
-
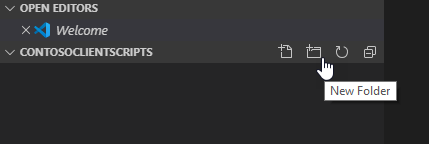
Create folder for form scripts.
- Hover over the folder and select New Folder.
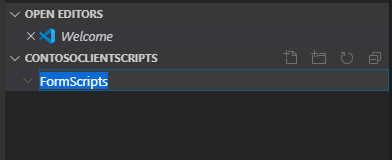
- Name the new folder as
FormScriptsand Enter.
-
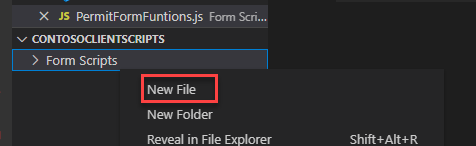
Create the file for the JavaScript form script.
-
Right click on the FormScripts folder and select New File.
-
Name the new file as
PermitFormFunctions.jsand Enter.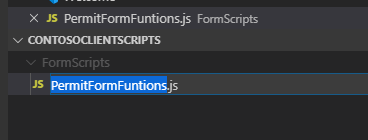
-
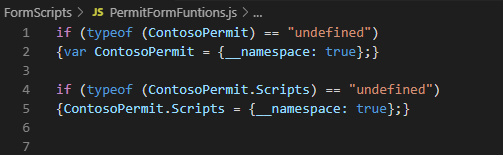
Add the below namespaces to the newly created PermitFormFunctions file.
if (typeof (ContosoPermit) === "undefined")
{var ContosoPermit = {__namespace: true};}
if (typeof (ContosoPermit.Scripts) === "undefined")
{ContosoPermit.Scripts = {__namespace: true};}
[!IMPORTANT] When copying and pasting code into Visual Studio Code, Intellisense may add or replace code. You should open Notepad and paste into Notepad first, and then copy and paste into Visual Studio Code.
-
Add the function below after adding the namespaces.
ContosoPermit.Scripts.PermitForm = {

   __namespace: true
}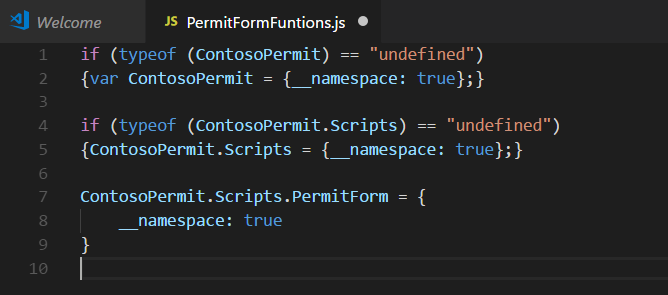
-
Task 1.2: Add Event Handlers
In this task, you will create functions for the logic that you will be implementing. This will allow you to register the event handlers in the next tasks for calling these functions and performing few basic tests in the upcoming tasks.
-
Add a function for the OnLoad event.
-
Add the function below to the PermitFormFunctions.js file at the top of the ContosoPermit.Scripts.PermitForm function created in the previous task.
 handleOnLoad: function (executionContext) {
    "use strict";
    console.log('on load - permit form');
 },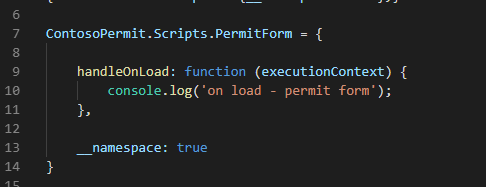
-
-
Add a function for the OnChange permit type event.
-
Add the function below to the PermitFormFunctions.js file inside the ContosoPermit.Scripts.PermitForm function.
 handleOnChangePermitType: function (executionContext) {
    "use strict";
     console.log('on change - permit type');
 },
-
-
Select File and Save All.
Task 1.3: Load Web Resources
In this task, you will upload the JavaScript file as a web resource.You will also edit the Permit table main form and associate the new web resource with its form. Finally, you will register your functions to be called on specific form events.
-
Open the Permit Management solution.
- Navigate to the Power Apps maker portal
- Select your Development environment.
- Select Solutions.
- Open the Permit Management solution.
-
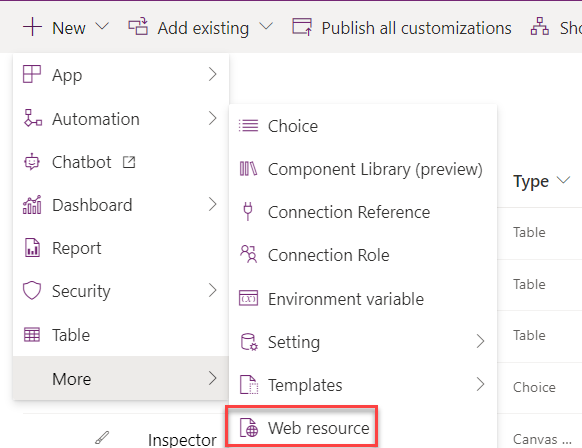
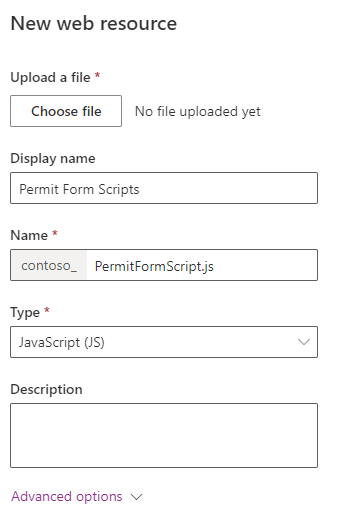
Create web resource.
-
Select + New.
-
Select More and then select Web resource.
-
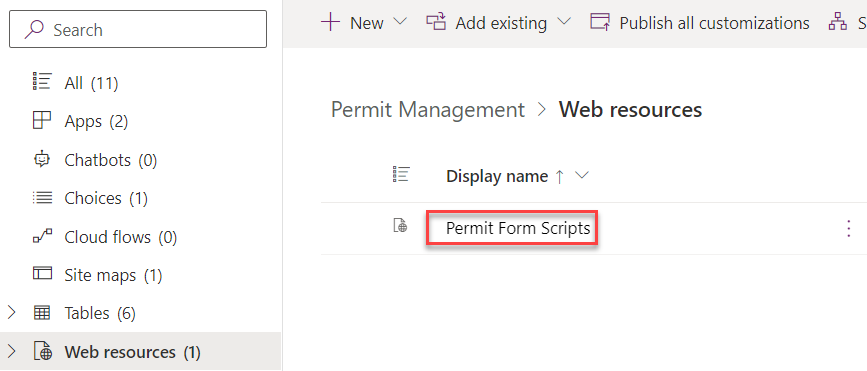
Enter
Permit Form Scriptsfor Display name. -
Enter
PermitFormScripts.jsfor Name. -
Select JavaScript (JS) for Type.
-
Select Choose file.
-
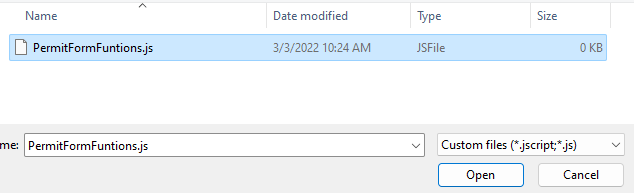
Browse to the ContosoClientScripts folder and then to the FormScripts folder.
-
Select the PermitFormFunctions.js file and select Open.
-
Select Save.
-
-
Add the JavaScript library to the Permit main form.
-
In the Objects tab of the solution, expand Tables.
-
Expand the Permit table.
-
Select Forms.
-
Select the Main form.
-
Select the ellipses … for the Main form, select Edit and select Edit in new tab.
-
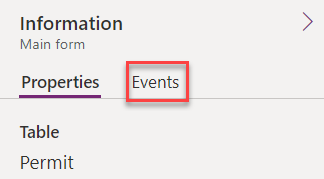
Go to the Properties pane and select the Events tab.
-
Select + Add library.
-
Search for
contoso, select Permit Form Scripts and select Add.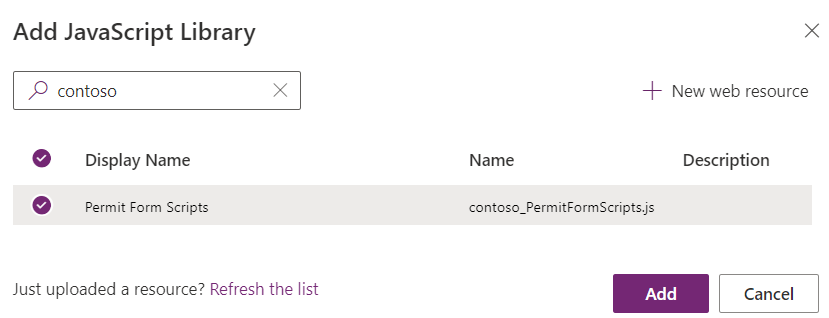
-
-
Add OnLoad event handler.
-
Expand the OnLoad section and select + Event Handler.
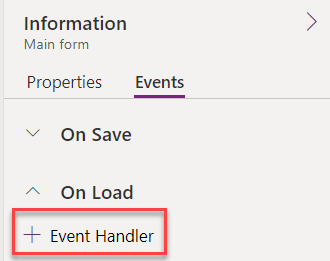
-
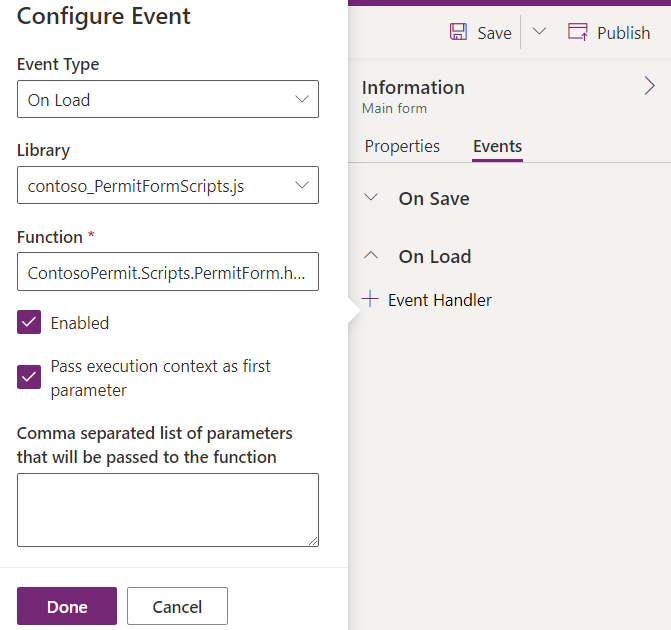
Select Contoso_PermitFormScripts.js in the dropdown for Library.
-
Enter
ContosoPermit.Scripts.PermitForm.handleOnLoadin the textbox for Function. -
Check the Pass execution context as first parameter checkbox.
-
Select Done.
-
-
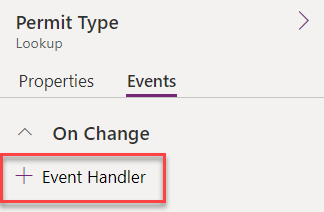
Add Permit Type OnChange event handler.
-
Select Permit Type field on the form.
-
Go to the Properties pane and select the Events tab.
-
In the On Change section, select + Event Handler
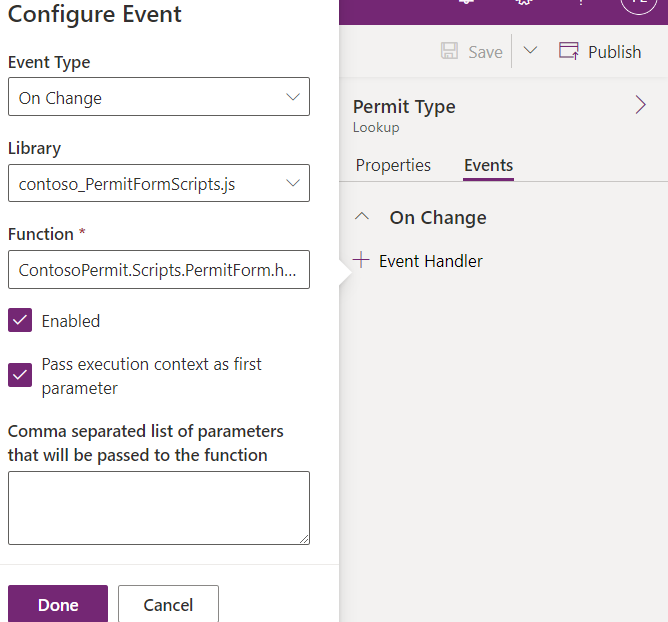
-
Select Contoso_PermitFormScripts.js in the dropdown for Library.
-
Enter
ContosoPermit.Scripts.PermitForm.handleOnChangePermitTypein the textbox for Function. -
Check the Pass execution context as first parameter checkbox.
-
Select Done.
-
-
Save and publish your changes.
- Select Save and publish.
- Close the form editor tab.
- Select Done.
Task 1.4: Test Event Handlers
In this task, you will test the event handlers.
-
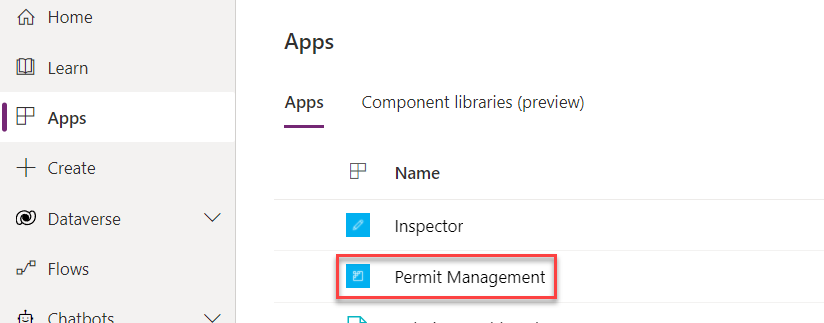
Start the Permit Management app.
- In the Objects tab of the solution, select the Apps node.
-
Select the Permit Management app, select the ellipses … and select Play.
-
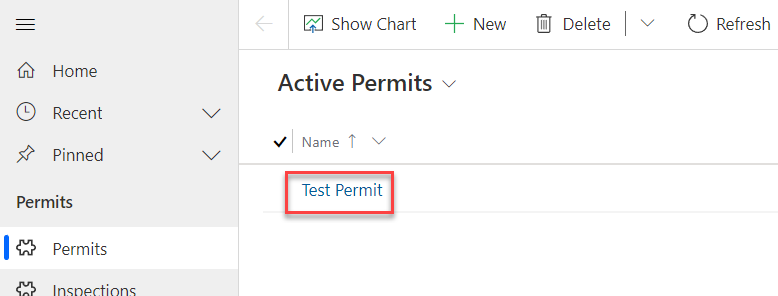
Open a Permit record
-
Select Permits.
-
Select to edit a permit record.
-
-
Open browser Dev Tools.
-
Press F12 or Ctrl+Shift+I or right click and select Inspect.
-
Select the Console tab in the top menu and select the Clear console icon.

-
-
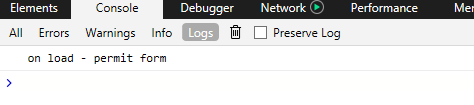
Confirm the OnLoad event handler function runs.
-
In the Permit record form, select the Refresh cion.
-
In the Dev Tools pane you should see the on load – permit form message.
-
-
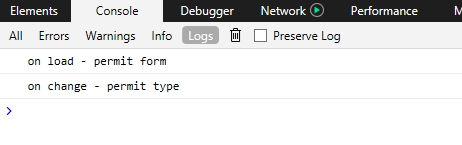
Confirm the OnChange Permit Type event handler function runs.
-
In the Permit record form, clear the Permit Type field.
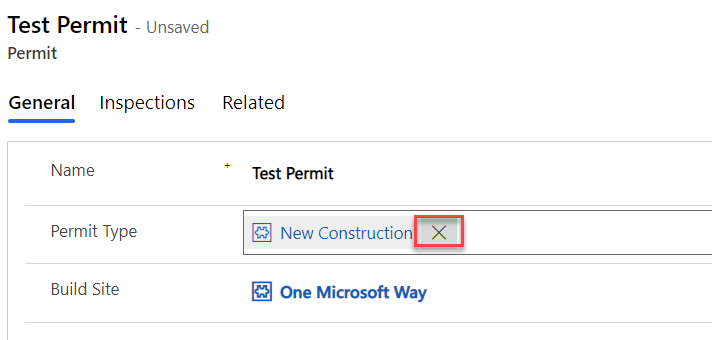
-
In the Dev Tools pane you should see the on change – permit type message.
-
Close the Dev Tools pane.
-
In the Permit record form, select the New Construction Permit Type.
-
In the Permit record form, select Save & Close.
-
Exercise 2: Show and hide tabs
Objective: In this exercise, you will create a script that will show and hide the Inspections tab based on the value of the permit type table’s Required inspections column.
Task 2.1: Create Function for Permit Type changes
-
Create a function that will run when the Permit form loads and when the Permit Type value changes.
-
Open Visual Studio Code.
-
Add the function below to the PermitFormFunctions.js file inside the ContosoPermit.Scripts.PermitForm function.
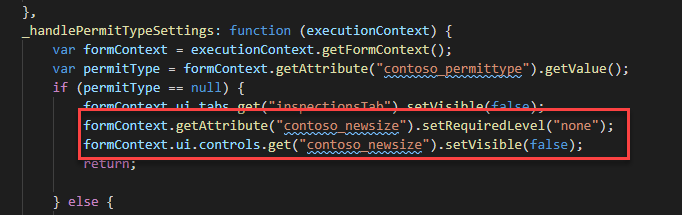
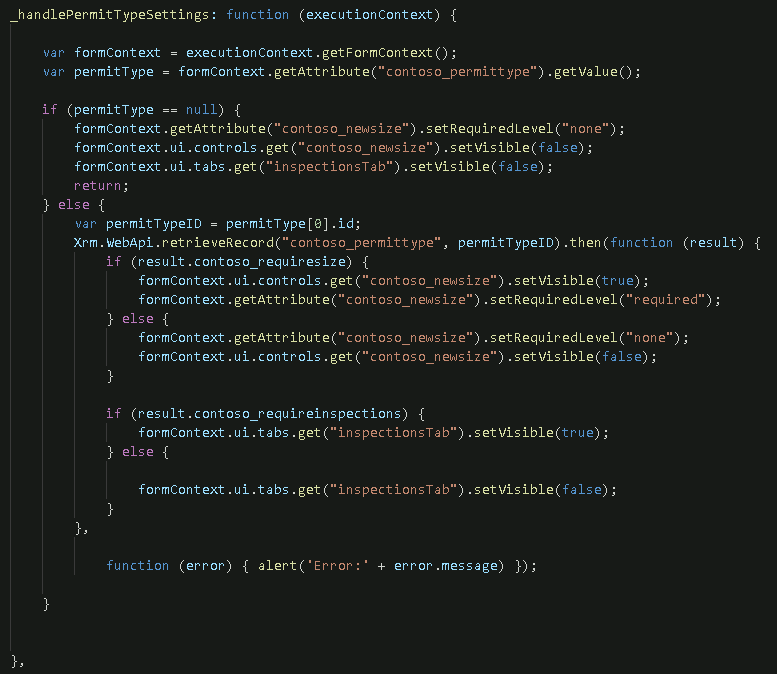
 _handlePermitTypeSettings: function (executionContext) {
    "use strict";

 },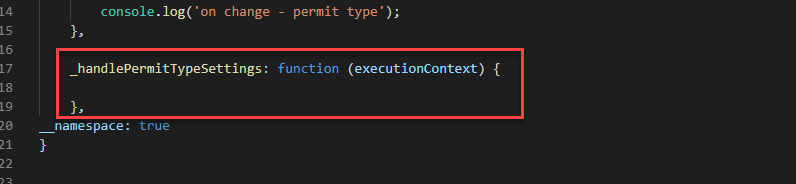
-
-
Get form context from the execution context
-
Add the script below inside the _handlePermitTypeSettings function.
var formContext = executionContext.getFormContext();
-
-
Get the Permit Type value.
-
Add the script below inside the _handlePermitTypeSettings function under the previous statement.
var permitType = formContext.getAttribute("contoso_permittype").getValue();[!NOTE] contoso_permittype is the logical name of the Permit Type column. You can verify this in the Power Apps maker portal.
-
-
Check if the Permit Type has a value.
-
Add the script below inside the _handlePermitTypeSettings function under the previous statement.
 if (permitType === null) {

 } else {

 }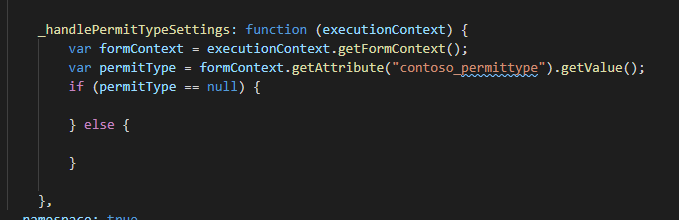
-
-
Hide the Inspections tab if the Permit type is null.
-
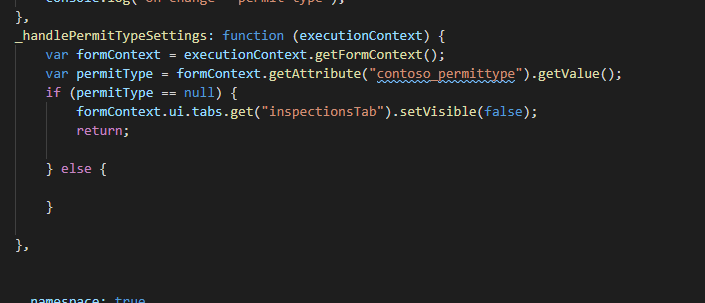
Add the script below inside the if statement in the _handlePermitTypeSettings function.
 formContext.ui.tabs.get("inspectionsTab").setVisible(false);
 return;
[!NOTE] inspectionsTab is the name of the Inspections tab configured while creating the model-driven app in an earlier lab.
-
Task 2.2: Get Inspection type record
In this task, you will use the Web API to retrieve the permit type lookup record associated with the current permit record that is currently displayed in the form.
-
Get the Permit Type ID
-
Add the script below inside the else statement in the _handlePermitTypeSettings function.
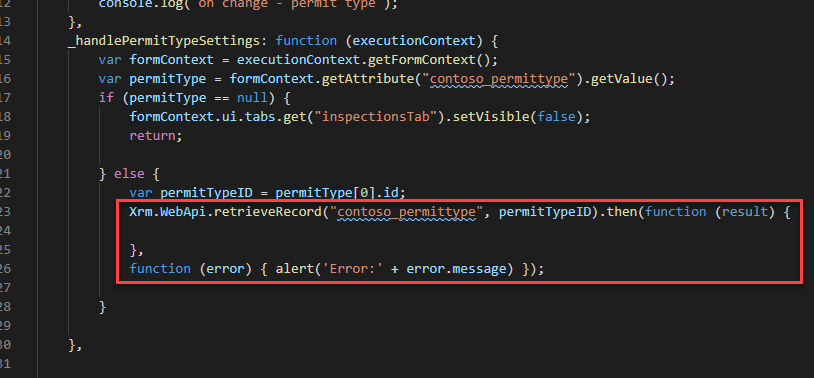
var permitTypeID = permitType[0].id;
-
-
Retrieve the Permit Type record and show alert if there are errors
-
Add the script below in the else statement of the _handlePermitTypeSettings function.
 Xrm.WebApi.retrieveRecord("contoso_permittype", permitTypeID).then(function (result) {

 },

     function (error) { alert('Error:' + error.message) });
[!NOTE] contoso_permittype is the logical name of the Permit Type table. You can verify this in the Power Apps maker portal.
-
-
Check if Require Inspections column value is true.
-
Add the script below inside the retrieveRecord function call.
if (result.contoso_requireinspections) {

} else {

}
[!NOTE] contoso_requireinspections is the logical name of the Require Inspections column of the Permit Type table.
-
-
Make the Inspections tab visible if Require Inspections is true
-
Add the script below in the if statement in the retrieveRecord call.
formContext.ui.tabs.get("inspectionsTab").setVisible(true);
-
-
Hide the Inspections tab if Require Inspections is not true
-
Add the script below in the else statement in the retrieveRecord call.
formContext.ui.tabs.get("inspectionsTab").setVisible(false);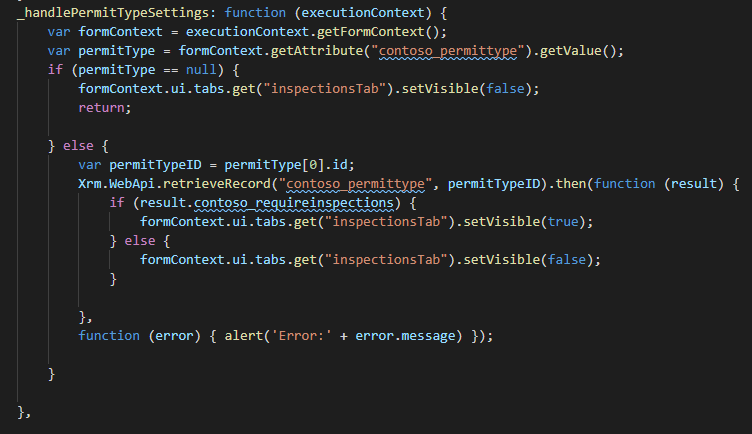
-
-
Call the _handlePermitTypeSettings function from the handleOnLoad function.
-
In the handleOnLoad function and add the script below.
ContosoPermit.Scripts.PermitForm._handlePermitTypeSettings(executionContext);
-
-
Call the _handlePermitTypeSettings function from the handleOnChangePermitType function.
-
In the handleOnChangePermitType function and add the script below.
ContosoPermit.Scripts.PermitForm._handlePermitTypeSettings(executionContext);
-
Select File and Save All.
-
Task 2.3: Load Updated Script
-
Open the Permit Form Script web resource.
- Navigate to the Power Apps maker portal
- Select your Development environment.
- Select Solutions.
- Open the Permit Management solution.
- Select Web resources.
- Edit the Permit Form Script web resource.
-
Load the updated version of PermitFormFunction.js.
- Select Choose file.
- Select the PermitFormFunctions.js file and select Open.
- Select Save. The Edit web resource pane will close.
- With the Perform Form Scripts web resources still selected, select Publish in the action bar.
Task 2.4: Test Your Changes
-
Start the Permit Management app.
- In the Objects tab of the solution, select the Apps node.
-
Select the Permit Management app, select the ellipses … and select Play.
-
Open a Permit record.
-
Select Permits.
-
Select to edit a permit record.
-
-
Check that when the Permit Type column is empty, the Inspections tab is hidden.
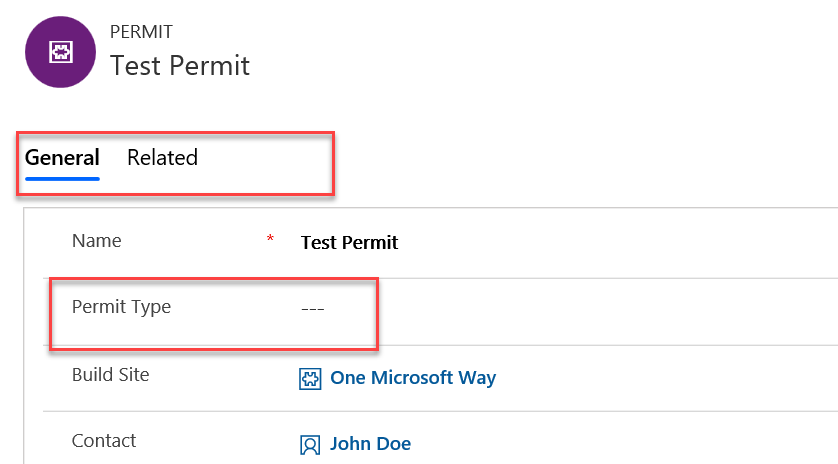
[!NOTE] If the Inspection tab is not hidden, refresh your browser.
-
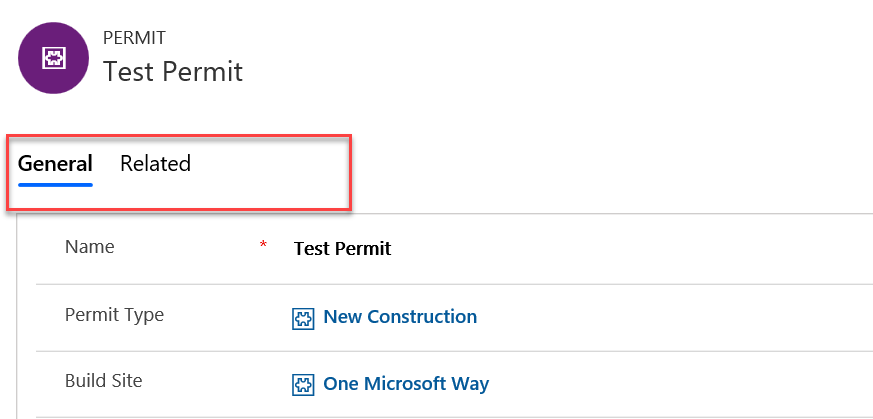
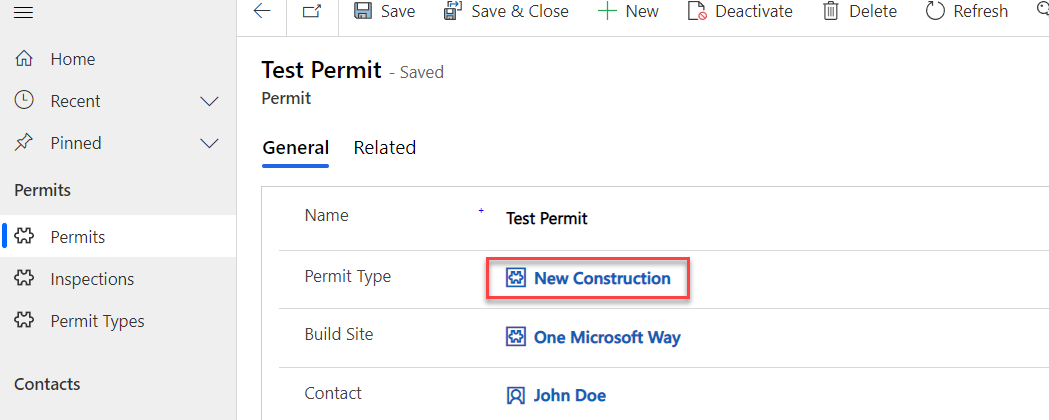
Select Permit Type.
-
Select the Permit Type lookup.
-
Select New Construction.
-
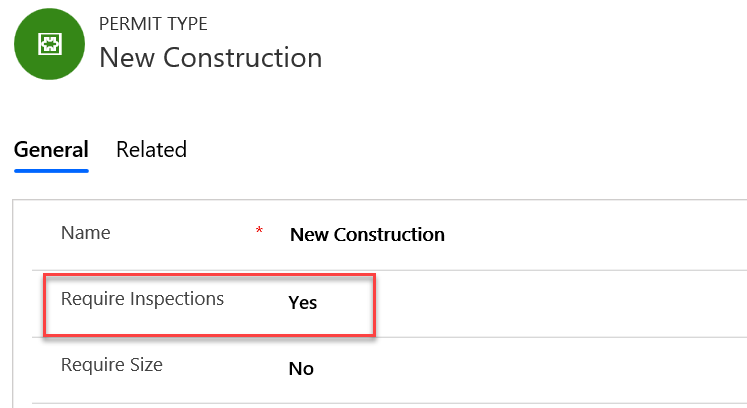
Check that the Inspections tab is still hidden. This is because the value of the Require Inspections column on the Permit Type table is No.
-
-
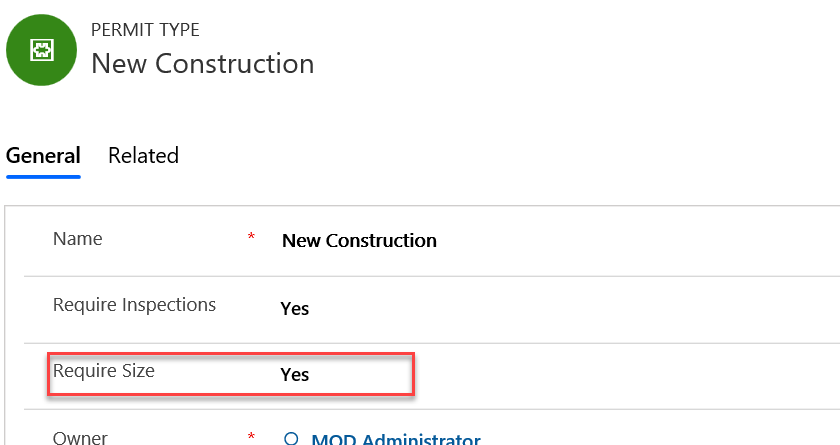
Set Require Inspections column value of the Permit Type to Yes.
-
Open the New Construction record by clicking in the Permit Type lookup field.
-
Set Require Inspections to Yes.
-
Select Save & Close.
-
-
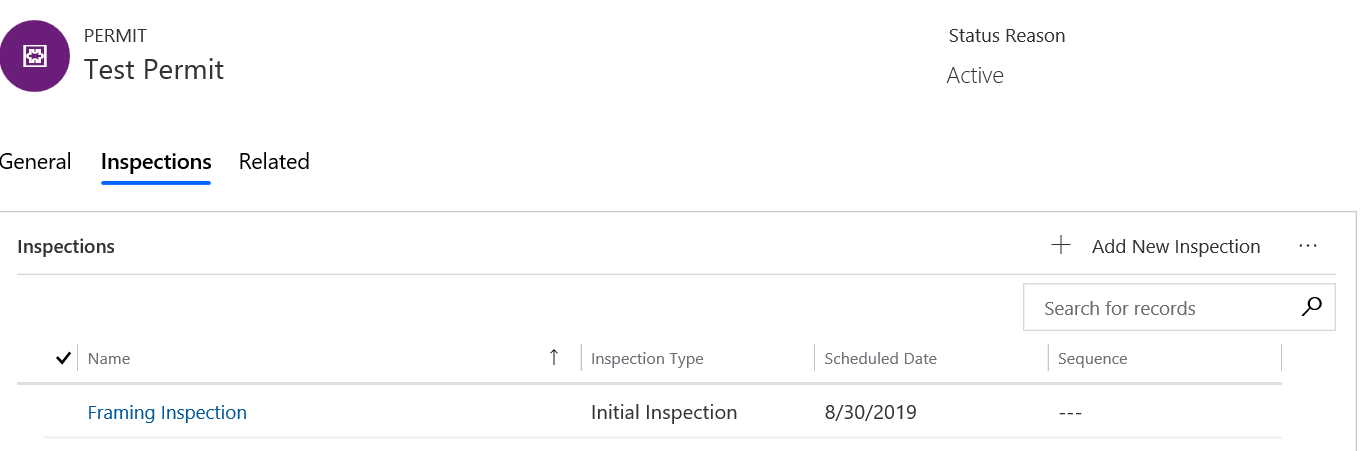
You should now be able to see the Inspections tab.

-
Select the Inspections tab.
-
You should now be able to the view inspections in the sub-grid.
-
Exercise 3: Toggle required property on the columns
Objective: In this exercise, you will create a script that will make the New Size column business required when the Require Size column value is set to Yes. If the Require Size column value is set to No, remove the requirement. You will also hide the New Size column. This logic will be driven by a column on the permit type record that was retrieved using the Web API in the previous exercise.
Task 3.1: Add script to control fields
-
When Permit Type is not selected, remove the column’s requirement and hide the New Size column.
-
Open Visual Studio Code.
-
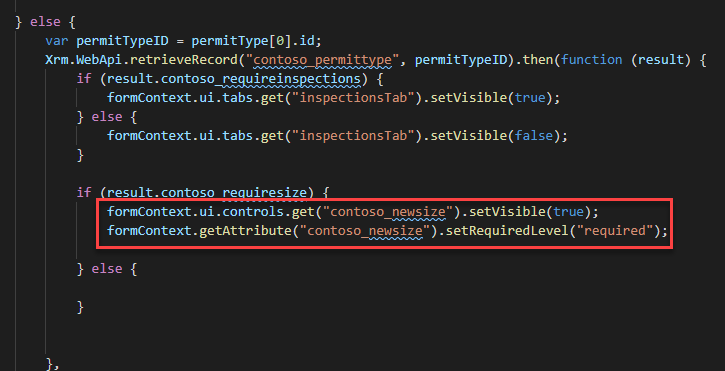
Add the script below inside the if permitType === null statement.
 formContext.getAttribute("contoso_newsize").setRequiredLevel("none");
 formContext.ui.controls.get("contoso_newsize").setVisible(false);
[!NOTE] contoso_newsize is the logical name of the New Size column.
-
-
When Permit Type is selected, check if the value of the Require Size column value of the Permit Type is set to Yes.
-
Add the script below inside the retrieveRecord function.
 if (result.contoso_requiresize) {

 } else {

 }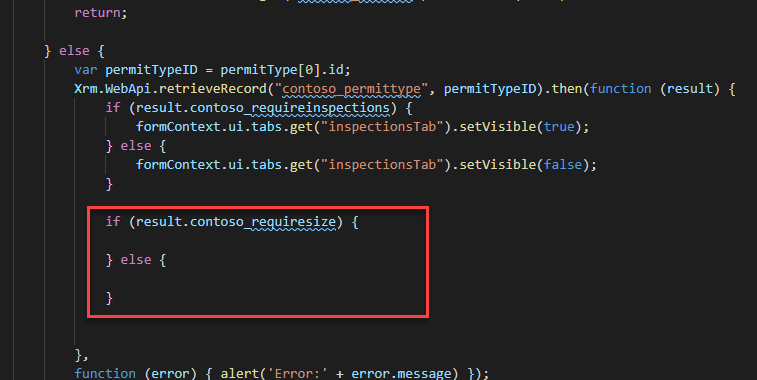
-
-
If the value of the Require Size column of the Permit Type is set to Yes, make the New Size column visible and required.
-
Add the script below in the if result.contoso_requiresize statement.
 formContext.ui.controls.get("contoso_newsize").setVisible(true);
 formContext.getAttribute("contoso_newsize").setRequiredLevel("required");
[!NOTE] contoso_requiresize is the logical name of the Require Size column.
-
-
If the value of the Require Size column of the Permit Type is not set to Yes, make the New Size column not required and hide it.
-
Add the script below inside the else statement.
 formContext.getAttribute("contoso_newsize").setRequiredLevel("none");
 formContext.ui.controls.get("contoso_newsize").setVisible(false);
-
-
The _handlePermitTypeSettings function should now look like the image below.
-
Select File and then Save All.
Task 3.2: Load Updated Script
-
Open the Permit Form Script web resource.
- Navigate to the Power Apps maker portal
- Select your Development environment.
- Select Solutions.
- Open the Permit Management solution.
- Select Web resources.
- Edit the Permit Form Script web resource.
-
Load the updated version of PermitFormFunction.js.
- Select Choose file.
- Select the PermitFormFunctions.js file and select Open.
- Select Save. The Edit web resource pane will close.
- With the Perform Form Scripts web resources still selected, select Publish in the action bar.
Task 3.3: Test Your Changes
-
Start the Permit Management app.
- In the Objects tab of the solution, select the Apps node.
- Select the Permit Management app, select the ellipses … and select Play.
-
Open a Permit record.
-
Select Permits.
-
Select to edit a permit record.
-
-
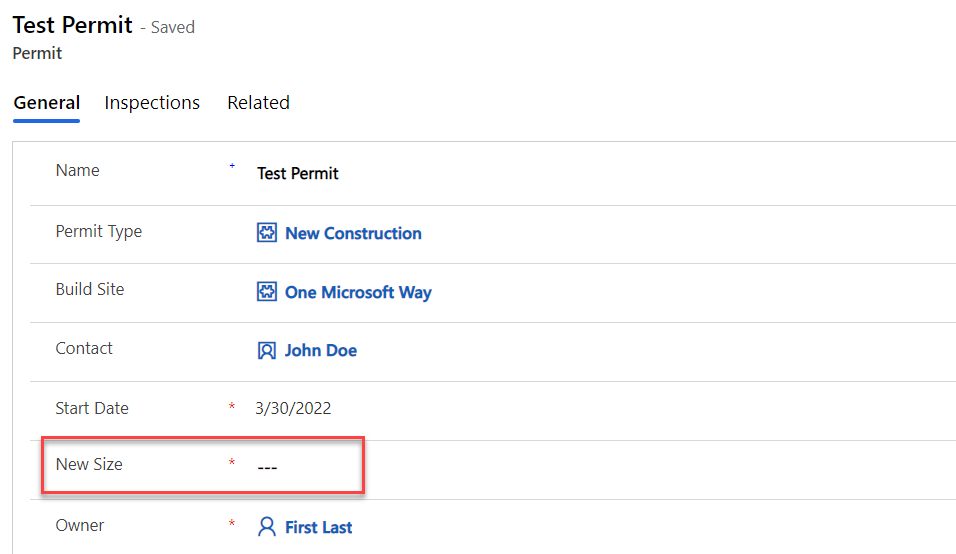
Check that the New Size column is hidden. This is because the value of the Require Size column on the Permit Type table is No.
[!NOTE] If the New Size column is not hidden, refresh your browser.
-
Set Require Size column value of the Permit Type to Yes.
-
Open the New Construction record by clicking in the Permit Type lookup field.

-
Set Require Size to Yes.
-
Select Save & Close.
-
You should now be able to see the New Size column on the form and it is a required field.
-
-
Change Permit Type.
-
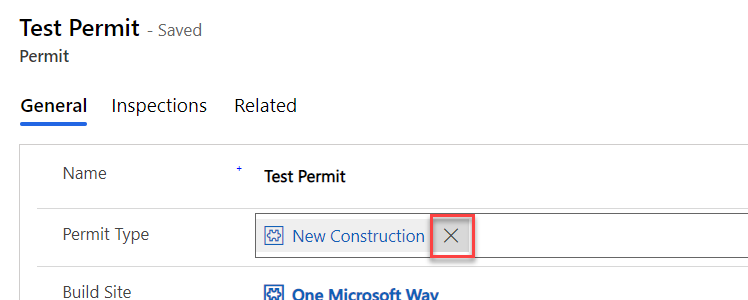
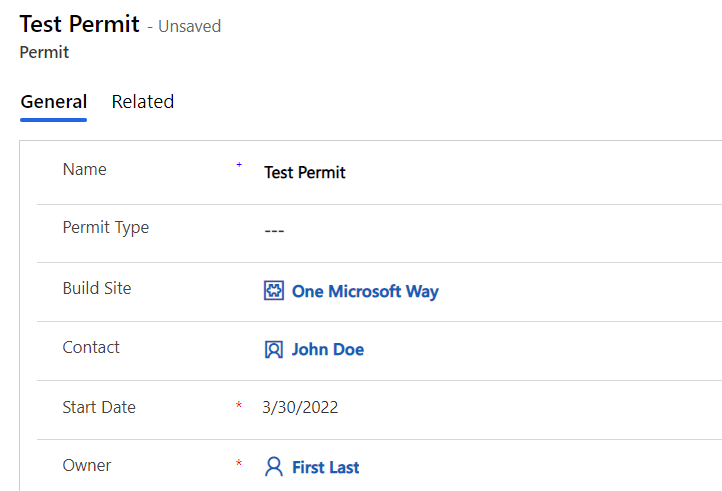
In the Permit record form, clear the Permit Type field.
-
Both the Inspections tab and New Size column should be hidden. They should be removed as soon as the Permit Type is removed.
-
Select the Permit Type lookup and select New Construction.
-
Enter
1000for New Size. -
Select Save & Close.
-
Exercise 4: Command Button Function
Objective: In this exercise, you will you will create custom API, create a function that will lock permits, add a button to the permit table and call the lock permit function when the button is selected.
Task 4.1: Create Custom API
In this task, you will create a custom API that will be called to lock the permit. You will not be implementing the business logic that will lock the permit in this lab. It will be completed later in the class when you build the plug-in that registers on the custom api you are defining here.
-
Open the Permit Management solution.
- Navigate to the Power Apps maker portal
- Select your Development environment.
- Select Solutions.
- Open the Permit Management solution.
-
Create Custom API.
-
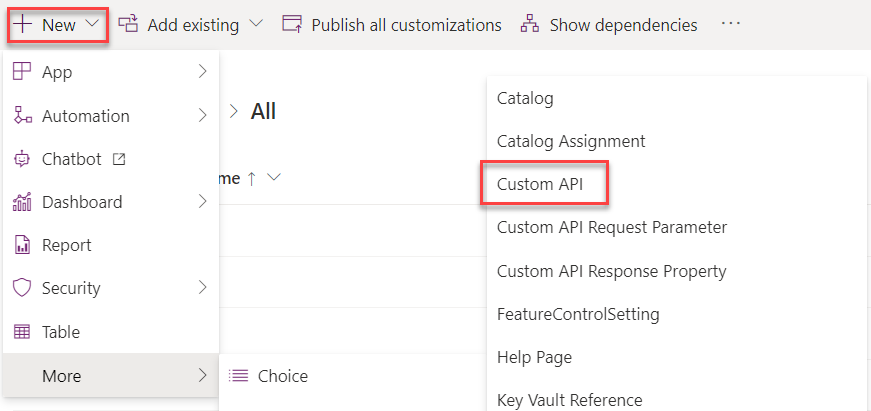
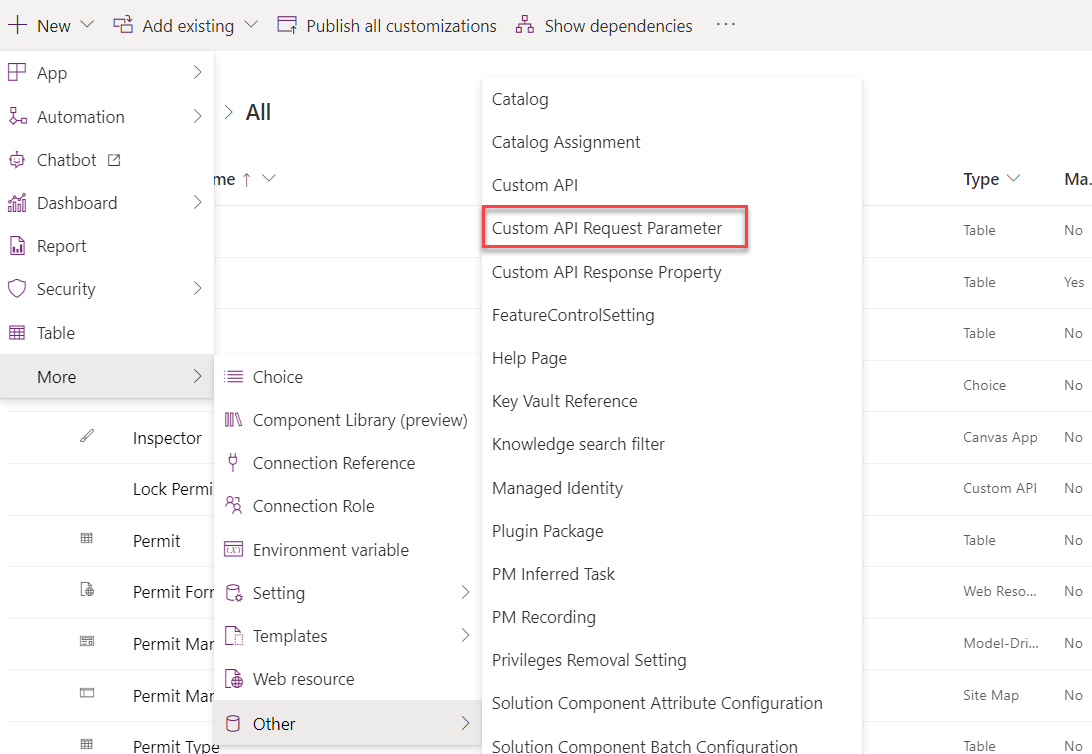
Select + New and then select More and then Other and then Custom API.
- Enter the following:
contoso_LockPermitfor Unique name.Lock Permitfor Name.Lock Permitfor Display name.Lock Permitfor Description.
- Select Entity for Binding type.
- Enter
contoso_permitfor Bound Entity Logical Name.
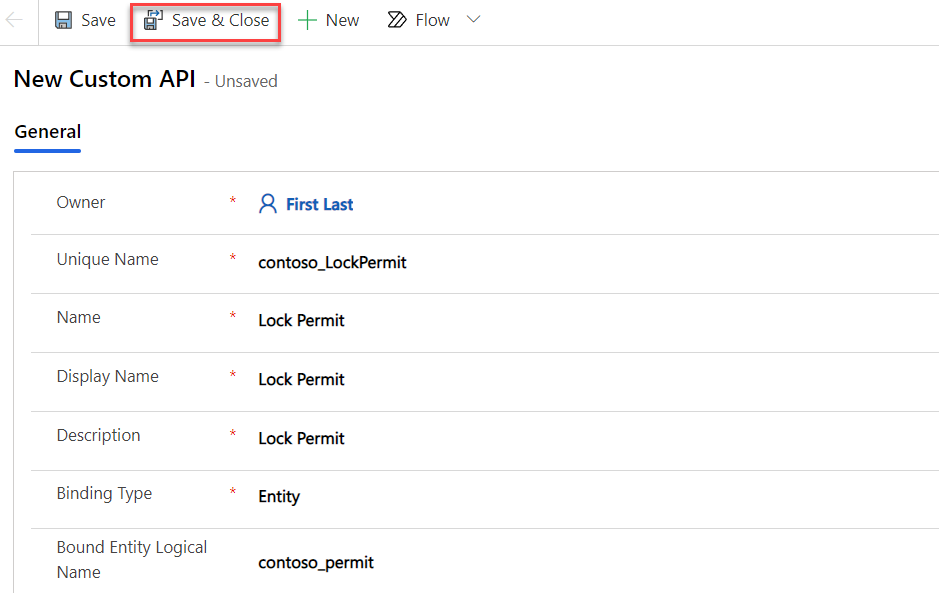
- Select Save & Close.
- Select Done.
-
-
Create custom API Request Parameter.
-
Select + New and then select More and Other and Custom API Request Parameter.
- Search for
lockand select Lock Permit for Custom API. - Enter the following:
Reasonfor Unique name.Reasonfor Name.Reasonfor Display name.Reasonfor Description.
-
Select String for Type.
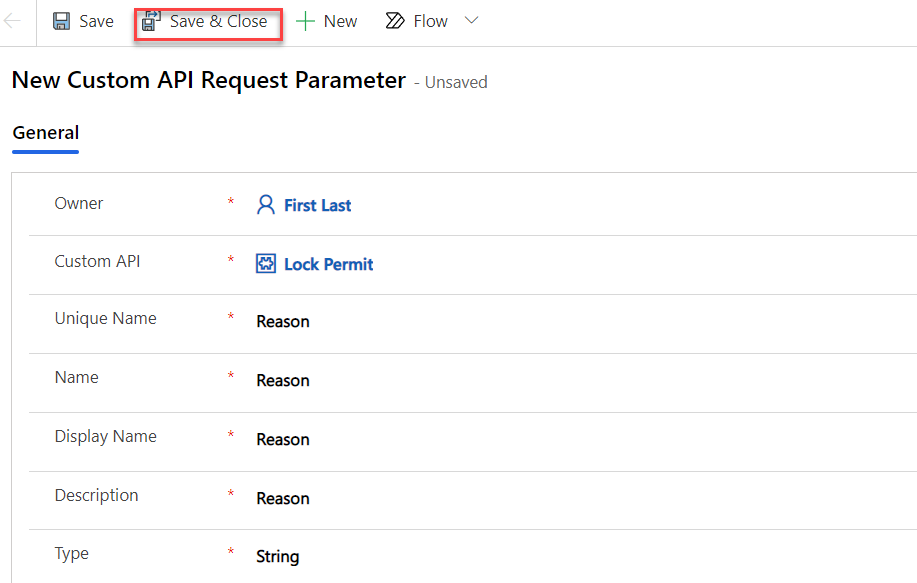
- Select Save & Close.
- Select Done.
-
-
Create Custom API Response Property.
-
Select + New and then select More and Other and Custom API Response Property.
- Search for
lockand select Lock Permit for Custom API. - Enter the following:
CanceledInspectionsCountfor Unique name.Canceled Inspections Countfor Name.Canceled Inspections Countfor Display name.Canceled Inspections Countfor Description.
- Select Integer for Type.
-
Select Save & Close.
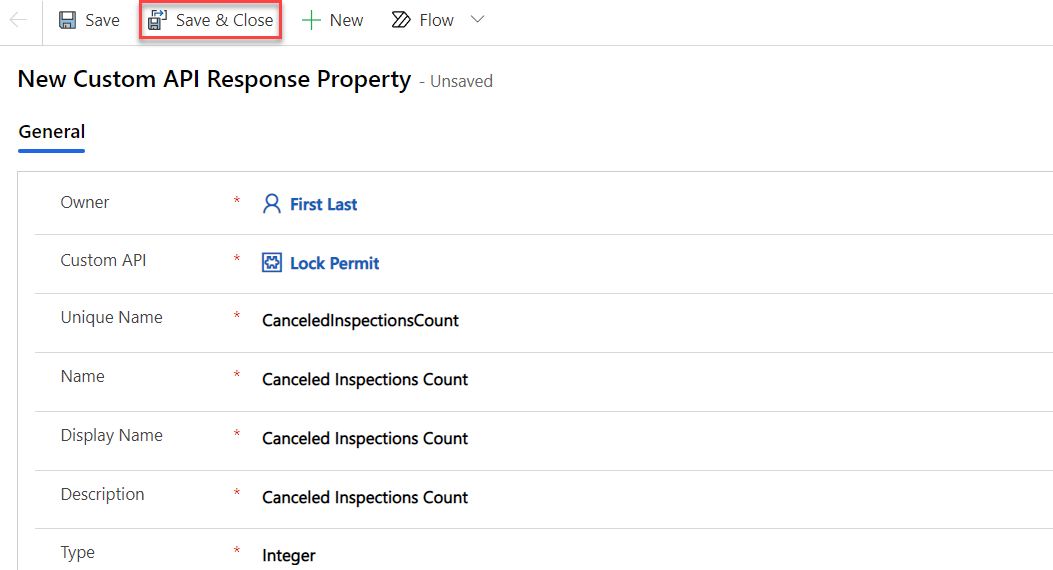
- Select Save and Close.
- Select Done.
-
Task 4.2: Create the function for the Lock Permit button
In this task, you will create the logic to invoke that will call the custom API.
-
Start Visual Studio Code and open the resources you created earlier in the lab.
- Open Visual Studio Code.
-
Open the ContosoClientScripts folder.

-
Add a function to build the Custom API request
-
Open the PermitFormFunctions.js file.
-
Add the function below after the _handlePermitTypeSettings function.
 _lockPermitRequest : function (permitID, reason) {

 },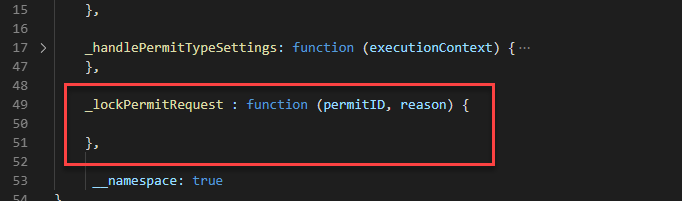
-
-
Build entity and set reason.
-
Add the script below inside the _lockPermitRequest function.
 this.entity = { entityType: "contoso_permit", id: permitID };
 this.Reason = reason;
-
-
Build and return the request.
-
Add the script below inside the _lockPermitRequest function.
 this.getMetadata = function () {
     return {
         boundParameter: "entity", parameterTypes: {
             "entity": {
                 typeName: "mscrm.contoso_permit",
                 structuralProperty: 5
             },
             "Reason": {
                 "typeName": "Edm.String",
                 "structuralProperty": 1 // Primitive Type
             }
         },
         operationType: 0, // This is an action. Use '1' for functions and '2' for CRUD
         operationName: "contoso_LockPermit",
     };
 };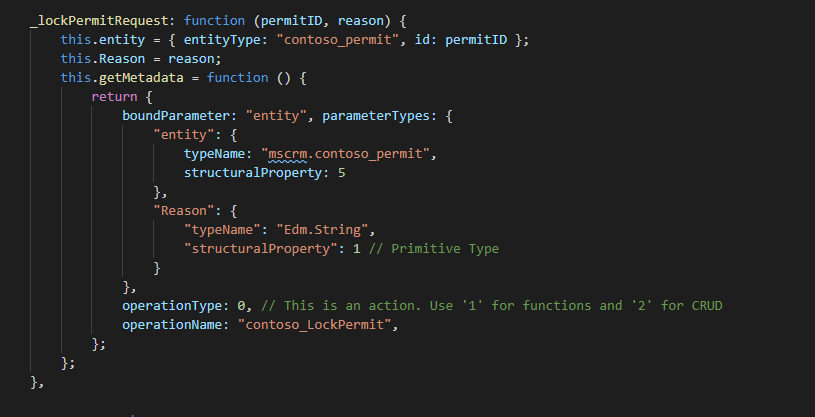
-
-
Add the function that will be called from the action button.
-
Add the function below after the _lockPermitRequest function.
 lockPermit: function (primaryControl) {

 },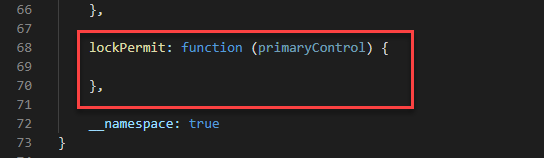
-
-
Get Permit ID and call _lockPermitRequest.
-
Get the id by adding the script below inside the lockPermit function.
var formContext = primaryControl; var PermitID = formContext.data.entity.getId().replace('{', '').replace('}', ''); -
Call _lockPermitRequest. Note: we are hard-coding the reason as
Admin Lock.var lockPermitRequest = new ContosoPermit.Scripts.PermitForm._lockPermitRequest(PermitID, "Admin Lock");
-
-
Execute the request.
-
Add the script below inside the lockPermit function.
 // Use the request object to execute the function
 Xrm.WebApi.online.execute(lockPermitRequest).then(
     function (result) {
         if (result.ok) {
             console.log("Status: %s %s", result.status, result.statusText);
             // perform other operations as required;
             formContext.ui.setFormNotification("Status " + result.status, "INFORMATION");
         }
     },
     function (error) {
         console.log(error.message);
         // handle error conditions
     }
 );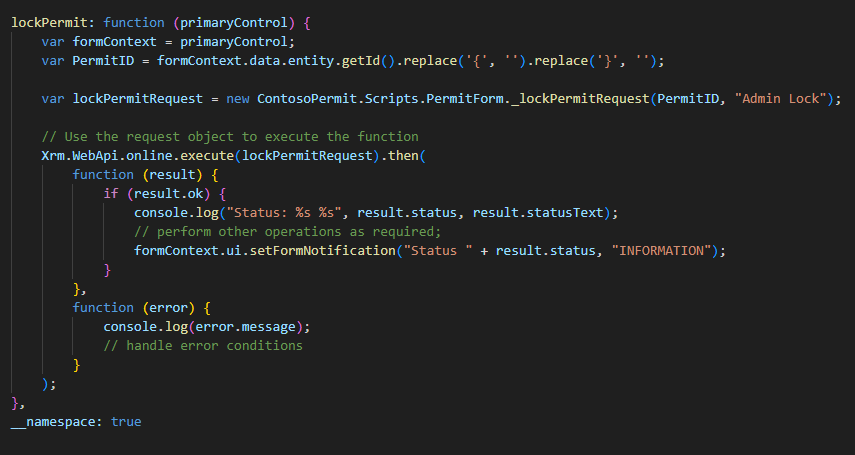
-
Select File and then Save All.
-
Task 4.3: Load Updated Script
-
Open the Permit Form Script web resource.
- Navigate to the Power Apps maker portal
- Select your Development environment.
- Select Solutions.
- Open the Permit Management solution.
- Select Web resources.
- Edit the Permit Form Script web resource.
-
Load the updated version of PermitFormFunction.js.
- Select Choose file.
- Select the PermitFormFunctions.js file and select Open.
- Select Save. The Edit web resource pane will close.
- With the Perform Form Scripts web resources still selected, select Publish in the action bar.
Task 4.4: Add Button to Command Bar
-
Open the Permit Management solution.
- Navigate to the Power Apps maker portal
- Select your Development environment.
- Select Solutions.
- Open the Permit Management solution.
-
Edit the Permit Management app
- In the Objects tab of the solution, select the Apps node.
-
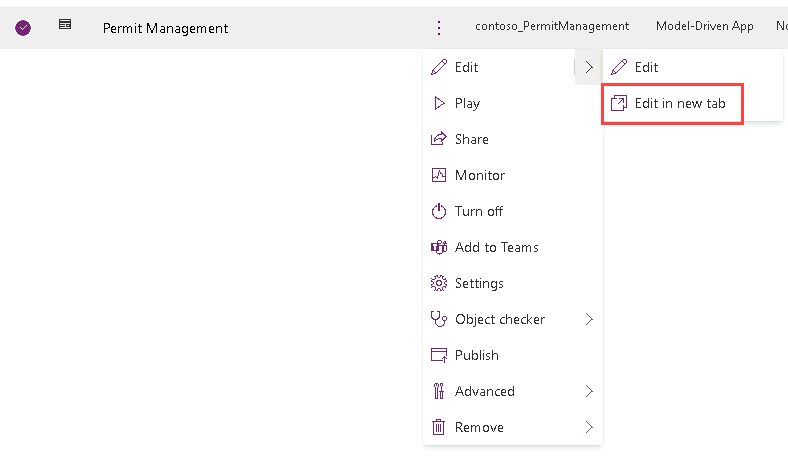
Select the Permit Management app, select the ellipses … and select Edit and select Edit in new tab.
-
Edit the Permit table command bar.
-
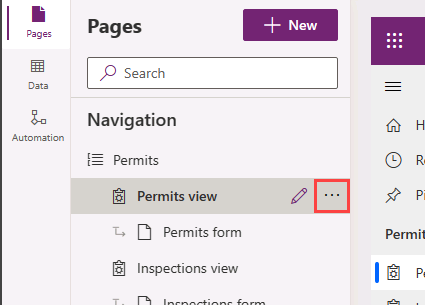
Select the Pages tab, Hover over Permits view and select the … button.
-
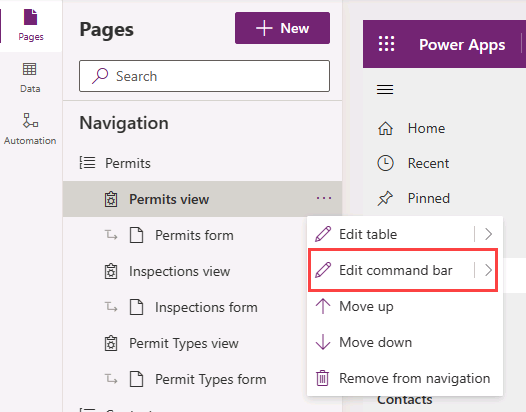
Select Edit command bar.
-
Select Main form and then select Edit.
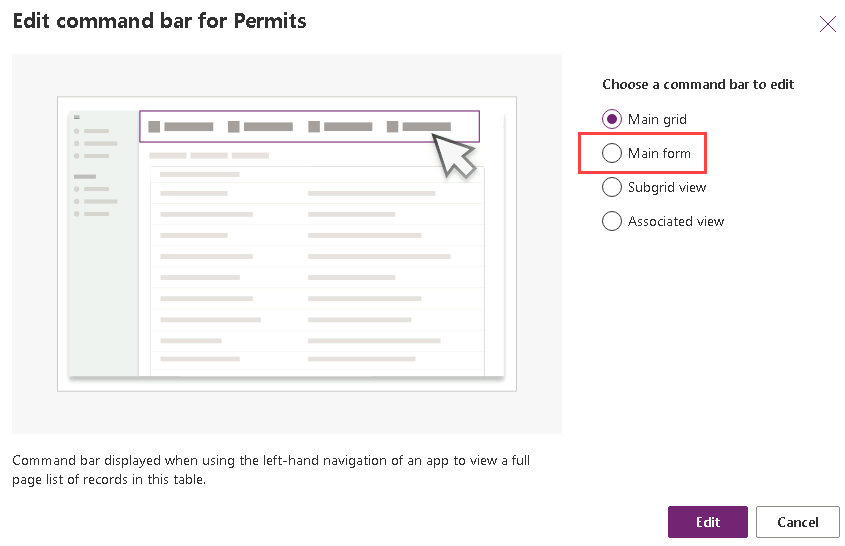
-
-
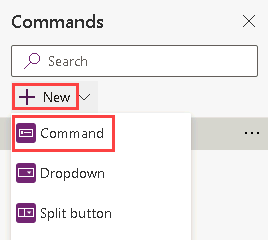
Add command to permit table
- Select + New and then select Command.
- Select JavaScript and then select Continue.
-
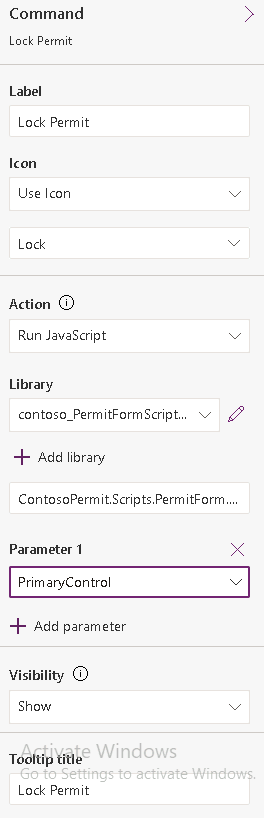
Configure command bar button
-
Enter
Lock Permitfor Label. -
Select Use Icon for Icon and then Select the Lock icon.
-
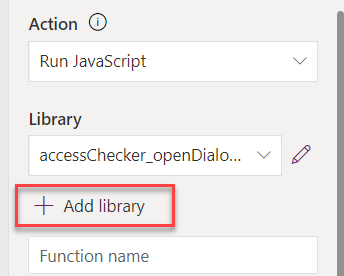
Select Run JavaScript for Action.
-
Select + Add library.
-
Search for
contoso, select Permit Form Scripts and select Add.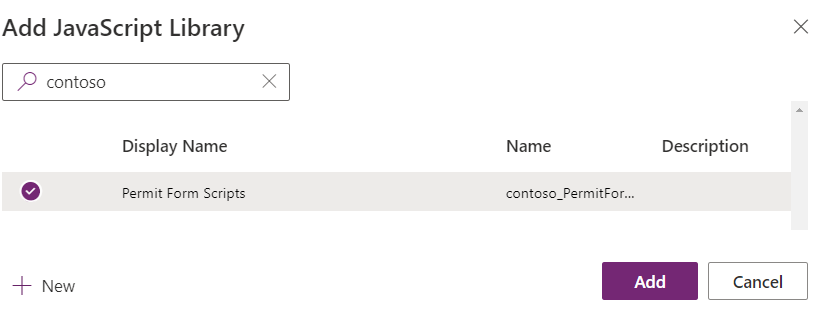
-
Enter
ContosoPermit.Scripts.PermitForm.lockPermitin the textbox for Function Name.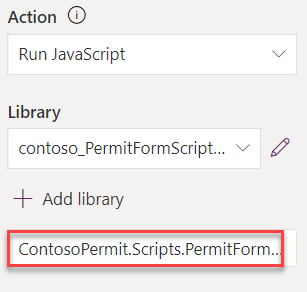
-
Add parameter.
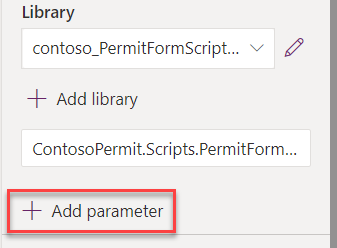
-
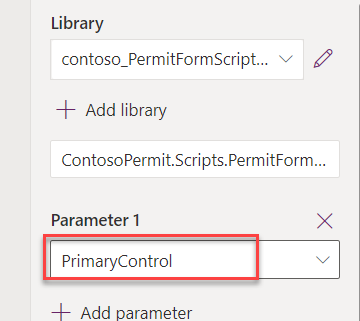
Select PrimaryControl for Parameter 1.
-
Enter
Lock Permitfor Tooltip title.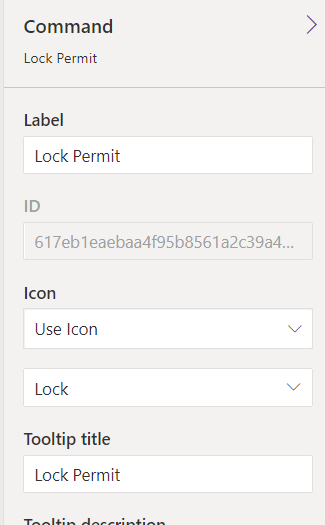
-
The Lock Permit command should look like the following.
-
Select Save and Publish.
-
Close the app designer.
-
Select Done.
-
In the Objects pane, select All.
-
Select Publish all customizations.
-
Task 4.5: Test Command Button
-
Start the Permit Management app.
- In the Objects tab of the solution, select the Apps node.
- Select the Permit Management app, select the ellipses … and select Play.
-
Open a Permit record.
-
Select Permits.
-
Select to edit a permit record.
-
You should be able to see the button you just added.

[!NOTE] If the button is not displayed, refresh your browser.
-
-
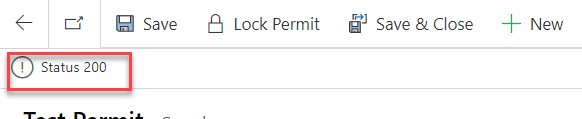
Test the command
-
Select the Lock Permit button.
-
The script should trigger the action and you should be able to see the Status 200 notification.
-