Practice Lab 2 – Advanced canvas app techniques
Scenario
As we continue to build our solution, we will now customize the canvas app to use the Patch formula.
High-level lab steps
We will follow the below basic steps to optimize the canvas app:
- Use Patch to set the status reason of an inspection to Failed.
Things to consider before you begin
- What do you need to update a record using Patch?
Starter solution
The starter solution was imported in lab 1.
Completed solution
Completed solution files for this lab can be found in the C:\Labfiles\L02 folder.
Exercise 1: Patch
Objective: In this exercise, you use Patch to update the Status Reason on an inspection.
Task 1.1: Update inspection row using Patch
-
Open the Permit Management solution.
- Navigate to the Power Apps Maker portal
https://make.powerapps.com/ - Select your Development environment.
- Select Solutions.
- Open the Permit Management solution.
- Navigate to the Power Apps Maker portal
-
Edit the Inspector canvas app.
- Select Apps in the Permit Management solution.
- Select the ellipses … next to the Inspector app and select Edit in new tab.
-
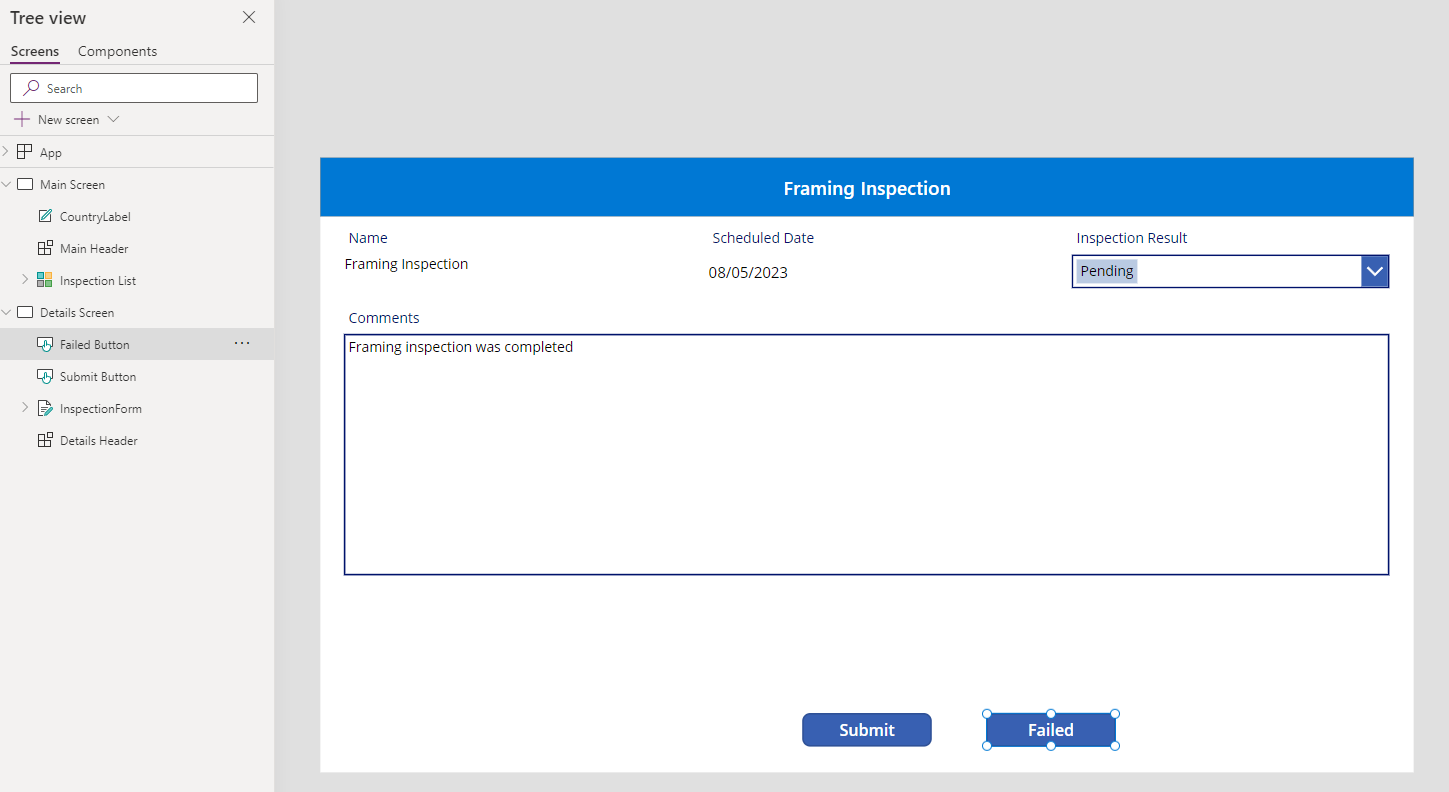
Add failed button to the details screen.
- Select the Tree view tab.
- Select the Details Screen in the Tree view. Make sure that you have selected the screen and not selected the form.
-
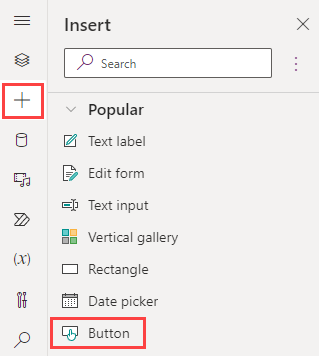
Select the + Insert tab and select Button.

- Drag the button next to the submit button.
- Select the Tree view tab.
- Rename the button to
Failed Button. -
Change the Text value of the button to
"Failed".
-
Use Patch to set the inspection result to Failed.
- Select the Failed Button in the Tree view.
- In the property selector, select OnSelect.
- Change the OnSelect property to the formula below.
Patch(Inspections, 'Inspection List'.Selected, {'Status Reason':'Status Reason (Inspections)'.Failed});Back(ScreenTransition.UnCoverRight); -
Save the app.
-
Do NOT navigate away from this screen.
Task 1.2: Test the app
[!NOTE] If you closed the application, follow these steps to get back to the Power Apps Studio.
- Navigate to the Power Apps Maker portal
https://make.powerapps.com/.- Select your Development environment.
- Select Solutions.
- Open the Permit Management solution.
- Select Apps in the Permit Management solution.
- Select the ellipses … next to the Inspector app and select Edit.
-
Start the application.
- Select the Main Screen and select Preview the app.
- The application should load and show at least one inspection.
- Select the Framing Inspection record.
- Select the Failed button.
- The inspection should be updated, and the application should navigate back to the Main Screen. The inspection you set to failed will not be listed in the gallery.
- Close preview mode.
-
Save and publish the app.
- Select the Publish icon.
- Select Publish this version.
- Select the <- Back icon.
- Select Leave.
-
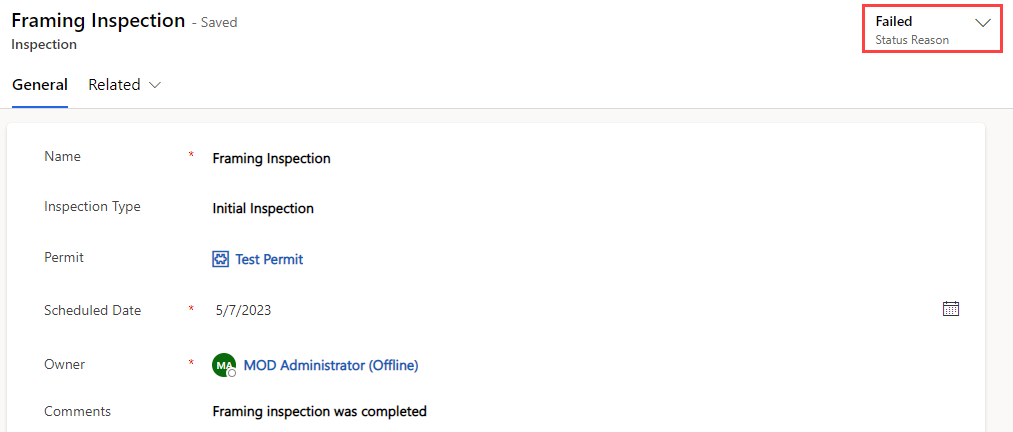
Confirm the inspection record was updated.
- Navigate to the Power Apps Maker portal
https://make.powerapps.com/ - Select your Development environment.
- Select Apps and play the Permit Management app.
- Select Inspections and open the Framing Inspection record.
-
The Status Reason of the inspection should be Failed.

- Change the Status Reason back to Pending.
- Select Save & Close.
- Close the Permit Management application.
- Navigate to the Power Apps Maker portal