Practice Lab 1 – Data Modeling
Scenario
A regional building department issues and tracks permits for new buildings and updates for remodeling of existing buildings. Throughout this course you will build applications and perform automation to enable the regional building department to manage the permitting process. This will be an end-to-end solution which will help you understand the overall process flow.
In this lab, you will create a data model to support the following requirements:
- R1 – Track the status of permits issued for new buildings and existing building modifications
- R2 – Permits are associated with a Build Site, which represents the building or land being modified
- R3 – Permit type indicates the type of permit and inspections, other data that might be required on a permit
- R4 – Inspections completed on the permit work are to be tracked for the entire process i.e., from request of inspection to the pass or fail of the inspection
- R5 – Permits, for our lab purposes, are requested by a person and we need to track who requested each permit
High-level lab steps
To prepare your learning environments you will create a solution, a publisher, and add both new and existing components that are necessary to meet the application requirements.
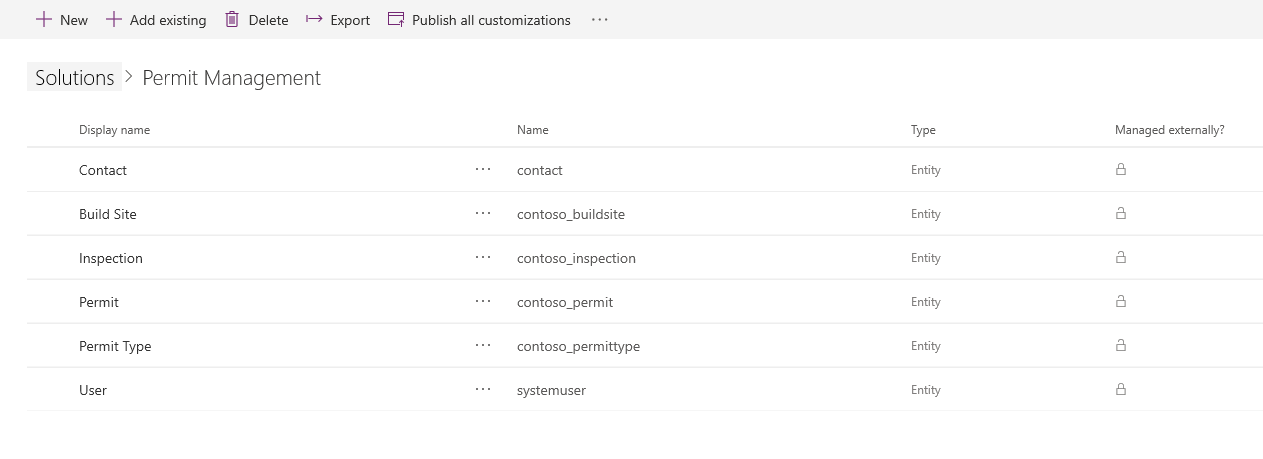
Refer to the data model pdf document for the metadata description (tables, column types and relationships) Data model and metadata.
Your solution will contain several tables upon completion of all the customizations.
Things to consider before you begin
- What are considered as best practices for managing changes in between environments (“Dev” to “Test” to “Prod”)? Are there additional considerations for team solution development?
- What tables a user might need in the scenario that we are building?
- What relationship behaviors would we consider enabling users to complete their tasks?
- Remember to work in your Development environment with the customizations. Once the customizations are completed, published and tested in Development, and if everything works fine, the same will be deployed to Live.
Starter solution
A starter solution file for this lab can be found in the C:\Labfiles\L01\Starter folder.
This starter solution covers all steps in Labs 1 and 2. You should import this solution if you are familiar with Dataverse and model-driven apps.
There is a second starter solution that covers all steps in Lab 3 if you are familiar with basic canvas apps.
Completed solution
A completed solution file for this lab can be found in the C:\Labfiles\L01\Completed folder.
Exercise 1: Create solution
Objective: In this exercise, you will create a publisher and solution for your customizations.
Task 1.1 – Maker portal
-
Navigate to the Power Apps maker portal https://make.powerapps.com and sign in with your Microsoft 365 credentials if prompted.
-
If you are prompted for a Phone number enter
0123456789and select Submit. -
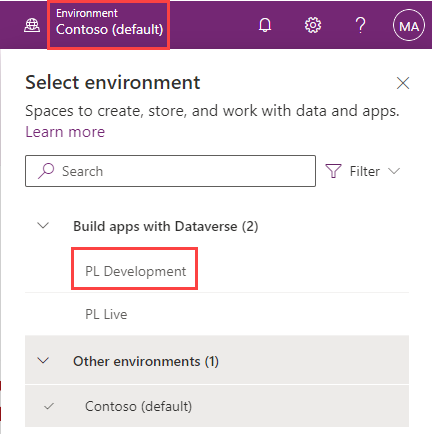
Switch environments by using the Environment Selector in the upper right corner of the screen. The Contoso (Default) environment will be selected by default.
-
Select your Development environment from the list.
-
Select Apps from the left navigation pane and then select All. You should see several apps including, Dataverse Accelerator App, Solution Health Hub, and Package Management View, listed.
-
Select Tables from the left navigation pane. You should see the standard tables from the Common Data Model including Account and Contact.
Task 1.2 – Create solution and publisher
-
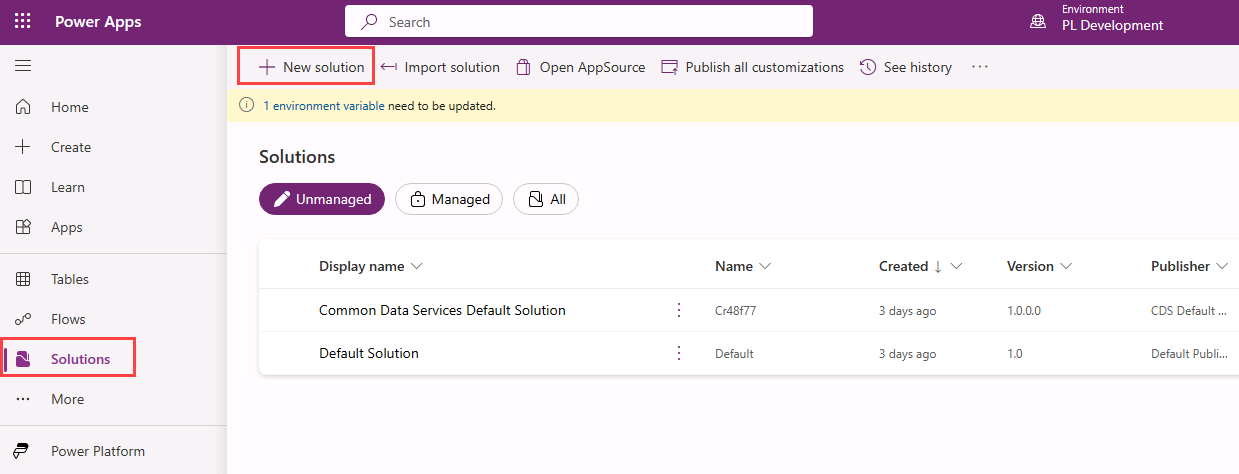
Select Solutions from the left navigation pane. You should see the Default Solution and the Common Data Services Default Solution.
-
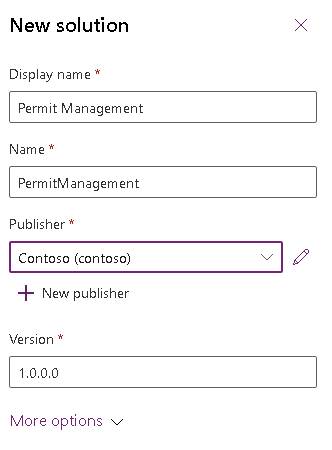
Select + New solution.
-
In the Display name text box, enter
Permit Management. The Name text box should be automatically populated.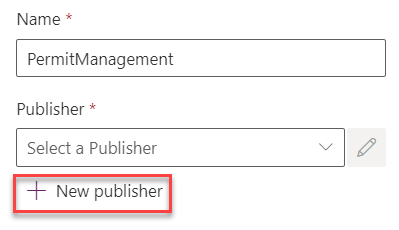
-
Select + New publisher below the Publisher dropdown.
-
In the Display name text box, enter
Contoso. -
In the Name text box, enter
contoso. -
In the Prefix text box, enter
contoso.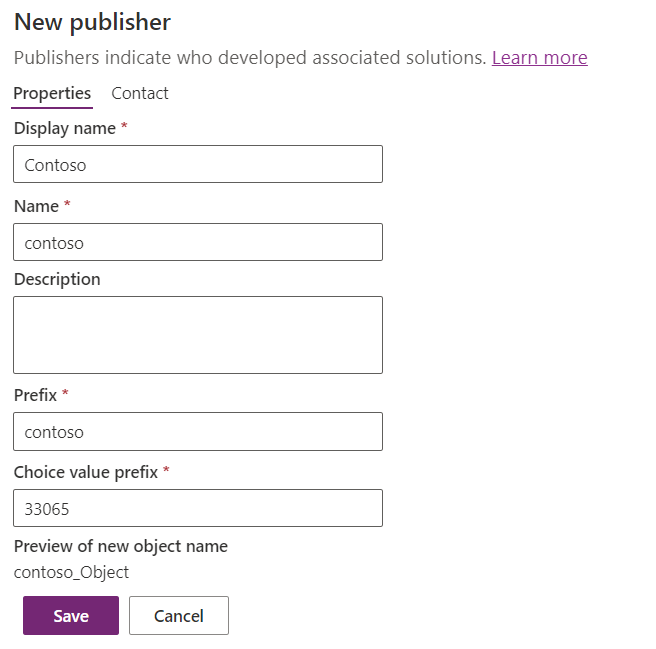
-
Make a note of the Choice value prefix.
-
Select Save.
-
In the Publisher drop-down, select Contoso (contoso).
-
Select Create.
Exercise 2: Add components to the solution
In this exercise, you will add existing tables to the solution.
Task 2.1 – Add existing tables
-
Navigate to the Power Apps maker portal
-
Select your Development environment.
-
Select Solutions.
-
Open the Permit Management solution you created in the previous exercise.
-
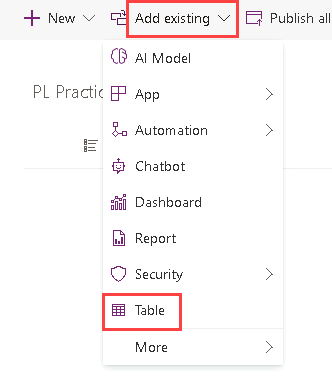
Select Add existing and select Table.
-
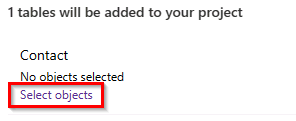
Search for
contactand select the Contact table. -
Select Next.
-
Select Select objects.
-
Select the Views tab.
-
Select the Active Contacts view.
-
Select Add.
-
Select Select objects.
-
Select the Forms tab.
-
Select the Contact main form.
-
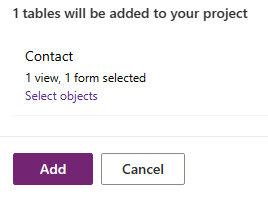
Select Add.
-
You should have 1 view and 1 form selected.
-
Select Add. This will add the Contact table to the Permit Management solution.
-
Select Add existing and select Table.
-
Search for
userand select the User table. -
Select Next.
-
DO NOT select any objects and Select Add. Your solution should now have two tables.
Exercise 3: Create tables and columns
In this exercise, you will create tables, add columns to these tables, and edit the Status Reason options for the Permit and Inspection tables.
Task 3.1: Create Permit table and columns
-
Navigate to the Power Apps maker portal
-
Select your Development environment.
-
Select Solutions.
-
Open the Permit Management solution.
-
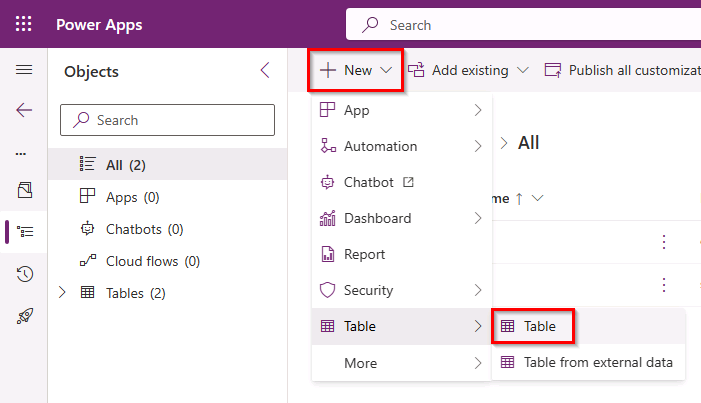
Select + New and then select Table and select Table again.
-
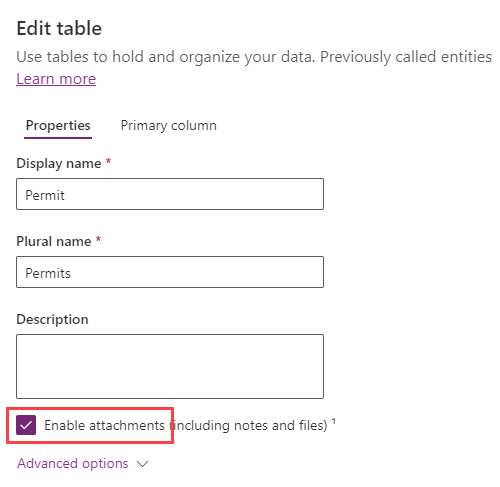
Enter
Permitfor Display Name. The plural name will be automatically populated. -
Check Enable attachments.
-
Select Save.
-
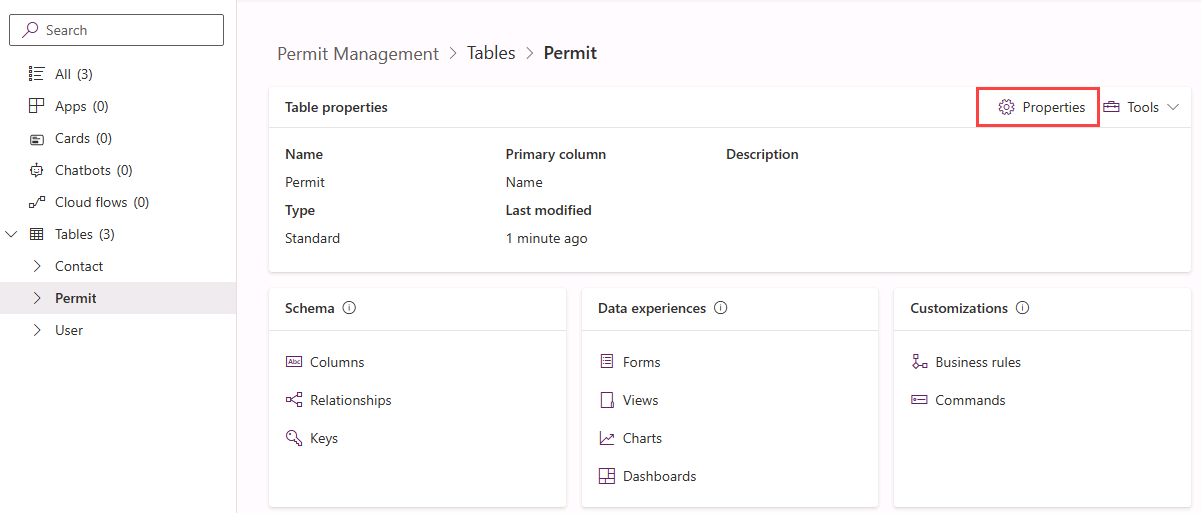
Select Properties.
-
If Enable attachments is not checked for the Permit table, then check Enable attachments again and select Save.
-
Under Schema, select Columns.
-
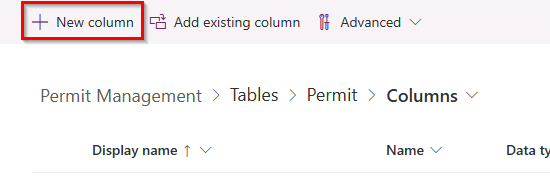
Select + New column.
-
Enter
Start Datefor Display name. -
Select Date and time in the Data type drop-down and then select Date only.
-
In the Required drop-down, select Business required.
-
Select Save.
-
Select + New column.
-
Enter
Expiration Datefor Display name. -
Select Date and time in the Data type drop-down and then select Date only.
-
Select Save.
-
Select + New column.
-
Enter
New Sizefor Display name. -
Select Number in the Data type drop-down and then select Whole number.
-
Select Save.
Task 3.2: Create Permit Type table and columns
-
Create Permit Type table
-
In the Objects pane, select All.
- Select + New and then select Table and select Table again.
- Enter
Permit Typefor Display name. - Expand Advanced options.
- Select Organization for Record ownership.
- Select Save.
-
-
Create Require Inspections column
- Under Schema, select Columns and select + New column.
- Enter
Require Inspectionsfor Display name. - Select Choice and then Yes/no for Data type.
- Select Save.
-
Create Require Size column
- Select + New column.
- Enter
Require Sizefor Display name. - Select Choice and then Yes/no for Data type.
- Select Save.
Task 3.3: Create Build Site table and columns
-
Create Build Site table
- In the Objects pane, select All.
- Select + New and then select Table and select Table again.
- Enter
Build Sitefor Display name. - Select the Primary column tab.
- Change the Display Name to
Street Address. - Expand Advanced options.
-
Change the Schema name to
street1.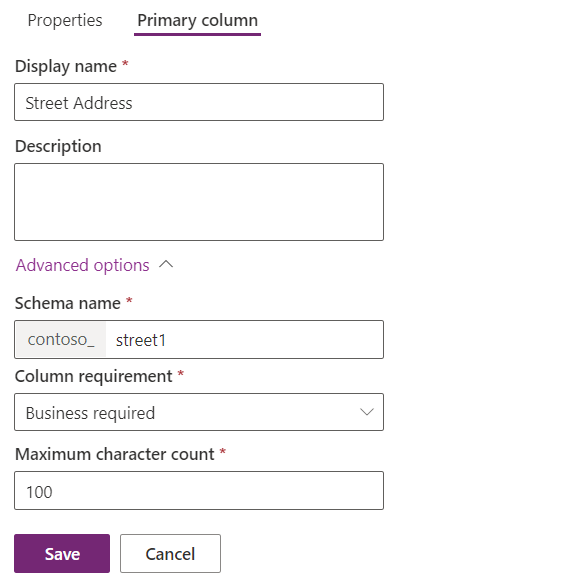
- Select Save.
-
Add City column
- Under Schema, select Columns and select + New column.
- Enter
Cityfor Display name. - Verify Single line of text is selected for Data type.
- For Required, select Business required.
- Expand Advanced options.
-
Set Schema name to
city.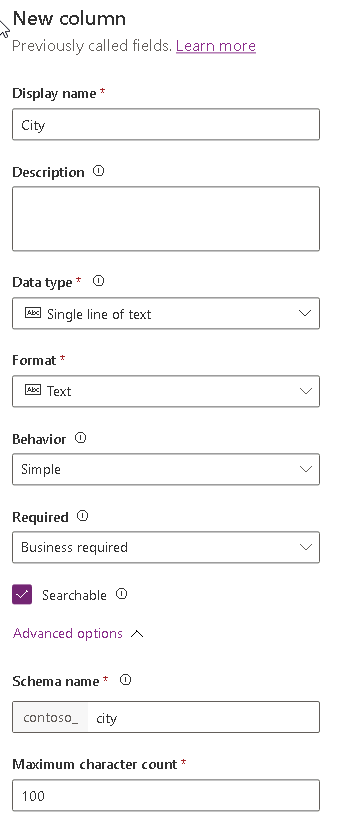
- Select Save.
-
Add Zip/Postal Code column
- Select + New column.
- Enter
ZIP/Postal Codefor Display Name. - Verify Single line of text is selected for Data type.
- For Required, select Business required.
- Expand Advanced options.
- Set Schema name to
postalcode. - Set Maximum character count to 10.
- Select Save.
-
Add State/Province column
- Select + New column.
- Enter
State/Provincefor Display Name. - Verify Single line of text is selected for Data type.
- For Required, select Business required.
- Expand Advanced options.
- Set Schema name to
stateprovince. - Select Save.
-
Add Country/Region column
- Select + New column.
- Enter
Country/Regionfor Display Name. - Verify Single line of text is selected for Data type.
- For Required, leave it set as Optional.
- Expand Advanced options.
- Set Schema name to
country. - Select Save.
Task 3.4: Create Inspection Table and Columns
-
Create Inspection table
- In the Objects pane, select All.
- Select + New and then select Table and select Table again.
- Enter
Inspectionfor Display name. - Select Save.
-
Add Inspection Type Column
- Under Schema, select Columns and select + New column.
- Enter
Inspection Typefor Display name. - Select Choice and then Choice for Data type.
- Under Sync this choice with, select + New choice.
- Enter
Inspection Typefor Display name. -
Enter
Initial Inspectionfor Label and select + New choice.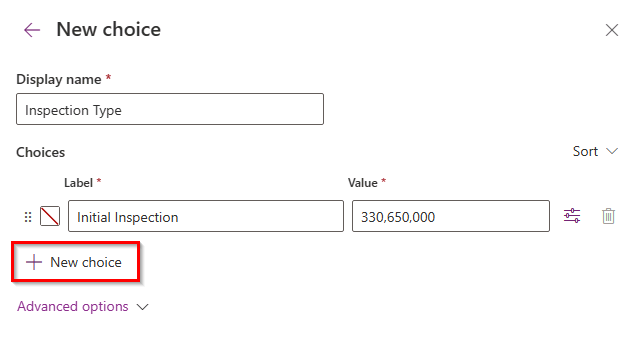
-
Enter
Final Inspectionfor Label.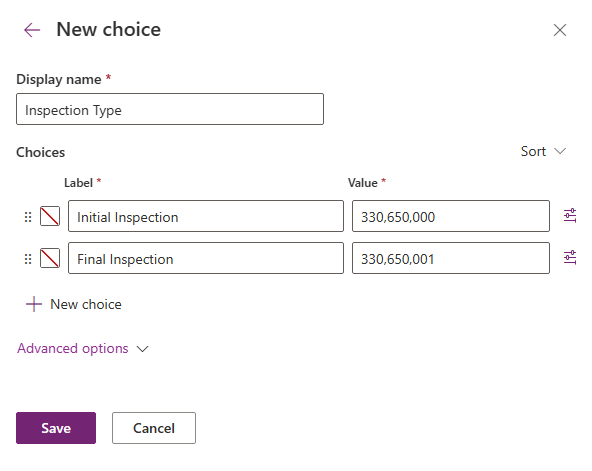
-
Select Save.
-
For Sync this choice with, select Inspection Type from the drop-down.
- Select Save.
-
Add Scheduled Date Column
- Select + New column.
- Enter
Scheduled Datefor Display name. - Select Date and time and then Date only for Data type.
- For Required, select Business required.
- Select Save.
-
Add Comments column
- Select + New column.
- Enter
Commentsfor Display name. - For Data type, select Text and then select Plain Text under Multiple lines of text.
- Select Save.
-
Add Sequence column
- Select + New column.
- Enter
Sequencefor Display name. - Verify Single line of text is selected for Data type.
- Select Save.
-
In the Objects pane, select All.
-
Select Publish all customizations.

Task 3.5: Edit Inspection status reasons
-
Navigate to the Power Apps maker portal
-
Select your Development environment.
-
Select Solutions.
-
Open the Permit Management solution.
-
Expand Tables.
-
Expand the Inspection table.
-
Select Columns.
-
Select the Status Reason column.
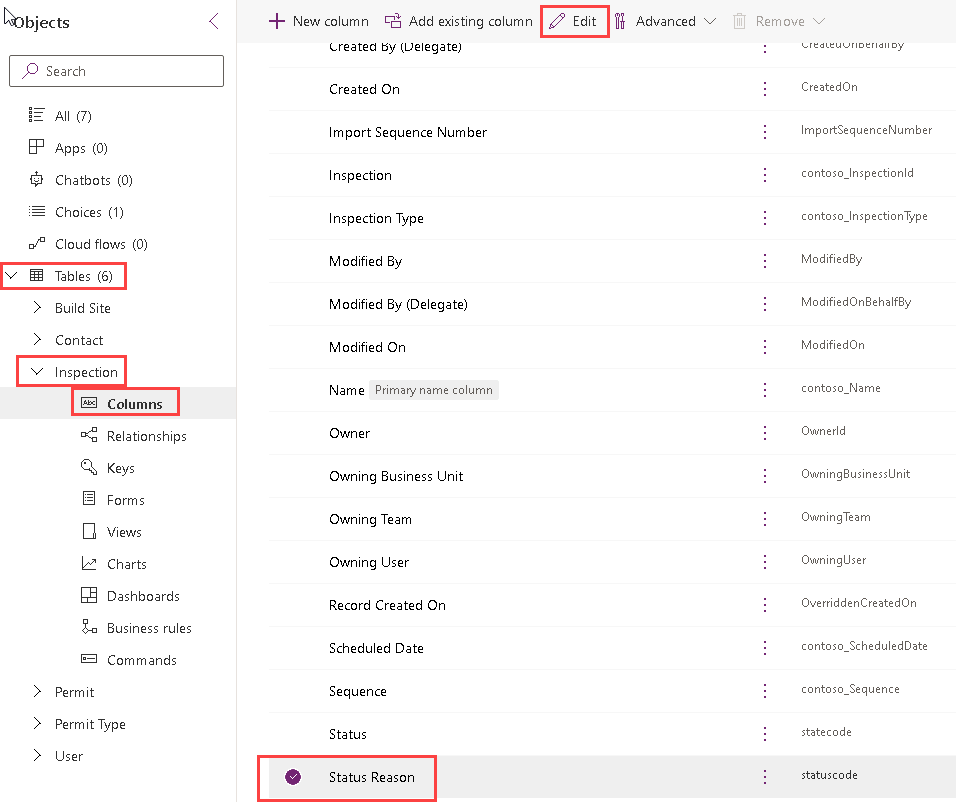
-
Select Edit.

-
Change the Active option label to New Request
- Make sure you have Active selected for Status.
-
Change the Label to
New Request.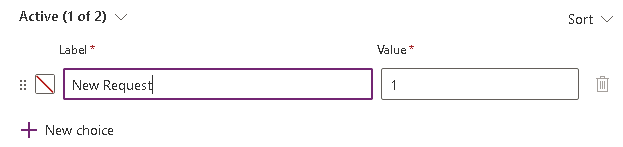
-
Add the Pending option
- Select +New choice.
- Enter
Pendingfor Label.
-
Add the Passed option
- Select +New choice.
- Enter
Passedfor Label.
-
Add the Failed option
- Select +New choice.
- Enter
Failedfor Label.
-
Add the Canceled option
- Select +New choice.
- Enter
Canceledfor Label.
-
Select Pending as the Default choice.
-
Your choice list should now have 5 options for the Active state.

-
Select Save.
Task 3.6: Edit Permit status reasons
-
Navigate to the Power Apps maker portal
-
Select your Development environment.
-
Select Solutions.
-
Open the Permit Management solution.
-
Expand Tables.
-
Expand the Permit table.
-
Select Columns.
-
Select the Status Reason column.
-
Select Edit.
-
Add the Locked option
- Make sure you have the Active selected for Status.
- Select +New choice.
- Enter
Lockedfor Label.
-
Add the Completed option
- Select +New choice.
- Enter
Completedfor Label.
-
Add the Canceled option
- Select +New choice.
- Enter
Canceledfor Label.
-
Add the Expired option
- Select +New choice.
- Enter
Expiredfor Label.
-
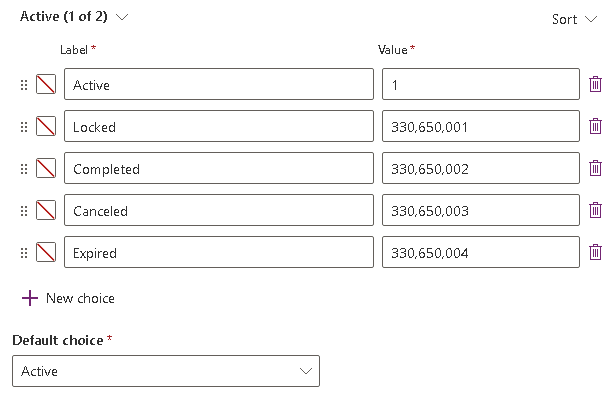
Select Active as the Default choice.
-
Your choice list should now have 5 options for the Active state.
-
Select Save.
-
In the Objects pane, select All.
-
Select Publish all customizations.
Exercise 4: Create Relationships
Objective: In this exercise, you will create relationships.
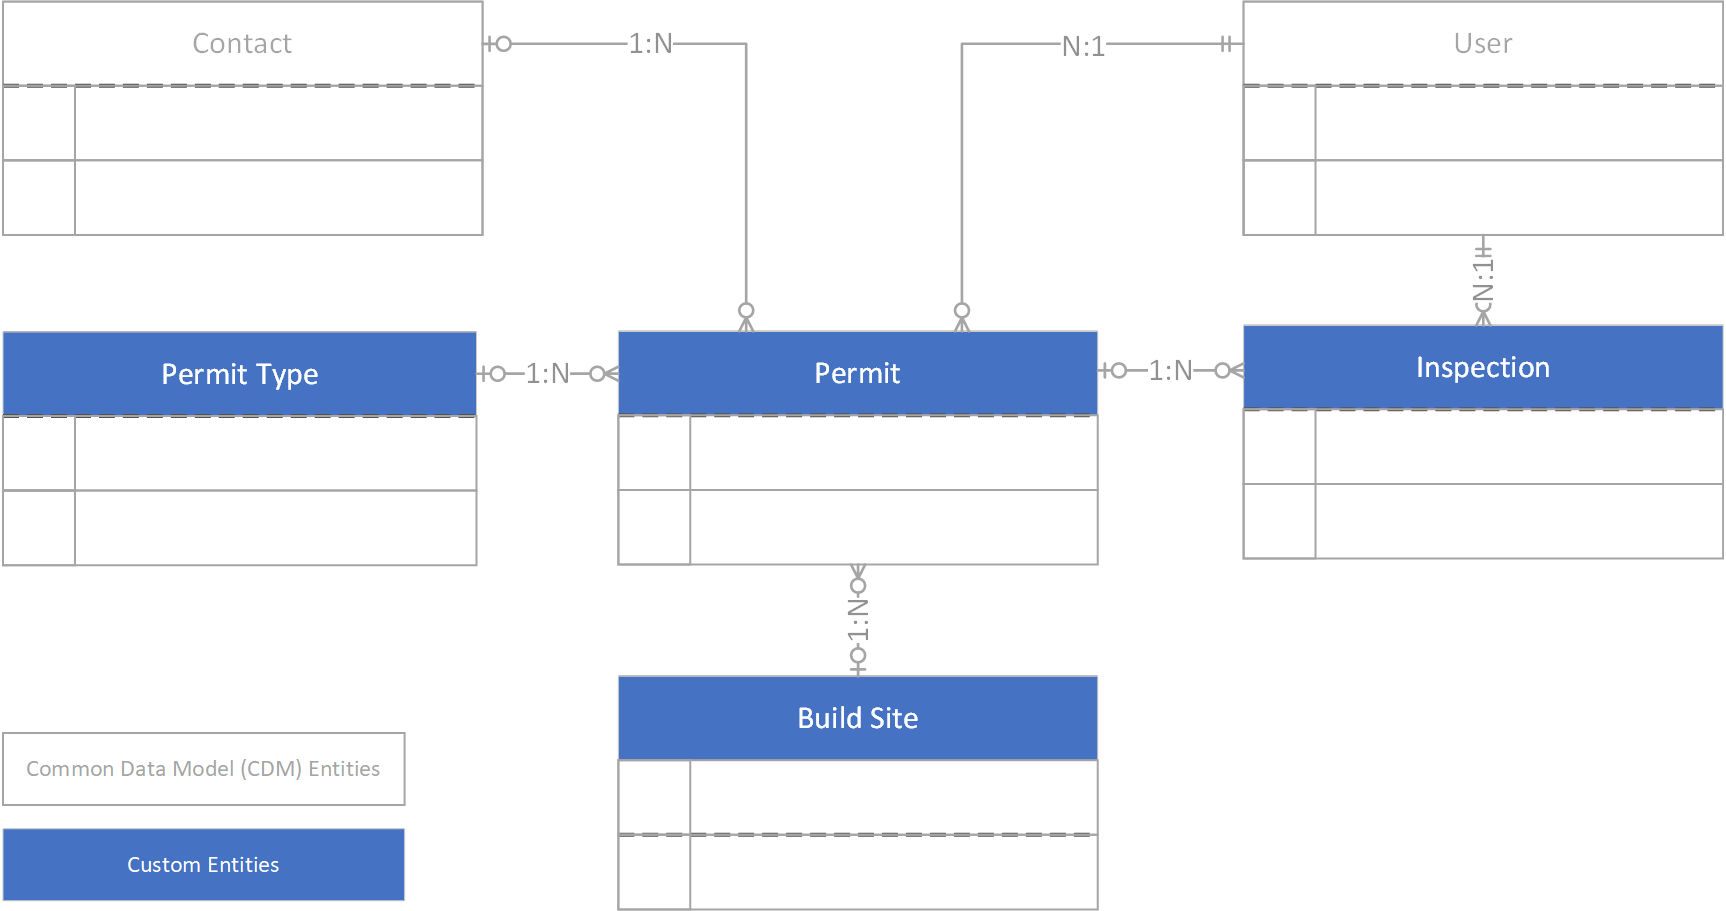
You will create the following data model.
Task 4.1: Create Relationships
-
Navigate to the Power Apps maker portal
-
Select your Development environment.
-
Select Solutions.
-
Open the Permit Management solution.
-
Expand Tables.
-
Select the Permit table.
-
Create Permit to Contact relationship
- Under Schema, select Relationships.
- Select + New relationship and select Many-to-one.
- Select
Contactfor the Related (One) > Table.
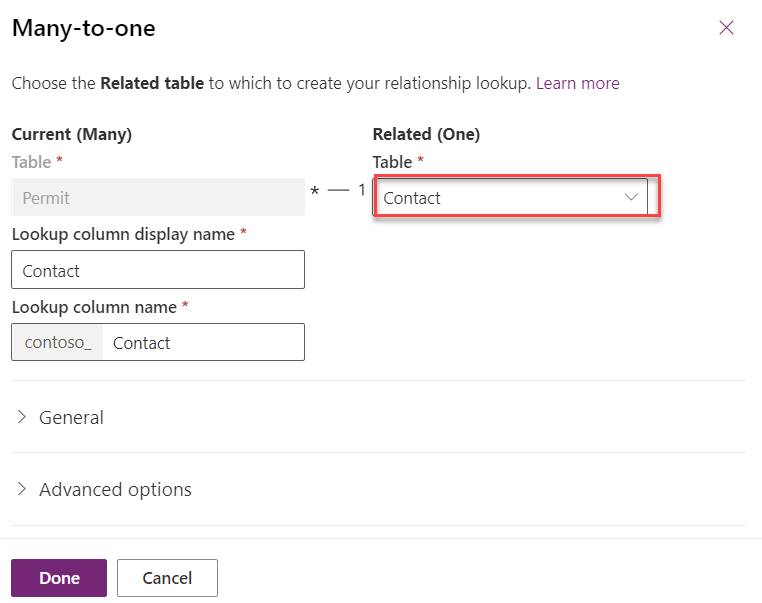
- Select Done.
-
Create Permit to Inspection relationship
- Select + New relationship and select One-to-many.
- Select
Inspectionfor Table in the Related (Many) - Expand Advanced options.
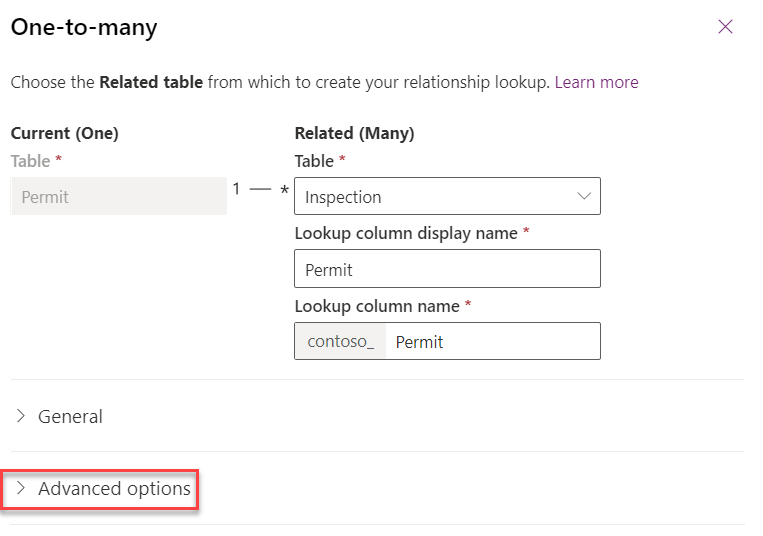
- Change the Type of behavior to Parental.
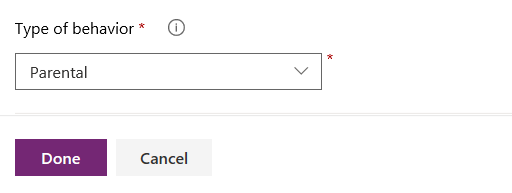
- Select Done.
-
Create Permit to Build Site relationship
- Select + New relationship and select Many-to-one.
- Select
Build Sitefor Related (One) > Table. - Expand Advanced options.
- Change the Delete field to Restrict.
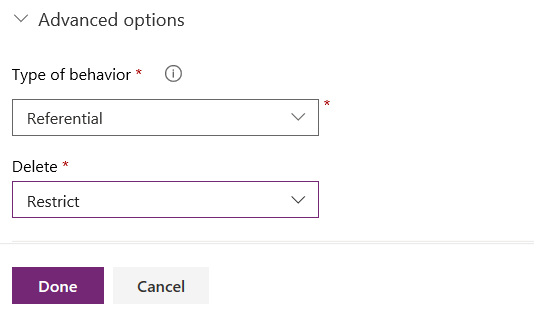
- Select Done.
-
Create Permit to Permit Type relationship
- Select + New relationship and select Many-to-one.
- Select
Permit Typefor Related (One) > Table. - Select Done.
-
In the Objects pane, select All.
-
Select Publish all customizations.