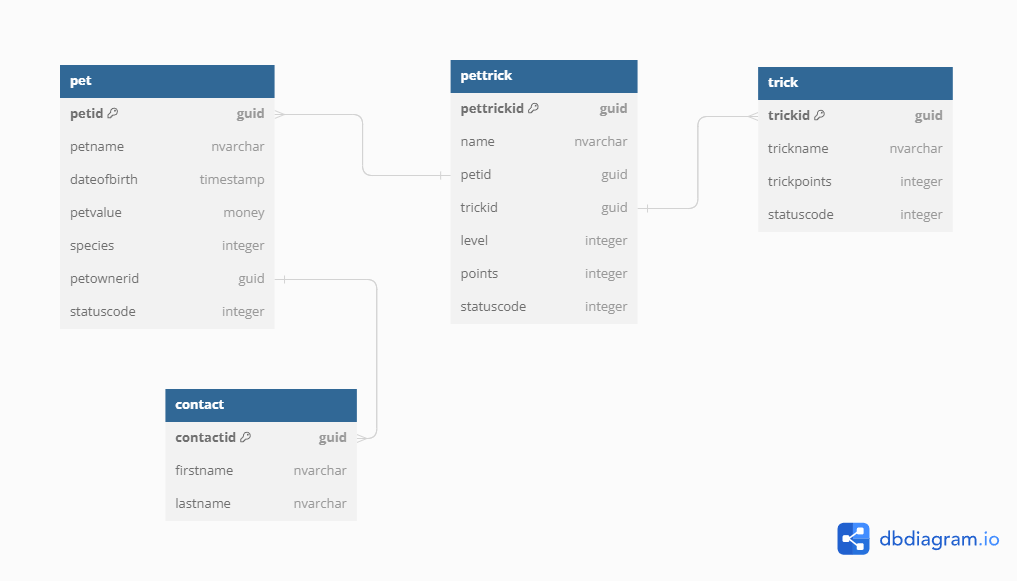
Demo 4 - Columns
Objective: In this demo, you will show how to add columns to the tables created in the previous demo.

Task 4.1 - Add columns to Pets table
-
Navigate to the Power Apps maker portal https://make.powerapps.com.
- Select the Demo environment.
- Select Solutions from the left navigation pane.
- Select the PL400 Demos solution.
- Expand Tables.
- Select and expand the Pet table.
-
Select Columns.
- Select + New column
- Enter
Date of birthfor Display name. - Select Date and time and then Date only for Data type.
- Expand Advanced options.
- Change Schema name to lower case.
- Show options for Time zone adjustment and select Date only.
-
Select Save.
- Select + New column
- Enter
Speciesfor Display name. - Select Choice and then Choice for Data type.
- Under Sync this choice with, select + New choice.
- Enter
Species typefor Display name. - Enter
Catfor Label and select + New choice. - Enter
Dogfor Label. - Expand Advanced options.
- Change Schema name to lower case.
- Select Save.
- Select Species type for Sync this choice with.
- Expand Advanced options.
- Change Schema name to lower case.
-
Select Save.
- Select + New column
- Enter
Pet valuefor Display name. - Select Currency for Data type.
- Expand Advanced options.
- Change Schema name to lower case.
- Enter
0for Minimum value. - Enter
99999for Minimum value. - Select Save.
Task 4.2 - Add columns to Tricks table
-
Select Tricks table.
- Select + New and then select Column.
- Enter
Pointsfor Display name. - Select Number and then Whole number for Data type.
- Show the options for Format and select None.
- Expand Advanced options.
- Enter `trickpoints’ for Schema name.
- Enter
0for Minimum value. - Enter
100for Minimum value. - Select Save.
Task 4.3 - Add columns to Pet Tricks table
- Select Pet Trick table.
- Under Schema, select Columns.
- Select + New column.
- Enter
Pointsfor Display name. - Select Number and then Whole number for Data type.
- Show the options for Format and select None.
- Expand Advanced options.
- Change Schema name to lower case.
- Enter
0for Minimum value. - Enter
100for Minimum value. -
Select Save.
- Select + New column
- Enter
Levelfor Display name. - Select Choice and then Choice for Data type.
- Under Sync this choice with, select + New choice.
- Enter
Skill levelfor Display name. - Enter
Beginnerfor Label and select + New choice. - Enter
Intermediatefor Label and select + New choice. - Enter
Expertfor Label. - Expand Advanced options.
- Change Schema name to lower case.
- Select Save.
- Select Skill level for Sync this choice with.
- Select Beginner for Default choice.
- Expand Advanced options.
- Change Schema name to lower case.
-
Select Save.
- Select the Status Reason column.
- Select Edit.
-
Change the Active option label to New Trick.
- Make sure you have Active selected for Status.
- Change the Label from Active to
New Trick.
-
Add the Training option.
- Select + New choice.
- Enter
Trainingfor Label.
-
Add the Evaluation option.
- Select + New choice.
- Enter
Evaluationfor Label.
-
Add the Passed option.
- Select + New choice.
- Enter
Passedfor Label.
-
Add the Rejected option.
- Select + New choice.
- Enter
Rejectedfor Label.
-
Select New Trick for Default choice.
-
Change the Inactive option label to Canceled.
- Select the Inactive Status.
- Change the Label from Inactive to
Canceled.
- Select Save.
- Select All in the Objects tree.
- Select Publish all customizations.