Lab 04.2: Compose a model-driven app
In this lab you will be model-driven app that will be used for tracking problems and managing the overall effort.
What you will learn
- Build as model-driven application
High-level lab steps
- Exercise 1 – Compose a basic model-driven app
Detailed steps
Exercise 1: Compose model-driven application
In this exercise, you will create a model-driven application.
Task 1: Create new model-driven application
-
Navigate to
https://make.powerapps.comand make sure you are in the correct environment. -
Select Solutions and open the Company 311 solution.
-
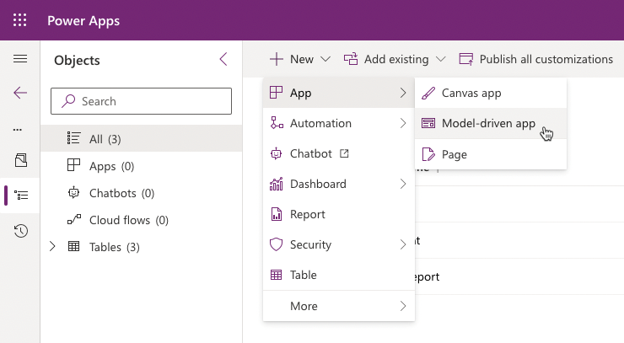
Select + New > App > Model-driven app from the command bar.
-
Enter
Company 311 Adminfor Name and select Create. -
Select Navigation from the left menu.
-
In the properties pane, check Enable Areas.
-
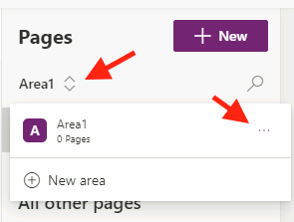
Select Area1. Select the ellipsis (…) on the right of Area1 and select Edit properties.
-
Go to the Properties pane, enter
Manage Problemsfor Title, and enterarea_manage_problemsfor ID. -
Select + Add page on the Pages menu.
-
Select Dataverse Table and select Next.
-
Search for and select Problem Report.
-
Select Add.
-
Select New Group in the navigation pane.
-
Go to the Properties, enter
Problemsfor Title, and entergroup_problemsfor ID. -
Select the area selector and then select New area.
-
Go to the Properties pane, enter
Settingsfor Title, and enterarea_settingsfor ID. -
Select + New on the Pages menu.
-
Select Next.
-
Search for and select Building.
-
Search for and select Department.
-
Select Add
-
Select New Group.
-
Go to the Properties pane, enter
Taxonomyfor Title, and entergroup_taxonomyfor ID. -
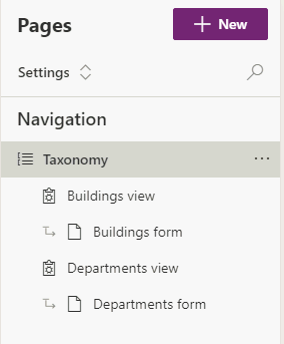
The navigation should now look like the image below. Select Save.
-
Select Publish to publish the sitemap and wait for the publishing to complete.
-
Select the 🡠 Back button to return to the Solution Explorer.
-
Select All in the Objects navigation tree.
-
Select Publish all customizations and wait for the publishing to complete.