Lab 04.1: Work with forms & views
In this lab you will be designing the forms and views that will be used in your model-driven application.
What you will learn
-
Create and configure Table forms
-
Create and configure Table views
High-level lab steps
- Exercise – Configure forms and views
Exercise 1: Configure form and views
In this exercise, you will configure form and views for the Problem Report table.
Task 1: Configure form
-
Navigate to
https://make.powerapps.comand make sure you are in the correct environment. -
Select Solutions and select the Company 311 solution.
-
In the Objects navigation tree expand Tables, expand Problem Report table.
-
Select the Forms tab and open the Information form of type Main.
-
Use the Zoom control at the bottom of the form to make the form large enough for you to work easily. Select the General tab.
-
Go to the Properties pane, change the Label to
Problem detailsand entertab_problem_detailsfor Name. -
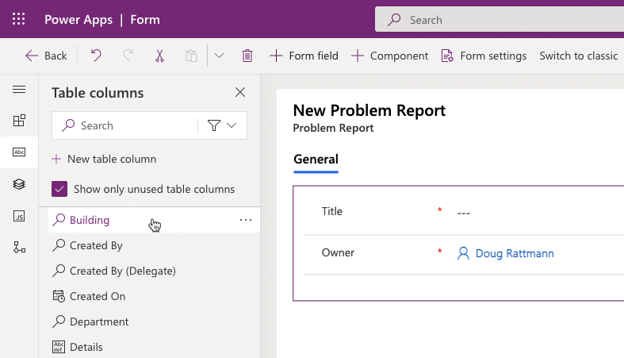
While you still have the section selected, go to the Table columns pane, and select the Building Column. The Building Column will be added to the form.
-
Add the Details, and Photo Columns to the form.
-
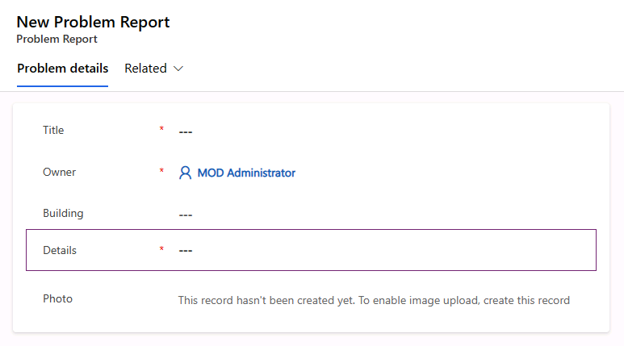
Your form should now look like the image below. Select the Details Column.
-
Go to the Properties pane and expand the Formatting section.
-
Change the Form field height to 4 rows.
-
Select Components from the left navigation menu then select 1-column section.
-
A new section should be added to the form. Select the New Section.
-
Go to the Properties pane, change the Section label to
Resolution detailsand entersection_resolution_detailsfor Name.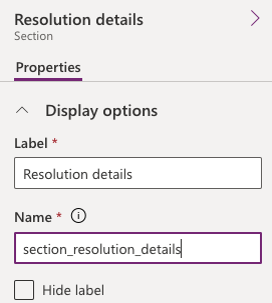
-
Select Table columns from the toolbar.
-
Add Department, Status Reason, Resolved On, Assign to, Estimated Cost, and Resolution columns to the Resolution details section.
-
Select the Resolution column.
-
Go to the Properties pane and, if necessary, expand the Formatting section.
-
Change the Form field height to 4 rows.
-
Select Save and publish.
-
Wait for the publishing to complete.
-
Select the 🡠 Back button to return to the Solution Explorer.
Task 2: Edit view
-
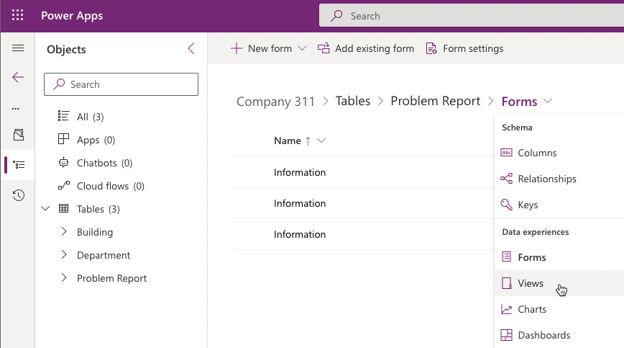
In the Problem Report table, under Data experiences, select Views.
-
Open the Active Problem Reports view.
-
Select Building in the Table columns list to add the Building column to the view.
-
Select Location, Status Reason, and Owner columns to add them to the view.
-
Go to the view Properties pane and select Edit filters.
-
Change the existing filter and set it to Status Reason Equals New.
-
Expand the values drop-down with Status Reason values where New is selected.
-
Select Assigned.
-
Select the drop-down again and select In Progress.
-
The filter should now look like the image below. Select Ok.

-
Select Save and publish.
Task 3: Create view from existing
In this task, you will edit the Active Problem Reports view and save it as a new view for Resolved Problems.
-
With the Active Problem Reports view still open, select Edit filters.
-
Remove In Progress from the filter.
-
Remove Assigned, then remove New value from the filter.
-
Select the drop-down list, then select Completed.
-
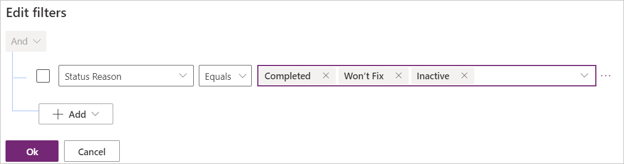
Add Won’t Fix and Inactive values to filter.
-
The filter should now look like the image below. Select Ok.
-
Select Save As.
-
Enter
Resolved Problemsfor Name and select Save. -
Select the 🡠 Back button to return to the solution explorer.
-
Select All in the Objects navigation tree.
-
Select Publish all customizations and wait for the publishing to complete.