Add custom knowledge
In this exercise you will update the declarative agent you created in the previous exercise with custom instructions and grounding data.
This exercise should take approximately 20 minutes to complete.
Before you start
Before you can start this exercise, you will need to upload the product-related documents to Microsoft 365 that the declarative agent will use as grounding data. Complete the steps below to prepare for the exercise.
[!NOTE] When you upload documents to a new SharePoint Online site, there’s a delay before the documents are indexed and available for use by Copilot. If you wish to test your agent immediately, then upload the documents to an existing site. The documents will be indexed and available for use by the agent without delay. If you choose to use a new SharePoint Online site, the documents may take longer to be indexed and available for use by Copilot.
The instructions below guide you through uploading the documents to a new site. If you’d like to use an existing site, start with the section labeled Upload sample data and use your existing library in place of the Products library.
Download the sample data
- In a web browser, navigate to the course’s GitHub repo at
https://github.com/MicrosoftLearning/MS-4022-Extend-Microsoft-365-Copilot-in-Copilot-Studio/blob/master/Allfiles/Products.zip. -
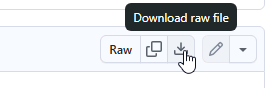
Select the Download raw file button to download Products.zip.
- Open the downloaded folder and select Extract all to extract the contents to a new folder on your machine named
Productsthat you can access later.
Create a SharePoint site
- In your web browser, navigate to Microsoft 365 Copilot at
https://m365.cloud.microsoft.comand sign in with the Microsoft 365 account you’re using for this lab. - Select the App Launcher icon (grid icon) in the top left corner of the page, then select More Apps.

- Select SharePoint from the catalog of apps.
- Skip any messages about new features and navigate to the SharePoint homepage.
- From the left-navigation menu, select Build.
- Under the Start building section, select Site.
- Select Team site as the type of site.
- On the Select a site template page, under the From Microsoft section, select Standard team.
- On the Preview site template page, select Use template.
- On the Give your site a name page, enter
Product support.[!NOTE] If the message The site address is available with modification appears, modify the site name until the message indicates that the site address is available. You can accept the suggested modification or create your own.
- Change the Privacy settings to Public - anyone in the organization can access this site.
- Select Create site. Creation of the site may take a few moments before the Go to site button is activated.
- Select Go to site. You’re navigated to your new SharePoint site in the browser.
Create a document library
- From the Product support SharePoint site, select the Create button at the top of the page then select Document library.
- On the Create a new document library page, select Blank library.
- In the Name field, enter
Productsthen select Create. You’re navigated to the new document library.
Upload sample data
- From the Products library, select the + Create or upload button then select Files upload.
- Navigate to the folder on your computer where you saved the sample files you downloaded in an earlier step.
- Select all of the files in your local Products folder and then select Open to upload them to SharePoint.
- Wait for the upload to complete. The files will now appear in the Products library in SharePoint.
Copy the SharePoint URL
Next, copy the direct URL to the site for use when configuring your agent’s knowledge.
- From the Products library page in SharePoint, select the Settings icon in the top right and choose Library settings then More library settings.
- Locate the Web address property. Your SharePoint site URL is the portion of the Web address that is in the format
https://DOMAIN.sharepoint.com/sites/SITE_NAME/LIBRARY_NAME/Forms/AllItems.aspx. Your URL should be in the formathttps://DOMAIN.sharepoint.com/sites/ProductSupport/Products/Forms/AllItems.aspx, where DOMAIN is your Microsoft 365 tenant domain. - Copy your SharePoint site URL and save it for use in upcoming lab steps. Do not include any portion of the URL that comes after “/Products”.
Configure your agent with custom knowledge
Add the SharePoint URL to your agent as a grounding knowledge source.
Add SharePoint URL
- In a web browser, navigate to Microsoft Copilot Studio at
https://copilotstudio.microsoft.com. - Skip any messages about new features.
- Select Agents.
- Select the Microsoft 365 Copilot agent.
- Select your Product Support agent.
- From the Knowledge section of the agent overview page, select Add Knowledge.
- On the Add knowledge page of the wizard that opens, select SharePoint.
-
In the text box, paste the URL of your Products SharePoint library, then select Add. This should be in the format:
https://DOMAIN.sharepoint.com/sites/ProductSupport/Products. - Select Add to agent then wait for the knowledge source to be added to the agent. This may take a minute.
-
Notice that the Products library is listed under the Knowledge section of the agent’s overview information.

[!NOTE] Copilot Studio agents access documents on behalf of the user. Your agent will only be able to get answers and content from documents your end users have access to.
Update custom instructions
Next, update the agent’s instructions to describe how the agent should use the knowledge source.
- From the agent’s overview page in Copilot Studio, select Edit within the Details section.
- Replace the contents of the Instructions text box with the following:
You are an agent tasked with answering questions about Contoso Electronics products. Start every response by enthusiastically thanking the user for their question or comment, then respond to their question or comment. You will use documents from the Products folder in SharePoint as your source of information. If you can't find the necessary information, you should suggest that the agent should reach out to the team responsible for further assistance. Your responses should be concise and always include a cited source. - Select Save in the Details section.
Test your agent in Copilot Studio
Finally, test your agent’s ability to use the custom knowledge source.
- From the Test your agent pane in your agent’s overview page in Copilot Studio, select the New chat button to refresh the test pane.
- In the text box for the test conversation, enter
Tell me about Eagle Airand send the message. -
Wait for the response. Notice that the response contains information about the Eagle Air drone. The response contains citations and references to the Eagle Air document stored in SharePoint.
Let’s try a few more prompts:
- In the message box, enter
Recommend a product suitable for a farmerand send the message. - Wait for the response. Notice that the response contains information about the Eagle Air and some extra context as to why the Eagle Air is recommended. The response contains citations and references to the Eagle Air document stored in SharePoint.
- In the message box, enter
Explain why the Eagle Air is more suitable than Contoso Quadand send the message. -
Wait for the response. Notice that the response explains in more detail why the Eagle Air is more suitable than the Contoso Quad for use by farmers.
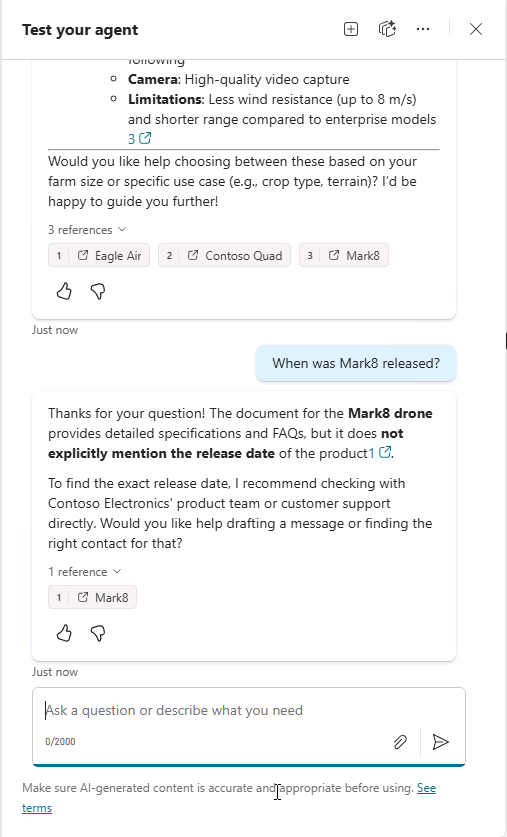
Finally, let’s test the fallback response by asking a question that the agent can’t answer:
- In the message box, enter
When was Mark8 released?and send the message. -
Wait for the response. Notice that the response suggests that the agent should reach out to the team responsible for further assistance as defined in the instructions.