Exercise 1: Implement a message extension that retrieves data from Microsoft Graph
Scenario
Suppose you have been asked to help the IT Support team build a message extension that allows team members to retrieve contact information for users and insert the contact details into messages in Teams using cards. In this exercise, you will implement a message extension that retrieves user data from Microsoft Graph. The solution has already been scaffolded using Teams Toolkit, but you will need to make changes to implement functionality.
Exercise tasks
Your goal is to ensure the app has the following functionality:
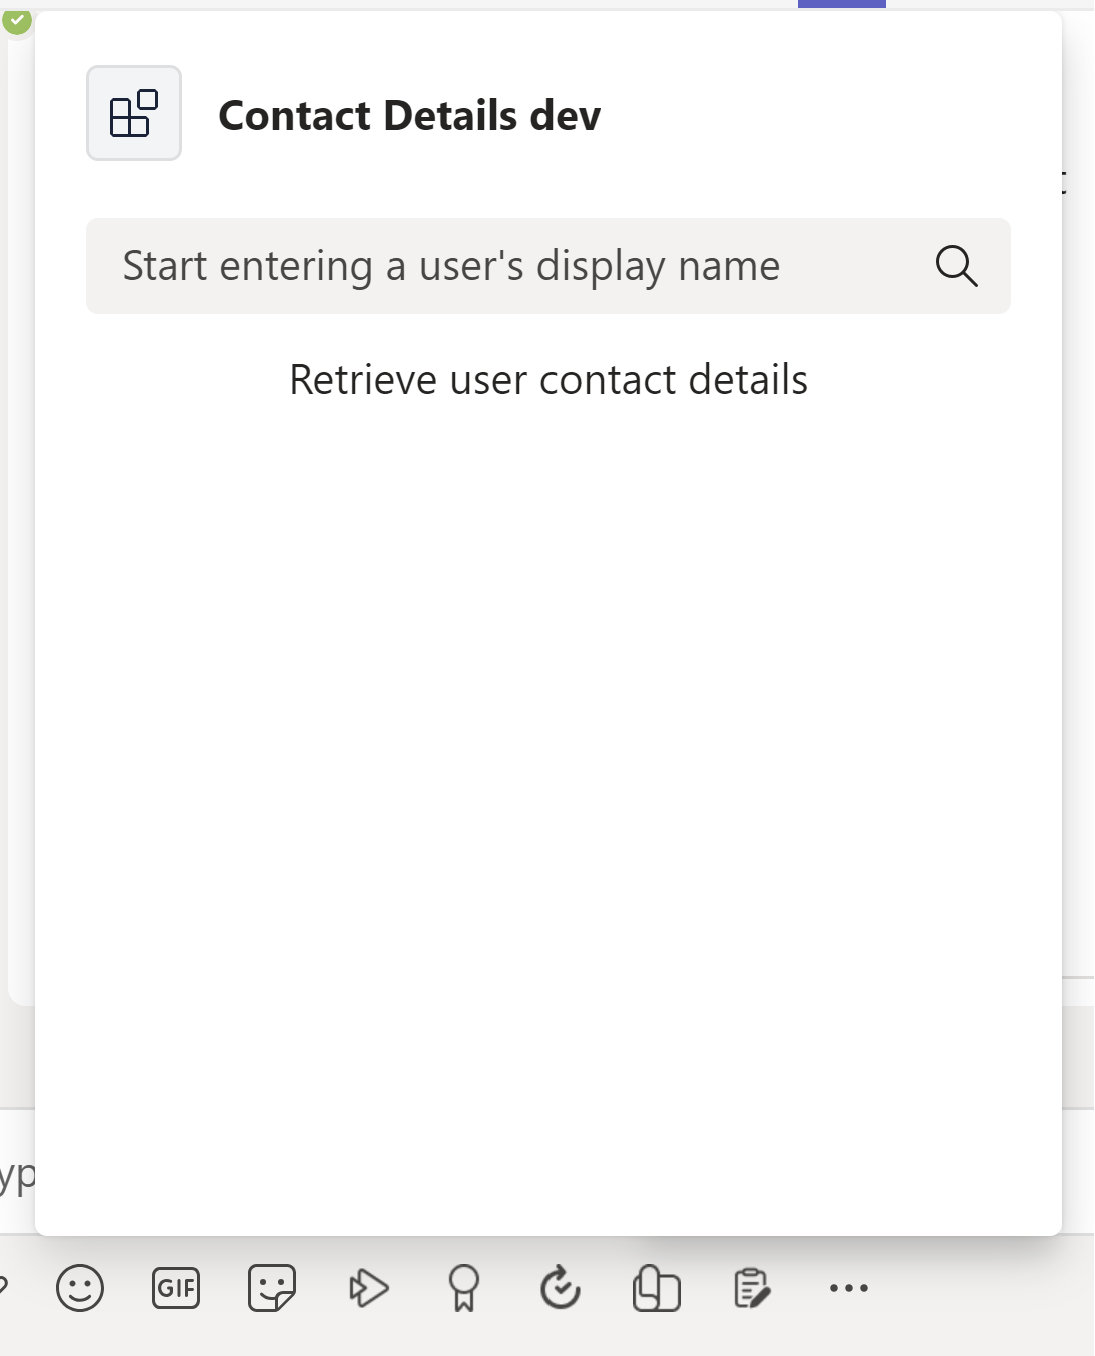
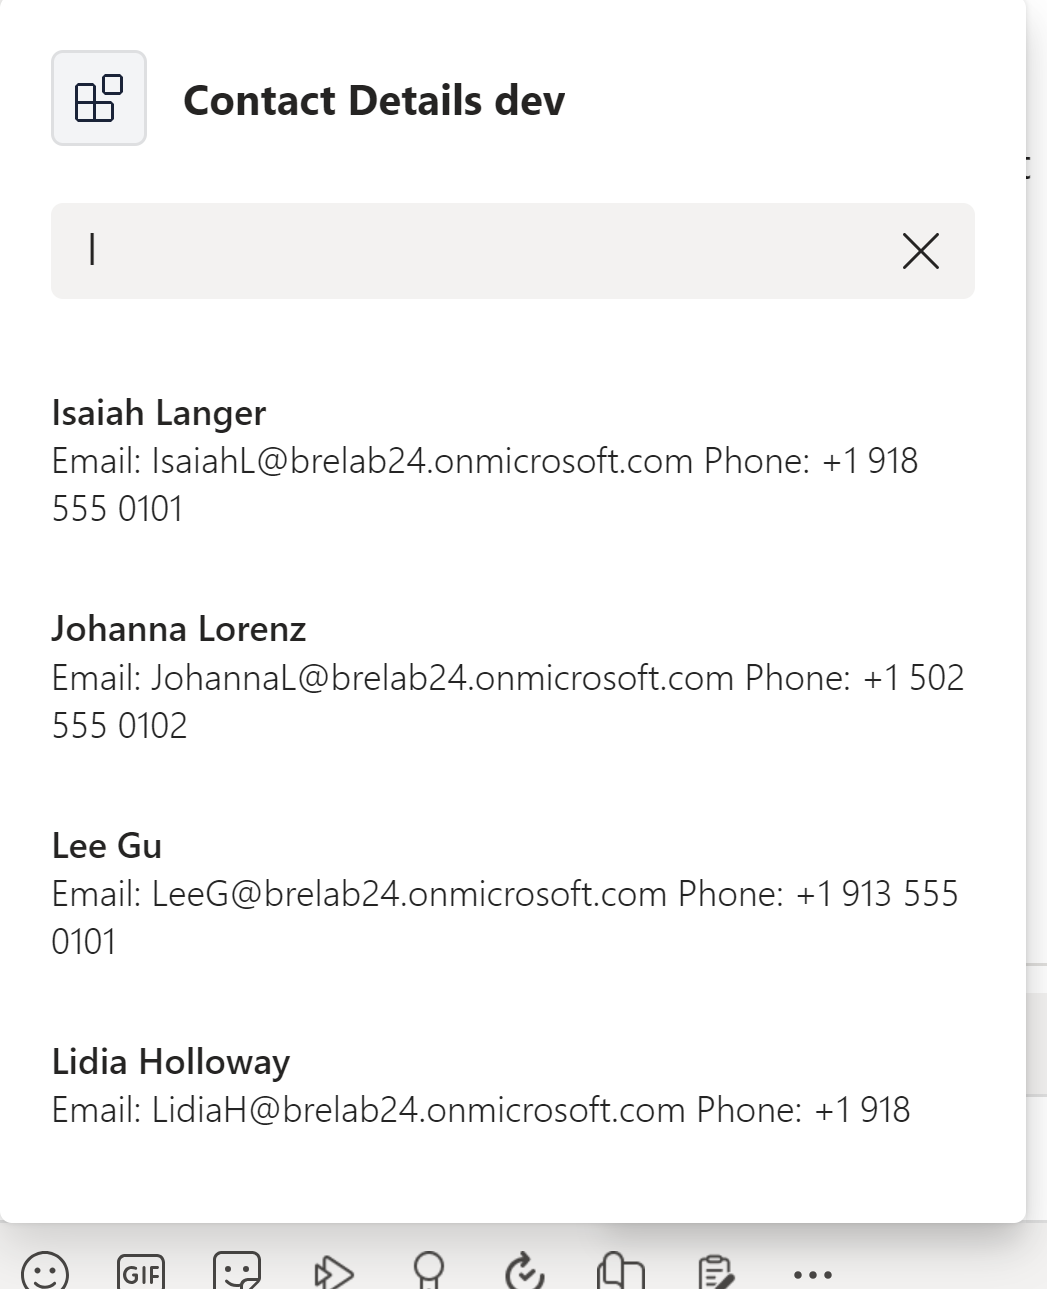
- App users enter the name of a user in the message extension UI.
- The app uses the Graph API
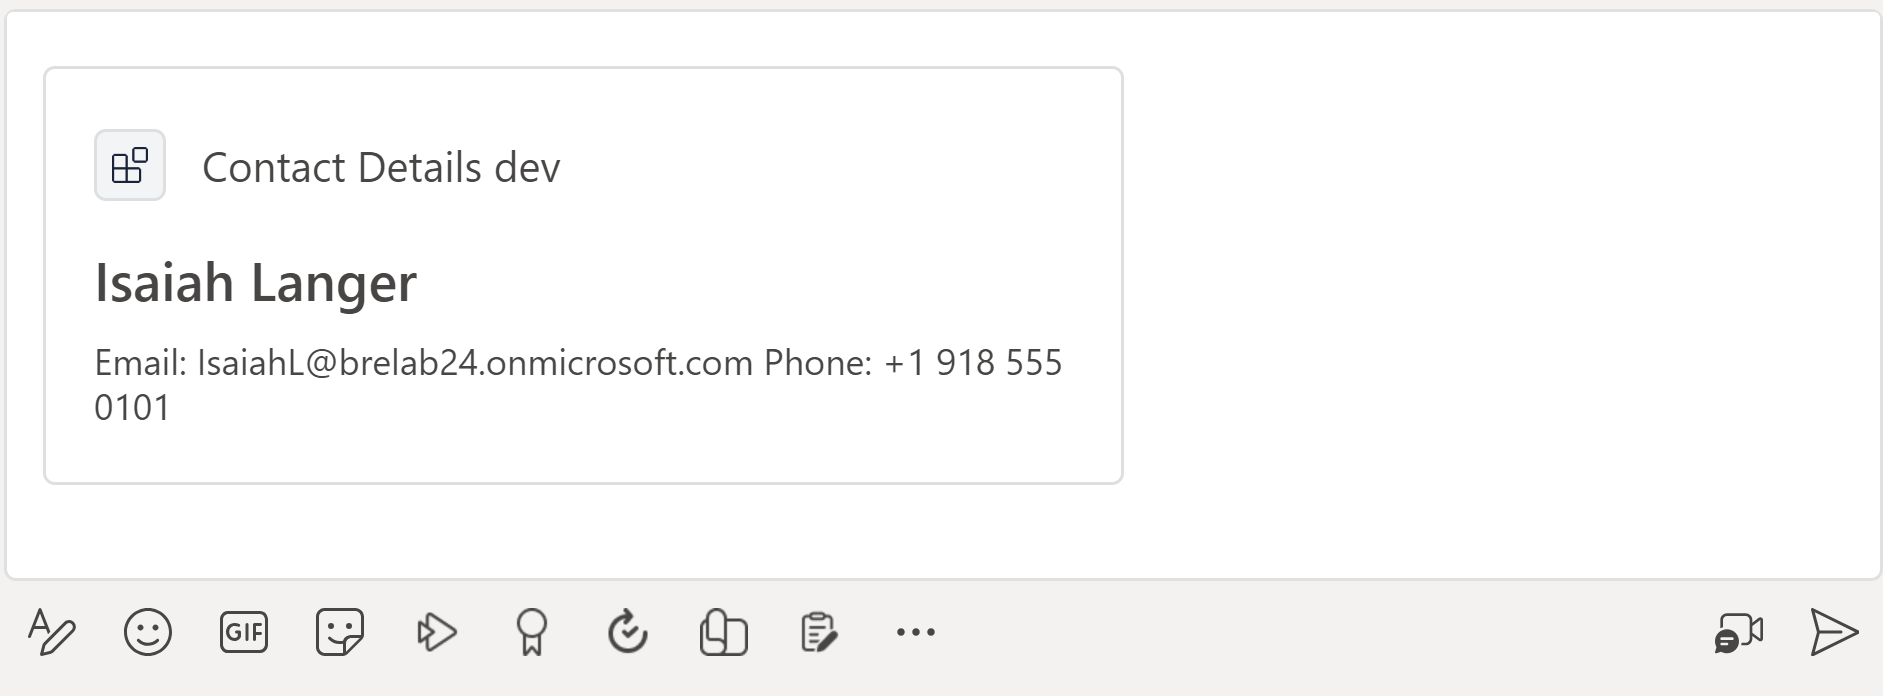
usersendpoint to find users by display name and lists the results. - When the app user selects the desired user from the search results, they can insert the desired card into a message in Teams.
- The card displays the user’s display name, email address, and phone number
You need to perform the following tasks to complete the exercise:
- Access and review the project.
- Complete the search functionality.
- Add the Graph queries.
- Provision resources for the message extension.
- Configure permissions to access Microsoft Graph.
- Deploy to Azure.
- Run and test the app.
Estimated completion time: 25 mins
Task 1: Access and review the project
The message extension app has been scaffolded using Teams Toolkit. The app has also been updated to retrieve user data from Microsoft Graph using the Microsoft Graph JavaScript Client Library. Some of the code is incomplete.
- Download the ContactDetails.zip project from the Starter folder.
- Extract the contents of the zip file to a folder named ContactDetails on your machine then open the folder in Visual Studio Code.
- Review the project directories and files in the Explorer area of Visual Studio Code to familiarize yourself with the source code. Key files and folders include:
| Folder / File | Contents |
|---|---|
teamsapp.yml |
Main project file describes your application configuration and defines the set of actions to run in each lifecycle stage. |
teamsapp.local.yml |
This overrides teamsapp.yml with actions that enable local execution and debugging. |
.vscode/ |
VSCode files for local debug. |
appPackage/ |
The app package files, including the Teams app manifest. |
infra/ |
Templates for provisioning Azure resources. |
index.ts |
Application entry point and restify handler. |
teamsBot.ts |
Teams activity handler. |
Task 2: Complete the search functionality
The solution is missing code to store the value of the search query string for use in the Graph query. Update the code to store this value in a variable named searchQuery.
- Navigate to the teamsBot.ts file.
-
In the
handleTeamsMessagingExtensionQuerymethod, locate the comment // Get the search context from the query parameters. on line 81 and add the following line of code on the next line:const searchQuery = query.parameters[0].value;
Task 3: Update the Graph query
The solution is missing the API path for the Graph query that uses the search string. Update the query to use $search to search for users by display name.
-
In the
handleTeamsMessagingExtensionQueryfunction, locate the following comment on line 84:// Use the Graph API to search for users by their display name. -
In the next line of code, replace
PATHwith the following API path:/users?$search="displayName:${searchQuery}"&$count=true
The code should meet functionality requirements now.
Task 4: Provision resources for the message extension
Next, use Teams Toolkit to provision the resources required for the message extension.
Note: Provisioning Azure cloud resources and deploying to Azure may cause charges to your Azure Subscription.
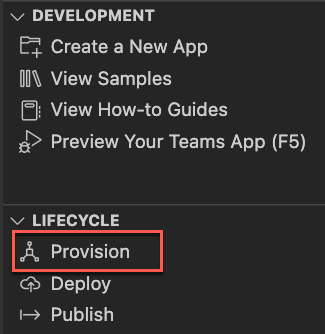
- In Visual Studio code, select Teams Toolkit from the sidebar.
- Under ACCOUNTS, sign into your Microsoft 365 tenant and your Azure account.
- Under LIFECYCLE, select Provision.
- Select a resource group where you can provision the resources, or create a new resource group by selecting the New resource group option and following the prompts.
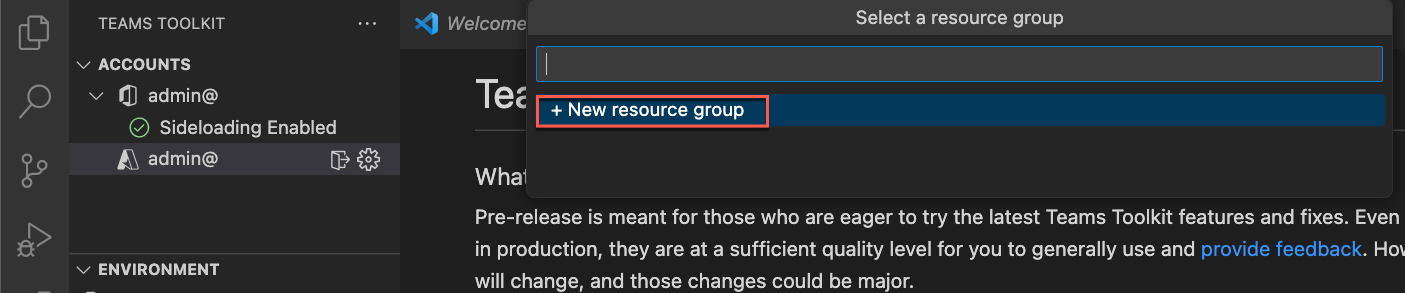
-
On the final dialog to confirm your select, select Provision.
When provisioning is complete, a new app registration should be created in your Microsoft 365 tenant using the
devenvironment in Teams Toolkit. Provisioning might take a while.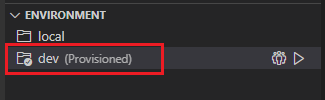
Task 5: Configure permissions to retrieve Microsoft Graph data
- Sign into the Azure portal at portal.azure.com using your Microsoft 365 admin account.
- In the left navigation menu, navigate to Microsoft Entra ID.
- Navigate to Manage > App registrations > All applications.
- Select the Contact Details app registration that was created during provisioning.
- Navigate to Manage > API permissions.
- Select +Add a permission.
- Select Microsoft Graph.
- Select Delegated permissions.
- Locate the permissions listed under User and select the User.Read.All permission.

- Select the Add permissions button.
- The permission is configured, but requires admin consent.
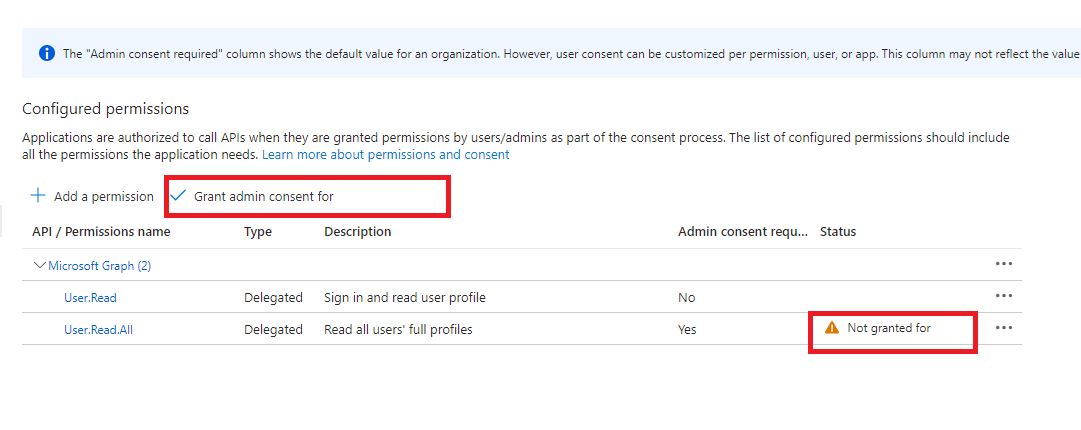
- Select Grant admin consent for [tenant] then select Yes to confirm.
The permission has been configured and consented.
Task 6: Deploy to Azure
Deploy the app to the provisioned resources in the dev environment.
- On the Teams Toolkit panel, under Lifecycle, select Deploy.
- In the deployment confirmation dialog, select Deploy.
- Check for confirmation of successful deployment in the Visual Studio Code editor.
The message extension is hosted in Azure.
Check your work
Preview your app in the Teams client to test the functionality.
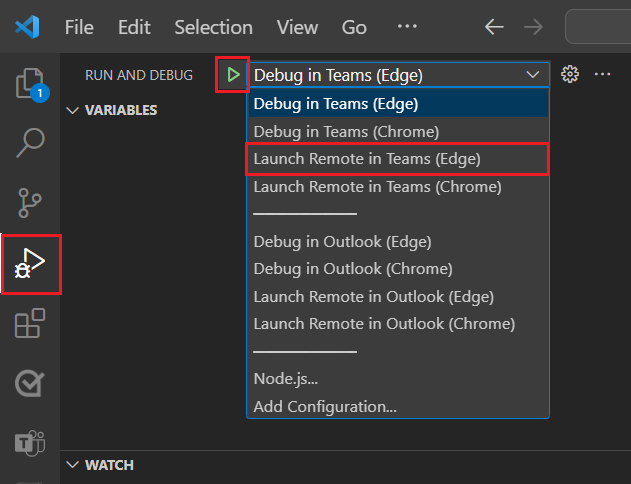
- On the Teams Toolkit panel, under Development, select Preview Your Teams App (F5).
-
In the dropdown menu, select the desired option to Launch Remote with your preferred browser.
- When you run the app for the first time, all dependencies are downloaded, and the app is built. A browser window opens when the build is complete. This process can take three to five minutes to complete.
-
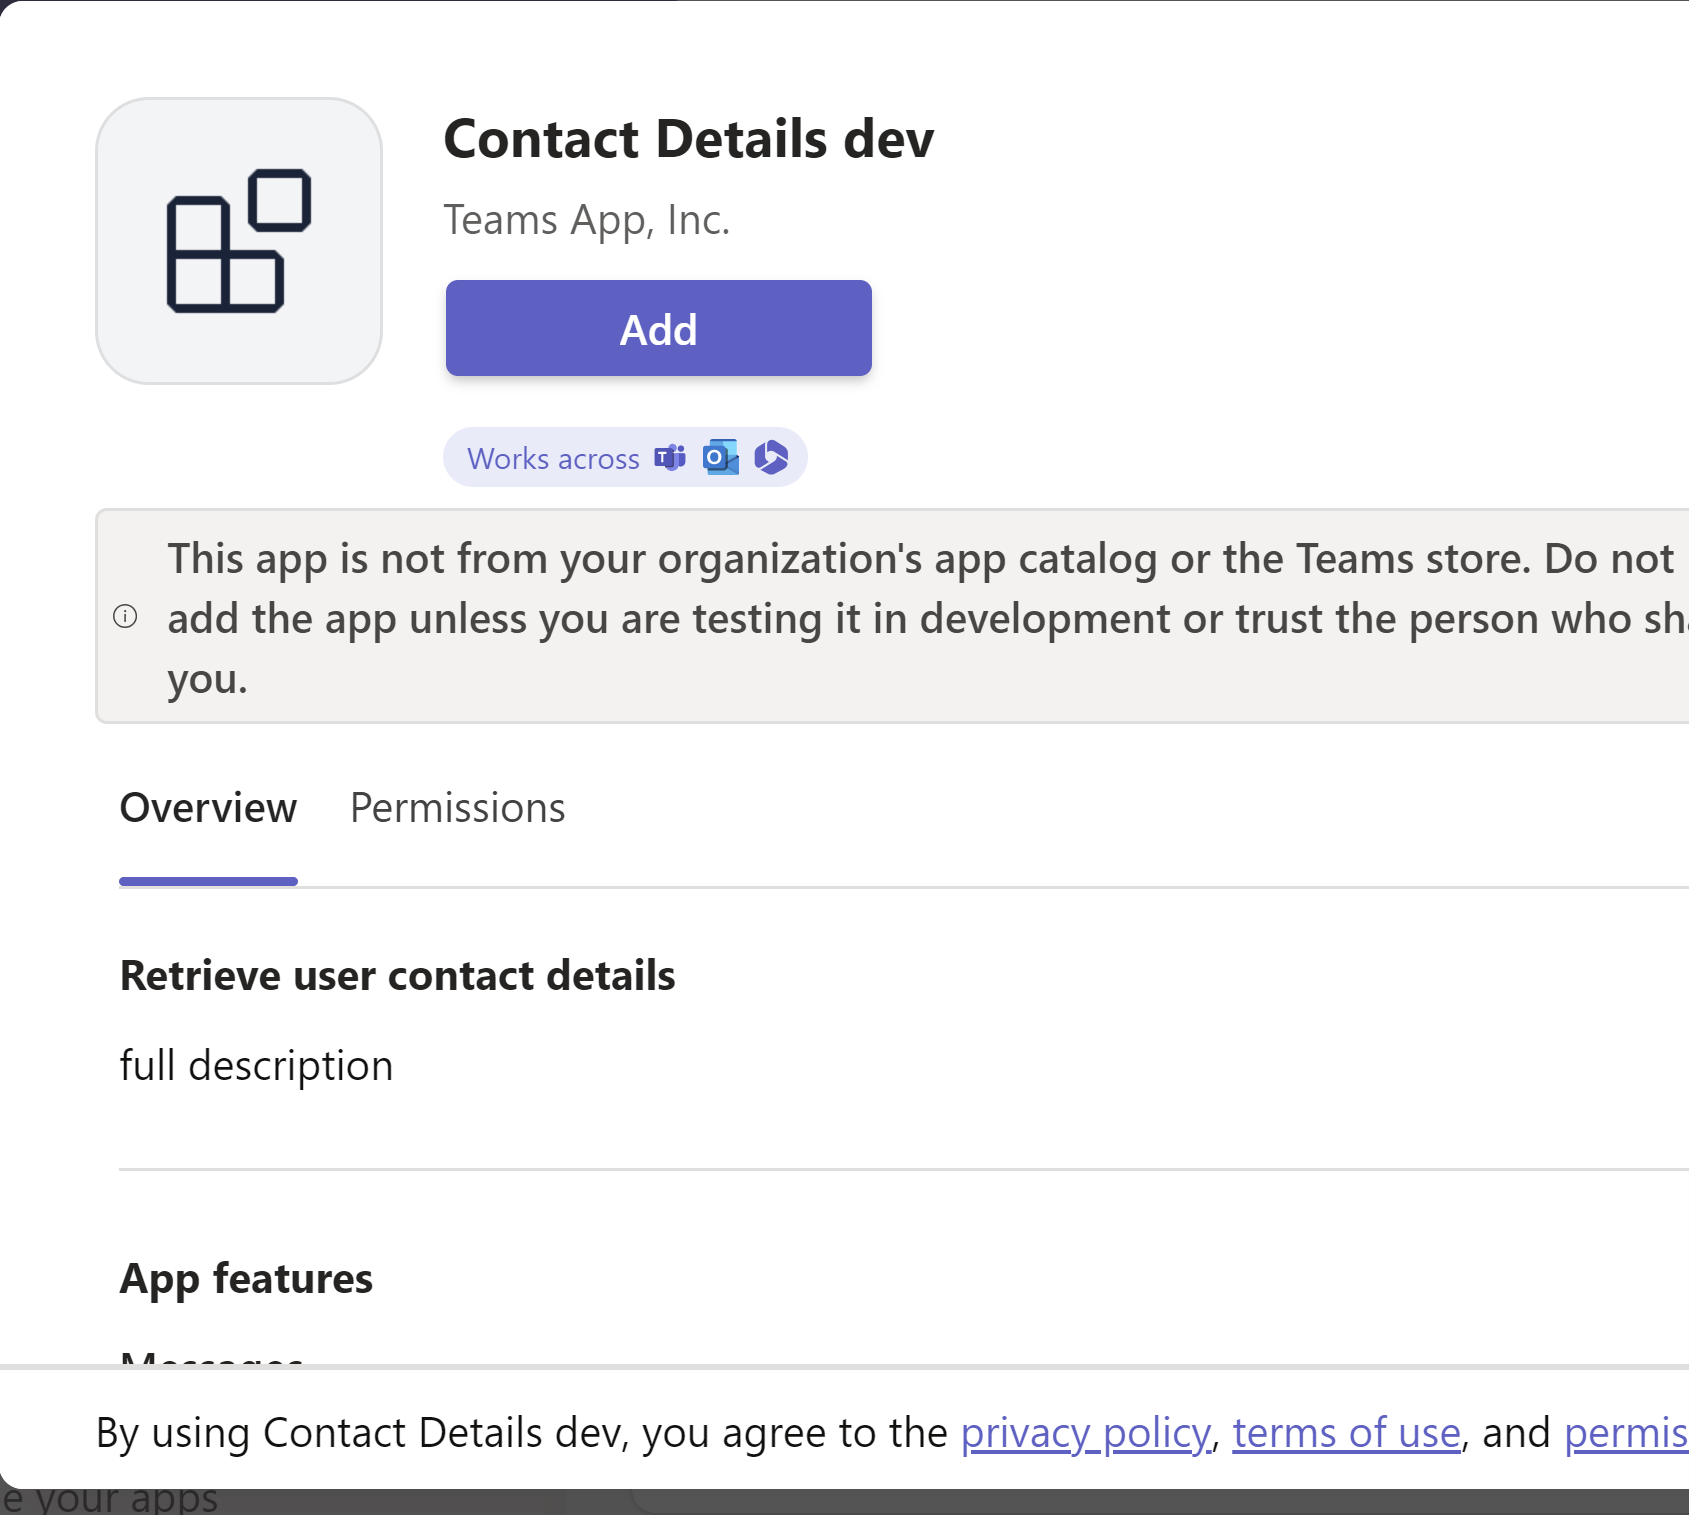
Teams displays a window with your app’s description and permission requirements. Select Add to add the app.
- When the message extension loads in the Teams client, enter a letter to search users by display name. Select a result to insert a card into the conversation.
Note: If for any reason the message extension is not automatically invoked, you can access it by entering “@Contact Details dev” in the command bar at the top of the Teams client or in the compose message area. You can also use the Actions and apps button from the Compose message area to locate the app.