Exercise 1: Install and set up Teams Toolkit for Visual Studio Code
In this exercise, you’ll install Teams Toolkit for Visual Studio Code and set up your environment.
Task 1: Install Teams Toolkit for Visual Studio Code
- Open Visual Studio Code.
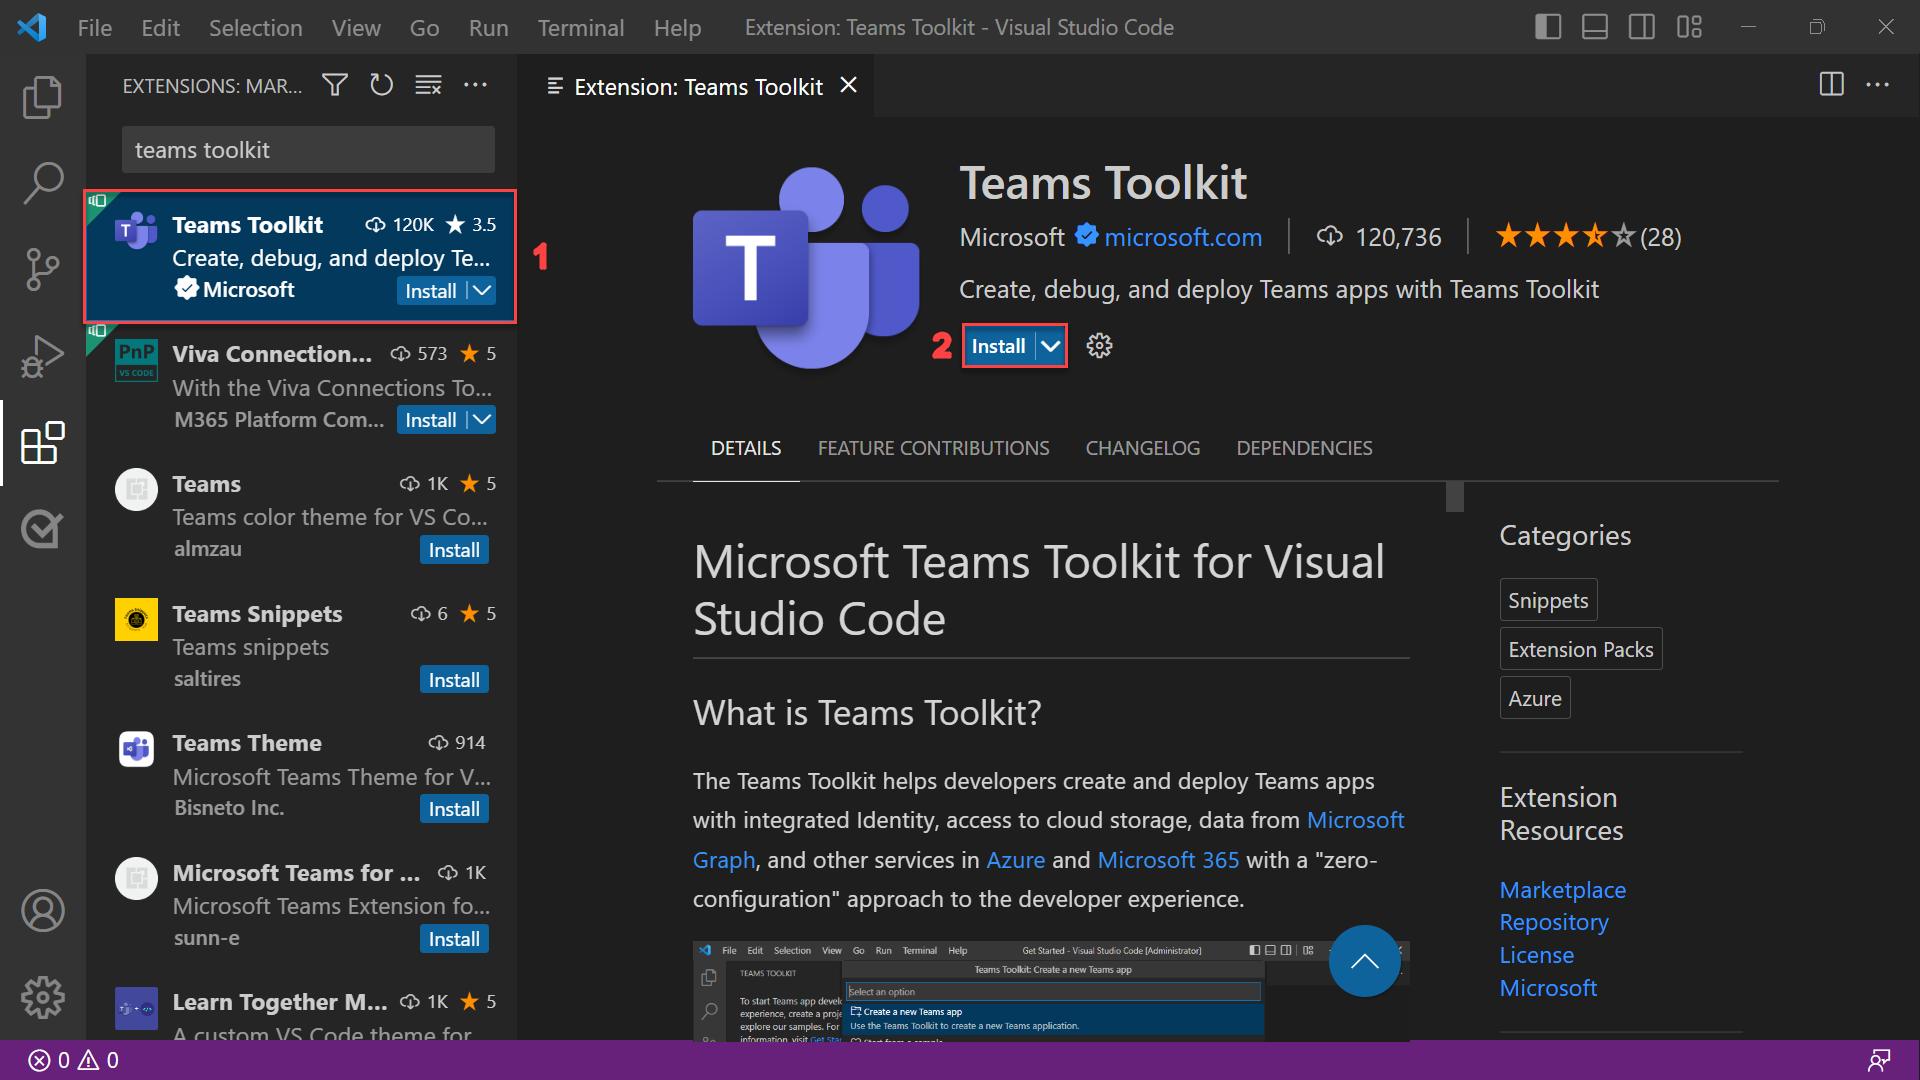
- Select the Extensions icon from the sidebar.
- Search for “Teams Toolkit” in the Extensions section by using the search bar. Then select Install.

Note: The exercises in this module use Teams Toolkit v5.6.0. Please note that minor versions may vary.
You can also install Teams Toolkit from Visual Studio Marketplace.
Task 2: Prepare your Microsoft 365 work or school account
If you already have admin access to a Microsoft 365 work or school account that is suitable for development and testing, you can use that account to run and debug your app. Be sure to use a tenant that is safe to perform operations in without impacting real users.
Otherwise, you can create a free test account using the Microsoft 365 Developer Program. After the setup is completed, the Microsoft 365 Developer Program will provide you with admin access to a tenant that you can use for building Teams apps.
Task 3: Configure your Microsoft 365 tenant to upload apps for Teams
Turn on custom app uploading for your tenant by following these steps:
-
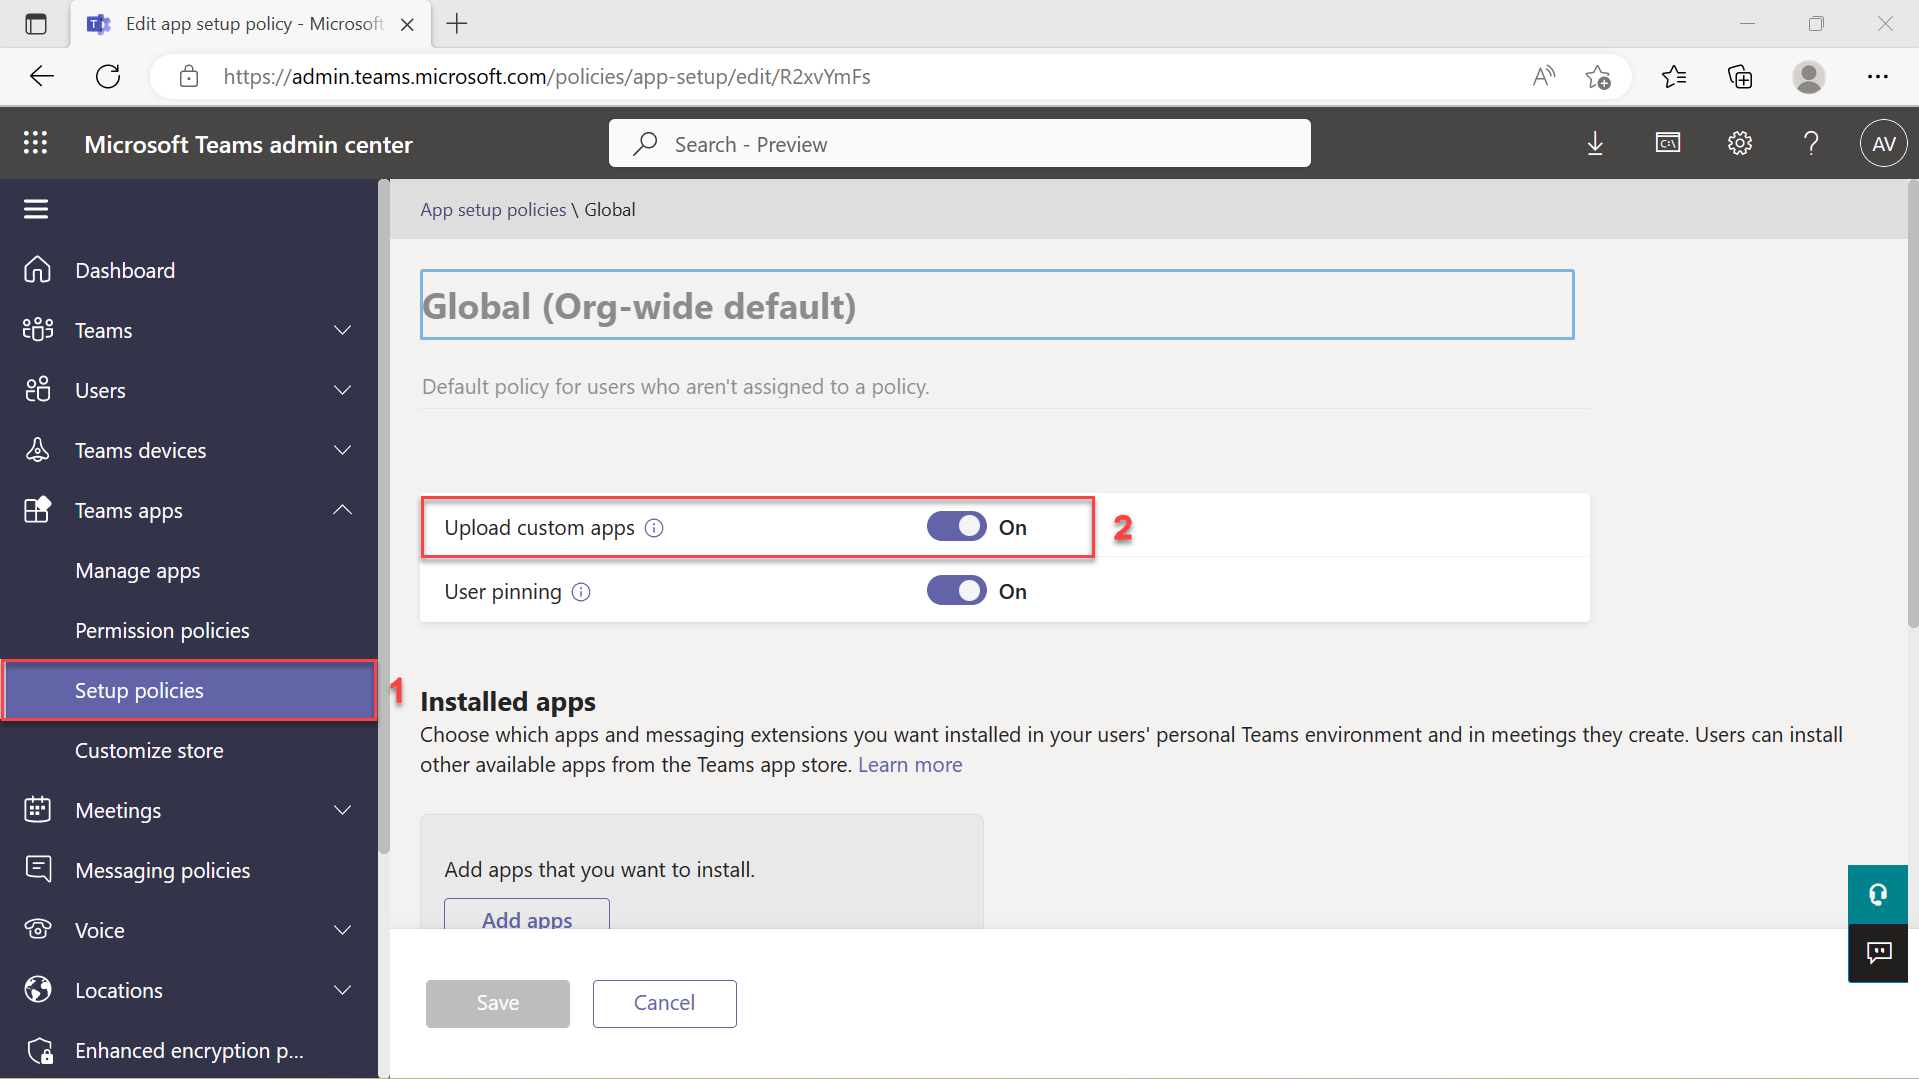
Sign in to the Microsoft Teams admin center with your Microsoft 365 admin credentials.
-
From the sidebar, select Teams apps, and then select Setup policies.
-
Select the Global (Org-wide default) policy, and then turn on the Upload custom apps toggle.

-
Select the Save button to save your changes. Your tenant is now configured to allow custom app sideloading.
In the next unit, you’ll learn how to create a Teams app and run it locally in Teams.