Demo 2 - Create an invoice
-
Browse to the Project management workspace.
In this demo, we’ll go over the process of invoicing a single project within project operations. Although it’s possible to perform mass invoicing, for demonstration purposes we will focus on just a single time and material project. We’ll also see the posting results and financial insights within the project statement. Let’s start with project invoicing. -
In the top-right company picker, verify the legal entity you are connected to is USSI. If it’s not, change the legal entity to USSI.
From the Project management workspace, we can see all the active projects. We can search for projects using the filter, or in this example, we will select a known Project ID. -
In the Active projects table, in the Project ID column, select 00000093 Contoso Consulting.
-
Next, open the Project invoice proposals page to view all previous invoices processed for Contoso Consulting.
-
In the action pane, in the BILL tab, select Project invoice proposals.
-
On the Project invoice proposals page, in the navigation bar, select New, then Invoice proposal.
This is a simple time and material invoice, so we don’t need to select the option for Invoice proposal from billing rule.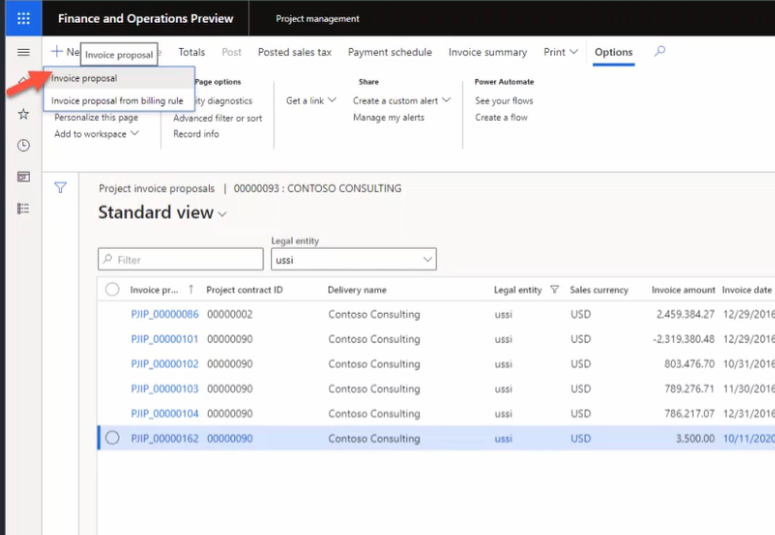
-
In the Create invoice proposal pane, point to the boxes under Select transactions.
From here, we can select things such as the invoicing method, the invoice date, the funding source, and the project. We can also choose to include sub projects, as well as incorporate transaction types, the start and end dates for transactions, and any financial dimensions we need.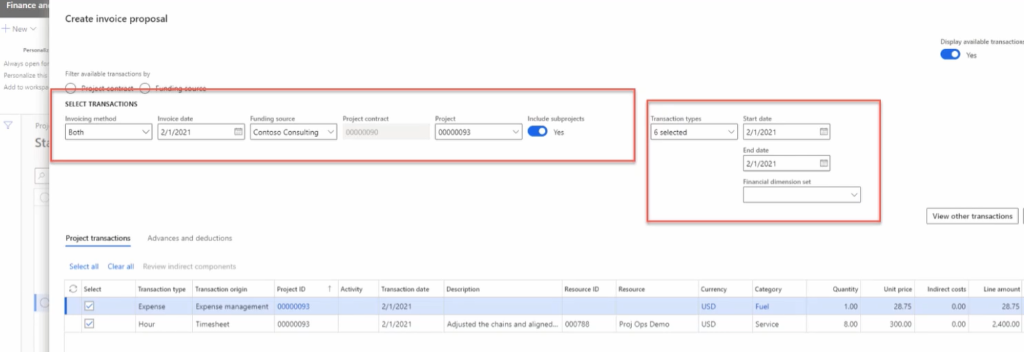
-
From the Project drop-down menu, select 00000093 Contoso Consulting.
-
For this example, ensure that the Invoice date is set to 2/1/21, the Start date is set to 2/1/21, and the end date is today’s date.
Once the selections are made, select the search button to find the transactions meeting those parameters. -
Select Search.
Next, to invoice all the transactions, select the Select all option. This will select the items we choose for expenses and hours. -
Under the Project transactions tab, select Select all.
-
Select OK.
-
On the Invoice proposal page, point to the Invoice line amount column.
Here we can see the invoice amount and summary, hours transactions, and expenses.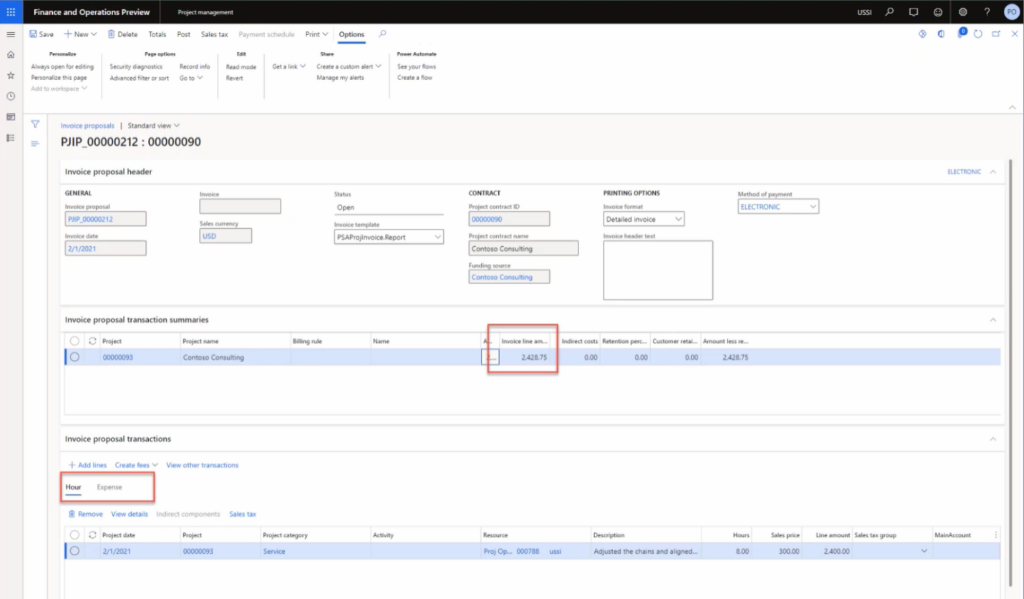
-
Point to the Hour tab.
-
Point to the Expense tab.
You can also switch and look at the expense transaction.
Next, let’s check the totals button to see what the invoice will look like from both a cost and revenue perspective. -
In the navigation bar, select Totals.
-
On the Totals page, point to the GENERAL LEDGER column, the CUSTOMER column, and the Line discount column.
On the totals screen, we can see what the impact will be on the general ledger, any customer information such as credit limits, any discounts, sales taxes, and the net impact of the invoice. -
On the right side of the screen, select X to close the page.
We are now ready to create a print preview to ensure that all invoicing information is accurate. Some organizations use the preview during project review meetings to ensure that everyone agrees with the totals before the invoice is finalized. -
On the Invoice proposal page, in the navigation bar, select Print preview.
-
In the dialogue box, select Print preview.
Here you can see an example of print preview for a Pro forma invoice. -
Select X to close the page.
Once we’ve validated all the information and are happy with the Print preview of the invoice, we can post the invoice proposal. -
In the navigation bar, select Post.
-
Select the Parameters tab.
-
Under PARAMETER, set Posting to Yes.
-
Under PRINT OPTIONS, set Print invoice to Yes.
-
Select OK.
-
On the Invoice page, point to the Invoice number.
Now we have an invoice number that has been generated.
Once the invoice has been posted, we are able to review the information in the invoice journal and drill down to the ledger transactions. -
Browse to the Project management workspace.
-
In the Active projects table, select project 00000093 Contoso consulting.
-
In the action pane, in the BILL tab, select Invoice journals.
-
On the Invoice journal page, in the action bar, select Voucher.
-
On the Voucher transactions page, point to the Ledger account column.
Here we see results posted to the general ledger. The general ledger accounts are determined by the account setup and the financial dimensions applied to each project. -
Browse to the Project management workspace.
-
In the Active projects table, select the 00000093 Contoso Consulting project.
-
On the Contoso Consulting page, in the navigation bar, select Control.
From here we can see all the project details.
Next, let’s look at the project financials on a project statement. -
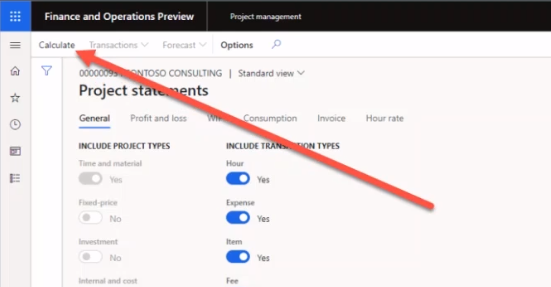
Select Project statements.
-
On the Project statements page, point to the PROJECT DATE section.
You can create a statement for any date range you like. - Select the From date box and enter 2/1/2021.
-
Select the To date box and enter today’s date.
-
When complete, select Calculate.
- Point to Transactions.
Once the data has refreshed, a project manager can choose to drill down further into the transactional details to make project decisions or make adjustments as necessary. In this demonstration, we have processed a time and material invoice with both an hour and expense transaction. We looked at it in preview, then posted the invoice, reviewed the ledger posting, and finally reviewed the financial impact through this project statement.