MB-500: Microsoft Dynamics 365: Finance and Operations Apps Developer
Change Record
| Version | Date | Change |
|---|---|---|
| 1.1 | 19 Dec 2023 | Tested against 10.0.37 |
| 1.0 | 29 Sep 2023 | Initial release |
Objective
In standard finance and operations apps, there is no workflow for the Positions page in the Human resources module. In this lab, we will enable workflow for the Positions page by creating a custom workflow.
This lab consists of several exercises. The first exercise is basic setup in Visual Studio in order to prepare to code. From exercise 2 to 6, we will create different components required to enable workflow for the position entity.
Exercise 1: Create model and project
-
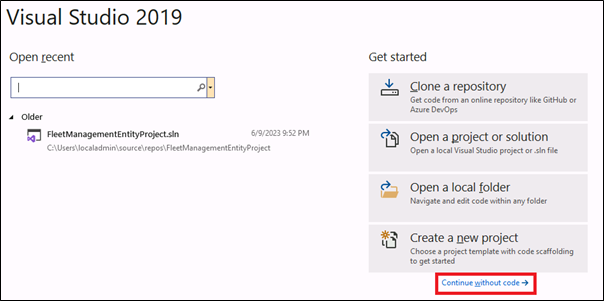
Run Visual Studio 2019 from the desktop.
-
Select Continue without code in the popped-up dialog Visual Studio 2019. Navigate to Tools > Options > Dynamics 365 > Projects and make sure Synchronize database on build… is checked.
 Note: You can check if there is already a model created named MB500Model. If
not, please continue from step 7 to step 12.
If the model is already present, execute step 3 to step 6.
Note: You can check if there is already a model created named MB500Model. If
not, please continue from step 7 to step 12.
If the model is already present, execute step 3 to step 6. -
Navigate to Extensions > Dynamics 365 > Model Management > Update model parameters, select the Model name MB-500 lab exercise, select Next, and make sure the below packages are checked in Select referenced packages, then select Next until the dialog is closed:
-
ApplicationFoundation
-
ApplicationPlatform
-
PersonnelCore
-
PersonnelManagement
-
-
Open Solution Explorer and right click on the solution SlnMb500Lab.
-
Select Add > New project.
-
Enter PrjMb500Lab-3 as the name of the new project.
-
Select Extensions > Dynamics 365 > Model management > Create model and enter the following information to create a new model, then select Next:
-
Model name: MB500Model
-
Model publisher: Microsoft training
-
Layer: usr
-
Version: 1.0.0.0
-
Model display name: MB-500 lab exercise

-
-
Select Create new package followed by the Next button.

-
Select the following referenced packages followed by the Next button:
-
ApplicationFoundation
-
ApplicationPlatform
-
PersonnelCore
-
PersonnelManagement
-
-
In the Summary step, check Create new project and select the Next button.
-
In the Configure your new project dialog, enter PrjMb500Lab-3 and SlnMb500Lab in the Project name and Solution name fields respectively, then select Create.
-
The new solution and project will appear in Solution Explorer.
Exercise 2: Working with data types
Task 1: Create a new base enum – MBPositionWFStatus
Note: This base enum should be added in the Position record that will identify the workflow status of the position record.
-
In Solution Explorer, click on the project PrjMB500Lab-3.
-
Select Add > New Item.
-
Under Dynamics 365 Items, select Data Types and select Base Enum.
-
In the Name field enter MBPositionWFStatus and select the Add button.
-
A new folder Base Enums will be created in the Solution Explorer under the project PrjMB500Lab-3.
-
In the Base Enums folder, a new element MBPositionWFStatus will also be created.
-
-
Open the MBPositionWFStatus in the Element designer pane and right click on it to select the Properties option.
-
Enter Workflow status in the Label property. Note: Ideally, the labels should be added in the label file for best practice, as practiced in Lab 1.
-
Right click on MBPositionWFStatus in the designer and select New Element.
-
Create seven Base Enum elements with names and labels of Created, Submitted, Approved, Rejected, Requested, Cancelled and Completed.
Exercise 3: Working with Data models
Task 1: Extend the existing table – HcmPosition
Note: We are extending the HcmPosition table to add the workflow status (created in the previous exercise) to the HcmPosition table
-
In the (View > ) Application Explorer, select the HcmPosition table under Data Model.
-
Right-click on the HcmPosition table and select Create extension.
-
A new folder Table Extensions will be created in the Solution Explorer under the project PrjMB500Lab-3.
-
A new element HcmPosition.MB500Model will be created in the Table Extensions folder.
-
Open HcmPosition.MB500Model in the Element designer pane.
-
Drag the MBPositionWFStatus base enum from the Solution Explorer and drop it under the Fields node under HcmPosition.MB500Model.
-
Drag the MBPositionWFStatus field from the Fields node of the HcmPosition table and drop it on the Identification Field group. The new field MBPositionWFStatus is added in the field group Identification along with the existing field PositionId.
Note: Now, forms which display the Identification field group will display this new status field.
Task 2: Create a new Query – MBPositionQuery
Note: This query will be associated to the workflow type later in the lab. The associated query will access the table fields for the workflow document.
-
Save all. Right click on the project in Solution Explorer and select Build.
-
In the Solution Explorer, right click on the project PrjMB500Lab-3.
-
Select Add > New Item.
-
Under Dynamics 365 Items, select Data Model and select Query.
-
In the Name field type MBPositionQuery and select the Add button.
-
A new folder Simple Queries will be created in the Solution Explorer under the project PrjMB500Lab-3.
-
In the Simple Queries folder, a new element MBPositionQuery will also be created.
-
Open MBPositionQuery in the Element designer pane.
-
From the (View > ) Application Explorer, drag the HcmPosition table under Data Model and drop it on the Data Sources node of the MBPositionQuery.
-
Navigate to the property pane of the HcmPosition Data Source and change the Dynamic Fields property to Yes. This will include all the fields under the Fields node of the HcmPosition Data Source. Verify that you see the MBPositionWFStatus, and change the Dynamic Fields property to No. (If not, synchronize the project with database and delete and re-add the data source.)
Exercise 4: Working with Business Process and Workflow
Task 1: Create a new workflow category – MBPositionWFCategory
Note: The workflow category determines whether the workflow type is available in a specific module. We will define Human resources as the module of the custom workflow category.
-
In the Solution Explorer, right click on the project PrjMB500Lab-3.
-
Select Add > New Item.
-
Under Dynamics 365 Items, select Business Process and Workflow and select Workflow Category.
-
In the Name field type MBPositionWFCategory and select the Add button.
-
A new folder Workflow Categories will be created in the Solution Explorer under the project PrjMB500Lab-3.
-
In the Workflow Categories folder, a new element MBPositionWFCategory will also be created.
-
-
Open the MBPositionWFCategory in the Element designer pane and right click on it to select the Properties option.
-
Navigate to the property pane of the MBPositionWFCategory and enter the following properties:
-
Module: HumanResource
-
Label: Position workflow category
-
Task 2: Create a new workflow type – MBPositionWFType
Note: To make the workflow process available for a workflow enabled entity, you must create the workflow types that are used in the workflow configuration user interface. You need to specify the workflow category, query and position menu item while defining the workflow type.
-
Save all. In the Solution Explorer, right click on the project PrjMB500Lab-3.
-
Select Add > New Item.
-
Under Dynamics 365 Items, select Business Process and Workflow and select Workflow Type.
-
In the Name field type MBPositionWFType and select the Add button.
-
A Workflow Type dialog will pop up, where you enter the following and select the Next button:
-
Category: MBPositionWFCategory
-
Query: MBPositionQuery
-
Document menu item: HcmPositionList
-
-
The following screen will provide you with the list of elements to be created. (Hint: If you’re not seeing them, you may not have hit Save all in Step 1.) You need to select the Next button in this screen. If you get an Add New Item dialog, Cancel it.
-
A new folder Workflow Types will be created in the Solution Explorer under the project PrjMB500Lab-3.
-
In the Workflow Types folder, a new element MBPositionWFType will also be created.
-
-
Open the MBPositionWFType in the Element designer pane and right click on it to select the Properties option.
-
Change the Label property to Position workflow.
-
Note the new objects created:
-
A new folder Action Menu Items will be created in the Solution Explorer under the project PrjMB500Lab-3 with elements MBPositionWFTypeCancelMenuItem and MBPositionWFTypeSubmitMenuItem.
-
A new folder Classes will be created in the Solution Explorer under the project PrjMB500Lab-3 with new classes MBPositionWFTypeEventHandler, MBPositionWFTypeDocument, and MBPositionWFTypeSubmitManager .
-
Task 3: Create a new workflow approval – MBPositionWFApproval
Note: This workflow element is responsible for creating the approval process of a workflow. It helps to create several steps and actions in the approval process like approve, reject, request change etc.
-
Save all. In the Solution Explorer right click on project PrjMB500Lab-3 and Build.
-
Right click again and select Add > New Item.
-
Under Dynamics 365 Items, select Business Process and Workflow and select Workflow Approval.
-
In the Name field type MBPositionWFApproval and select the Add button.
-
A Workflow Approval dialog will pop up, where you enter the following and select the Next button:
-
Workflow document: MBPositionWFTypeDocument
-
Document preview field group: Identification
-
Document menu item: HcmPositionList
-
-
The following screen will provide you with the list of elements to be created. You need to select the Next button in this screen.
-
Note the new objects created:
-
A new folder Workflow Approvals will be created in the Solution Explorer under the project PrjMB500Lab-3.
-
In the Workflow Approvals folder, a new element MBPositionWFApproval will also be created.
-
-
Open the MBPositionWFApproval in the Element designer pane and right click on it to select the Properties option.
-
Change the Label property to Position approval.
-
Note the other new elements created:
-
In the Action Menu Items folder, new elements MBPositionWFApprovalApprove, MBPositionWFApprovalDelegateMenuItem, MBPositionWFApprovalReject, MBPositionWFApprovalRequestChange, and MBPositionWFApprovalResubmitMenuItem.
-
In the Classes folder, new elements MBPositionWFApprovalEventHandler and MBPositionWFApprovalResubmitActionMgr.
-
Task 4: Update workflow type – MBPositionWFType
Note: This step associates the workflow approval element with the workflow type.
-
Save all. Open the MBPositionWFType in the Element designer pane from the Workflow Types folder of the Solution Explorer.
-
Right click on the Supported Elements node of MBPositionWFType and select New Workflow Element Reference.
-
Navigate to the property pane of the newly created workflow element reference and change both the Name and Element Name property to MBPositionWFApproval.
Exercise 5: Working with User interfaces
Task 1: Extend the existing form – HcmPosition
Note: In this task, we will add the workflow status field in the positions page. We will also enable the positions page workflow by changing its properties.
-
Save all and Build the project. In the (View > ) Application Explorer, select the HcmPosition form under User Interface.
-
Right-click on HcmPosition form and select Create extension.
-
A new folder Form Extensions will be created in the Solution Explorer under the project PrjMB500Lab-3.
-
A new element HcmPosition.MB500Model will be created in the Form Extensions folder.
-
-
Open HcmPosition.MB500Model in the Element designer pane.
-
Locate the MBPositionWFStatus field in the HcmPosition data source. In case you cannot find the field, right click on the HcmPosition data source and select the Restore button.
-
Drag the MBPositionWFStatus field and drop it under Design > Tab > DetailsPanel > FastTabs > DetailsTabPage.
-
Select the newly created field HcmPosition_MBPositionWFStatus and change the Allow Edit property to No.
-
Navigate to the property pane of the Design root node and enter the following properties:
-
Workflow enabled: Yes
-
Workflow Data Source: HcmPosition
-
Workflow Type: MBPositionWFType
-
Task 2: Update action menu items
-
Open the following action menu items in the Element designer pane.
-
Navigate to the Label property and change the labels as specified below.
| Action Menu Item | Label |
|---|---|
| MBPositionWFApprovalApprove | Approve |
| MBPositionWFApprovalDelegateMenuItem | Delegate |
| MBPositionWFApprovalReject | Reject |
| MBPositionWFApprovalRequestChange | Change request |
| MBPositionWFApprovalResubmitMenuItem | Resubmit |
| MBPositionWFTypeCancelMenuItem | Cancel |
| MBPositionWFTypeSubmitMenuItem | Submit |
Exercise 6: Working with Code
Task 1: Create a new class – MBPositionTable_Extension
Note: CanSubmitToWorkflow() is a standard method of any table which is extended using Chain of command to allow the submission of the record to workflow if the Position record is in the Created status.
UpdateWorkflowStatus() is a custom method added in the HcmPosition table that will update the workflow status.
InitValue() is a standard method of any table which is extended using Chain of command to initialize the MBPositionWFStatus field with Created, when a new record is being added to the Position table.
-
In the Solution Explorer, right click on the project PrjMB500Lab-3.
-
Select Add > New Item.
-
Under Dynamics 365 Items, select Code and select Class.
-
In the Name field type MBPositionTable_Extension and select the Add button.
- In the Classes folder, a new element MBPositionTable_Extension will be created.
-
Open the class MBPositionTable_Extension in the Code Editor pane and replace the existing class signature with the following:
[ExtensionOf(tableStr(HcmPosition))] final class MBPositionTable_Extension -
Extend the standard table method canSubmitToWorkflow() by adding a chain of command. Add the following method in the class:
public boolean canSubmitToWorkflow(str _workflowType) { boolean ret; ret = next canSubmitToWorkflow(_workflowType); //This statement calls the parent method ret = this.RecId != 0 && this.MBPositionWFStatus == MBPositionWFStatus::Created; //This code returns true if the current record of the HcmPosition table has workflow status as Created. return ret; } -
Add updateWorkflowStatus() method to the class; it will be responsible for updating the workflow status of the HcmPosition table.
public static void updateWorkflowStatus(RefRecId recId , MBPositionWFStatus status) { HcmPosition position; ttsbegin; //The code below updates the Workflow status field of the HcmPosition table select forupdate position where position.RecId == recId; position.MBPositionWFStatus = status; position.update(); ttscommit; } -
Create a chain of command of the initValue() method to initialize the MBPositionWFStatus field while a new position is entered in the system.
void initValue()
{
    next initValue(); //This statement calls the parent method
    this.MBPositionWFStatus = MBPositionWFStatus::Created; //Updates the workflow status field of the HcmPosition table to Created, when new record is added in the HcmPosition table
}
Task 2: Update the class – MBPositionWFTypeEventHandler
Note: In this class, you can write code that will guide the workflow based on actions like started, cancelled and completed.
-
Open the MBPositionWFTypeEventHandler class in the Code Editor pane from the Classes folder of the Solution Explorer.
-
There are three blank methods which are already created in this class. Replace the methods with the following:
public void started(WorkflowEventArgs _workflowEventArgs)
{
    // This code Updates the Workflow status to Submitted once the workflow is started.
    HcmPosition::updateWorkflowStatus(_workflowEventArgs.parmWorkflowContext().parmRecId(),MBPositionWFStatus::Submitted);
}

public void canceled(WorkflowEventArgs _workflowEventArgs)
{
    // This code wUpdates the workflow status to Cancelled once the workflow is canceled.
    HcmPosition::updateWorkflowStatus(_workflowEventArgs.parmWorkflowContext().parmRecId(),MBPositionWFStatus::Cancelled);
}

public void completed(WorkflowEventArgs _workflowEventArgs)
{
    //This code Updates the workflow status to Completed once the workflow is completed.
    HcmPosition::updateWorkflowStatus(_workflowEventArgs.parmWorkflowContext().parmRecId(), MBPositionWFStatus::Completed);
}
Task 3: Update the class – MBPositionWFTypeSubmitManager
-
Note: The code written in the main() method of this class is executed when the position record is submitted to workflow. You can apply additional business logic if required.
-
Open the MBPositionWFTypeSubmitManager class in the Code Editor pane from the Classes folder of the Solution Explorer.
-
Replace the main() method in the class
public static void main(Args args)
{
    //This code will be executed once a work item is submitted.
    HcmPosition position;
    WorkflowCorrelationId _workflowCorrelationId;
    WorkflowTypeName _workflowTypeName = workFlowTypeStr("MBPositionWFType");
    WorkflowComment note = "";
    WorkflowSubmitDialog workflowSubmitDialog; //Opens the submit to workflow dialog.
    workflowSubmitDialog = WorkflowSubmitDialog::construct(args.caller().getActiveWorkflowConfiguration());
    workflowSubmitDialog.run();
    if (workflowSubmitDialog.parmIsClosedOK())
    {
        position = args.record();
        // Get comments from the submit to workflow dialog.
        note = workflowSubmitDialog.parmWorkflowComment();
        try
        {
            ttsbegin;
            // Activate the workflow.
            _workflowCorrelationId = Workflow::activateFromWorkflowType(_workflowTypeName, position.RecId, note, NoYes::No);
            position.MBPositionWFStatus = MBPositionWFStatus::Submitted;
            position.update();
            ttscommit;
            // Send an Infolog message.
            info("Submitted to workflow.");
        }
        catch (Exception::Error)
        {
            error("Error on workflow activation.");
        }
    }
    args.caller().updateWorkFlowControls();
}
Task 4: Update the class – MBPositionWFApprovalEventHandler
Note: This class contains the business logic associated to the approval actions.
-
Open the MBPositionWFApprovalEventHandler class in the Code Editor pane from the Classes folder of the Solution Explorer.
-
There are seven blank methods which are already created in this class. Replace the methods with the following ones:
public void started(WorkflowElementEventArgs _workflowElementEventArgs)
{
    // This code is executed once the workflow is started.
    HcmPosition::updateWorkflowStatus(_workflowElementEventArgs.parmWorkflowContext().parmRecId(), MBPositionWFStatus::Submitted);
}

public void canceled(WorkflowElementEventArgs _workflowElementEventArgs)
{
    // This code is executed once the workflow is canceled.
    HcmPosition::updateWorkflowStatus(_workflowElementEventArgs.parmWorkflowContext().parmRecId(), MBPositionWFStatus::Cancelled);
}

public void completed(WorkflowElementEventArgs _workflowElementEventArgs)
{
    // This code is executed once the workflow is approved.
    HcmPosition::updateWorkflowStatus(_workflowElementEventArgs.parmWorkflowContext().parmRecId(), MBPositionWFStatus::Approved);
}

public void denied(WorkflowElementEventArgs _workflowElementEventArgs)
{
    // This code is executed once the workflow is rejected.
    HcmPosition::updateWorkflowStatus(_workflowElementEventArgs.parmWorkflowContext().parmRecId(), MBPositionWFStatus::Rejected);
}

public void changeRequested(WorkflowElementEventArgs _workflowElementEventArgs)
{
    // This code is executed once change is requested for the workflow.
    HcmPosition::updateWorkflowStatus(_workflowElementEventArgs.parmWorkflowContext().parmRecId(), MBPositionWFStatus::Requested);
}

public void returned(WorkflowElementEventArgs _workflowElementEventArgs)
{
    // This code is executed once the workflow is returned. We can leave this blank for this lab.
}

public void created(WorkflowWorkItemsEventArgs _workflowWorkItemsEventArgs)
{
    // This code is executed once work items are created. We can leave this blank for this lab.
}
Testing
-
Save all.
-
In the Solution Explorer, right click on the project PrjMB500Lab-3 and select Build.
-
Once the build is successful, navigate to the finance and operations apps page on your browser and refresh the page.
-
Select the legal entity USMF.
-
Navigate to Modules > Human resources > Setup > Human resource workflows.
-
Select New in the action pane.
-
In the Create workflow dialog, select the workflow type Position workflow.
-
A dialog will pop up asking Open this file, where you can select the Open button, and Run.
-
The system will attempt to launch the workflow application. It will ask for the username and password. You need to provide the username and password of the application (Azure portal credential; NOT the username and password of the VM).
-
The workflow editor will open. (It will pop under.) The editor will have two elements, Start and End. (If you don’t see the End element, scroll down.)
-
Drag the Position approval workflow element from the left panel and drop it between the Start and End element.
-
Connect the Start element with the Position approval element by dragging a line from the center of the bottom line of the Start icon to the Position approval 1 icon. The arrow should point to the latter.
-
Connect the Position approval element with the End element, with the arrow pointing to End.
-
Double click on the Position approval element and you will find an element Step 1 within the Position approval element.
-
Select Step 1 and select the Properties button in the action pane.
-
The Properties dialog will appear. Navigate to the Basic Settings tab in the Properties dialog.
-
In the Work item subject, type Position workflow.
-
In the Work item instructions, type Position approval.
-
Navigate to the Assignment tab in the Properties dialog.
-
In the Assignment type tab page, select User.
-
Navigate to the User tab page, select the Admin User ID from the Available users, and move it to the Selected users list.
-
Close the Properties dialog box.
-
Select the Save and close button at the bottom of the workflow editor. (Hint: If you can’t see the button, try resizing the window smaller.)
-
A dialog box will appear asking to save the position workflow. Select the OK button, and Activate the new version for the workflow you just created.
-
Close My view and Refresh the Workflows screen. A new workflow called Position workflow will be added to the existing list.
-
Navigate to Modules > Human resources > Positions > All positions.
-
In the action pane, select the New button.
-
Enter Accountant and Finance in the Job and Department fields respectively.
-
A new position record will be created with Workflow status as Created.
-
You will find the Workflow button in the action pane.
-
Select Workflow > Submit. A dialog box will appear; select the Submit button.
-
The Workflow status in the All Positions page will change to Submitted.
-
Wait a minute or two and refresh the page.
-
Select the Workflow button again in the action pane.
-
You will find actions like Approve, Reject, Change request, Delegate and Cancel.
-
Select the Approve button, Approve, and wait for a minute or two.
-
The Workflow status in the All positions page will change to Completed and the position will be ready for further use.