MB-500: Microsoft Dynamics 365: Finance and Operations Apps Developer
Change Record
| Version | Date | Change |
|---|---|---|
| 1.1 | 19 Dec 2023 | Tested against 10.0.37 |
| 1.0 | 29 Sep 2023 | Initial release |
Objective
This lab consists of several exercises.
The first exercise is basic setup in Visual Studio in order to prepare to code.
From exercise 2 to 4, we will create an interface in the Human Resource module to enter exam details. To create this interface, you need to create a few data types, data model and user interfaces, which are covered in exercise 2, 3 and 4 respectively.
Exercise 1: Create model and project
-
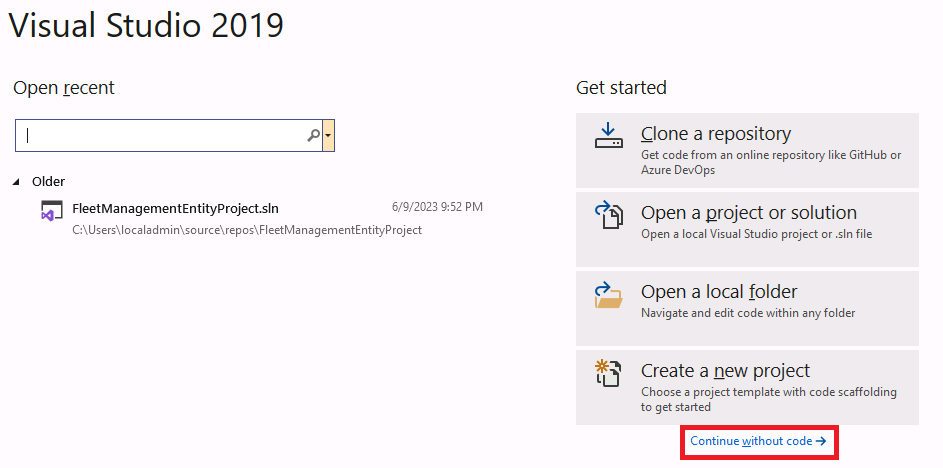
Run Visual Studio 2019 from the desktop.
-
Select Continue without code in the popped-up dialog Visual Studio 2019.
Note: You can check if there is already a model created named MB500Model. If not, please continue from step 7 up to step 12. If the model is already present, execute step 3 to step 6. -
Open Solution Explorer.
-
Right click on the solution SlnMb500Lab.
-
Select Add > New project.
-
Type PrjMb500Lab-2 as the name of the new project.
-
Select Extensions > Dynamics 365 > Model management > Create model and enter the following information to create a new model, then select Next:
-
Model name: MB500Model
-
Model publisher: Microsoft training
-
Layer: usr
-
Version: 1.0.0.0
-
Model display name: MB-500 lab exercise

-
-
Select Create new package followed by the Next button.

-
Select the following referenced packages followed by the Next button:
-
ApplicationFoundation
-
ApplicationPlatform
-
PersonnelManagement
-
-
In the Summary step, check Create new project and select the Next button.
-
In the Configure your new project dialog, enter PrjMb500Lab-2 and SlnMb500Lab in the Project name and Solution name fields respectively, then select Create.
- Also: Select Tools > Options > Dynamics 365 > Projects > and check the boxes to Organize projects by element type and Synchronize database on build for newly created project
-
The new solution and project will appear in Solution Explorer.
Exercise 2: Create new data types
Task 1: Create a new extended data type - MBExamID
-
In the Solution Explorer right click on the project PrjMB500Lab-2.
-
Select Add > New Item.
-
Under Dynamics 365 Items, select Data Types and select EDT String.
-
In the Name field type MBExamID and select the Add button.
-
A new folder EDT Strings will be created in the Solution Explorer under the project PrjMB500Lab-2.
-
In the EDT Strings folder, a new element MBExamID will also be created.
-
Open the MBExamID in the Element designer pane and right click on it to select the Properties option.
-
Type Exam ID in the Label property
Note: Ideally, the labels should be added in the label file for best practice, as practiced in Lab 1.
Task 2: Create a new extended data type - MBExamName
-
In the Solution Explorer right click on the project PrjMB500Lab-2.
-
Select Add > New Item.
-
Under Dynamics 365 Items, select Data Types and select EDT String.
-
In the Name field type MBExamName and select the Add button.
-
In the EDT Strings folder, a new element MBExamName will also be created.
-
Open the MBExamName in the Element designer pane and right click on it to select the Properties option.
-
Type Exam Name in the Label property
Note: Ideally, the labels should be added in the label file for best practice, as practiced in Lab 1.
Task 3: Create a new extended data type - MBExamDate
-
In the Solution Explorer right click on the project PrjMB500Lab-2.
-
Select Add > New Item.
-
Under Dynamics 365 Items, select Data Types and select EDT Date.
-
In the Name field type MBExamDate and select the Add button.
-
A new folder EDT Dates will be created in the Solution Explorer under the project PrjMB500Lab-2.
-
In the EDT Dates folder, a new element MBExamDate will also be created.
-
Open the MBExamDate in the Element designer pane and right click on it to select the Properties option.
-
Type Exam Date in the Label property
Note: Ideally, the labels should be added in the label file for best practice, as practiced in Lab 1.
Task 4: Create a new base enum - MBExamOrganizer
-
In the Solution Explorer right click on the project PrjMB500Lab-2.
-
Select Add > New Item.
-
Under Dynamics 365 Items, select Data Types and select Base Enum.
-
In the Name field type MBExamOrganizer and select the Add button.
-
A new folder Base Enums will be created in the Solution Explorer under the project PrjMB500Lab-2.
-
In the Base Enums folder, a new element MBExamOrganizer will also be created.
-
Open the MBExamOrganizer in the Element designer pane and right click on it to select the Properties option.
-
Type Organizer in the Label property.
Note: Ideally, the labels should be added in the label file for best practice, as practiced in Lab 1. -
Right click on MBExamOrganizer and select New Element.
-
Create two Base Enum elements: Internal and External.
-
Use the same Labels in the Enum Element properties.
Exercise 3: Create new Data models
Task 1: Create a new Table - MBExamTable
-
In the Solution Explorer right click on the project PrjMB500Lab-2.
-
Select Add > New Item.
-
Under Dynamics 365 Items, select Data Model and select Table.
-
In the Name field type MBExamTable and select the Add button.
-
A new folder Tables will be created in the Solution Explorer under the project PrjMB500Lab-2.
-
In the Tables folder, a new element MBExamTable will also be created.
-
Open the MBExamTable in the Element designer pane.
-
Select the three extended data types from the Solution Explorer and drop them at the Fields node of MBExamTable: MBExamID, MBExamName and MBExamDate.
-
Select the base enum from the Solution Explorer and drop it on the Fields node of MBExamTable: MBExamOrganizer.
-
Remove the MB prefix from all the field names. Hence, the field names will become: ExamID, ExamName, ExamDate and ExamOrganizer.
-
Navigate to the Field groups node of the table MBExamTable and add a new Field group MBExam. In the Label property of the field group type Exam details.
-
Add all four fields (other than the Sys field) into the newly created Field group by dragging them from the Fields node and dropping on the MBExam field group.
-
In the Indexes node, create a new index ExamIdx.
-
Change the Allow Duplicates property of the ExamIdx index to No.
Note: This will make the index unique. -
Add the ExamID field in the newly created index by dragging the field from the Fields node and dropping on the ExamIdx index.
Exercise 4: Create new User interfaces
Task 1: Create a new Form – MBExamTable
-
Save all, and right click the project and select Build. This will also perform a sync.
-
In the Solution Explorer right click on the project PrjMB500Lab-2.
-
Select Add > New Item.
-
Under Dynamics 365 Items, select User Interface and select Form.
-
In the Name field type MBExamTable and select the Add button.
-
A new folder Forms will be created in the Solution Explorer under the project PrjMB500Lab-2.
-
In the Forms folder, a new element MBExamTable will also be created.
-
Open the MBExamTable form in the Element designer pane.
-
Add table MBExamTable in the Data Sources node of the MBExamTable form by dragging the table from the Solution Explorer and dropping onto the Data Sources node.
-
Right click on the Design node and select Simple List as the Pattern.
-
Enter the following properties of the Design node:
-
Caption: Exam Details
-
Data Source: MBExamTable
-
-
Right click on the Design node and add three controls by selecting New.
-
Action Pane
-
Group
-
Grid
-
-
Rename the newly created Action Pane control to ActionPane.
-
Rename the newly created Group control to FilterGroup.
-
Add sub-pattern Custom and Quick Filters by right clicking on FilterGroup.
-
Add the QuickFilter control under FilterGroup by right clicking on FilterGroup and selecting New.
-
Rename the newly created QuickFilter control to QuickFilter.
-
Rename the newly created Grid control to Grid.
-
Navigate to the Data Source property of the Grid and select MBExamTable
-
Navigate to the Field groups node under the MBExamTable in the Data Sources node of the form. (If it’s not there, make sure you have done a Save all, and a Build, then right click the Data Source name and select Restore.)
-
Locate the MBExam field group and add it under the Grid in the Design node by dragging and dropping respectively.
-
Navigate to the Default Column property of the QuickFilter and type MBExam_ExamID.
Task 2: Create a new Display menu item – MBExamTable
-
In the Solution Explorer right click on the project PrjMB500Lab-2.
-
Select Add > New Item.
-
Under Dynamics 365 Items, select User Interface and select Display Menu Item.
-
In the Name field type MBExamTable and select the Add button.
-
A new folder Display Menu Items will be created in the Solution Explorer under the project PrjMB500Lab-2.
-
In the Display Menu Items folder, a new menu item MBExamTable will also be created.
-
Open the MBExamTable menu item in the Element designer pane and right click on it to select the Properties option.
-
For Object Type, select Form.
-
For Object, select MBExamTable.
-
For Label, type Exam.
Task 3: Extend the HRM menu
-
In the (View > ) Application Explorer, select HRM menu under User Interface.
-
Right-click on HRM menu and select Create extension.
-
A new folder Menu Extensions will be created in the Solution Explorer under the project PrjMB500Lab-2.
-
A new element HRM.MB500Model will be created in the Menu Extensions folder.
-
Open HRM.MB500Model in the Element designer pane.
-
Drag the MBExamTable display menu item from the Solution Explorer and drop it under the Setup sub-menu under HRM.MB500Model.
Task 4: Test
-
In the Solution Explorer right click on the project PrjMB500Lab-2.
-
Select Build.
-
Once the build is successful, navigate to the finance and operations apps page on your browser and refresh the page.
-
Select legal entity USMF.
-
Navigate to Modules > Human resources > Setup > Exam
- If you get errors, then go back to your project and Synchronize it with the database
-
Use the New button in the action pane to create a new exam record.
-
Use the Edit button in the action pane to edit an existing exam record.
-
Use the Delete button in the action pane to delete an existing exam record.