MB-310: Microsoft Dynamics 365 Financial Consultant
Lab 3: Breakdown of voucher
Change Record
| Version | Date | Change |
|---|---|---|
| 1.0 | 13 Sep 2024 | Initial release |
| 1.1 | 10 Dec 2024 | Workaround for expired certificate |
| 1.2 | 13 Jan 2025 | Added business scenario |
| 1.3 | 19 Feb 2025 | Added The Why |
| 1.4 | 10 Feb 2026 | Corrected and clarified steps |
The Why
In the realm of financial management, understanding the breakdown of vouchers is essential for maintaining accurate and transparent financial records. This hands-on lab will provide you with the skills to dissect and analyze voucher transactions, ensuring that every financial entry is correctly accounted for and traceable. By mastering this process, you’ll enhance your ability to audit financial records, identify discrepancies, and ensure compliance with financial regulations. This lab is a critical competency that will empower you to uphold the integrity of your organization’s financial data and contribute to more reliable financial reporting.
Business scenario
Imagine you are an accounts payable clerk at a company. You receive a vendor invoice that includes multiple tax rates. For example, one portion of the invoice might be subject to a sales tax of 7.25%, while another portion might be subject to a sales tax of 8.25%.
In Microsoft Dynamics 365 Finance, you cannot enter a single invoice line with multiple tax rates. To accurately record the sales tax for each portion of the invoice, you need to break down the voucher.
The voucher breakdown feature in Dynamics 365 Finance allows you to split a single invoice line into multiple lines, each with its own tax rate. This ensures that the sales tax is calculated and recorded correctly for each portion of the invoice.
Use the USMF company for the exercises in this lab.
Exercise Break down a voucher
During this lab, you will enter a vendor invoice journal by using multiple tax rates.
Scenario
The accounts payable clerk at Contoso, Ltd. receives a vendor invoice with two tax lines and one net amount. The clerk plans to break down the voucher so the tax posts correctly. The total net amount is $10,000, with 7.25 percent charged on $7,000 and 8.25 percent on $3,000.
Note: If you get a “Your connection isn’t private” error on browser opening, then select the Advanced link, select to Continue, then wait 2-3 minutes.
-
Navigate to Accounts payable > Invoices > Invoice journal.
-
Select the New button to create a new journal.

-
In the Name field, select APInvoice.

-
Select the Lines button in the Action Pane.

-
In the Date field, select today for the date.
-
In the Account field, enter US-111.
-
In the Invoice date field, enter 7/10/2024.
-
In the Invoice field, enter
125. -
In the Description field, enter Office supplies.
-
In the Credit field, enter $10,000.
-
Note that Offset account was filled automatically with main account 606300.
-
Select Functions > Breakdown of voucher from the lines header, not the Action pane.

-
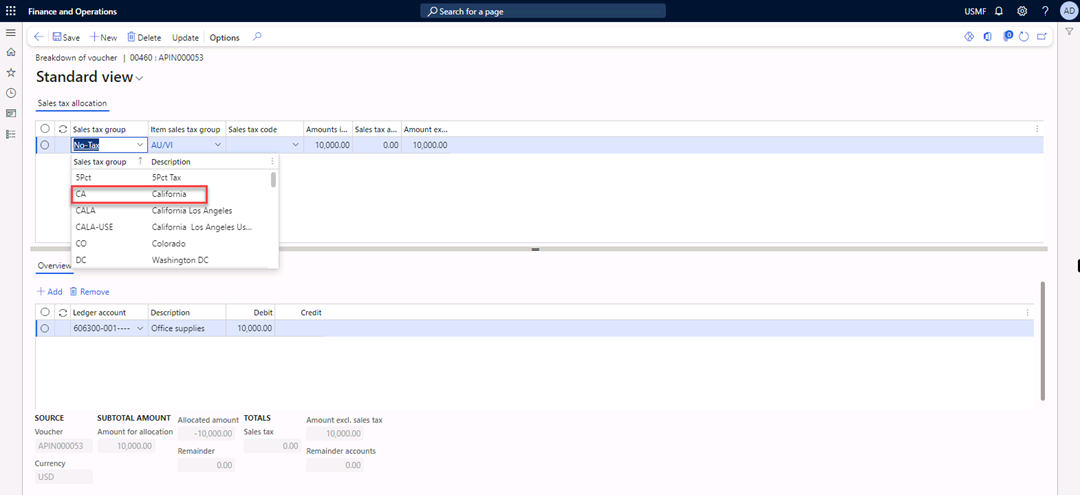
In the Sales tax group field, select CA.
-
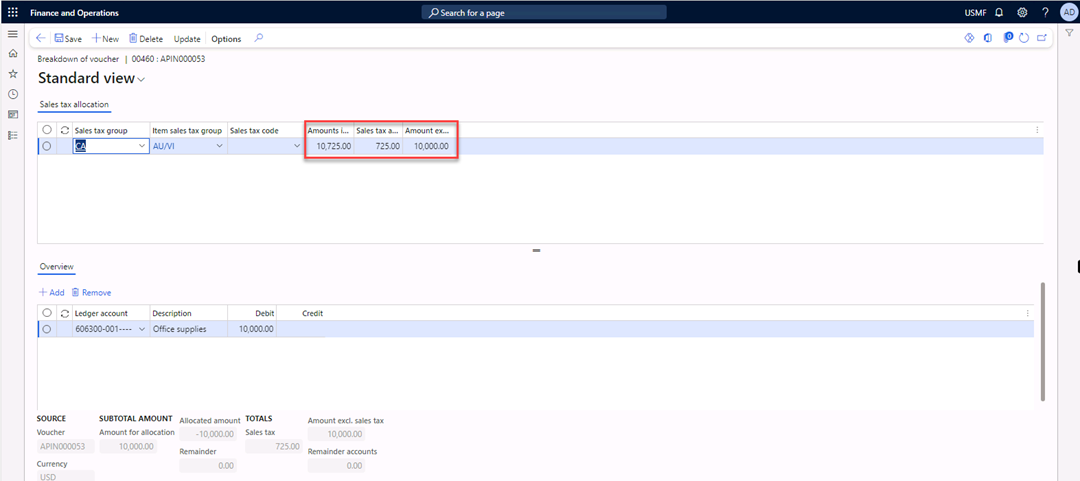
In the Item sales tax group field, select AU/VI.
Note that the amount in the Amounts include sales tax column and the amount in the Sales tax amount column are changed.
-
In the Amount excl. sales tax field, enter
7,000.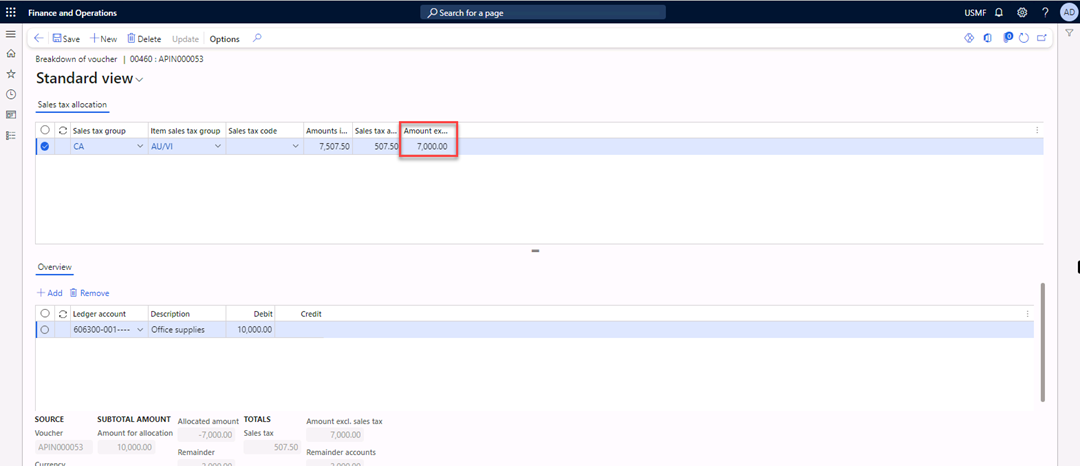
-
Navigate to the lower part of the page. In the Debit field, enter
7,000.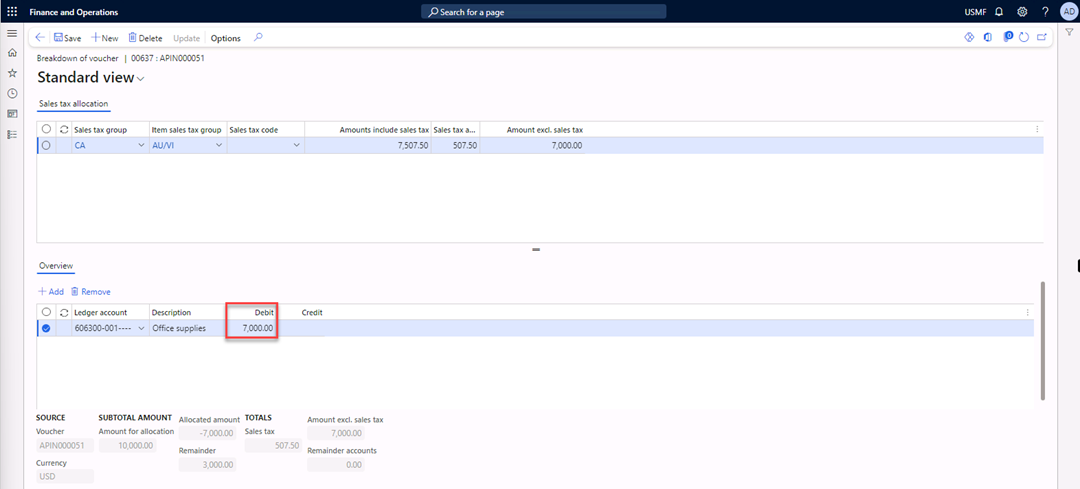
-
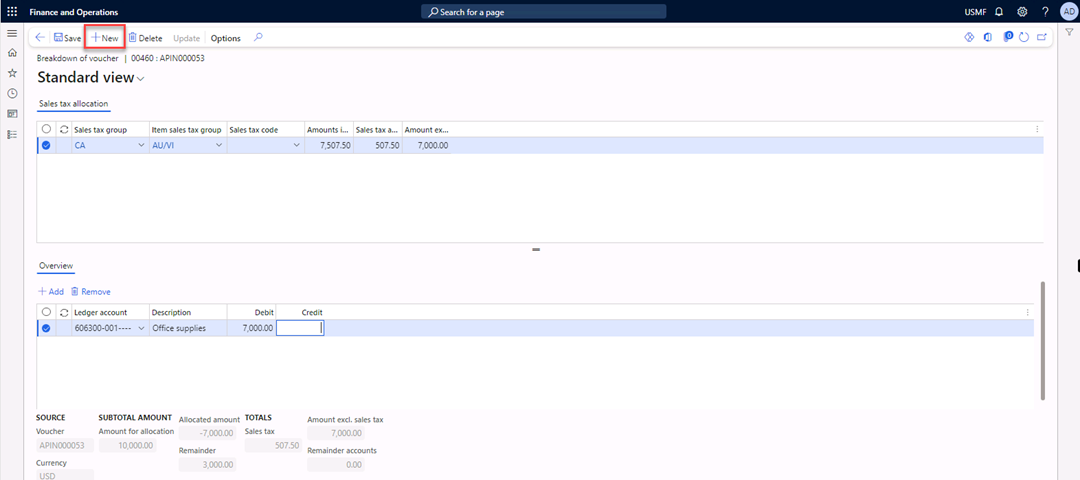
Select New in the Action Pane to create a new line in the upper part of the page.
-
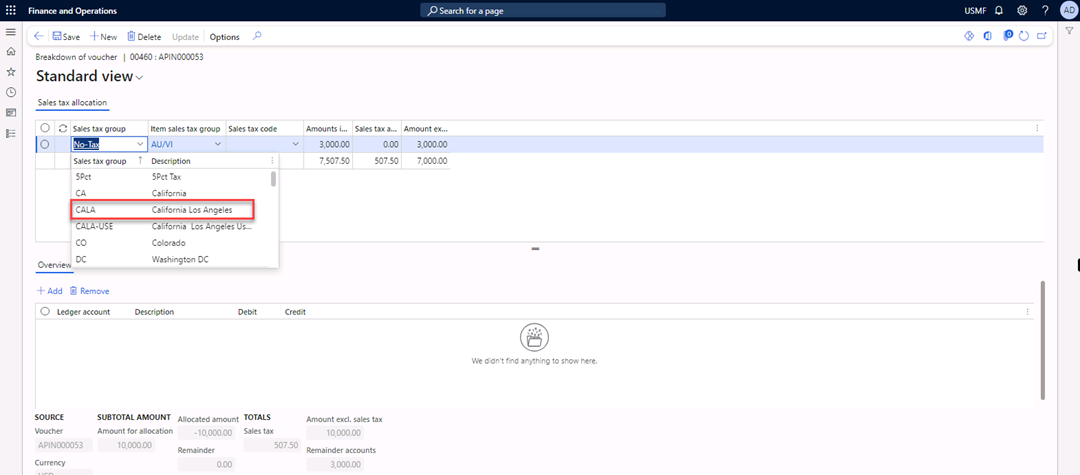
In the Sales tax group field, select CALA (for Los Angeles, California).
-
In the Item sales tax group field, select AU/VI (for audio/visual).
-
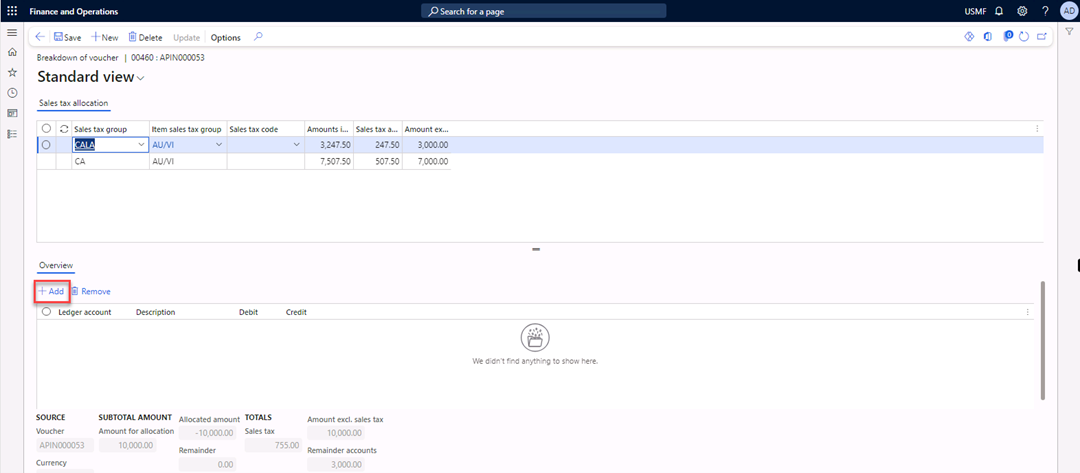
Navigate to the lower part of the page and select Add to add a line in the lower part.
-
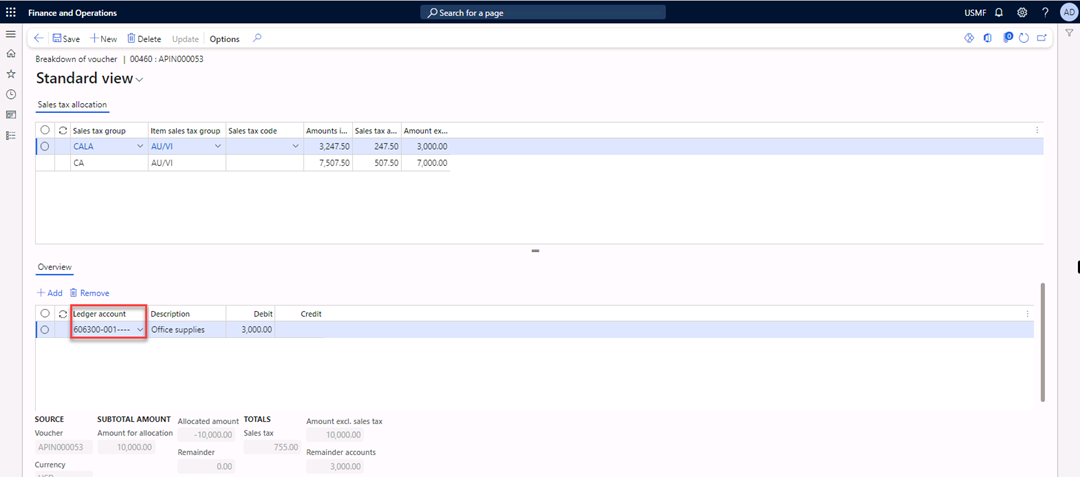
In the Ledger account field, enter 606300-001—-.
-
Select Save in the Action Pane.
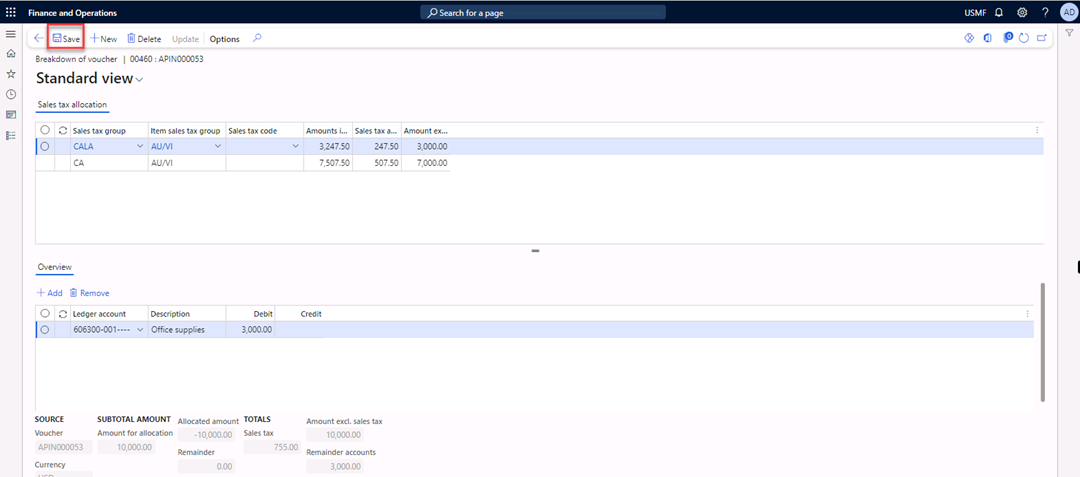
-
The Update button is available after saving the data. Select Update in the Action Pane.
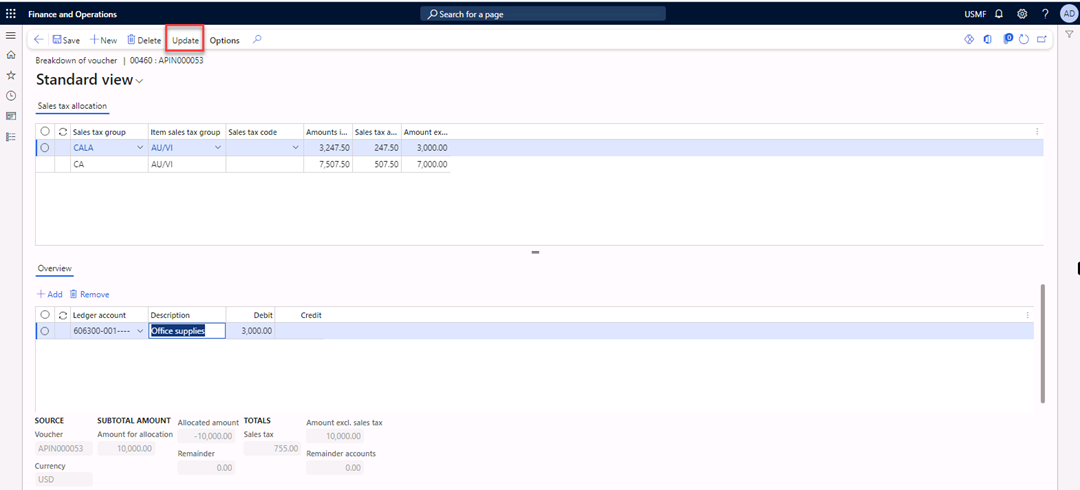
-
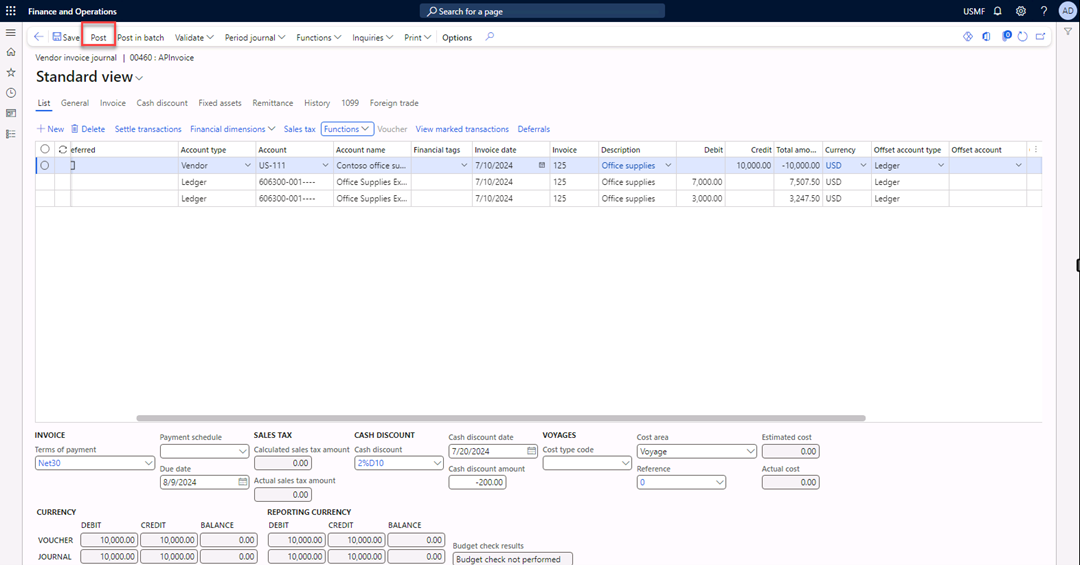
Note that the original line is reversed and two new lines are created according to the breakdown of the voucher.
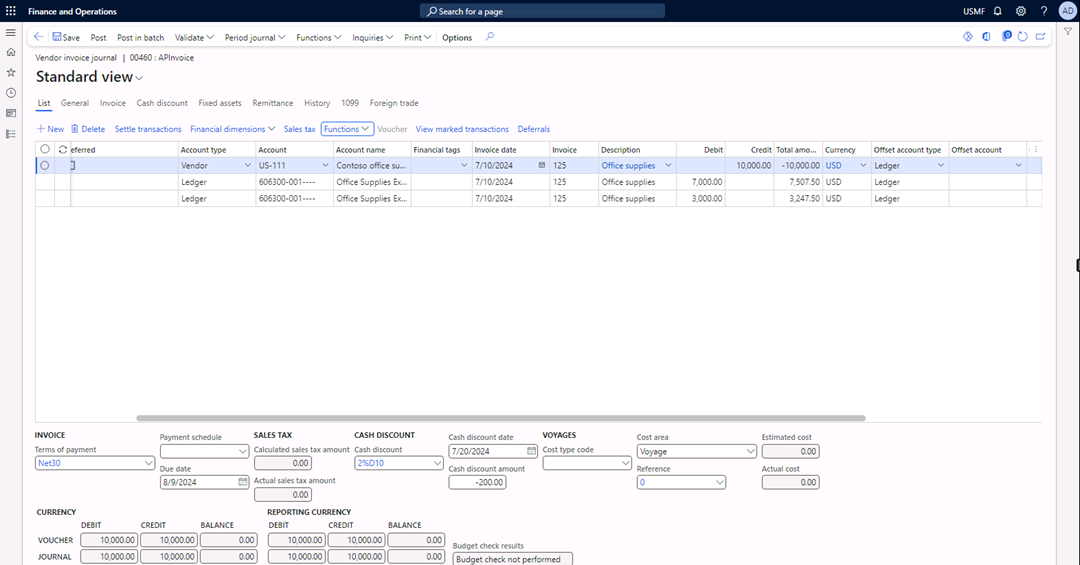
-
Scroll to the right to review the Sales tax groups.
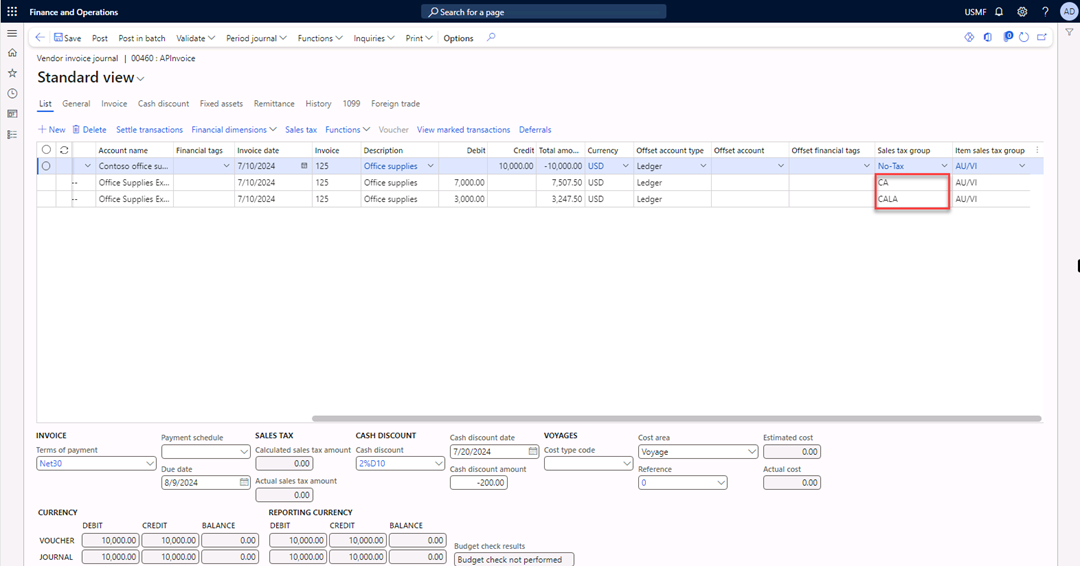
-
Select Post in the Action Pane.
-
After the message “Operation completed” appears, close the form.

By doing this lab, you ensured accurate tax calculation and compliant financial posting by breaking down a vendor invoice into multiple voucher lines with correct tax rates in Dynamics 365 Finance.