Lab 1 Configure a prepayment invoice process
Companies might issue prepayments (advance payments) to vendors for goods or services before those goods or services are fulfilled. You can use two methods to issue prepayments to vendors. One method creates a prepayment invoice that is associated with a purchase order. The other method creates prepayment journal vouchers by creating journal entries and marking them as prepayment journal vouchers.
In this lab, the first method is described: the creation of a prepayment invoice that is associated with a purchase order. You will define a prepayment value on the purchase order, record and pay a prepayment invoice, and then apply the prepayment invoice to the final invoice.
Use the USMF company for the exercises in this lab. In this lab, all configuration is discussed; some setup is already present in legal entity USMF, and some is not. The purpose of this lab is to show you all the settings necessary for the prepayment invoice process.
Exercise 1 Prerequisites prepayment invoice
In this exercise, you will check and configure the settings for the prepayment invoice.
Scenario
Contoso, Ltd. has a purchase manager who must make prepayments for purchase orders before the vendor will deliver items to Contoso, Ltd. The vendor requires $25.00 USD prepayment. You will help the purchase manager set up the prepayment invoice process.
Inventory posting profile
-
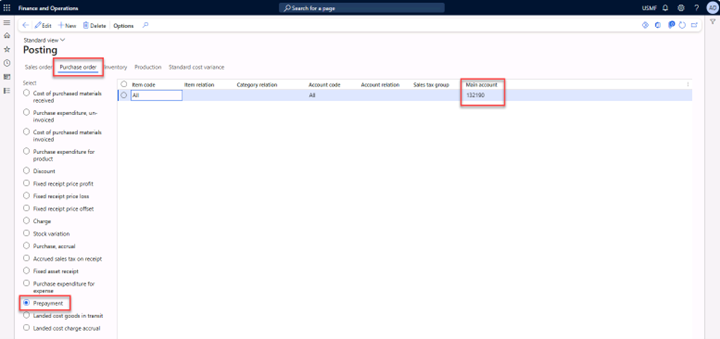
Navigate to the Inventory management module, select Setup > Posting > Posting.
-
On the Purchase order tab, select Prepayment, and then verify that the main account is 132190 for all item codes.
-
Close the form.
Procurement category
-
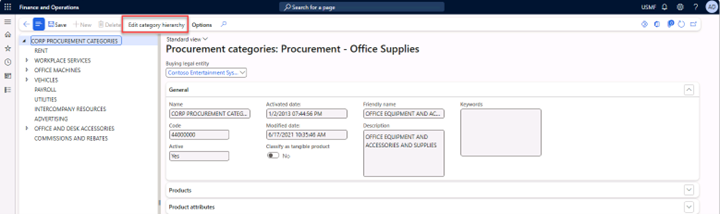
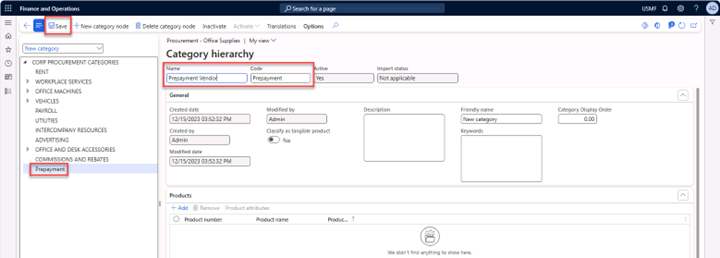
Navigate to the Procurement and sourcing module and select Procurement categories. A procurement category must be created to add a prepayment in the Purchase order.
-
Select Edit category hierarchy.
-
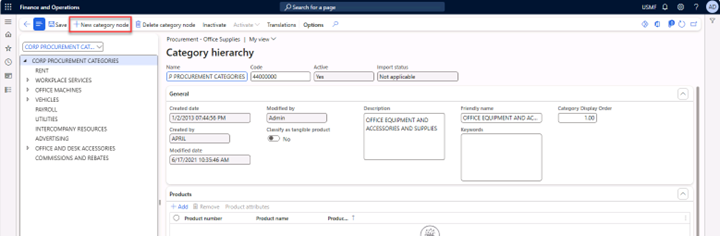
Select New category node.
-
Enter Prepayment vendor in the Name field.
-
Enter Prepayment in the Code field.
-
Select Save and then close the form.
Vendor posting profile
-
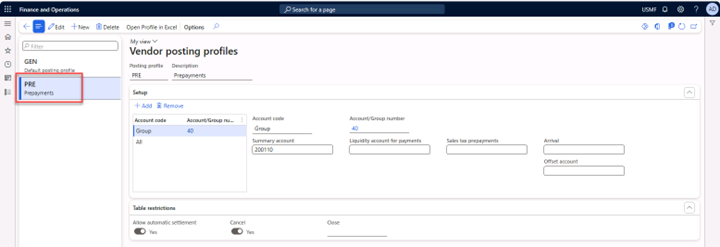
Navigate to Accounts payable > Setup > Vendor posting profiles. Verify that a posting profile for prepayments was created.
-
Close the form.
Accounts payable parameters
-
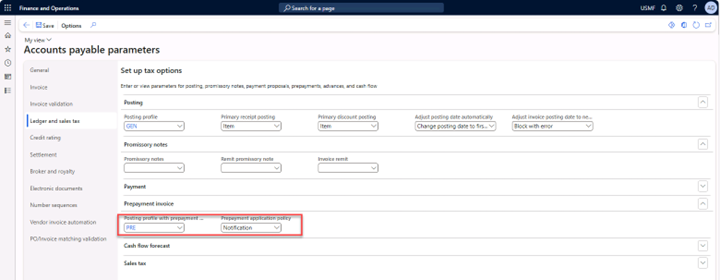
Navigate to the Accounts payable parameters form, and then select Ledger and sales tax. In the Posting profile for payment journal with prepayment parameter field, select the Prepayments posting profile.
-
Select Notification in the field Prepayment application policy. A visual indication that a prepayment invoice is available for application will display when the final invoice is created.
-
Select Save, then close the form.
Exercise 2 Create a prepayment associated with a purchase order
In this exercise, you will create a prepayment invoice associated with a purchase order.
-
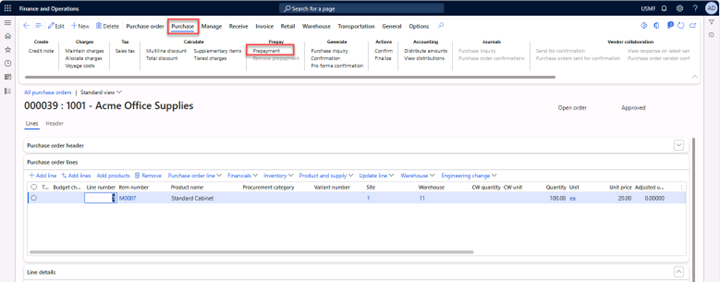
Navigate to Accounts payable > Purchase orders > All purchase orders, and then select purchase order 000039 from Vendor 1001.
-
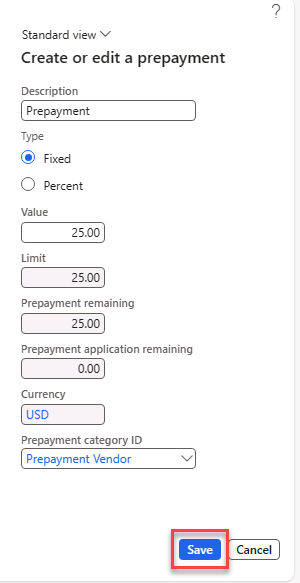
Select Purchase > Prepay > Prepayment.
-
Enter Prepayment in the Description field.
-
Select the Fixed type.
-
Enter 25 in the Value field.
-
Go to the Prepayment category ID field and select the Prepayment vendor category you set up previously. Then select OK.
-
Select Save.
-
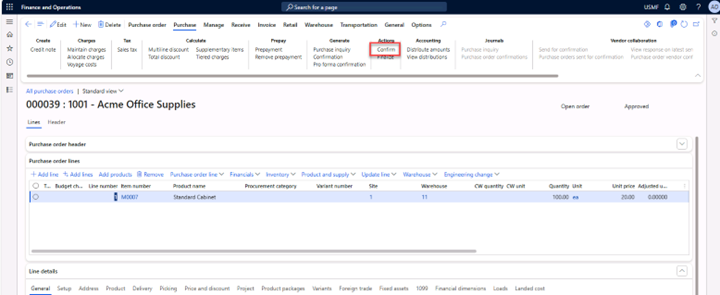
In the Purchase tab section, select Actions > Confirm to confirm the purchase order.
-
The message Operation completed will appear on top of the screen.
Exercise 3 Create a prepayment invoice
-
Navigate to Accounts payable > Purchase orders > All purchase orders, and then select purchase order 000039 from Vendor 1001.
-
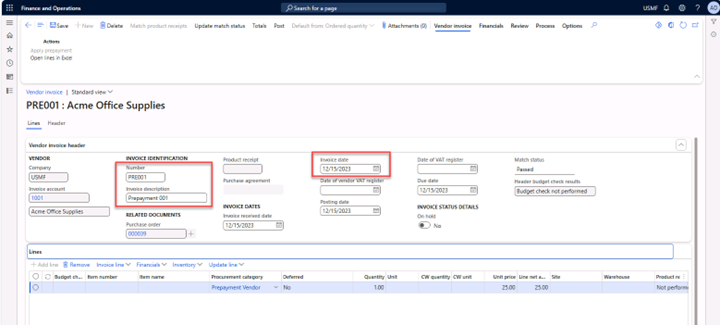
On the Invoice tab, select Generate > Prepayment invoice. This will open the vendor invoice form.

-
Enter PRE001 in the Number field.
-
Enter Prepayment 001 in the Invoice description field.
-
Select date 12/15/2023 in the Invoice date field.
-
Select Post in the action pane to post the prepayment invoice.
-
The message The vendor invoice posting process is complete for vendor 1001, invoice PRE001 will appear on top of the screen.
-
Close the form.
-
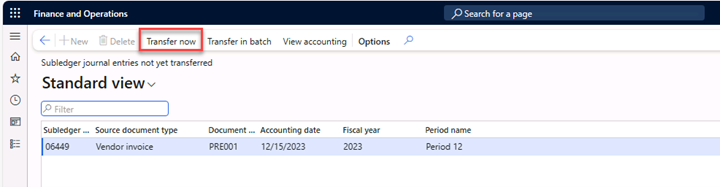
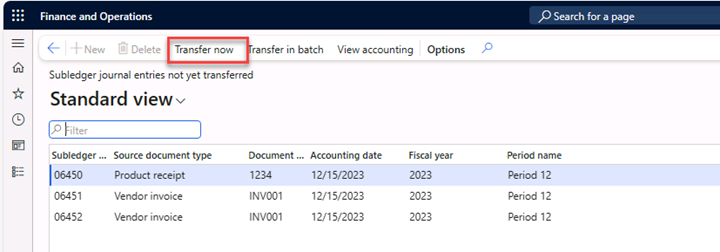
Navigate to General ledger > Periodic tasks > Subledger journal entries not yet transferred.
-
Select the journal and then select Transfer now in the action pane. This step is necessary to perform the next exercise.
-
Close the form.
Exercise 4 Pay the prepayment invoice
-
Navigate to Accounts payable > Payments > Vendor payment journal.
-
Select New to create a new Vendor payment journal.
-
Select VendPay in the Name field.
-
Select Lines in the action pane.
-
Select vendor 1001 Acme Office Supplies in the Account field and tab out.
-
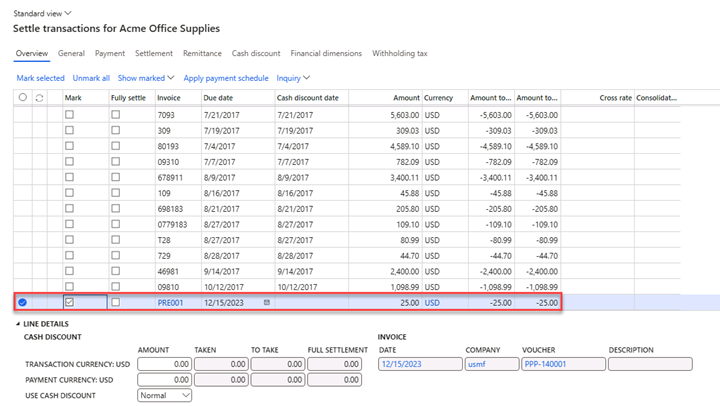
Select Settle transactions.
-
Mark the prepayment invoice PRE001 for settlement and select OK.
-
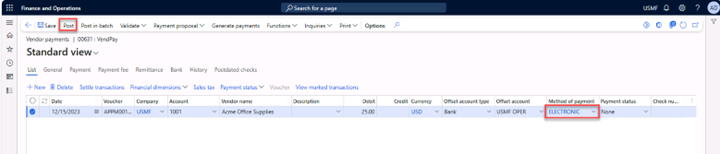
Select Electronic in the Method of payment field.
-
Select Post in the action pane to post the payment.
-
The message Operation completed will appear on top of the screen.
-
Close the form.
Exercise 5 Receive the items and post the invoice
-
Navigate to Accounts payable > Purchase orders > All purchase orders, and then select purchase order 000039 from Vendor 1001.
-
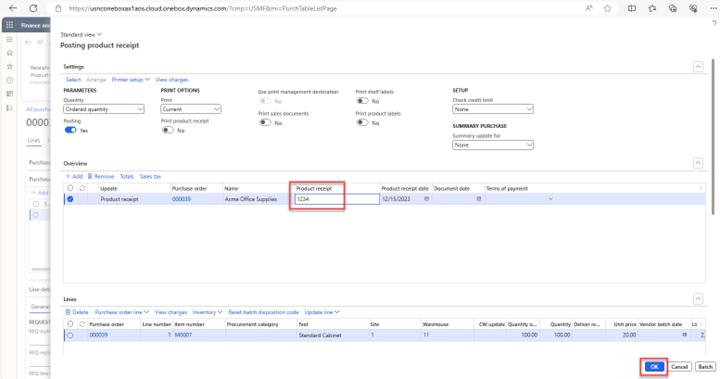
On the Receive tab, select Generate > Product receipt.

-
Enter 1234 in the field Product receipt and select OK.
-
The message Operation completed will appear on top of the screen.
-
Close the form.
Exercise 6 Post the invoice including the prepayment
-
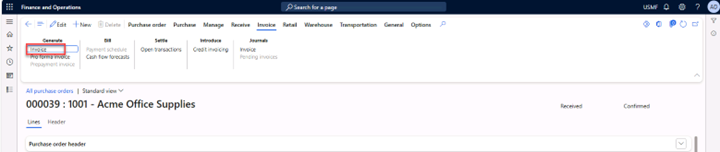
Navigate to Accounts payable > Purchase orders > All purchase orders, and then select purchase order 000039 from Vendor 1001.
-
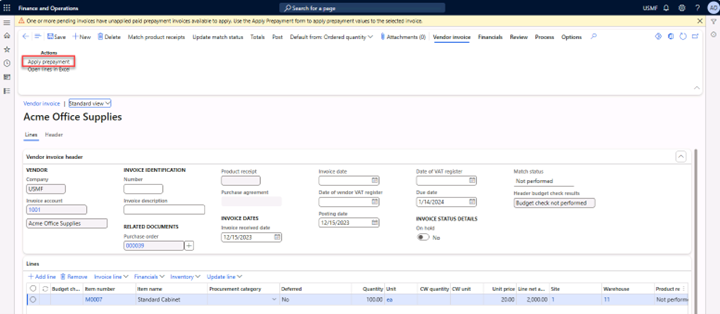
On the Invoice tab, select Generate > Invoice.
-
Read the message One or more pending invoices have unapplied paid prepayment invoices available to apply. Use the Apply Prepayment form to apply prepayment values to the selected invoice.
-
On the Vendor Invoice tab, select Actions > Apply prepayment.
-
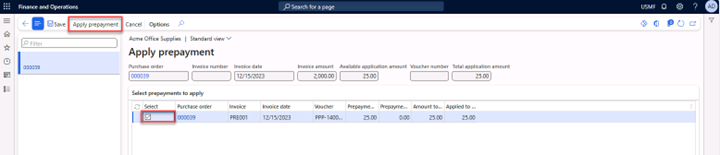
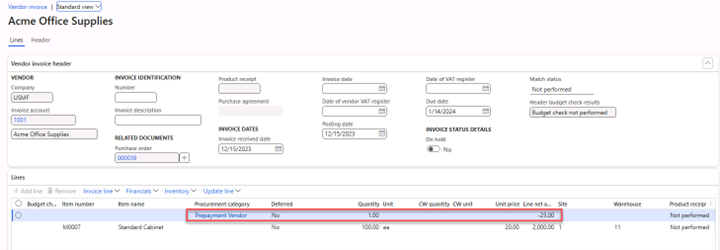
Select the Prepayment invoice by marking the field, and then select Apply prepayment in the action pane.
 The line of the prepayment is transferred to the invoice journal and will reduce
the total amount of the invoice with the amount we already paid.
The line of the prepayment is transferred to the invoice journal and will reduce
the total amount of the invoice with the amount we already paid.
-
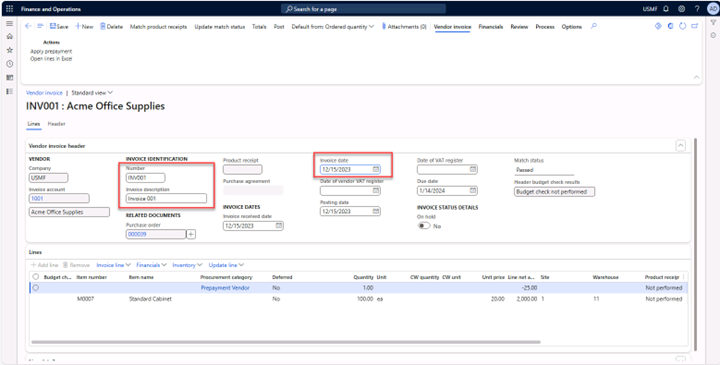
Enter INV001 in the Number field.
-
Enter Invoice 001 in the Invoice description field, if you have it.
-
Select date 12/15/2023 in the invoice date field.
-
Select Post in the action pane. (Update match status if needed, then Post.)
The message The vendor invoice process is complete for vendor 1001, invoice INV001 will appear on top of the screen.
-
Close the form.
-
Navigate to General ledger > Periodic tasks > Subledger journal entries not yet transferred.
-
Select the journal and select Transfer now in the action pane. Repeat this for the other two journals.
Exercise 7 Check the balance of the invoice
-
Navigate to Accounts payable > Vendors > All vendors and select Vendor 1001.
-
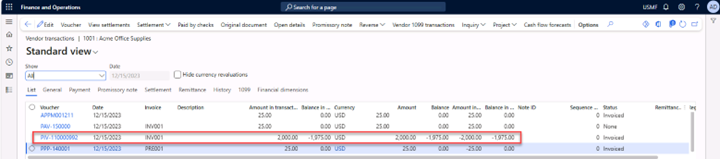
On the Vendor tab, select Transactions > Transactions.
-
Scroll all the way down to review the balance of the INV001 invoice.
-
Note the balance of the invoice, which is $1,975 USD (total invoice amount $2,000 USD minus the prepayment of $25.00 USD).