MB-310: Microsoft Dynamics 365 Financial Consultant
Lab 2: Calculate risk scores
Change Record
| Version | Date | Change |
|---|---|---|
| 1.0 | 13 Sep 2024 | Initial release |
| 1.1 | 25 Sep 2024 | Corrected title |
| 1.2 | 10 Dec 2024 | Workaround for expired certificate |
| 1.3 | 13 Jan 2025 | Added business scenario |
| 1.4 | 19 Feb 2025 | Added The Why |
| 1.5 | 10 Feb 2026 | Corrected and clarified steps |
The Why
In today’s dynamic business landscape, understanding and managing risk is paramount to the success and stability of any organization. This hands-on lab will empower you with the ability to calculate risk scores, a critical skill that enables you to identify, assess, and prioritize potential risks effectively. By mastering this process, you’ll be equipped to contribute to your organization’s risk management strategy, ensuring that potential threats are mitigated before they can impact operations. This lab is a practical tool that will enhance your decision-making capabilities and prepare you to handle real-world challenges with confidence and precision.
Business scenario
Imagine you are a loan officer at a bank. Your job is to assess the creditworthiness of potential borrowers. To make an informed decision, you need to consider a variety of factors, such as the borrower’s income, employment history, and credit score. A high credit score indicates a lower risk of the borrower defaulting on the loan, while a low credit score indicates a higher risk.
In this scenario, the risk score would be a numerical value that summarizes the overall creditworthiness of the borrower. The bank would have a set of criteria for calculating the risk score, and this score would be used to determine whether or not to approve the loan, and if so, what interest rate to charge.
By calculating risk scores, the bank can make more informed lending decisions. This can help to protect the bank from financial losses and ensure that loans are only made to borrowers who are likely to repay them.
Use the USMF company for the exercises in this lab.
Exercise 1 Configure a scoring group
During this lab, you will configure a scoring group, add the new group to a customer, and calculate the risk group classification to determine how risky the customer is.
Scenario
At Contoso, Ltd., the credit management manager wants to configure a new scoring group that must be used to calculate the customer’s risk.
Note: If you get a “Your connection isn’t private” error on browser opening, then select the Advanced link, select to Continue, then wait 2-3 minutes.
-
Navigate to Credit and collections > Setup > Credit management setup > Risk > Scoring groups and select New.

-
In the Scoring group field, enter
CM Group. -
In the Description field, enter
Credit management group. -
In the Group type field, select the Credit management group value.
-
Navigate to Lines > Add.

-
In the Value field, select Indie.
-
In the Risk contribution score field, enter
30. -
Select Add to add a new line.
-
In the Value field, select the Major customer value.
-
In the Risk contribution score field, enter
10. -
Close the form.
Exercise 2 Add the new scoring group to a customer
-
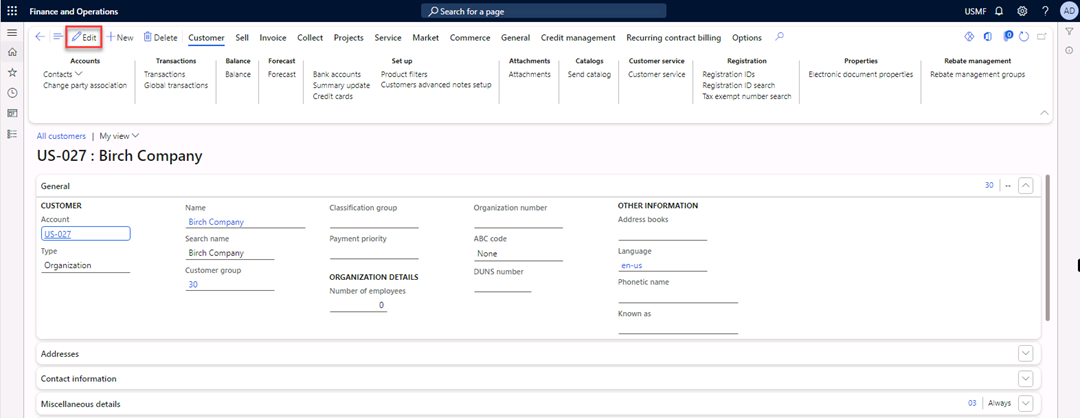
Navigate to Accounts receivable > Customers > All customers and select customer US-027 Birch Company.
-
Select Edit in the Action Pane.
-
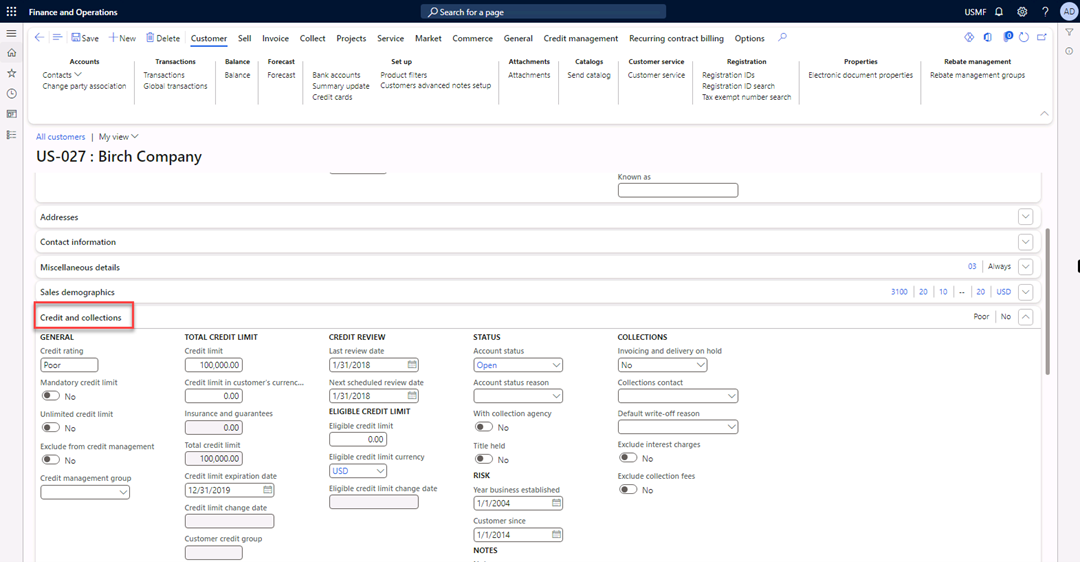
Navigate to the Credit and collections FastTab.
-
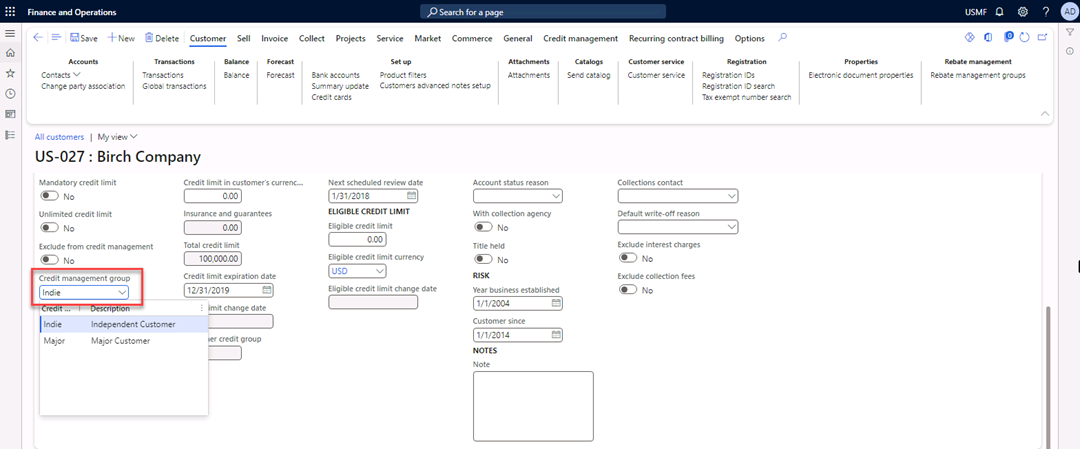
In the Credit Management group field, select the Independent Customer value.
-
Select Save in the Action Pane.

-
Close the form.
Exercise 3 Configure risk classification
-
Navigate to Credit and collections > Setup > Credit management setup > Risk > Risk classification.

-
Select Edit in the Action Pane.

-
Under Risk group, select Medium. Then in the To field, enter
49.99. -
Select New in the Action Pane to add a new line.

-
In the Risk group field, enter
Med-High. -
In the Description field, enter
Medium-High. -
In the From field, enter
50. -
In the To field, enter
59.99. -
In the Risk group indicator field, select the Orange value.
-
Select Save in the Action Pane.

-
Close the form.
Exercise 4 Check the risk group of the customer
-
Navigate to Accounts receivable > Customers > All customers, and then select customer US-027 Birch Company.
-
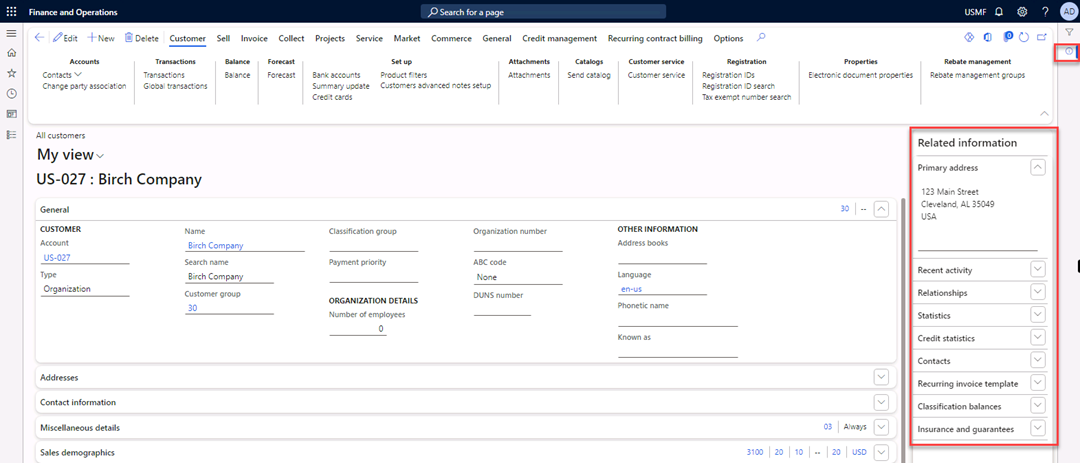
Open the Related information pane by pressing Ctrl+F2.
-
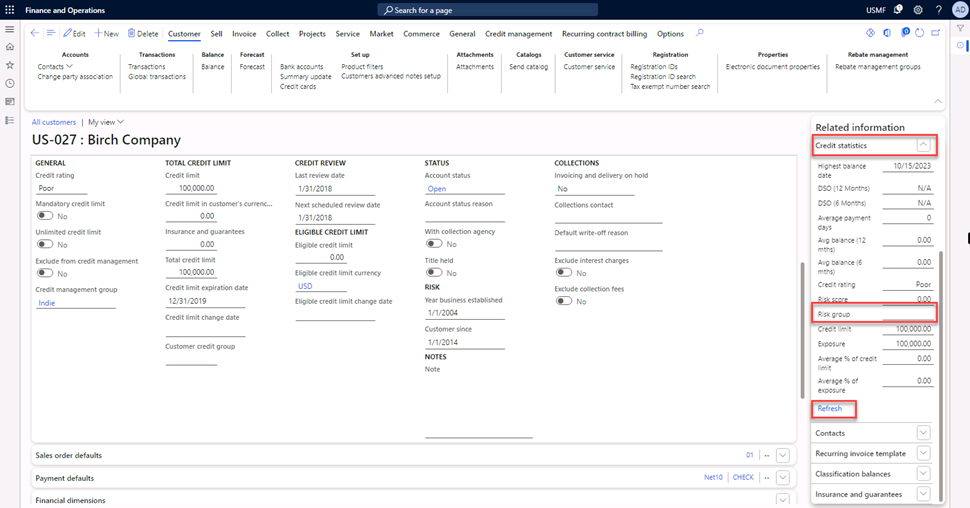
Expand Credit statistics and select Refresh.
-
Note that the risk group is Empty.
In exercise 1, you configured a new scoring group, and then in exercise 2, you added the group to a customer. The new configuration places this customer in a risk group. The new configuration will be apparent after the periodic task Update risk scores is performed.
-
Close the form.
Exercise 5 Update risk scores
-
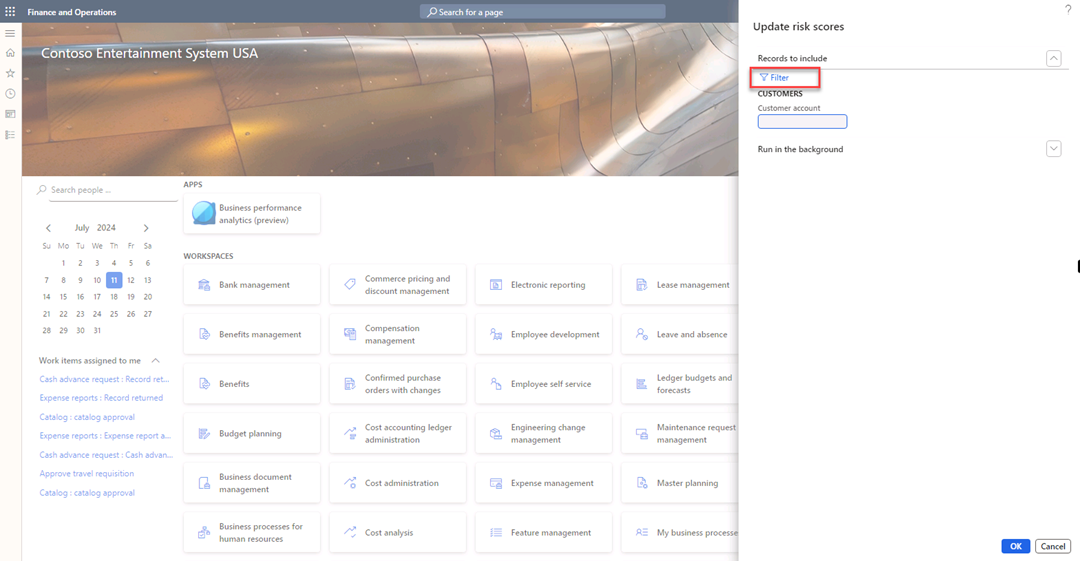
Navigate to module Credit and collections > Periodic tasks > Credit management > Update risk scores, and then select Records to include > Filter.
-
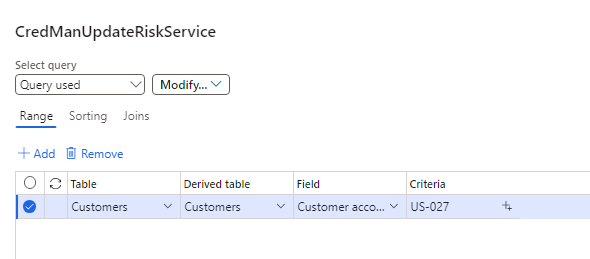
In the Criteria field for Customer account, enter the value US-027.
-
Select OK, and OK.
Exercise 6 Check the risk group of the customer
-
Navigate to Accounts receivable > Customers > All customers, select customer US-027 Birch Company.
-
Open the Related information Pane if it’s not already open by pressing Ctrl+F2.
-
Expand Credit statistics.
-
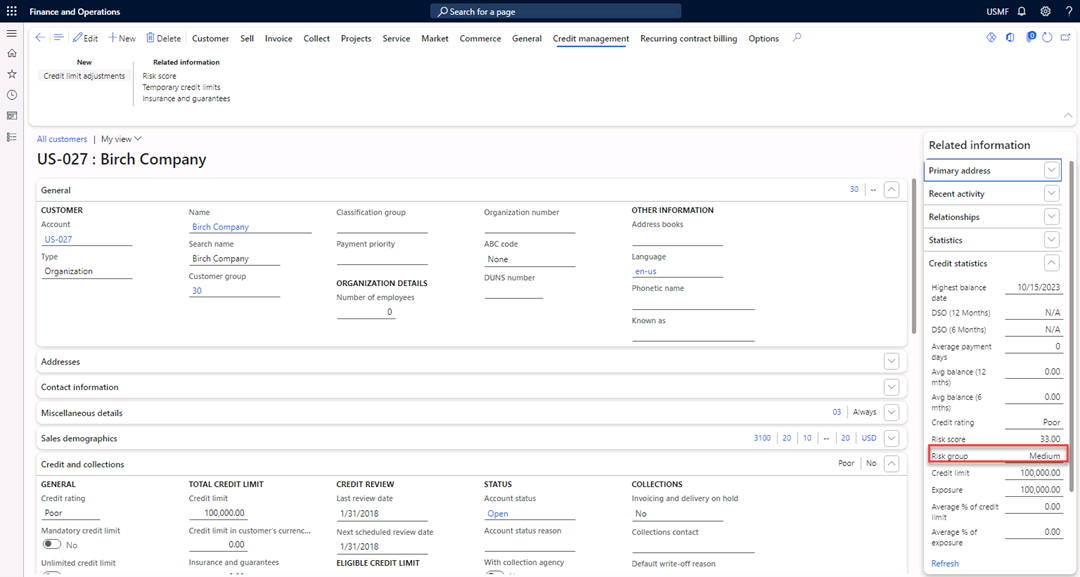
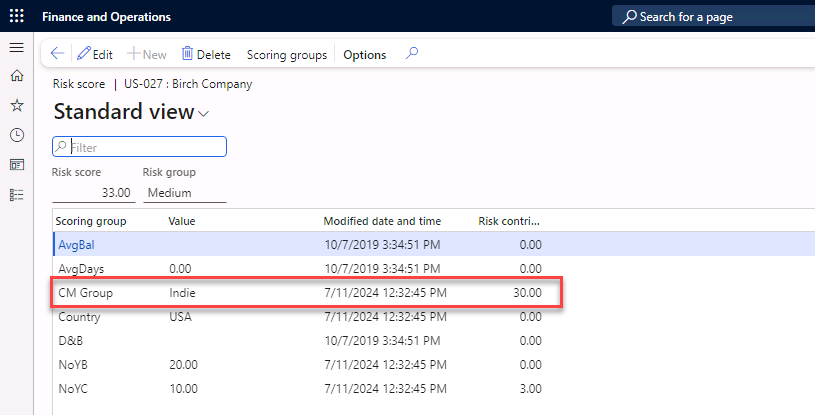
Select Refresh. Note that the risk group is changed.
-
Select the Credit management tab in the Action Pane.
-
Select Risk score.
-
View the details of the risk score calculation.
-
Close the form.