Lab 4.4: Build a model-driven app
Scenario
Bellows College is an educational organization with multiple campuses and programs.
Many of Bellow Colleges instructors and administrators need to attend events, and purchase items. Historically tracking these expenses has been a challenge. Campus administration would like to modernize their expense reporting system by providing employees with a digital way to report expenses.
Throughout this course, you will build applications and perform automation to enable the Bellows College employees to manage expenses.
This lab will take approximately 20 minutes to complete.
High-level lab steps
As part of configuring the model-driven app, you will complete the following:
- Configure your new model-driven app named Employee Expense Management
We will work with the following components:
- Views: Views allow the user to display the existing data in the form table.
- Forms: This is where the user creates/updates new rows in the tables. Both will be integrated to the model-driven app for a better user-experience.
Prerequisites
- Completion of Module 1 Lab 0 - Validate lab environment
Exercise 1: Create Model-driven app
Objective: In this exercise, you will use the model-driven app that you configured in Lab 4.3. You will then customize the sitemap and test the app. For simplicity and time’s sake, we will not be addressing all of the Expense Report columns in this lab.
Task 1: Configure the sitemap
- If you are not already signed in, sign in to https://make.powerapps.com
- Select the environment that you imported the Expense Report solution into at the top right if it is not already selected.
- Using the navigation on the left, select Solutions.
- Open the Expense Report solution.
- Find the
Employee Expense Managementmodel-driven app that you created in the last exercise. - Select Edit to open the modern app designer.
- Select +Add page on the command bar.
- The Add page screen will open.
- Choose Dataverse table.
- Select the following tables:
- Expense Report
- Expense Line
- Make sure that Show in navigation is selected.
- After you have selected both tables, select Add.
- Under Navigation, select the Expense Reports form.
- On the right side of the screen, expand Expense Reports forms, and then go to the In this app section.
- Select Show more.
- Select the Ellipsis next to Information Quick View Form.
- From the menu that appears, select Remove.
- Select the Ellipsis next to Information Card Form.
- From the menu that appears, select Remove.
- Under Navigation, select Expense Lines form.
- Go to the In this app section on the right side of the screen.
- Select Show more.
- Select the Ellipsis next to Information Quick View Form.
- From the menu that appears, select Remove.
- Select the Ellipsis next to Information Card Form.
- From the menu that appears, select Remove.
- Select Save and wait until the changes are saved.
- Once the save is complete, select the Publish button to publish your changes. Wait for the publishing to complete.
Task #2: Test app
Start the application
- Select the Play button, the model-driven app will load in a new tab.
Create a new Expense Report
- Select Expense Reports from the left-hand navigation (also known as the sitemap).
- Select + New.
- Enter the fields as follows:
- Report Name:
New Test Report - Report Purpose: Select
Conference - Report due date: Select
Today's date
- Report Name:
- Select Save & Close. This will create the new Test Report and you should be able to see it on the Active Expense Reports view.
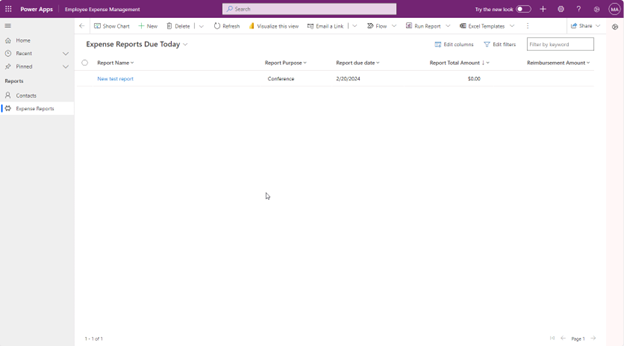
- Change view to Expense Reports Due Today by using the drop-down next to Active Expense Reports.
- You may add some more test records.
Your running model-driven app should look approximately like the following:
Congratulations! You have created and configured your first model-driven app.