Explore Azure Database for PostgreSQL
In this exercise you’ll provision an Azure Database for PostgreSQL resource in your Azure subscription.
This lab will take approximately 5 minutes to complete.
Before you start
You’ll need an Azure subscription in which you have administrative-level access.
Provision an Azure Database for PostgreSQL resource
In this exercise, you’ll provision an Azure Database for PostgreSQL resource.
-
In the Azure portal, select + Create a resource from the upper left-hand corner and search for
Azure Database for PostgreSQL. Then in the resulting Azure Database for PostgreSQL page, select Create. -
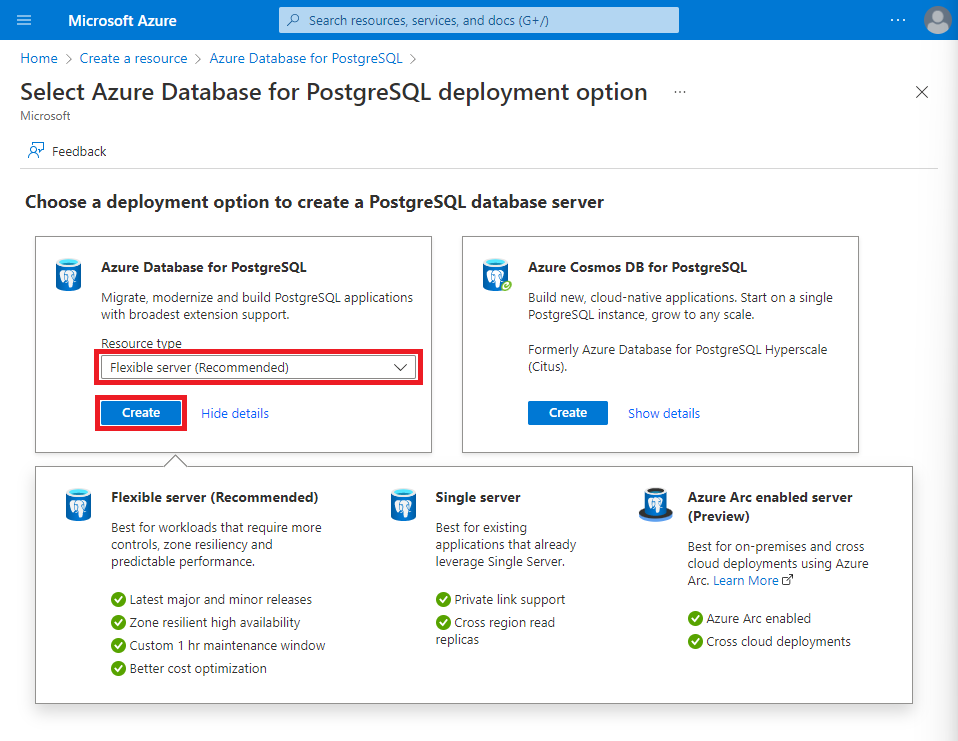
Review the Azure Database for PostgreSQL options that are available, and then in the Azure Database for PostgreSQL tile, select Flexible server (Recommended), then Create.

- Enter the following values on the Create SQL Database page:
- Subscription: Select your Azure subscription.
- Resource group: Create a new resource group with a name of your choice.
- Server name: Enter a unique name.
- Region: Select a region near you.
- PostgreSQL version: Leave unchanged.
- Workload type: Select Development.
- Compute + storage: Leave unchanged.
- Availability zone: Leave unchanged.
- Enable high availability: Leave unchanged.
- Admin username: Your name.
- Password and Confirm password: A suitably complex password.
-
Select Next: Networking.
-
Under Firewall rules, select + Add current client IP address.
-
Select Review + Create, and then select Create to create your Azure PostgreSQL database.
-
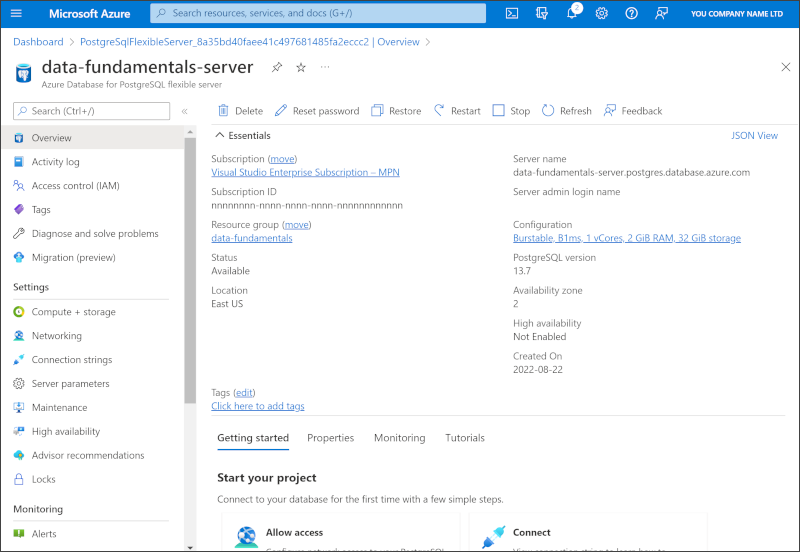
Wait for deployment to complete. Then go to the resource that was deployed, which should look like this:

- Review the options for managing your Azure Database for PostgreSQL resource.
Tip: If you’ve finished exploring Azure Database for PostgreSQL, you can delete the resource group that you created in this exercise.