Explore Azure SQL Database
In this lab, you’ll create your very first cloud database using Azure SQL Database. A database is simply an organized place to store information so you can find and use it later. In this case, you’ll store information for a fictional car dealership: the manufacturers that build cars, and the vehicles the dealership sells.
You’ll create the database, add a small amount of sample data, and then use SQL (Structured Query Language) to ask the database questions like “Which cars cost less than $30,000?” Don’t worry if you’ve never written SQL or used Azure before, every step is explained as you go.
This lab will take approximately 20 minutes to complete.
Before you start
You’ll need an Azure subscription in which you have administrative-level access. If you don’t have one, you can sign up for a free account using the link above.
What is Azure? Azure is Microsoft’s cloud platform. Instead of buying and running your own server computer, you rent computing resources (like a database) from Microsoft and use them over the internet. The Azure portal is the website you use to create and manage those resources.
Provision an Azure SQL Database resource
“Provisioning” just means creating and setting up a new resource. In this section, you’ll create your database server and an empty database to put your data in.
-
Sign in to the Azure portal using your Azure account.
-
At the top left of the page, select + Create a resource. In the Search the Marketplace box, type
Azure SQLand press Enter. In the search results, select Azure SQL (published by Microsoft).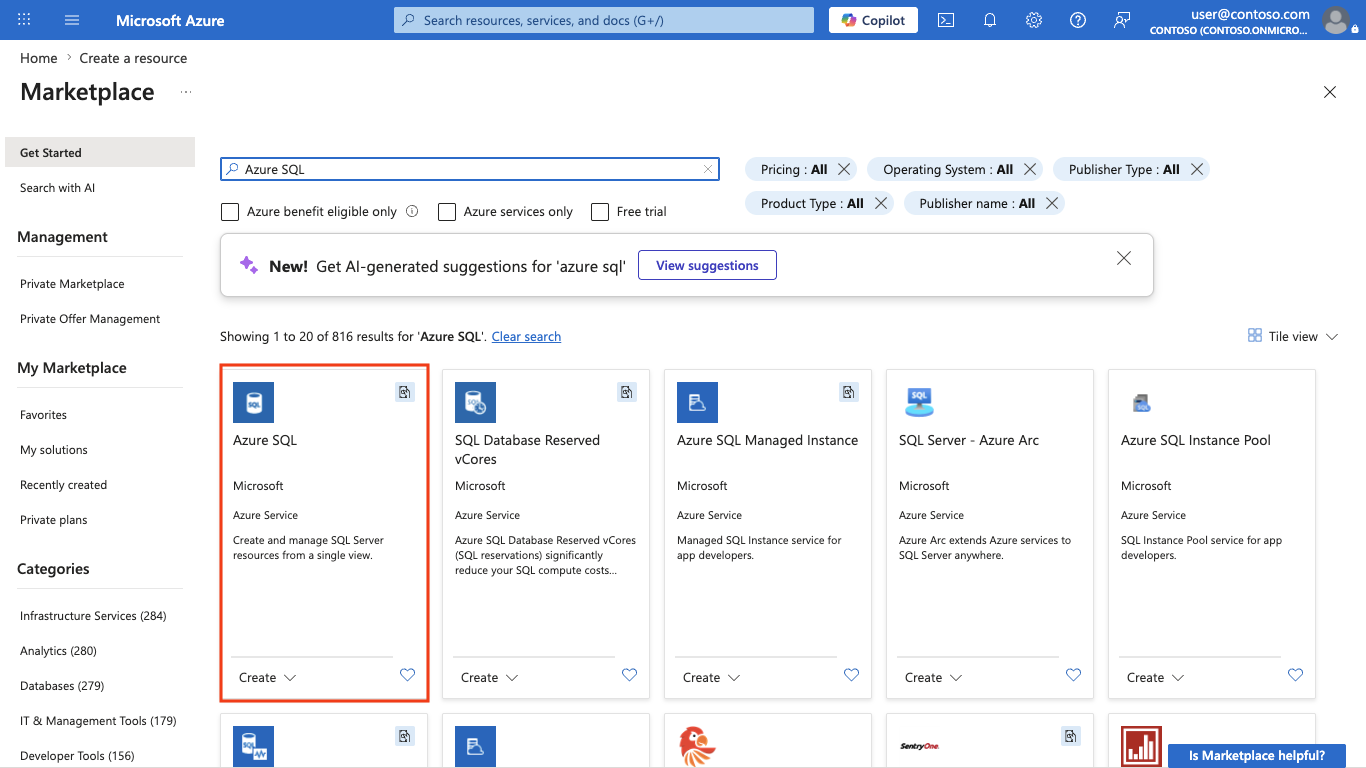
-
On the Azure SQL page, select Create. On the Find the right Azure SQL solution for your workload page, in the Create a database tile, select More details, and then select Create SQL Database.
Tip: A single SQL database is the simplest option to set up and is perfect for learning. The other options (such as Hyperscale, elastic pools, or managed instances) add features you don’t need yet.
-
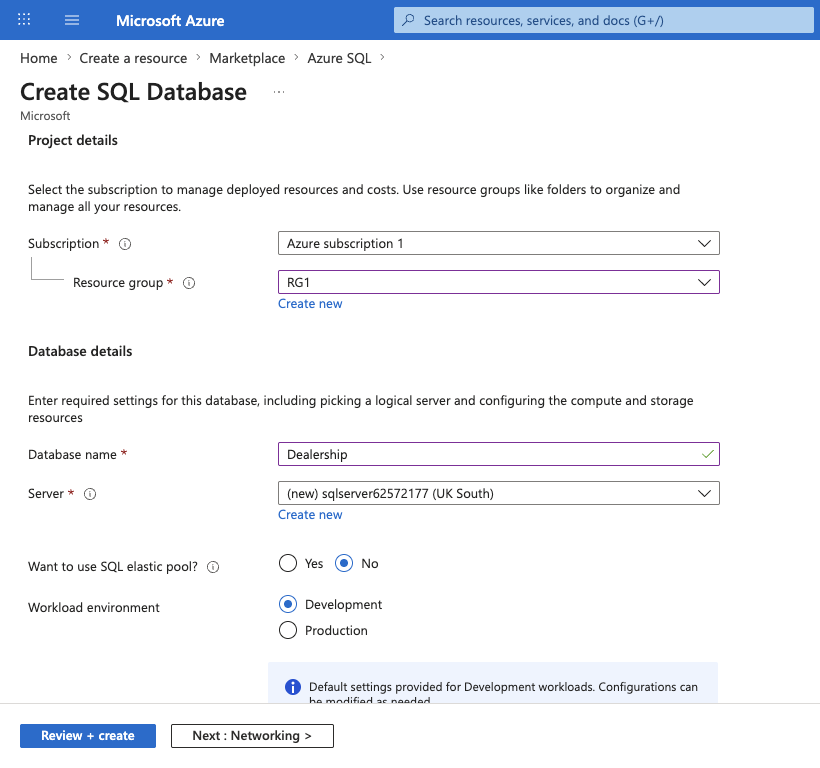
Enter the following values on the Create SQL Database page, and leave all other properties with their default setting:
- Subscription: Select your Azure subscription.
-
Resource group: Create a new resource group with a name of your choice.
What is a resource group? It’s just a folder that holds related Azure resources together. When you’re finished, you can delete the folder to remove everything in one click.
- Database name:
Dealership
-
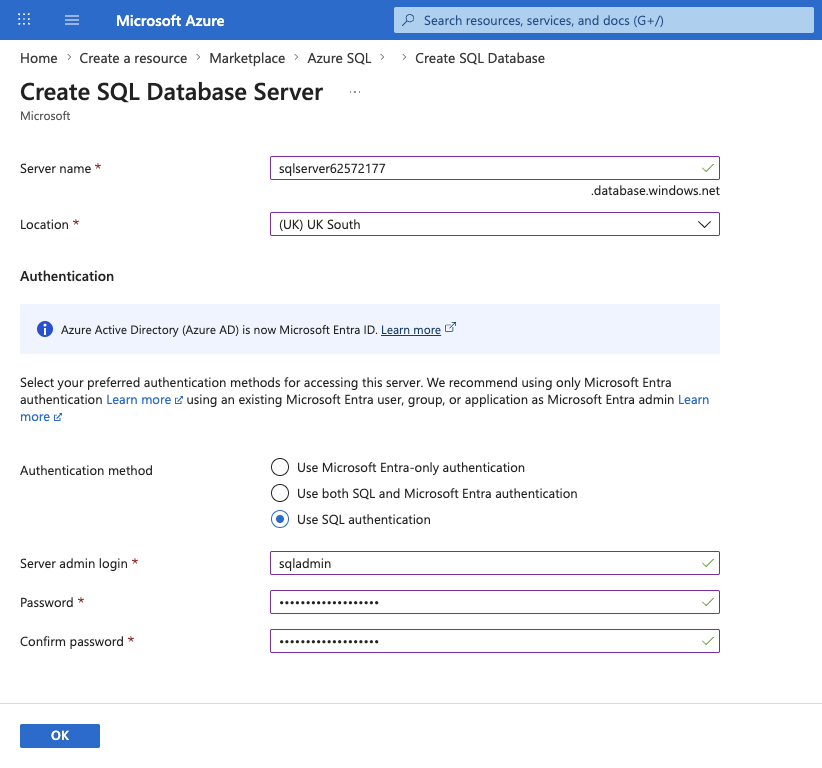
Server: Select Create new and create a new server with a unique name in any available location. Use SQL authentication and specify your name as the server admin login and a suitably complex password (remember the password - you’ll need it later!)
Select OK to close the server form.
- Want to use SQL elastic pool?: No
- Workload environment: Development
- Compute + storage: Leave unchanged.
- Backup storage redundancy: Locally-redundant backup storage
Tip: SQL authentication (a username and password) is the quickest way to sign in for this lab. The Development and Locally-redundant options keep costs as low as possible for a short practice database.
-
Select Next: Networking >. On the Networking page, in the Network connectivity section, select Public endpoint. Then, in the Firewall rules section, set both Allow Azure services and resources to access this server and Add current client IP address to Yes.

Tip: A firewall blocks unwanted connections. These settings open just enough access so that *you* can connect to the database during the lab. In a real project, you’d lock this down much more tightly.
-
Select Next: Security > and make sure the Enable Microsoft Defender for SQL option is set to Not now.
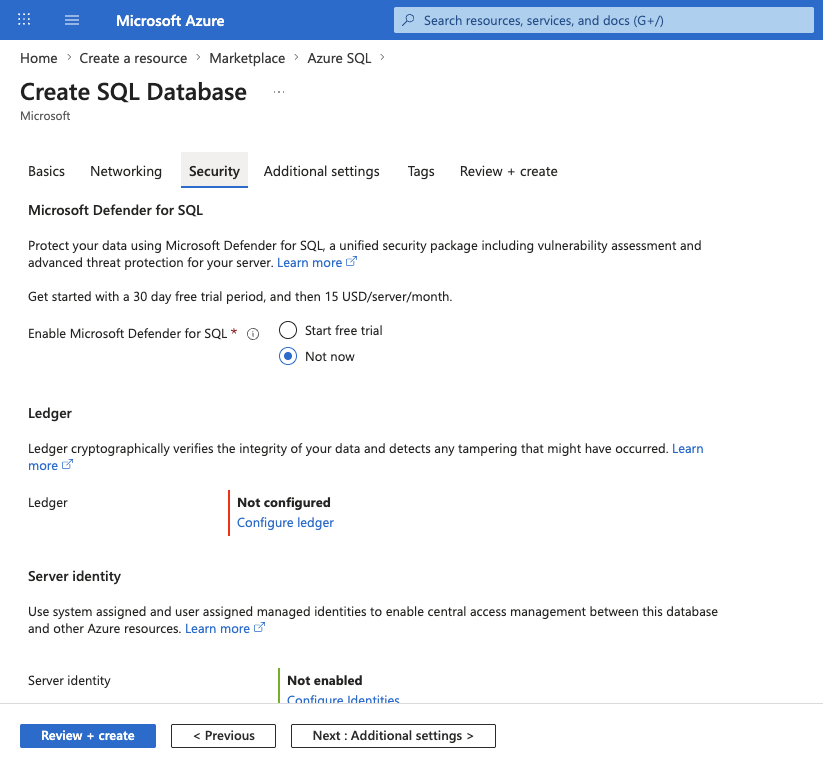
Tip: Defender is a paid security add-on. You can safely skip it for this short, no-cost-sensitive exercise.
-
Select Next: Additional settings >. On the Additional settings tab, make sure the Use existing data option is set to None.
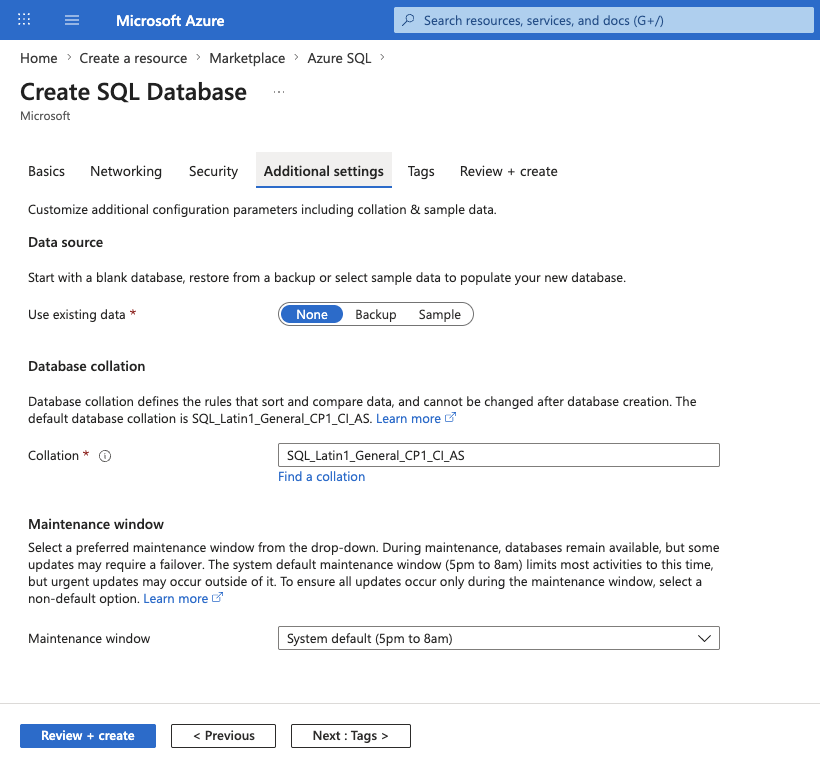
Important: Leaving this as None gives you a completely empty database. That’s what you want, because you’ll create your own automotive tables and data in the next section.
-
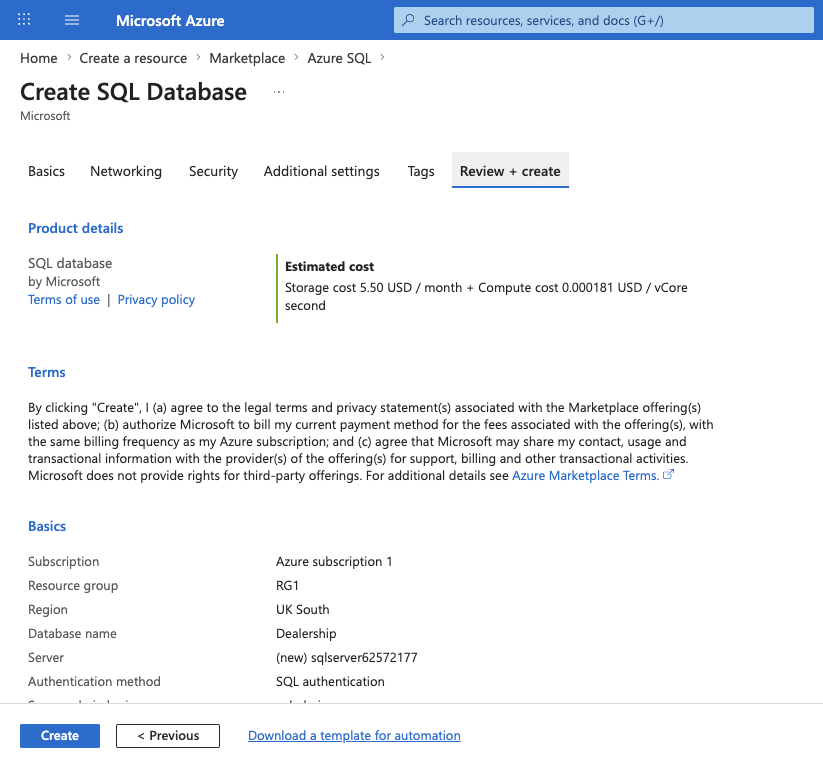
Select Review + create, review the settings, and then select Create.
-
Wait a few minutes for the deployment to complete. When it’s finished, select Go to resource.
Create the database tables and add sample data
Your database is created, but it’s empty. In a relational database, data is stored in tables, which are like spreadsheets made of rows and columns. You’ll now create two tables and fill them with a small amount of sample data.
-
In the menu on the left side of the database page, select Query editor (preview). On the sign-in pane, select the SQL authentication tab, enter the server admin login and password you created earlier, and then select Connect.
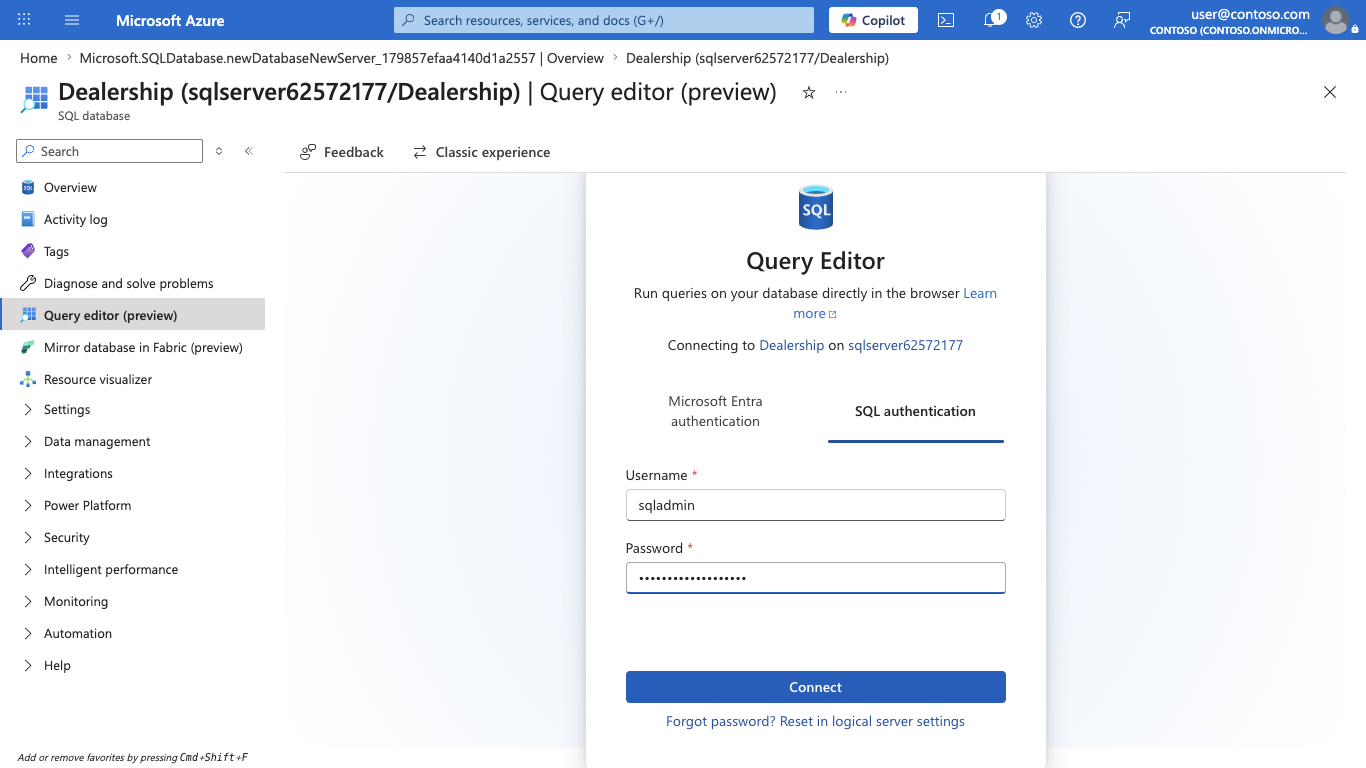
Note: If you see an error saying your client IP address isn’t allowed, select the Allowlist IP … link in the message to grant access, then try connecting again.
The query editor is where you’ll type and run SQL commands. Select + New query to open a blank query tab.
-
In the query tab, paste the following SQL code. This creates a Manufacturer table (the companies that build vehicles) and a Vehicle table (the cars the dealership sells).
 CREATE TABLE Manufacturer
 (
     ManufacturerID   INT          PRIMARY KEY,
     ManufacturerName NVARCHAR(50) NOT NULL,
     Country          NVARCHAR(50)
 );

 CREATE TABLE Vehicle
 (
     VehicleID      INT            PRIMARY KEY,
     ModelName      NVARCHAR(50)   NOT NULL,
     ManufacturerID INT            NOT NULL,
     ModelYear      INT,
     BodyType       NVARCHAR(30),
     ListPrice      DECIMAL(10, 2),
     FOREIGN KEY (ManufacturerID) REFERENCES Manufacturer(ManufacturerID)
 );
What does this do? Each
CREATE TABLEstatement defines a table and its columns. The PRIMARY KEY uniquely identifies each row (no two manufacturers can share an ID). The FOREIGN KEY links each vehicle to a manufacturer, so the two tables are related, that’s what makes this a “relational” database.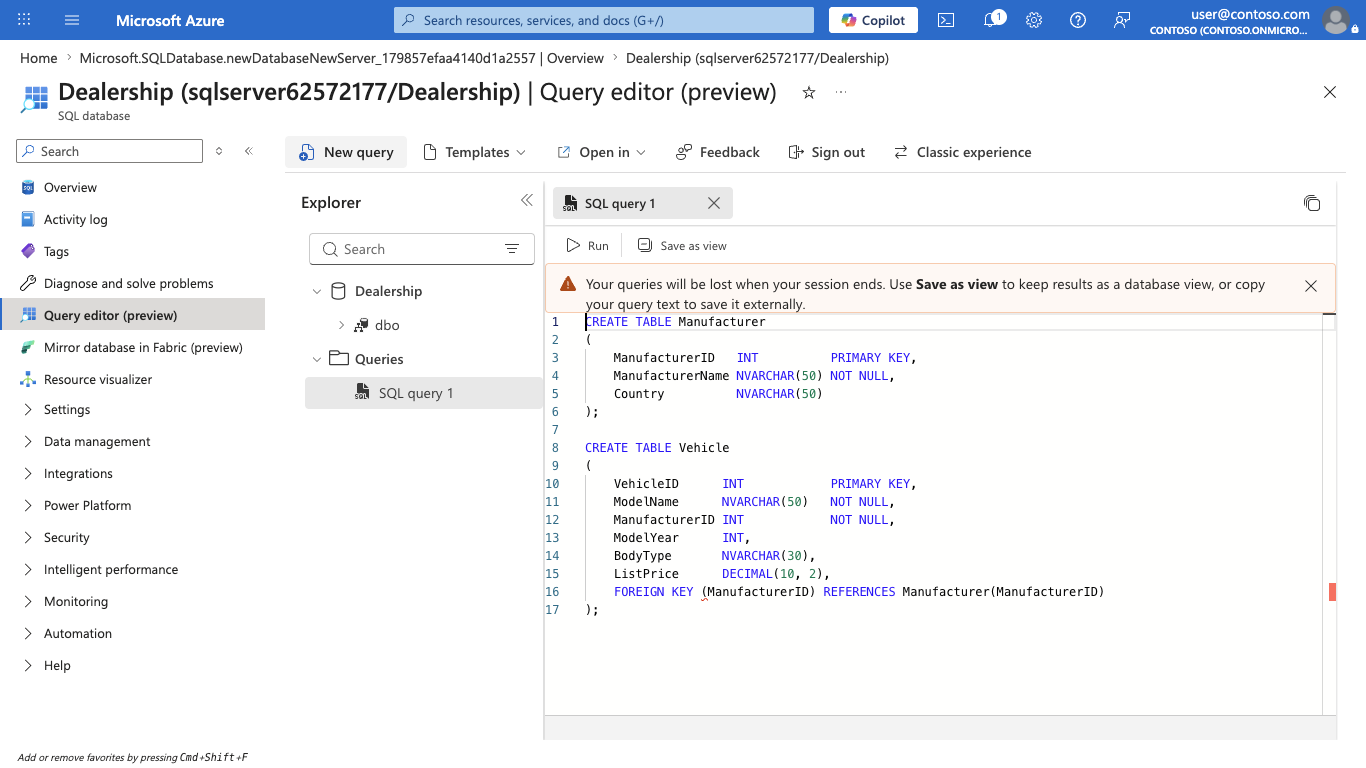
-
Select ▷ Run above the query. You should see a message confirming the query succeeded. Your two tables now exist, but they’re empty.
-
Replace all the SQL in the query tab with the following code, which adds sample manufacturers and vehicles. Then select ▷ Run.
 INSERT INTO Manufacturer (ManufacturerID, ManufacturerName, Country) VALUES
 (1, 'Toyota',        'Japan'),
 (2, 'Ford',          'United States'),
 (3, 'Volkswagen',    'Germany'),
 (4, 'Hyundai',       'South Korea');

 INSERT INTO Vehicle (VehicleID, ModelName, ManufacturerID, ModelYear, BodyType, ListPrice) VALUES
 (101, 'Corolla',     1, 2024, 'Sedan',      24500.00),
 (102, 'RAV4',        1, 2024, 'SUV',        31200.00),
 (103, 'F-150',       2, 2023, 'Pickup',     38900.00),
 (104, 'Mustang',     2, 2024, 'Coupe',      42500.00),
 (105, 'Golf',        3, 2023, 'Hatchback',  27800.00),
 (106, 'Tiguan',      3, 2024, 'SUV',        33400.00),
 (107, 'Elantra',     4, 2024, 'Sedan',      22300.00),
 (108, 'Tucson',      4, 2023, 'SUV',        29600.00);
What does this do? Each
INSERTstatement adds rows of data to a table. You’ve now added 4 manufacturers and 8 vehicles. Notice that each vehicle’s ManufacturerID matches an ID in the Manufacturer table.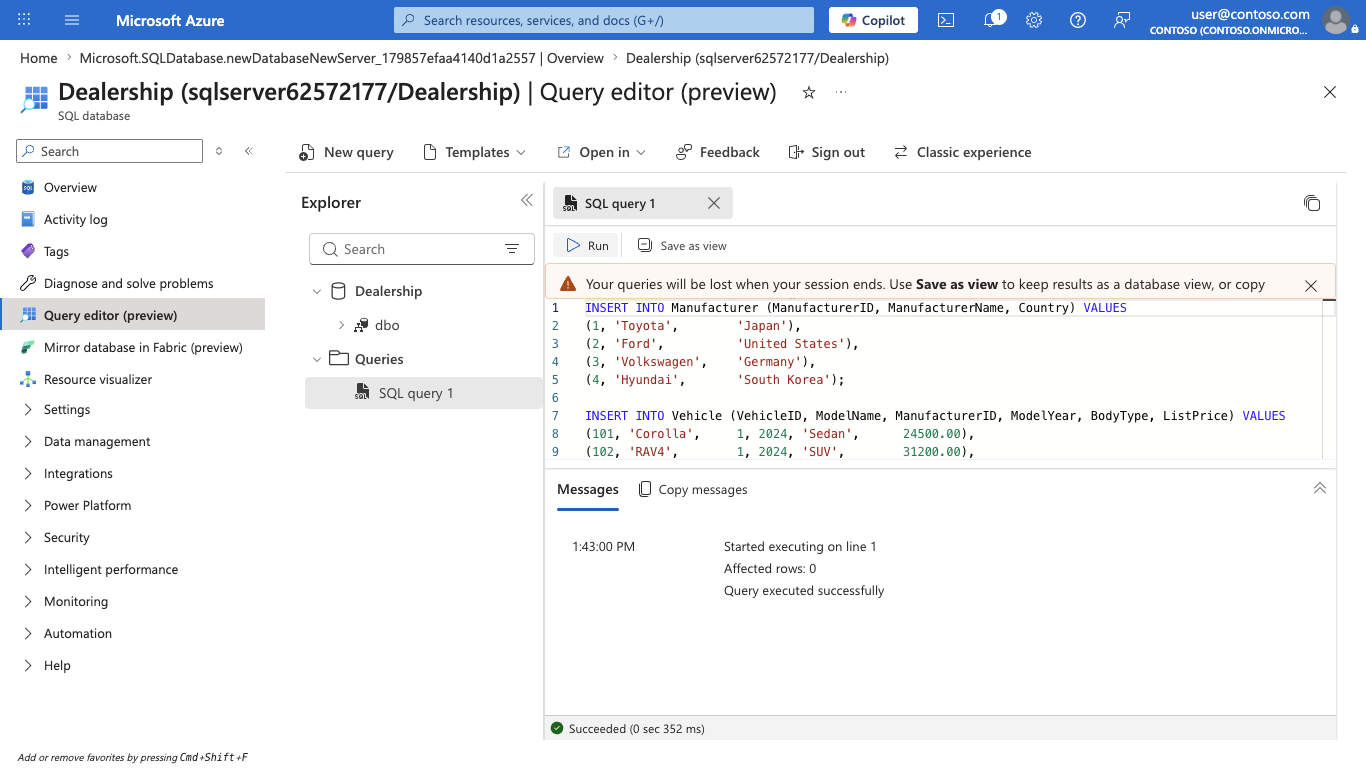
Query the data
Now that your database has data in it, you can use SQL SELECT statements to retrieve and explore it.
-
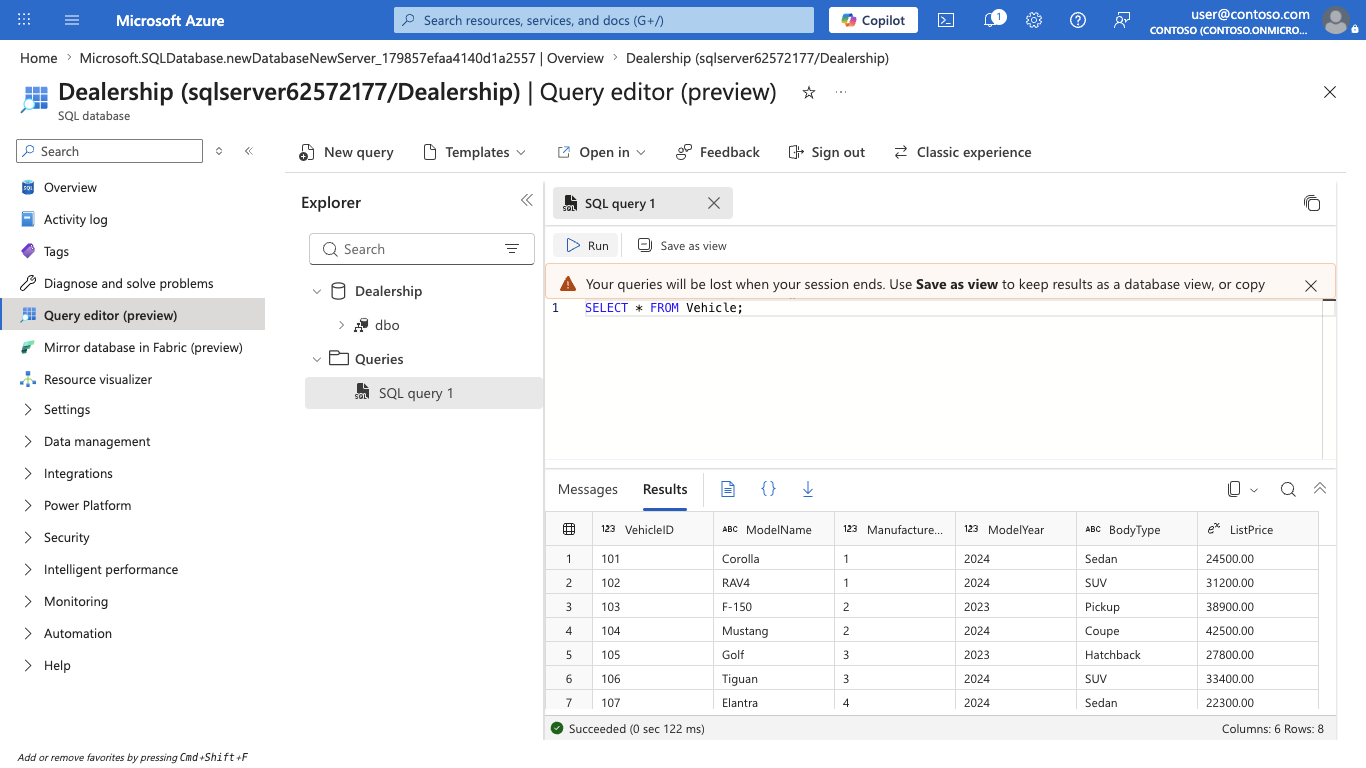
Replace all the SQL in the query tab with the following code, and select ▷ Run. This returns every column and every row from the Vehicle table.
SELECT * FROM Vehicle;The results should show all 8 vehicles you added.
Tip:
SELECT *means “select all columns”. It’s handy for a quick look, but in real applications you usually list only the columns you actually need. -
Replace the query with the following code and select ▷ Run. This returns only specific columns, so the results are easier to read.
SELECT ModelName, BodyType, ListPrice FROM Vehicle; -
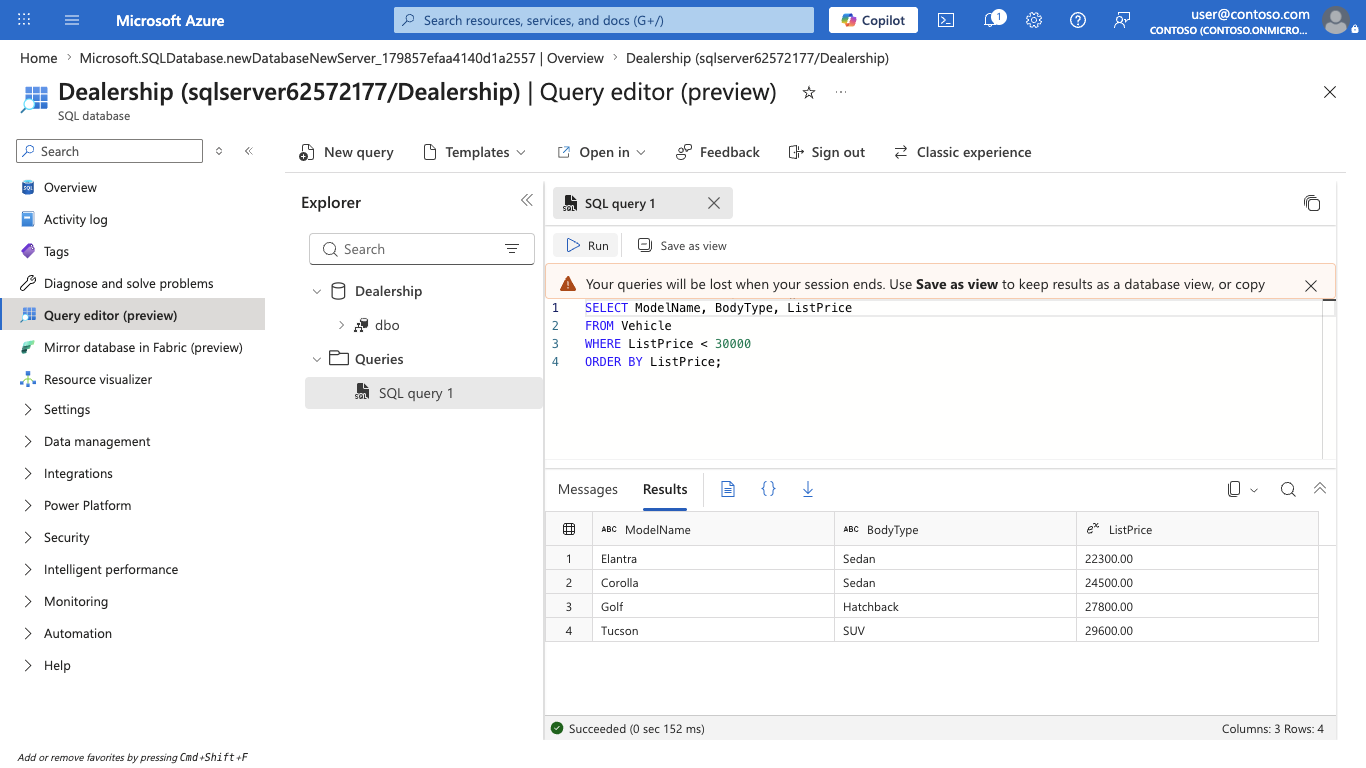
Now try filtering the data. Replace the query with the following code and select ▷ Run. The WHERE clause returns only the vehicles that cost less than $30,000, and ORDER BY sorts them from cheapest to most expensive.
 SELECT ModelName, BodyType, ListPrice
 FROM Vehicle
 WHERE ListPrice < 30000
 ORDER BY ListPrice;
Tip: WHERE filters which rows you get back, and ORDER BY controls the order they appear in. These are two of the most useful tools in SQL.
-
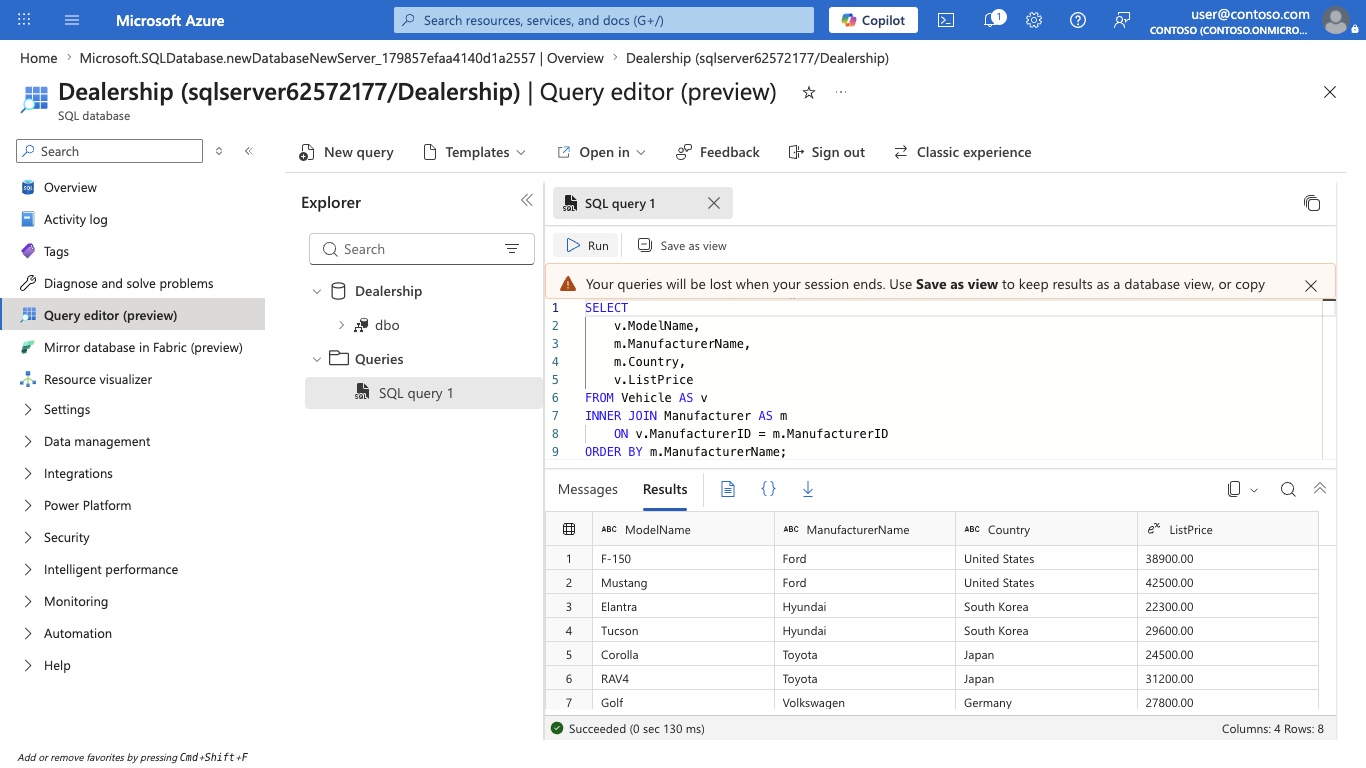
Finally, try a query that combines data from both tables. Replace the query with the following code and select ▷ Run.
 SELECT
     v.ModelName,
     m.ManufacturerName,
     m.Country,
     v.ListPrice
 FROM Vehicle AS v
 INNER JOIN Manufacturer AS m
     ON v.ManufacturerID = m.ManufacturerID
 ORDER BY m.ManufacturerName;
What does this do? A JOIN combines rows from two tables based on a matching value, here, the ManufacturerID that both tables share. This lets you see each vehicle alongside the name and country of the company that makes it, even though that information lives in a separate table.
-
Take a moment to experiment. Try changing the price in the WHERE clause, or sorting by a different column, then run the query again to see how the results change.
-
When you’re done, close the query editor pane, discarding your edits if prompted.
Clean up
When you’ve finished exploring, you should delete the resources you created so you don’t incur any further costs.
-
In the Azure portal, navigate to the resource group you created at the start of the lab (for example,
dp900-lab-rg).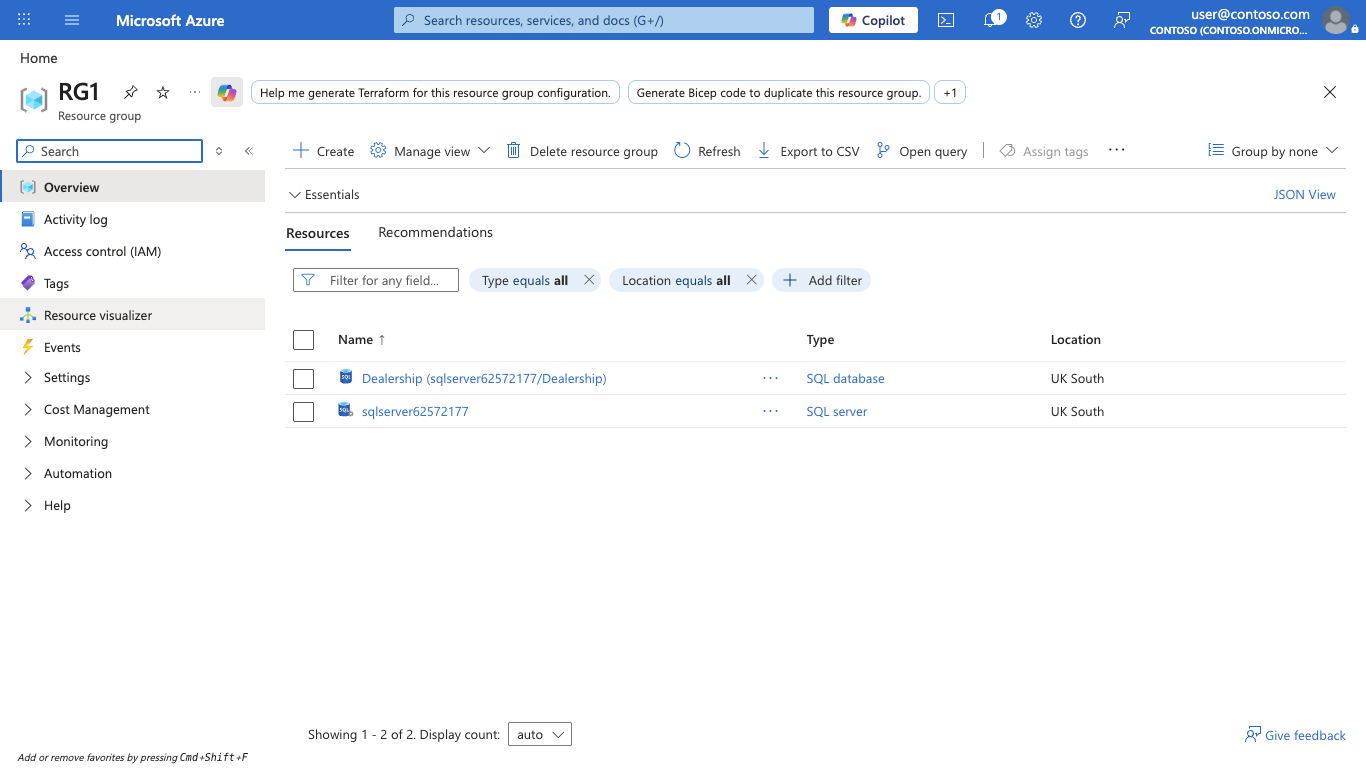
-
Select Delete resource group, confirm the deletion by entering the resource group name, and select Delete.
Tip: Deleting the resource group removes the database, the server, and everything else inside it in a single step. This is the easiest way to make sure nothing is left running and costing money.
In this lab, you provisioned an Azure SQL Database, created your own tables, added automotive sample data, and queried it using SQL. You’ve now taken your first steps with relational data in the cloud!