Set up your Azure Databricks environment
Before starting the labs in this course, you need to provision an Azure Databricks Premium workspace. This setup lab walks you through that process using Azure Cloud Shell so you don’t need to install any tools locally.
This setup should take approximately 15 minutes to complete.
Provision an Azure Databricks Premium workspace
You’ll use a single Azure CLI script in Cloud Shell to create a resource group and an Azure Databricks Premium workspace in a randomly selected Azure region.
Task 1: Open Azure Cloud Shell
-
Sign in to the Azure portal at
https://portal.azure.comusing the credentials provided to you. -
Select the Cloud Shell button (>_) in the toolbar at the top of the portal. If prompted, select Bash as the shell type.
[!NOTE] If the Cloud Shell button isn’t visible, your browser window may be too narrow. Try expanding the window or navigating directly to
https://shell.azure.comto open Cloud Shell in a full browser tab.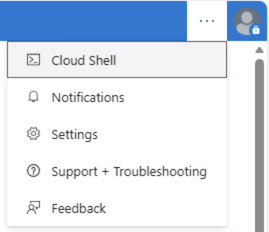
-
If this is your first time using Cloud Shell, you’re prompted to set up a storage account. Select No storage account required, choose your subscription, and select Apply.
-
Wait for the Cloud Shell prompt to appear. It looks like this:
yourname@Azure:~$
Task 2: Run the provisioning script
-
In Cloud Shell, run the following command to download and execute the setup script:
curl -sL https://raw.githubusercontent.com/MicrosoftLearning/DP-750T00-Implement-Data-Engineering-Solutions-using-Azure-Databricks/refs/heads/main/Instructions/Labs/00-setup.sh | bash -
Wait for the deployment to finish. This takes approximately 5 minutes.
[!NOTE] The region is chosen at random from a list of supported public Azure regions. The workspace name and resource group name are fixed so you can easily find them in later labs.
Task 3: Open the Azure Databricks workspace
-
In the Azure portal, search for Azure Databricks in the top search bar and select it.
-
Select the adb-dp750 workspace from the list.
-
On the workspace overview page, select Launch workspace. The Azure Databricks UI opens in a new browser tab.
-
Confirm you can see the Azure Databricks home page. You are now ready to start the course labs.
[!IMPORTANT] Keep the rg-dp750 resource group name noted. You’ll need it if you want to clean up resources after the course.